Is your vacuum cleaner not picking up dirt like it used to? A loss of suction can be frustrating and affect the cleanliness of your home. When vacuum cleaners lose suction, it’s usually due to a few common issues, such as a tangled brush bar, clogged filters, or an overflowing dust container.
Regular maintenance can prevent these problems and extend the lifespan of your appliance. In this guide, we’ll explore the most common reasons for suction issues and provide a step-by-step troubleshooting process to help you restore your vacuum cleaner’s optimal performance.
Key Takeaways
- Identify and fix common issues causing loss of suction in your vacuum cleaner.
- Learn how regular maintenance can prevent suction problems.
- Understand how to troubleshoot your vacuum cleaner for optimal performance.
- Discover solutions for different types of vacuum cleaners, including upright and bagless models.
- Improve your home’s air quality by ensuring your vacuum cleaner is working efficiently.
Understanding Why Vacuum Cleaners Lose Suction
The efficiency of a vacuum cleaner is heavily dependent on its suction power, which can be lost due to various reasons. Understanding how vacuum cleaners work and what causes them to lose suction is crucial for maintaining their effectiveness.
Common Causes of Suction Loss
There are several common causes for a vacuum to lose suction. These include clogged filters, which restrict airflow through the appliance, and blockages in hoses and pathways. Additionally, issues with the brush roll, such as tangled hair or debris, and damaged or loose belts can also contribute to suction loss. Furthermore, a full dust container or bag and damaged seals or gaskets can lead to a loss of suction power.
Regular maintenance, such as cleaning or replacing filters and checking for blockages, can help prevent lost suction. It’s also important to empty the dust container or replace the bag when it’s full to maintain optimal suction.
How Suction Works in Different Vacuum Types
Different types of vacuum cleaners, such as upright, cylinder, bagless, bagged, and robot vacuums, generate suction in various ways. Understanding how each type works can help you identify potential issues. For instance, bagless vacuums rely on a filter to trap dust and debris, while bagged vacuums use a bag to collect dirt. Regularly cleaning or replacing these components is essential for maintaining suction power and ensuring the cleaner operates efficiently.
By understanding the mechanics of your vacuum cleaner and addressing any issues promptly, you can restore its suction and maintain a clean environment.
Check and Empty the Dust Container or Bag
One of the simplest yet most effective ways to restore your vacuum cleaner’s suction power is by checking and emptying the dust container or bag. When your vacuum is chock full of dust, it significantly affects its cleaning power. In fact, tests have shown that suction can drop by as much as 30% when the bag or container is full.

Signs Your Dust Container Needs Emptying
If you’re using a bagless vacuum, it’s essential to check the dust container regularly. Ideally, you should empty it after every use, especially if the dust capacity is less than a litre, which is common in cordless vacuums. Look for the max fill line on the canister; it might be lower than you expect, sometimes only a third of the way up. When the container appears visibly full, it’s likely overdue for emptying.
How to Properly Empty Bagless Vacuums
To empty a bagless vacuum, make sure to do so carefully to prevent dust from escaping back into your home. Check your vacuum’s manual for specific instructions, as different models may have varying mechanisms for releasing the dust container’s contents.
When and How to Replace Vacuum Bags
For vacuums that use a dust bag, it’s crucial to replace the bag when it’s full. Check the bag’s fullness regularly, and replace it when necessary to maintain your vacuum’s suction power. Also, inspect the bag for any tears or damage that could cause dust to escape, further reducing suction.
By regularly checking and emptying or replacing your vacuum’s dust container or bag, you can ensure your vacuum cleaner maintains its cleaning performance. For those in the market for a new vacuum, consider models that are designed to maintain suction better as their containers fill with dust.
Clean or Replace Vacuum Filters
One of the simplest ways to restore your vacuum cleaner’s suction power is by checking and maintaining its filters. Clogged filters are a common cause of reduced suction, affecting the overall performance of your vacuum cleaner.
Locating Your Vacuum’s Filters
Most vacuum cleaners have two main filters: the motor filter and the allergen filter. The motor filter is usually located at the back of the vacuum, near the exhaust area, while the allergen filter is typically found near the dust container or bag. To maintain optimal suction and overall performance, it’s essential to know where these filters are and how to access them.
How to Clean Washable Filters
Washable filters can be cleaned by removing them and rinsing under a tap. Some may be machine washable, but always check the manufacturer’s instructions first. After washing, it’s crucial to let the filters dry naturally, ideally for 24 hours, before reinstalling them in your vacuum cleaner. This ensures that the filters are completely dry and helps maintain the appliance’s efficiency.
When to Replace Non-Washable Filters
Non-washable filters need to be replaced periodically. Signs that a filter needs replacement include visible dirt accumulation and a noticeable decrease in suction power. To maintain your vacuum cleaner’s performance, make sure to select the correct replacement filters for your specific model. Regularly checking and maintaining your vacuum’s filters will help ensure it continues to clean effectively and efficiently.
By following these guidelines, you can keep your vacuum cleaner in good working condition, ensuring it provides the best possible cleaning results while maintaining good indoor air quality.
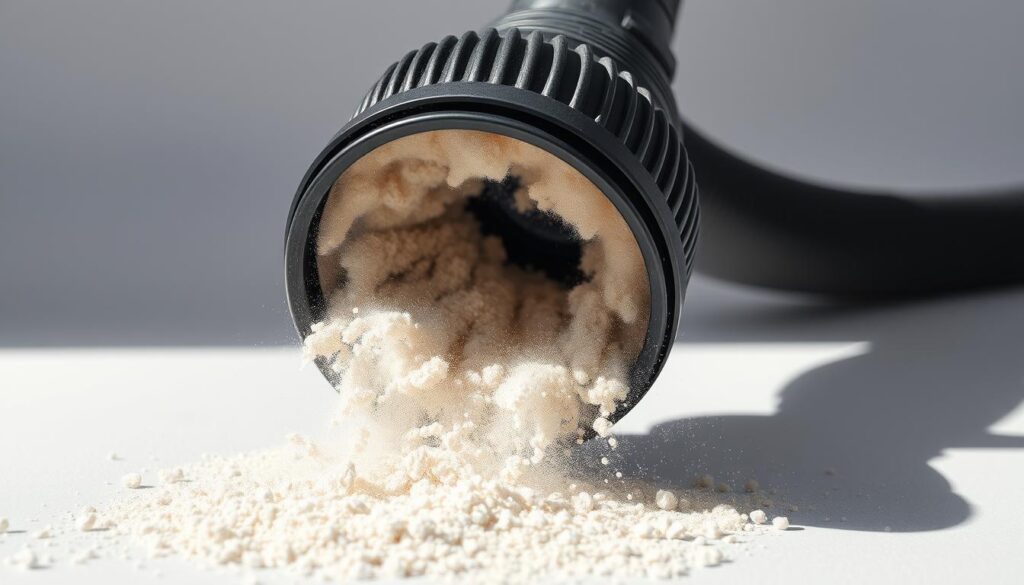
Clear Blockages in Hoses and Pathways
When your vacuum cleaner’s suction power dwindles, a likely culprit is a blockage in the hose or internal pathways. Such obstructions can severely restrict airflow, leading to a significant loss of suction. It’s crucial to methodically inspect your vacuum system to identify and clear any blockages.

Identifying Blockage Points
To start, you’ll need to inspect the hose and other parts of your vacuum cleaner for any signs of obstruction. Use a torch to look inside the tube and separate it from the floor head and vacuum body to check for any blockages. Common items that cause blockages include stray socks, clumps of hair, and debris like bottle caps.
Tools and Techniques for Removing Blockages
For removing blockages, you can use an item like an unravelled coat hanger to reach deep into hoses and tubes. Be cautious not to damage the hose when doing this. It’s also helpful to consult a diagram of your vacuum cleaner’s internal parts, such as the flowchart for NuTone vacuum parts, to understand the layout and identify potential blockage points.
Preventing Future Blockages
To prevent future blockages, adopt proper vacuuming techniques and perform regular maintenance checks. For households with pets or long-haired residents, it’s particularly important to regularly clean the vacuum’s filters and check for hair accumulation in the hose and other areas. By doing so, you can maintain optimal suction power and extend the lifespan of your vacuum cleaner.
Fix Brush Roll and Belt Issues
Brush roll and belt problems are common causes of suction loss in vacuum cleaners, and fixing them is relatively straightforward. The brush roll plays a crucial role in agitating carpet fibers and picking up dirt, while the belt drives the brush roll in many upright vacuum models.
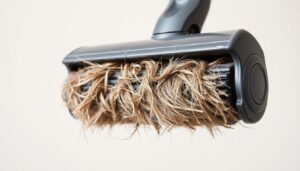
Cleaning Tangled Hair and Debris from Brush Rolls
To maintain your vacuum cleaner’s performance, regularly inspect and clean the brush roll. Turn your vacuum cleaner floor head over and examine it. If your floor tool has a spinning brush bar, check for hair and fibers wrapped around it. This buildup can prevent the brush roll from rotating effectively, reducing suction power. Use scissors or a seam ripper to carefully cut away tangled hair and debris. For more thorough cleaning, some brush rolls can be removed by unscrewing the end caps or clips holding them in place.
Checking and Replacing Broken Belts
If your upright vacuum cleaner has a spinning brush bar that has stopped working, even after clearing any trapped hair and debris, it’s possible the belt has broken. Replacing the belt is a simple process. First, order a replacement belt from an approved supplier. Then, unscrew the bottom panel on the floor head to remove the brush bar. Slip off the old belt from the brush bar and the drive pulley, usually located near the rear wheels of the vacuum. Fit the new belt in its place and screw the panel back on. For more information on repairing your vacuum, you can visit the SEBO vacuum repair page.
Brush Roll Maintenance for Different Floor Types
Adjusting your vacuum cleaner’s settings according to the floor type can help maintain the brush roll and overall cleaning performance. For delicate hard floors, consider disabling the brush roll to prevent scratching. For carpets, ensure the brush roll is enabled and adjust the height setting as needed to optimize cleaning. Regular maintenance, such as cleaning the brush roll and checking the belt, will keep your vacuum machine running efficiently.
Advanced Vacuum Cleaner Loss of Suction Fixes
When basic fixes fail to restore your vacuum cleaner’s suction, advanced troubleshooting is the next step. At this stage, it’s crucial to inspect various components that could be causing the issue.
Checking for Damaged Hoses and Seals
Over time, vacuum cleaner hoses can degrade, developing small tears or cracks that significantly reduce suction power. Inspect your hose carefully for any signs of damage. For upright vacuum cleaners, ensure the connection between the hose and the base unit is secure, as this is a common area for suction loss.
Addressing Motor Issues
If you’ve checked the hose and seals and still experience suction problems, the issue may lie with the motor. You might need to replace the motor itself or the carbon brushes within it. Worn-out carbon brushes can lead to reduced suction power.
When to Seek Professional Repair
If you’re not comfortable with DIY repairs or if the problem persists after checking the above components, it’s time to seek professional help. Contacting the manufacturer’s service centre can provide a solution, especially if your appliance is still under warranty.
| Component | Issue | Solution |
|---|---|---|
| Hose | Damage or degradation | Inspect and replace if necessary |
| Seals | Air leaks | Inspect and replace if necessary |
| Motor | Worn-out carbon brushes or faulty motor | Replace carbon brushes or the motor |
Conclusion
Restoring suction power to your vacuum cleaner can be achieved through simple troubleshooting steps outlined in this guide. Regular maintenance is crucial for the longevity and efficiency of your appliance.
To maintain optimal suction power, it’s essential to regularly clean filters, empty the dust container or bag before it’s full, and keep the brush bar free from hair and debris. For cordless vacuums, proper battery care is also vital to ensure consistent performance over time.
If your vacuum continues to lose suction despite these efforts, it may be time to consult the manufacturer or a professional repair service. Many manufacturers, such as Dyson and Miele, offer service centers for diagnosis and repairs. If your vacuum is no longer under warranty, resources like Which? Trusted Traders can help you find a reliable repair service in your area.
When deciding whether to repair or replace your vacuum cleaner, consider the age of the appliance and the availability of replacement parts. For those in the market for a new vacuum, look for models with good filtration systems, easy maintenance features, and reliable suction performance to make future upkeep easier.