Are you tired of struggling with complex woodworking joints? Pocket hole joinery is revolutionising the way DIY enthusiasts and professional woodworkers approach their projects, offering a quick, strong, and accessible method for joining wood.
With a pocket hole jig, you can create professional-looking furniture and cabinetry without requiring years of woodworking experience. This comprehensive guide will introduce you to the fundamentals of pocket-hole jigs and how they can significantly improve your woodworking capabilities.
Key Takeaways
- Simplify complex joinery with pocket hole techniques.
- Create stronger, more professional projects.
- Save time with efficient jig usage.
- Improve your woodworking capabilities with pocket hole joinery.
- Build professional-looking furniture and cabinetry.
Understanding Pocket-Hole Joinery Basics
Mastering pocket-hole joinery basics can significantly improve the quality of your woodworking projects. Pocket-hole joinery is a versatile technique used to assemble various woodwork pieces without visible screws.
What Is a Pocket Hole?
A pocket hole is a hole drilled at an angle into one board, allowing a screw to be driven into another board, creating a strong joint. This technique is particularly useful for attaching two boards together on the same plane, such as when constructing a face frame.
Benefits of Pocket-Hole Joinery
The benefits of using pocket holes include creating strong joints without visible fasteners on the exterior face or edge of the wood. This method is ideal for cabinet construction, furniture making, and other woodworking projects where aesthetics and strength are crucial.
When to Use Pocket Holes in Your Projects
You can use pocket holes in various woodworking projects, such as building furniture frames, attaching table tops to aprons, and creating face frames for cabinets. They are particularly useful when working with plywood panels, as they create strong joints without requiring edge banding to hide screws.
Essential Tools and Materials for Pocket-Hole Joinery

To get the most out of pocket-hole joinery, you’ll need the right tools and materials. Pocket-hole joinery is a versatile technique that requires specific equipment to produce high-quality results.
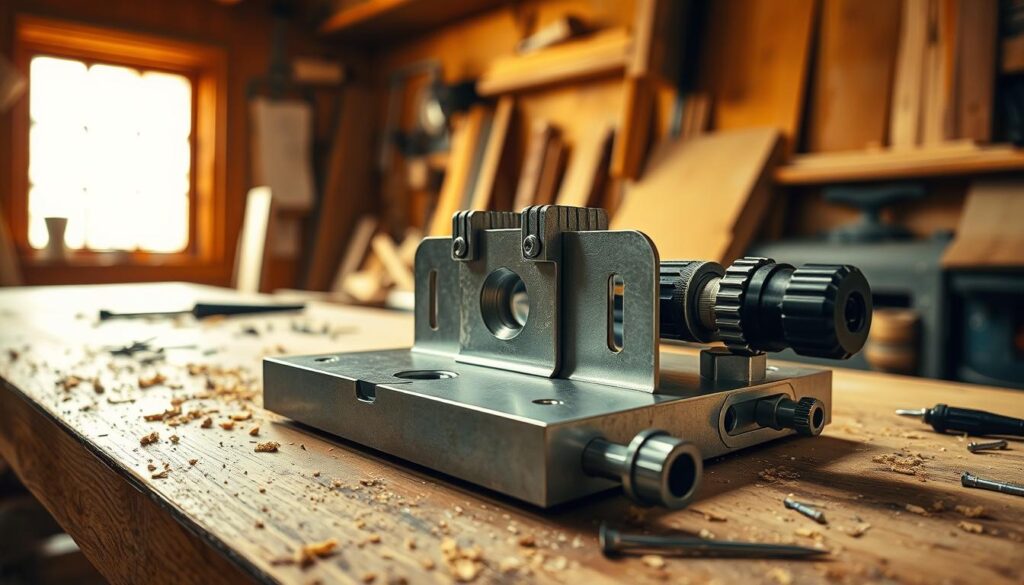
Types of Pocket-Hole Jigs Available
There are several types of pocket-hole jigs available, catering to different needs and preferences. When choosing a jig, consider the type of projects you’ll be working on and the level of precision required.
Required Accessories and Supplies
To complement your pocket-hole jig, you’ll need various clamps, such as a face clamp, to ensure proper alignment during assembly. Working with wood or plywood requires careful clamping to avoid misalignment.
Optional Tools That Enhance Your Workflow
Additional tools can streamline your pocket-hole joinery process. Consider investing in right-angle clamps, F-style clamps, and a dedicated drill for your pocket-hole operations.
Some essential accessories include:
– Right-angle clamps for holding workpieces at perfect 90-degree angles.
– Face clamps for keeping board faces perfectly flush during assembly.
– A pocket-hole jig workstation or mounting surface for improved efficiency.
– Dust collection attachments to keep your workspace clean.
– Plug cutters for creating wooden plugs to fill visible pocket holes.
– A dedicated drill for pocket-hole operations to eliminate constant bit changes.
How to Set Up Your Pocket-Hole Jig Correctly
Setting up your pocket-hole jig correctly is crucial for achieving professional-grade woodworking results. A properly configured jig ensures that your pocket holes are drilled to the correct depth and angle, resulting in strong and durable joints.
Measuring Material Thickness
To set up your jig, you first need to measure the thickness of your material. Most modern pocket-hole jigs, such as the Kreg Pocket Hole Jig, come with a built-in gauge to help you determine the correct setting for your drill bit. This gauge allows you to accurately measure the thickness of your workpiece.
Adjusting the Jig for Different Wood Thicknesses
Once you have measured your material’s thickness, you need to adjust the jig accordingly. The jig should be set to match the thickness of your workpiece. For example, if you are working with a ¾″ thick board, you need to set your jig to the ¾″ setting. This ensures that the drill bit is positioned correctly to create a properly formed pocket hole.
Setting the Drill Bit Depth Collar
The depth collar on your pocket-hole drill bit serves as a critical stop that prevents drilling too deeply. To set the collar, loosen the set screw using the provided hex key, slide the collar to align with your material thickness marking, and then retighten the set screw firmly. Ensure that both your jig height and drill bit collar are set to the same material thickness for consistent results.
- The collar on your drill bit prevents over-drilling, which can result in the screw breaking through the surface.
- Modern drill bits feature easy-set markings for standard material thicknesses, making it quick to position the collar correctly.
- Always verify that your jig and drill bit are set to the same thickness to ensure properly formed pocket holes.

Mastering the Technique to Use Pocket-Hole Jig Fundamentals
Mastering the technique of using a pocket-hole jig is crucial for achieving professional-grade woodworking results. To effectively use pocket-hole jig fundamentals, you need to understand how to position the jig correctly, drill pocket holes accurately, and avoid common mistakes that can compromise your project’s quality.
Positioning the Jig on Your Workpiece
Correctly positioning the jig on your workpiece is the first step towards creating strong and durable joints. Ensure the jig is aligned with the edge of your workpiece and clamped securely in place. This will help you drill pocket holes that are perfectly angled and positioned for optimal screw placement.
Proper Drilling Technique
A proper drilling technique is vital when using a pocket-hole jig. Make sure to set the drill bit depth collar correctly to avoid drilling too far or too shallow. When you drill pocket holes, maintain a steady hand and apply consistent pressure to ensure clean and accurate holes.
Common Mistakes to Avoid
Several common mistakes can be avoided when using a pocket-hole jig. These include setting the drill bit depth collar incorrectly, using the wrong jig setting for your material thickness, and failing to clamp the workpiece securely. Refer to the table below for a summary of common mistakes and their consequences.
| Mistake | Consequence |
|---|---|
| Incorrect drill bit depth | Pocket holes break through the opposite face or aren’t deep enough |
| Wrong jig setting | Improperly angled pocket holes |
| Failing to clamp securely | Misaligned or improperly formed pocket holes |
| Drilling in end grain | Reduced joint strength |
By understanding these potential pitfalls and taking steps to avoid them, you can ensure that your pocket-hole joints are strong, durable, and professional-grade. Using the right screws and following proper drilling techniques will also enhance the overall quality of your woodworking projects.
Selecting the Right Pocket-Hole Screws

When it comes to pocket-hole joinery, selecting the appropriate screws is vital. The type of screw you choose can significantly impact the durability and quality of your project.
The right pocket-hole screws can ensure a strong and lasting joint. Kreg offers a range of screws suitable for various applications.
Screw Length Guidelines
The length of the screw is crucial. It should be long enough to provide a strong hold but not so long that it protrudes from the other side of the material. Typically, the screw length should be about 1.5 times the thickness of the material being joined.
Coarse vs. Fine Thread Screws
Coarse thread screws are ideal for softwoods as they provide a stronger grip, while fine thread screws are better suited for hardwoods, offering a cleaner finish and less likelihood of splitting the wood.
Material Considerations for Indoor and Outdoor Projects
For indoor projects, zinc-plated pocket-hole screws are sufficient. However, for outdoor projects, it’s advisable to use screws with a weather-resistant coating, such as Kreg’s Blue-Kote, to prevent rust and corrosion.
Creating Strong Joints with Pocket Holes
The strength of your woodworking projects relies heavily on the quality of the joints you create. To achieve robust and durable joints, it’s crucial to master the techniques involved in pocket-hole joinery.
Proper Clamping Techniques
Effective clamping is vital to ensure that the pieces being joined are held firmly together. You should apply even pressure across the joint area to prevent any movement during the screwing process. This helps in creating a strong and rigid joint.
Driving Screws Correctly
Driving screws correctly is another critical aspect of creating strong joints. Ensure that the screws are driven straight and at the correct angle as specified by your pocket-hole jig. For more information on using pocket-hole jigs effectively, you can visit Kreg Tool’s learning resources.
Using Wood Glue with Pocket Holes
Using wood glue in conjunction with pocket holes significantly enhances the strength of the joint. Apply a thin, even bead of wood glue along the joining surface before clamping and driving screws. For maximum joint strength, use a high-quality PVA glue like Titebond II or III. The combination of mechanical connection from screws and molecular bond from glue creates a very strong joint.
| Technique | Benefit |
|---|---|
| Proper Clamping | Prevents movement during screwing |
| Correct Screw Driving | Ensures strong mechanical connection |
| Using Wood Glue | Adds molecular bond for extra strength |

Practical Applications for Pocket-Hole Joinery
The practical applications of pocket-hole joinery are diverse and widespread in woodworking. You can effectively utilise this technique in various projects, from building cabinet boxes to creating face frames.
Building Cabinet Boxes and Furniture
Pocket-hole joinery is particularly useful when building cabinet boxes and furniture. It allows you to create strong joints without visible screws on the exterior. When working with boards of different thicknesses, you’ll generally want to drill pocket holes in the thinner material and drive screws into the thicker piece for maximum strength.
Creating Face Frames
Face frames are an essential component of many cabinet and furniture designs. Pocket holes provide a quick and efficient method for assembling these frames. By using pocket-hole joinery, you can ensure that your face frames are both sturdy and visually appealing, with minimal visible hardware.
Working with Different Materials and Thicknesses
Pocket-hole joinery works effectively across a wide range of materials, including solid timber, plywood, MDF, and some composite materials. When joining materials of different thicknesses, it’s crucial to adjust your technique accordingly. For instance, when working with hardwoods, use fine-thread pocket-hole screws and consider reducing your drill speed to prevent splitting.
| Material | Screw Type | Drill Speed |
|---|---|---|
| Softwoods | Coarse-thread | Standard |
| Hardwoods | Fine-thread | Reduced |
| Plywood | Fine-thread | Standard |
By understanding how to adapt your pocket-hole joinery technique to different materials and thicknesses, you can expand your woodworking capabilities and achieve professional-grade results.
Conclusion: Elevating Your Woodworking with Pocket-Hole Techniques
By mastering pocket-hole jig fundamentals, you can significantly enhance your woodworking capabilities, allowing you to create professional-quality joints with minimal tools and experience.
The versatility of pocket-hole joinery makes it applicable to countless projects, from simple shelves to complex furniture and cabinetry. As you become more comfortable with pocket-hole techniques, you’ll complete projects more quickly and with greater confidence in their strength and durability.
To get the most out of pocket holes, remember to use the correct screw length and consider using wood glue to reinforce your joints. With practice, you’ll find that pocket-hole joinery becomes an invaluable skill in your woodworking repertoire, enabling you to tackle a wide range of applications with ease.