Are you tired of using a wobbly chair that threatens to topple over at any moment? Loose joints can be a real nuisance, but fortunately, repairing them is a relatively straightforward process.
You can start by identifying the source of the problem. Typically, a wooden chair becomes wobbly because the joints connecting the legs and other parts come loose. A quick fix can pull them together, but a more permanent solution involves completely disassembling and re-gluing the furniture.
This comprehensive guide will walk you through the process, providing a step-by-step approach to repairing loose joints and restoring your chair to its former glory.
Key Takeaways
- Identify the source of the problem and understand why chairs become wobbly.
- Learn how to disassemble and re-glue loose joints for a more permanent solution.
- Discover the basic tools and materials needed to complete the repair in 2-3 hours.
- Understand how to extend the life of your cherished furniture through proper repair.
- Gain confidence in your ability to repair loose joints with minimal woodworking experience.
Understanding Why Rocking Chairs Become Loose
As you use your rocking chair, it may start to feel wobbly or loose. This is often due to the natural wear and tear on the joints of the chair.
Common Causes of Wobbly Chairs
Typically, a wooden chair becomes wobbly because the joints connecting the legs, seat, and back come loose. Many chair parts are bound with screws or nails as well as glue. The constant back-and-forth motion of a rocking chair puts additional stress on these joints, causing them to loosen over time.
Other factors contributing to this issue include temperature and humidity fluctuations, which cause the wood to expand and contract, weakening the glue bonds in the joints.
Identifying Problem Areas in Your Rocking Chair
To address the issue, you need to identify the problem areas. Common problem areas include where the arms connect to the back posts, where spindles meet the seat, and where legs join the chair frame.
- Carefully examine the chair while gently rocking it to detect movement or creaking sounds.
- Look for visible gaps between wooden components, dried glue residue, or areas where the finish has worn away around joints.
- Some chairs may have hidden fasteners like dowels, screws, or nails that have worked loose and need attention.
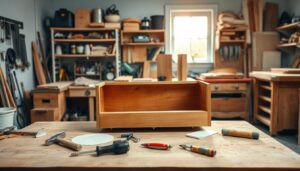
Tools and Materials You’ll Need
The right tools and materials are crucial for successfully tightening loose rocking-chair arms. Having these on hand will ensure a smooth and effective repair process.
Essential Tools for the Job
To start, you’ll need a selection of essential tools. A deadblow hammer is highly recommended as it provides controlled force without damaging wood surfaces or causing excessive rebound.

You’ll also require several clamps of various sizes, including at least one 36-inch clamp, to hold parts firmly during glue drying.
 Both flat-head and Phillips-head screwdrivers are essential for removing any fasteners and prying apart stubborn joints.
 Additionally, needle-nose pliers will help extract old nails or broken fasteners that may be holding joints together.

Materials Required for Repairs
For the repair, you’ll need quality wood glue designed specifically for furniture repair, which provides the strongest bond for wooden joints.
 Medium-grit sandpaper (around 100-grit) is necessary for cleaning old glue residue and preparing surfaces for new adhesive.
 Optional materials include wood filler for repairing small cracks, epoxy for severely damaged areas, and matching stain for touch-ups.
 It’s also a good idea to have protective padding for your work surface to prevent damage to the chair’s finish during disassembly and repair.

Preparing Your Workspace
A well-prepared workspace is the foundation of a successful chair repair project. To begin, you need to create a suitable work area that allows you to work comfortably and efficiently.
Creating a Suitable Work Area
Select a spacious, well-lit area with a sturdy workbench or table. Cover your work surface with soft padding, such as old blankets or towels, to protect the chair‘s finish from scratches.
Safety Considerations
Ensure you have adequate ventilation, especially when using glues or stains. Organise your tools and materials before beginning, and keep a clean cloth handy for wiping away excess glue. Consider laying out a large sheet or tarp to catch any small parts that might fall during disassembly. As a safety precaution, keep children and pets away from your workshop area.

How to Tighten Loose Rocking-Chair Arms
The key to tightening loose rocking-chair arms lies in understanding the chair’s construction and identifying hidden fasteners. Many rocking chairs become loose over time due to wear and tear on the joints and other connecting parts.
Examining the Chair for Hidden Fasteners
Begin by carefully examining the chair arms and their connection points, looking for any hidden nails or screws that may be covered with wood filler or stain. Gently probe suspicious holes with a small screwdriver to determine if they contain fasteners that need to be removed before disassembly.
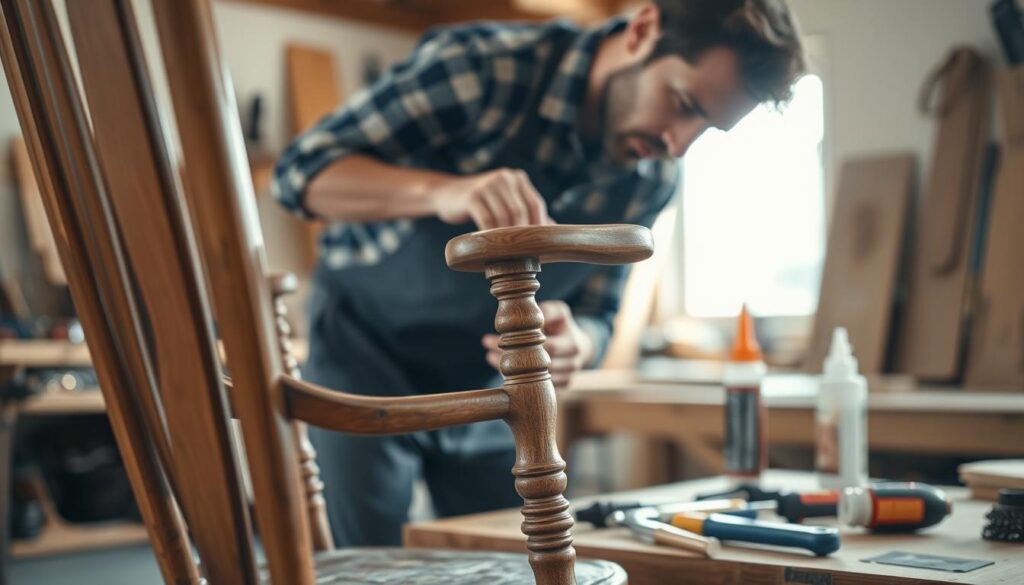
Disassembling the Chair Properly
When you’re ready to disassemble the chair, use a deadblow hammer to gently tap the joints apart. This tool is particularly useful as it minimizes rebound and doesn’t damage the work material.
Using a Deadblow Hammer Effectively
Strike the joints with controlled, firm taps rather than forceful blows to gradually loosen the connection without causing damage. For stubborn joints, apply gentle pressure from multiple angles.
Dealing with Stubborn Joints
If you encounter resistance, stop and re-examine the joint for missed nails or other fasteners. Pay close attention to how tenons and mortises fit together, as this will be crucial during reassembly.
By following these steps and being mindful of the chair’s construction, you can successfully tighten loose rocking-chair arms and restore your chair’s stability.
Cleaning and Preparing the Joints
The process of tightening loose rocking-chair arms involves more than just reattaching parts; it requires thorough joint preparation. When you disassemble your chair, you’ll likely encounter old glue and debris that need to be removed to ensure a sturdy reassembly.
Removing Old Glue and Debris
Carefully scrape away all traces of old glue from both the tenons and their receiving holes using a small chisel or utility knife. Old glue must be completely removed as it prevents new adhesive from properly bonding with the wood surfaces.
Sanding and Preparing Surfaces
Use 100-grit sandpaper to gently sand all joint surfaces, creating a slightly rough texture that will help the new glue adhere more effectively. Clean out any debris from mortise holes using a small brush or compressed air to ensure a proper fit when reassembling.
| Task | Tool/ Material | Purpose |
|---|---|---|
| Removing old glue | Small chisel or utility knife | To remove old glue and debris |
| Sanding joint surfaces | 100-grit sandpaper | To create a rough texture for new glue |
| Cleaning mortise holes | Small brush or compressed air | To remove debris and ensure a proper fit |
Addressing Any Damage Found
Inspect all wooden parts for splits, cracks, or other damage that occurred during use or the disassembly process. For minor splits in the wood, apply a small amount of glue into the crack, then clamp the piece firmly until the glue dries completely. If you find severely damaged areas where wood has broken away, consider using wood filler or even fashioning a small wooden patch to restore structural integrity.

Reassembling Your Rocking Chair
Now that you’ve prepared the joints, it’s time to reassemble your chair. Begin with a “dry fit” to ensure all parts align properly and to practice the assembly sequence. This step is crucial for a smooth reassembly process.
Applying Wood Glue Correctly
Apply wood glue sparingly but thoroughly to all joint surfaces. Use a small brush to ensure even coverage inside mortise holes and on tenons. Work methodically and quickly, as most wood glues begin to set within 10-15 minutes.
Clamping Techniques for Strong Joints
Use clamps (such as 36″ clamps) to apply firm, even pressure across glued joints. Be careful not to overtighten, which could force too much glue out of the joint or damage the wood. For awkwardly shaped areas, consider using straps or modified clamps with wooden blocks.
Proper Drying Time
Allow the chair to remain clamped for at least 24 hours to ensure the glue joints cure properly. Keep the chair in a warm, dry environment during the curing time.
Finishing Touches and Maintenance Tips
Having completed the repair of your rocking chair, you can now focus on restoring its original beauty. Examine the rebuilt chair for scuffs and marks; most minimal scuffs can be buffed out with a lint-free cloth.
Use a fine-grit sandpaper to smooth any rough spots where excess glue dried on the wood surface. Establish a maintenance routine of checking and tightening joints every 6-12 months. Keep your rocking chair away from direct heat sources and areas with dramatic temperature or humidity changes to prevent wood movement that can stress joints over time.
Apply a thin coat of furniture wax or polish to the entire chair to protect the wood and give it a fresh appearance.