Are you facing the daunting task of dealing with frozen pipes in your home? As temperatures drop, the risk of pipes freezing increases, particularly in unheated areas or exterior walls. Frozen pipes can lead to burst pipes and subsequent water damage if not addressed promptly.
Fortunately, with the right guidance, you can safely thaw your pipes without professional help in many cases. This guide will walk you through the process of identifying frozen pipes, preparing for the thawing process, and implementing effective thawing methods.
Key Takeaways
- Identify the signs of frozen pipes to take prompt action.
- Understand the risks associated with frozen pipes, including burst pipes and water damage.
- Learn how to prepare your pipes for the thawing process.
- Discover effective methods for thawing frozen pipes.
- Implement prevention techniques to avoid future pipe freezing.
Understanding the Dangers of Frozen Water Lines
As winter sets in, it’s essential to be aware of the potential risks posed by frozen water pipes in your home. Frozen pipes can lead to significant damage if not addressed promptly.
Why Do Pipes Freeze?
Pipes are most likely to freeze when they are located in areas exposed to cold temperatures, such as exterior walls, unheated basements, attics, and crawl spaces. Pipes under sinks, especially those against exterior walls, are particularly vulnerable due to cabinet doors blocking warm air.
The Risks of Ignoring Frozen Pipes
Ignoring frozen pipes can lead to them bursting, resulting in costly water damage to your home. The consequences can be severe, including potential mould growth and structural issues.
Common Areas Vulnerable to Freezing
During winter, pipes in various areas of your home are at risk of freezing. These include:
- Pipes located in exterior walls or near outdoor faucets.
- Pipes under sinks, particularly those against exterior walls.
- Pipes in unheated areas like basements, attics, and crawl spaces.
Here’s a summary of the common areas vulnerable to freezing and their associated risks:
| Area | Vulnerability | Risk |
|---|---|---|
| Exterior walls | High | Freezing temperatures |
| Unheated basements | High | Water damage |
| Pipes under sinks | Moderate | Blocked warm air |
Understanding these risks and taking preventive measures can help mitigate potential damage to your home during the winter months.
Identifying Signs of Frozen Water Lines
Understanding the signs of frozen water lines is key to taking the right steps to thaw them safely. When temperatures drop, it’s crucial to be vigilant about the condition of your pipes.
Reduced or No Water Flow
One of the primary indicators of a frozen pipe is a significant reduction or complete stoppage of water flow from the tap. If you turn on the faucet and only a trickle or no water comes out, it may indicate that the pipe is frozen.
Unusual Noises from Pipes
You might also hear unusual noises coming from the pipes, such as clanking, banging, or gurgling sounds, which can be a sign that ice is forming inside the pipe.
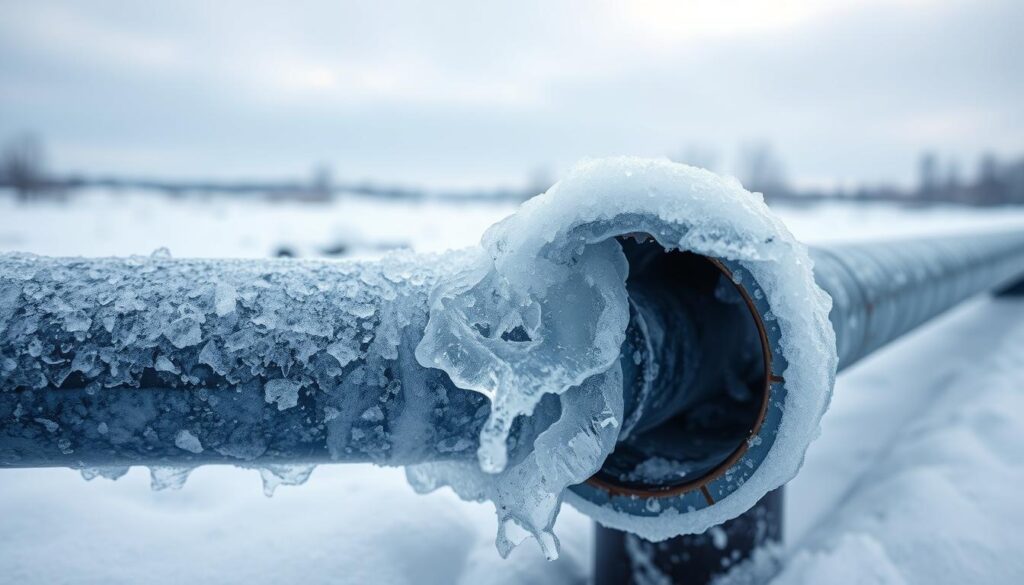
Visible Frost or Condensation
Visually inspect exposed pipes for signs of freezing, including frost accumulation or condensation. Frozen pipes may have a frosty white coating or visible ice formations. Check areas like garages, outbuildings, attics, and basements, especially where pipes are exposed or near exterior walls.
| Signs | Description | Locations to Check |
|---|---|---|
| Reduced Water Flow | Minimal or no water comes out when tap is turned on | All taps, especially those on exterior walls or in unheated areas |
| Unusual Noises | Clanking, banging, or gurgling sounds | Near the source of the noise, typically near frozen sections |
| Visible Frost or Condensation | Frosty coating, ice formations, or condensation on pipes | Exposed pipes in garages, outbuildings, attics, and basements |
By being aware of these signs and taking prompt action, you can mitigate the risk of water frozen in your pipes causing significant damage.
Essential Preparations Before You Thaw Frozen Water Lines
To safely thaw frozen water lines, you need to take a few preparatory steps that will help prevent potential hazards. Before starting the thawing process, it’s essential to prepare your plumbing system to avoid further complications.
Locating and Operating the Main Shut-Off Valve
Firstly, locate the main shut-off valve, which controls the water supply to your home. This valve is typically found near the water meter or where the water supply line enters your house. Ensure you know how to operate it to shut off the water supply in case of an emergency. Familiarise yourself with the valve’s location and operation to respond quickly if needed.
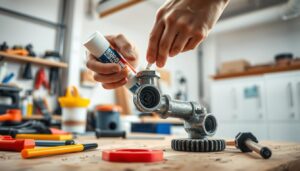
Gathering Necessary Equipment
Gather the necessary equipment before you start thawing the frozen pipes. You may need items like hot towels, a hair dryer, or a space heater, depending on the thawing method you choose. Having these items ready will make the process smoother and more efficient.
Opening Affected Taps
Open the faucet supplied by the frozen pipe to relieve pressure. Turn on both the hot and cold handles of the affected fixture fully. This crucial step helps prevent pipes from bursting during thawing by providing an escape route for water and steam. Keeping the taps open throughout the thawing process is essential for safety and effectiveness. As water begins to flow, you’ll know the thawing is successful.
By following these preparatory steps, you’ll be well-prepared to thaw your frozen water lines safely and effectively.
How to Thaw Frozen Water Lines Safely
Successfully thawing frozen water lines involves identifying the frozen section, applying heat gradually, and monitoring the thawing process closely. This approach helps prevent pipes from bursting and reduces the risk of water damage.
Locating the Frozen Section
The first step in thawing frozen pipes is to locate the frozen section. Check areas prone to freezing, such as unheated garages, basements, or exterior walls. Look for visible signs like frost or condensation on the pipes. If you suspect a pipe is frozen, check the water flow from nearby taps to isolate the affected area.
Applying Heat Gradually
Once you’ve identified the frozen section, apply heat gradually. You can use hot towels, a hair dryer, or space heaters to warm the pipe. Start at the faucet end and work your way back to avoid creating pressure that could cause the pipe to burst. Be cautious with open flames or electrical appliances to avoid accidents.
Monitoring the Thawing Process
As you apply heat, monitor the thawing process closely. Check for water flow at the open tap; a steady flow indicates successful thawing. Inspect the pipes for signs of leaks or damage, such as water droplets, hissing sounds, or visible cracks. If you notice any damage, turn off the main water supply and consult a qualified plumber before proceeding.
| Signs of Thawing Progress | Action Required |
|---|---|
| Water flow resumes at the tap | Continue heating until full flow is restored |
| Visible leaks or water droplets | Turn off main water supply, consult a plumber |
After thawing, remove any heating sources and inspect the pipes again. If you’re confident the pipes are undamaged, you can restore your water supply. Continued monitoring is crucial to ensure no hidden damage has occurred.
Effective Methods to Thaw Frozen Pipes
The onset of winter often brings with it the challenge of dealing with frozen water pipes. When this happens, it’s crucial to act quickly to thaw the frozen section and restore water flow. Several methods can be employed to safely thaw frozen pipes, each with its own advantages.
Using Hot Towels and Water Bottles
One simple method to thaw frozen pipes is by using hot towels or water bottles. Wrap hot towels around the frozen section or place hot water bottles along the pipe. This method is particularly effective for pipes located in accessible areas. It’s a gentle way to apply heat gradually, helping to thaw the ice blockage without causing sudden changes in temperature that could lead to further damage.
Applying Heat Lamps or Space Heaters
For pipes located in areas like under sinks or near exterior walls, applying heat lamps or space heaters can be an effective thawing method. Position the heater to warm the area around the frozen pipe, but ensure it’s safely placed to avoid any fire hazards or burns. Keep the heater at a safe distance from flammable materials and monitor it closely.

Using Hair Dryers and Heat Guns
Using a hair dryer or a heat gun can be an efficient way to thaw frozen pipes, especially for pipes in accessible locations. Move the dryer or gun slowly along the frozen section to apply heat evenly. Be cautious not to apply too much heat, which can damage the pipe. This method requires patience and careful application to avoid causing further issues.
Heat Tape and Cables
Heat tape and cables are highly effective for both thawing and preventing frozen pipes. Heat tape is a ribbon-like wrap containing electrical heating elements controlled by a thermostat. To use, wrap the heat tape around the frozen pipe and plug it into a wall outlet. For optimal results, follow the manufacturer’s instructions for wrapping techniques and spacing, especially for different pipe materials. Safety considerations include adhering to electrical requirements and avoiding overlapping the tape to prevent overheating. Heat tape can be used not only for thawing but also as a preventative measure during winter months. Various types of heat tape are available, including thermostat-controlled and self-regulating options, each suitable for different situations. For more detailed guidance on thawing frozen pipes, you can visit this resource.
Thawing Pipes in Difficult Locations
Thawing frozen pipes in inaccessible areas necessitates a strategic and cautious approach. When dealing with frozen pipes in hard-to-reach locations, it’s crucial to assess the situation carefully to avoid causing further damage.
Frozen Pipes Inside Walls
Frozen pipes inside walls can be particularly challenging to thaw. To tackle this issue, you may need to use specialized equipment, such as a heat lamp or a hair dryer with a long nozzle, to direct heat towards the frozen area. Be cautious not to damage the surrounding area or compromise the pipe’s integrity.
Dealing with Frozen Drain Pipes
Frozen drain pipes require a different approach, as they often involve a combination of thawing and clearing blockages. Use a plumbing snake or a drain auger to remove any debris, and then apply heat to thaw the frozen section. Be prepared to deal with potential backups or overflows.
When to Call a Professional Plumber
If you’re unsure about how to thaw a frozen pipe or suspect that it may be damaged, it’s time to call a professional plumber. Scenarios that require immediate professional intervention include burst pipes, pipes in inaccessible locations, or multiple frozen areas. While waiting for a plumber to arrive, shut off the main water supply and document any damage for insurance purposes.
| Scenario | Recommended Action |
|---|---|
| Burst Pipe | Call a plumber immediately and shut off the main water supply |
| Inaccessible Pipe | Consult a professional plumber for safe and effective thawing |
| Multiple Frozen Areas | Seek professional assistance to avoid further damage |
A professional plumber will assess the situation, provide a suitable solution, and perform the necessary repairs. Expect to incur costs for their services, equipment, and any required materials. For complex situations or significant water damage, professional help can prevent further damage and ensure proper repairs.
Preventing Future Pipe Freezes
To prevent frozen water lines from becoming a recurring issue, it’s essential to adopt a few straightforward measures. By taking proactive steps, you can safeguard your plumbing system against the cold and avoid the hassle and expense of repairs.
Insulating Vulnerable Pipes
One of the most effective ways to prevent pipe freezing is by insulating vulnerable pipes. This is particularly important for pipes located in unheated areas such as the garage, basement, or crawlspace. Use foam pipe insulation or wrap pipes with heat tape or thermostatically controlled heat cables to keep them warm.

Maintaining Adequate Home Heating
Maintaining a consistent temperature in your home, especially during prolonged cold snaps, can help prevent pipes from freezing. Ensure your heating system is in good working order, and consider keeping your home at a minimum temperature of around 13°C (55°F) to keep pipes from getting too cold.
Allowing Taps to Drip During Cold Spells
During especially cold temperatures, letting your tap or faucet drip slightly can make a significant difference. The consistent flow of water prevents water from freezing inside the pipe, reducing the risk of a burst due to excessive pressure. Leave the faucet dripping steadily; moving water will keep the pipes slightly above the freezing point. This simple step can significantly reduce the risk of burst pipes by relieving pressure even if some freezing occurs.
- Allow taps served by exposed pipes to drip slowly.
- Implement this measure when temperatures drop below freezing for extended periods.
- Understand that the minimal water usage and cost are insignificant compared to the potential expense of repairing burst pipes.
Conclusion: Protecting Your Home from Water Damage
To protect your home from water damage, it’s crucial to act quickly when pipes freeze. By understanding how to thaw frozen water lines safely and taking preventive measures, you can significantly reduce the risk of burst pipes and subsequent leaks. Regular maintenance, including insulating vulnerable pipes and maintaining adequate home heating, is key. Knowing when to call a plumber is also vital. With proper knowledge and preparation, you can confidently handle frozen pipes and safeguard your home against costly water damage.