Have you ever struggled to create precise threads in metal or other materials, only to end up with damaged screws or bolts? You’re not alone. Many DIY enthusiasts and professionals alike face this challenge daily. The solution lies in understanding and utilising tap-and-die sets, essential tools for creating accurate threads.
These versatile tools enable you to create both internal and external threads on various materials, from metal to wood. A typical tap-and-die set comprises several components, each playing a crucial role in the threading process. By mastering these tools, you’ll be able to tackle a wide range of projects, from automotive repairs to woodworking and metalworking applications.
Key Takeaways
- Understand the fundamental purpose of tap-and-die sets and their role in creating precise threads.
- Learn about the basic components found in a typical tap-and-die set.
- Discover the common applications where tap-and-die sets prove invaluable.
- Gain insight into the importance of mastering threading tools for various projects.
- Appreciate the versatility of tap-and-die sets in different materials and industries.
Understanding Tap-and-Die Sets
Tap-and-die sets play a vital role in creating and maintaining threaded connections in various materials. These sets are essential for anyone involved in metalwork, from professional machinists to DIY enthusiasts.
What Are Tap-and-Die Sets?
A tap-and-die set is a collection of tools designed for creating precise internal and external threads on various materials. A tap is used to cut internal threads, while a die is used for external threads. Together, they enable the creation of threaded holes and fasteners, making them vital in various mechanical applications.
You’ll gain a clear understanding of how these tools work together to facilitate threading operations. The tap creates internal threads in holes, while the die forms external threads on rods or bolts.
The Importance of Threading Tools
Threading tools, such as those found in a tap die set, are crucial in mechanical work, manufacturing, and repair tasks where fasteners are essential. Proper threading ensures secure connections in mechanical assemblies and prevents fastener failure under load.
The use of high-quality tap and die tools can significantly impact the durability and reliability of the final product.
Common Applications and Uses
Tap-and-die sets prove invaluable in various applications, from automotive repair to plumbing, furniture making, and general DIY projects. These versatile tools help you create custom-threaded components when standard parts aren’t available or suitable.
By understanding how to use a tap die set effectively, you can expand your capabilities in metalworking and other related tasks.
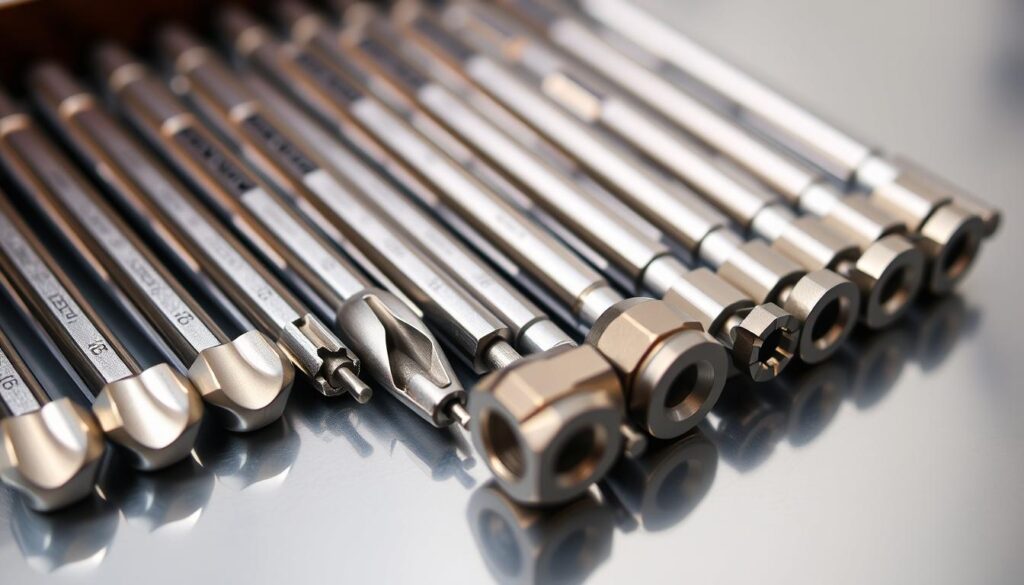
Components of a Tap-and-Die Set
To effectively use a tap-and-die set, you need to know its components and their functions. A comprehensive tap-and-die set includes various tools designed for specific threading tasks, making it an indispensable asset for any workshop.
Taps: Creating Internal Threads
Taps are used to create internal threads in a hole. The anatomy of a tap includes the tap chamfer, flutes, land, pitch, shank, and square drive. These features work together to create clean, precise threads. For instance, the flutes help in removing debris from the hole, while the tap chamfer guides the tap into the hole.
Dies: Creating External Threads
Dies are used to cut external threads on rods and bolts. Different types of dies are designed for various threading applications, ensuring that the external threads are precise and functional. The design of a die allows it to effectively cut threads on a variety of materials.
Accessories and Supporting Tools
A quality tap-and-die set includes various parts and accessories, such as tap wrenches, die holders, thread gauges, and alignment tools. These supporting tools are essential for ensuring that threading operations are successful and that the threads created meet industry standards.
| Component | Function |
|---|---|
| Taps | Create internal threads |
| Dies | Create external threads |
| Tap Wrenches | Used to turn taps |
| Die Holders | Hold dies in place |
Understanding the components of a tap-and-die set and their functions is crucial for successful threading operations. By selecting the right tool for the job and using it correctly, you can ensure precise, functional threads that meet your needs.
Types of Taps and Dies
To master the art of threading, it’s essential to familiarize yourself with the different types of taps and dies available. These tools are the backbone of threading operations, and understanding their variations is crucial for achieving optimal results.
Tap Varieties: Taper, Plug, and Bottoming
Hand taps are categorized into three main types based on their chamfer characteristics: taper, plug, and bottoming. The taper tap has the longest taper, typically 7-10 threads, which serves as a guide when starting threads. In contrast, bottoming taps have the shortest chamfer with only 1-2 threads, allowing you to thread closer to the bottom of blind holes. Between these two extremes lies the plug tap, featuring a medium taper of 3-5 threads.
The choice of tap depends on the specific threading situation. For instance, taper taps are ideal for starting threads due to their gradual cutting design. On the other hand, bottoming taps are used when you need to thread close to the bottom of a blind hole.
Die Varieties and Their Uses
Just like taps, dies also come in various types, including solid dies, adjustable split dies, and die nuts. Each design has its advantages and limitations. For example, solid dies are simple and effective but lack adjustability, whereas adjustable split dies offer more flexibility in terms of thread size and pitch.
Thread Standards and Measurements
Understanding thread standards and measurements is vital when working with taps and dies. Common thread standards include metric, Unified Thread Standard (UTS), and British Standard Whitworth (BSW). Thread measurements involve considering factors such as diameter, pitch, and thread count. These specifications directly impact your choice of taps and dies, ensuring that you select the right tool for the job.
By grasping the different types of taps and dies, as well as thread standards and measurements, you’ll be well-equipped to tackle various threading applications with confidence.
Choosing the Right Tap-and-Die Set Introduction

As a beginner, finding the best tap-and-die set that suits your projects and skill level is crucial. When selecting a tap die set, consider factors like thread type (metric or imperial), material (carbon steel, alloy steel), and purpose (general-purpose or specialised).
Material Considerations
The material of your tap-and-die set significantly affects its performance and longevity. Carbon steel is a popular choice due to its durability and resistance to wear. Other materials like high-speed steel (HSS) and cobalt alloys offer enhanced performance but at a higher cost.
Size and Thread Pitch Options
Having the right size and thread pitch options is vital for versatility in your workshop. Ensure that your tap-and-die set includes a variety of sizes to accommodate different projects. Understanding the thread standards and measurements is also crucial.
Quality vs. Cost Factors
The relationship between quality and cost is a significant consideration. While professional-grade sets offer superior performance, they come at a higher price. Balancing your budget with the need for quality is essential to make an informed decision.
By considering these factors, you can select a tap-and-die set that meets your needs and enhances your threading capabilities.
Preparing for Threading Operations
To ensure a smooth threading process, several preparatory steps are essential. Understanding these steps will help you achieve accurate and safe threading results.
Required Tools and Materials
Before commencing the threading process, gather all necessary tools and materials. This includes your tap-and-die set, drill bits, measuring tools, lubricants, and workholding devices. Ensure your drill bit is the correct size for the tap you’re using.
For instance, when working with a workpiece made of a hard material, you may need specialized lubricants to reduce friction and prevent damage.
| Tool/Material | Purpose |
|---|---|
| Tap-and-die set | For creating threads |
| Drill bits | For drilling holes |
| Measuring tools | For measuring thread specifications |
| Lubricants | For reducing friction |
Workspace Setup and Safety Precautions
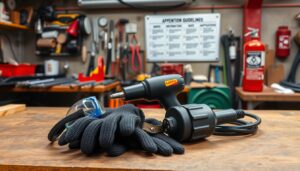
Setting up your workspace correctly is vital for efficient and safe threading. Ensure good lighting, stability, and easy access to your tools and materials. Wear proper eye protection and gloves to prevent injuries from sharp chips or accidental slips.

Understanding Thread Specifications
Understanding thread specifications is crucial for selecting the right tap or die. Know the TPI (threads per inch) and the thread pitch to match your threading needs. This information will guide you in choosing the correct drill bit size and preparing the hole for tapping.
For example, before drilling, center punch the location to prevent the drill bit from wandering, ensuring a precise hole.
Step-by-Step Guide to Using Taps
To achieve accurate and strong threads, it’s essential to understand the step-by-step process of using taps. This guide will walk you through the necessary steps, from preparing the correct hole size to troubleshooting common issues that may arise during the tapping process.
Drilling the Correct Hole Size
Before you start tapping, you need to drill a hole of the correct size. To do this, you must first know the pitch of the thread. For inch threads, the Threads Per Inch (TPI) is used to find the thread pitch. Once you have the pitch, subtract it from the thread’s nominal size to determine the necessary tap drill size. For example, if you’re using a tap with a nominal size of 1/4 inch and a pitch of 0.05 inches, your tap drill size would be 0.2 inches (1/4 inch – 0.05 inches).
Proper Tapping Techniques
With the correct hole drilled, you can begin the tapping process. Start by aligning the tap squarely with the workpiece. Apply gentle, consistent pressure while turning the tap handle clockwise. It’s crucial to use cutting oil to lubricate the tap and reduce friction. To control chip formation, stop after every half turn of the tap handle and break the chips free. This “two steps forward, one step back” technique helps prevent the tap from binding due to excess chips.
- Ensure the tap is aligned perpendicular to the workpiece.
- Apply consistent pressure and turn the tap handle clockwise.
- Use cutting oil to reduce friction and prevent overheating.
- Regularly break chips to prevent tap binding.
Troubleshooting Common Tapping Issues
Despite careful preparation, issues can still arise during the tapping process. Common problems include broken taps, misaligned threads, and torn threads. To avoid these issues, ensure that you’re using the correct drill bit size and that your tap is properly aligned with the hole. If a tap breaks, carefully remove the broken piece using appropriate tools to avoid damaging the surrounding material.
By following these steps and techniques, you can successfully use taps to create strong, accurate threads in your projects.
Step-by-Step Guide to Using Dies
Using a die to cut external threads is a fundamental skill that every machinist should possess. To achieve precise external threading, you need to understand the process of preparing the material, using the die correctly, and troubleshooting common issues that may arise.
Preparing the Material for Threading
Before you start threading, it’s essential to prepare the material. To do this, create a chamfer at the end of the round stock to receive a thread. This chamfer allows for a full first thread, making it easier for the die to engage with the stock material. Ensuring the die handle assembly is kept perpendicular to the stock axis is crucial for forming straight threads.

Proper Die Cutting Techniques
When cutting external threads with a die, maintaining the correct technique is vital. Rotate the die handle clockwise to start cutting the thread, applying gentle pressure. It’s crucial to stop every half turn to break the chips loose, preventing them from clogging the die. Using the right lubricant for the material you’re working with can significantly improve the threading process.
To ensure the threads run true to the axis of the workpiece, proper die alignment is necessary. Misalignment can lead to crooked or damaged threads, compromising the integrity of the workpiece.
Troubleshooting Common Die Cutting Issues
Despite careful preparation and technique, issues can still arise when cutting external threads with a die. Common problems include torn threads, difficult starting, and maintaining perpendicularity throughout the threading process. To address these issues, check the die alignment, ensure the material is properly prepared, and adjust your cutting technique as needed.
By mastering the use of dies and understanding how to troubleshoot common problems, you can achieve high-quality external threads on various materials. Whether you’re working with rods, bolts, or other cylindrical workpieces, the right techniques and tools will help you succeed in your threading operations.
Conclusion
With the knowledge gained from this article, you’re now well-equipped to tackle threading projects with confidence. Understanding tap-and-die sets and their applications can significantly enhance your DIY or professional toolkit. You’ve gained a comprehensive understanding of these essential tools, from their basic components to advanced usage techniques.
The key to mastering tapping and die-cutting lies in proper preparation and technique. Remember to select the correct drill bit sizes, create appropriate chamfers, and use suitable cutting oils and lubricants. By doing so, you’ll be able to avoid common pitfalls such as broken taps, misaligned threads, and improper chip clearing.
Tap-and-die sets are versatile tools with a wide range of applications, from automotive repair to furniture making and general DIY projects. As you’ve learned, the right tap or die can make all the difference in creating precise, functional threads that meet your specific requirements. With practice and patience, you’ll become proficient in using these essential tools, and proper maintenance will ensure they serve you well for years to come.