Are you wondering if it’s possible to remove outdated or unwanted wallpaper from your walls without causing damage? The answer is yes, but it requires careful planning and the right techniques.
Understanding the type of wallpaper and the surface of your wall is crucial for a successful removal process. With the right tools and methods, you can transform your space without the need for professional help or expensive repairs.
Key Takeaways
- Identify the type of wallpaper and wall surface before removal.
- Choose the appropriate removal method based on the wallpaper type.
- Prepare the necessary tools and safety precautions.
- Test a small area first to avoid damage.
- Work carefully to avoid damaging the wall.
Understanding Different Types of Wallpaper
Different wallpapers require different removal techniques, making it crucial to determine the type of wallpaper on your walls. When it comes to removing wallpapers, the five most commonly encountered types are strippable, peel-and-stick, traditional, vinyl-coated, and textured.
Strippable and Peel-and-Stick Wallpapers
Strippable wallpapers are designed to be removed easily, often in a single layer, without leaving residue. Peel-and-stick wallpapers are similar but may require a bit more effort. These types are generally the easiest to remove.
Traditional and Vinyl-Coated Wallpapers
Traditional wallpapers can be more challenging as they are often adhered strongly to the wall. Vinyl-coated wallpapers have a top layer that is more resistant to moisture, making their removal more difficult. You may need to use a wallpaper scoring tool to aid in removal.
Textured and Embossed Wallpapers
Textured or embossed wallpapers feature raised patterns, creating a three-dimensional effect. The texture can make these wallpapers particularly challenging to remove. A combination of scoring, soaking, and scraping is typically required for effective removal.
- Textured wallpapers require patience and the right tools for removal.
- A wallpaper scoring tool is often necessary to create small punctures, allowing removal solutions to reach the adhesive.
- Extra care is needed to avoid damaging the wall.
Assessing Your Wall Type
Understanding the wall type beneath your wallpaper is essential for a damage-free removal process. The type of wall you’re dealing with significantly impacts the removal technique and tools you’ll need.
Drywall Considerations
Drywall is a common wall type in many homes, especially in modern constructions. When removing wallpaper from drywall, you need to be cautious as it can be prone to damage. Drywall is more susceptible to moisture, so you’ll need to be gentle when using water-based removal methods to avoid soaking the wall.
Plaster Wall Considerations
Plaster walls, often found in older homes, are generally more durable and can withstand more aggressive removal techniques. These walls are hard, solid, and cool to the touch, producing a dull thud when tapped. While plaster walls are more resistant to damage, older plaster may have cracks or weak spots, requiring caution during the removal process. You can use water-based removal methods more liberally on plaster walls, but be mindful of the potential for hidden weaknesses.
Essential Tools for Wallpaper Removal
The right tools are crucial for removing wallpaper without damaging your walls. To achieve a smooth finish, you’ll need to gather a selection of basic and specialised tools.
Basic Tools Every DIYer Needs
Every DIYer should have a putty knife and a scraper for removing wallpaper. These basic tools are used to gently pry away the wallpaper from the wall. A scoring tool is also necessary for creating holes in the wallpaper, allowing the removal solution to penetrate.
Specialised Tools for Stubborn Wallpaper
For more stubborn wallpaper, a wallpaper steamer can be invaluable. This tool uses steam to loosen the adhesive, making it easier to remove the wallpaper. A steamer is particularly useful for older or more stubborn wallpapers.
Safety Equipment
When removing wallpaper, safety should be your top priority. You’ll need protective gloves to shield your hands from potentially irritating chemicals in wallpaper strippers and to prevent cuts from scraping tools. Other essential safety equipment includes safety goggles, a dust mask or respirator, knee pads, and a sturdy step ladder or platform.
- Protective gloves are essential to shield your hands from potentially irritating chemicals in wallpaper strippers and to prevent cuts from scraping tools.
- Safety goggles protect your eyes from falling debris, splashing removal solutions, and steam if using a wallpaper steamer.
- A dust mask or respirator is recommended, especially when dealing with older wallpapers that might contain mould or when using chemical strippers.
- Knee pads can provide comfort during extended periods of working near the floor or baseboards.
- A sturdy step ladder or platform allows for safe access to higher areas without overreaching or risking falls.
Preparing the Room Before You Start
Proper room preparation is crucial for a smooth and damage-free wallpaper removal process. To achieve this, you need to take a few essential steps.
Protecting Furniture and Flooring
Clear the room as much as possible to create ample working space and prevent damage to your furniture. Cover any remaining furniture and flooring with plastic sheeting or tarps to protect them from potential drips of the cleaning solution.
Electrical Safety Precautions
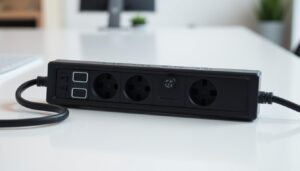
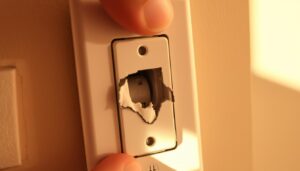
Ensure that you take necessary electrical safety precautions to avoid any accidents. This includes switching off the power to any outlets near your work area and keeping electrical appliances away from water.
Creating an Efficient Workspace
To work efficiently, set up a designated area for your tools and supplies where they won’t be in the way but remain easily accessible. Position your ladder or step stool strategically to minimise the need for frequent repositioning. Additionally, prepare garbage bags or a bin specifically for wallpaper waste to keep your work area tidy as you progress.
By following these steps, you can ensure a well-prepared room for the wallpaper removal process, protecting your walls and making the task less daunting.
Testing Your Wallpaper
Testing your wallpaper is a vital step in determining the best removal approach. This initial test will help you understand how the wallpaper is adhered to the wall and what method will be most effective for its removal.
The Corner Peel Test
Start by performing a corner peel test. Gently peel back a corner of the wallpaper to see how it responds. If it comes off easily, you’re dealing with a strippable or peel-and-stick wallpaper. However, if it resists or tears, it’s likely a more traditional type that requires additional effort for removal.
Determining the Best Removal Method
After your initial peel test, you can try various methods to loosen the adhesive. You may start by applying warm water to a small section using a spray bottle or sponge. If this doesn’t work, a mixture of warm water and washing-up liquid can be more effective. For stubborn cases, consider using a commercial wallpaper stripper or a steamer. Based on your test results, you can determine the best removal method for your specific wallpaper and wall type.
Removal Method | Effectiveness | Wall Protection |
---|---|---|
Warm Water | Moderate | High |
Water and Detergent | High | Moderate |
Commercial Stripper | Very High | Low |
Steamer | High | Moderate |
Removing Wallpaper Without Damaging Walls: Step-by-Step Methods
Removing wallpaper can be a daunting task, but with the right techniques, you can achieve a smooth finish without damaging your walls. The key is to choose the appropriate method based on your wallpaper type and wall condition.
Dry Stripping Method
If your wallpaper is easily peeling away dry, you might be able to remove it using the dry stripping method. Start by gently pulling the wallpaper away from the wall. If it comes off easily, continue; otherwise, switch to a different method to avoid damaging the plaster.
Soaking Method
For wallpapers that don’t come off dry, soaking can be an effective method. Mix a solution of warm water and a small amount of wallpaper remover. Apply this to the wallpaper using a sponge or spray bottle, allowing it to soak before scraping it off with a standard wallpaper scraper.
Scoring and Soaking Method
Some wallpapers, especially those with multiple layers or vinyl coatings, may require scoring before soaking. Use a wallpaper scoring tool to create small perforations in the surface, allowing the soaking solution to penetrate more effectively.
Steamer Method
A wallpaper steamer uses hot steam to loosen the adhesive, making it easier to remove stubborn wallpaper. Hold the steamer against the wallpaper for 10-30 seconds before scraping it away. Be cautious not to over-steam, especially on drywall, as excessive moisture can cause damage. You can find more information on stripping wallpaper to ensure you’re using the best method for your walls.
Regardless of the method you choose, it’s essential to work in small sections and take your time to avoid damaging the walls. Always switch off the electricity at the fuse box and cover sockets to prevent water ingress.
Homemade Solutions vs Commercial Wallpaper Strippers
When it comes to removing wallpaper, you have two primary options: homemade solutions and commercial wallpaper strippers. The choice between these methods depends on the type of wallpaper and its adhesive.
Effective DIY Mixtures
Homemade solutions can be an effective and cost-efficient way to remove wallpaper. A mixture of hot water and fabric softener or a solution of vinegar and water can help loosen the adhesive. You can also use a spray bottle to apply the warm water and let it sit before scraping off the wallpaper.
When to Use Commercial Products
If your wallpaper was applied with a stronger adhesive or you’re still struggling to lift it, you may need a specialist wallpaper stripper like Zinsser Dif. Commercial strippers contain enzymes or chemicals that break down adhesives more aggressively than homemade solutions. These products are particularly useful for old or multiple-layered wallpapers.
Tackling Stubborn and Old Wallpaper
Removing old wallpaper can be a challenging task, especially when faced with multiple layers or stubborn adhesive residue. To successfully tackle this task, you need to understand the type of wallpaper you’re dealing with and choose the right removal technique.
Dealing with Multiple Layers
When dealing with multiple layers of wallpaper, start from the top layer and work your way down, using a suitable removal technique for each layer. Different layers may require different methods, depending on the type of wallpaper used.
Removing Adhesive Residue
After removing the wallpaper, you’ll often be left with adhesive residue on the wall. To remove this, apply a generous amount of removal solution, let it soak, and then scrape it off gently. For particularly stubborn residue, consider using a scoring tool to help the solution penetrate.
Solutions for Brittle or Crumbling Wallpaper
For old wallpaper that has become brittle or crumbling, apply a removal solution and let it soak thoroughly. Work in small sections to maintain control, and consider using a steamer to soften both the paper and adhesive. Be prepared to make multiple passes to gradually remove the layers.
Preparing Walls After Wallpaper Removal
With the old wallpaper gone, it’s time to prepare your walls for a fresh new look. This involves a few crucial steps to ensure your walls are in the best condition for painting or hanging new wallpaper.
Cleaning the Wall Surface
Start by sanding the wall surface to remove any remaining adhesive residue. Using a hand sander with low grit sanding paper, such as Mirka Oxide 120 grit, will help you achieve a smooth surface.
Repairing Any Wall Damage
Inspect your walls for any damage caused during the wallpaper removal process. Make any necessary repairs to holes or cracks using a suitable filler, and sand smooth before proceeding.
Priming for Your Next Project
Applying a high-quality primer is essential after wallpaper removal. For walls with stubborn adhesive, consider a specialised primer-sealer. Apply primer with a roller for large areas and a brush for edges, ensuring complete coverage. Allow the primer to dry according to the manufacturer’s instructions.
Conclusion: Ensuring a Smooth Finish for Your Next Project
As you’ve learned from this guide, removing wallpaper without damaging walls is achievable with patience and the right methods. By following the steps outlined, you can transform your walls from outdated wallpaper to a clean canvas ready for your next decorating project.
To ensure a smooth finish, remember to adapt your approach according to the type of wallpaper and wall surface you’re dealing with. Properly preparing your walls after wallpaper removal will yield the best results for your new paint or wallpaper application. With this knowledge, you can confidently tackle remove wallpaper projects throughout your home.
FAQ
What is the best method to remove old wallpaper?
The best method depends on the type of wallpaper and its condition. For most wallpapers, using a steamer or a scoring tool followed by soaking with warm water is effective. For particularly stubborn cases, a commercial wallpaper stripper may be necessary.
How do I remove wallpaper from drywall without damaging it?
To remove wallpaper from drywall, start by testing a small area to determine the best removal method. You can use a putty knife or a scraper to gently pry off the wallpaper, taking care not to gouge the drywall. Applying a wallpaper stripper or using a steamer can also help loosen the adhesive.
Can I use a hairdryer to remove wallpaper?
While a hairdryer can be used to heat the adhesive, making it easier to remove the wallpaper, it’s not the most efficient method for large areas. A steamer is generally more effective for heating and loosening the adhesive over a broader surface.
How do I remove adhesive residue after taking off the wallpaper?
To remove adhesive residue, apply a wallpaper stripper or a mixture of warm water and a mild detergent to the area. Let it soak for a few minutes before scraping off the residue with a putty knife or scraper. For stubborn residue, repeating the process or using a more aggressive stripper may be necessary.
Is it necessary to score the wallpaper before removal?
Scoring the wallpaper can be beneficial, especially for vinyl-coated or traditional wallpapers, as it allows the removal solution or steam to penetrate the paper and loosen the adhesive more effectively. However, for strippable or peel-and-stick wallpapers, scoring may not be necessary.
What safety precautions should I take when removing wallpaper?
When removing wallpaper, ensure good ventilation, especially when using commercial strippers. Wear protective gloves, safety goggles, and a dust mask to protect yourself from the solution, debris, and any potential electrical hazards.