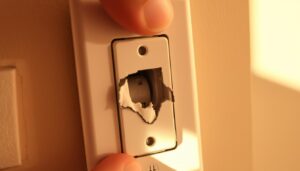
Tag: Wallpaper bubbling

  • Wallpaper Bubbling Solution: Walls & Surfaces Tips for UK Homes

    Wallpaper Bubbling Solution: Walls & Surfaces Tips for UK Homes

    Did you know that nearly 40% of homeowners in the UK experience wallpaper bubbling at some point? This frustrating issue can mar the beauty of your home’s interior. Bubbles can appear immediately after installation or develop over time due to various factors, including moisture issues or improper application techniques.

    Understanding the causes of these bubbles is crucial for implementing the right wallpaper bubbling solution. In many cases, bubbles dissipate on their own as the adhesive dries. However, some issues require prompt attention to prevent further damage to your home’s walls.

    Key Takeaways

    • Identify the root causes of wallpaper bubbles to apply the correct fix.
    • Timing is crucial; some bubbles resolve themselves over time.
    • Moisture issues can contribute to the formation of bubbles.
    • Proper application techniques can prevent bubbling.
    • Regular inspection can help in early detection of the problem.

    Understanding Wallpaper Bubbles in UK Homes

    The appearance of bubbles under wallpaper is a widespread issue in the UK, typically caused by factors such as improper wall preparation or trapped air pockets. Understanding the root causes of these bubbles is crucial for determining the appropriate wallpaper bubbling solution.

    Detailed close-up of wallpaper bubbles on a textured surface, capturing the intricate patterns and varied shapes of the air pockets. Soft, diffused lighting illuminates the dimensional quality of the bubbles, creating a sense of depth and dimension. The wallpaper has a muted, vintage color palette, evoking a sense of age and character. The overall composition focuses on the bubbles, filling the frame and highlighting their organic, almost sculptural qualities. Subtle shifts in focus draw the eye to the delicate edges and contours of the individual bubbles, emphasizing their fragile, ephemeral nature.

    Common Causes of Wallpaper Bubbling

    Several factors contribute to the formation of wallpaper bubbles in UK homes. These include:

    Excess or Insufficient Adhesive

    If a bubble is still wet, it may indicate that too much paste was applied. Conversely, a dry bubble could signify insufficient adhesive.

    Improper Wall Preparation

    Failure to clean surfaces thoroughly or address underlying issues like damp or uneven walls can lead to persistent bubbling problems.

    Trapped Air Pockets

    Air sealed between the wall surface and the wallpaper during application is a common cause of bubbles. Ensuring smooth application can mitigate this issue.

    When to Address Bubbling Issues

    Timing is critical when dealing with wallpaper bubbles. Some minor air pockets may resolve themselves as the adhesive dries.

    Immediate vs. Delayed Repairs

    Large, numerous, or highly visible bubbles require immediate attention, while smaller, isolated ones might be monitored before intervention.

    Assessing Bubble Severity

    Determining whether the issue is cosmetic or indicates a more serious underlying problem is essential before proceeding with repairs.

    By understanding the causes and assessing the severity of wallpaper bubbles, homeowners can apply the appropriate solution effectively.

    Essential Tools for Fixing Wallpaper Bubbles

    To tackle wallpaper bubbles, you’ll need to assemble a basic repair kit with the necessary tools. Having the right equipment makes the job significantly easier and more professional-looking.

    Basic Repair Kit Components

    The following tools are essential for effectively addressing wallpaper bubbles in your UK home:

    Sharp Snap-Blade Knife

    A sharp snap-blade knife is crucial for making precise incisions in the wallpaper.

    Generate an image of a sharp snap-blade knife used for wallpaper repair.

    Buy Now

    Wallpaper Paste Syringe

    The wallpaper paste syringe allows for precise application of adhesive directly into bubble areas.

    Generate an image of a wallpaper paste syringe.

    Buy Now

    Smoothing Tool

    A proper smoothing tool helps ensure that repaired areas lie completely flat against the wall.

    Generate an image of a smoothing tool used for wallpaper.

    Buy Now

    Wallpaper Adhesive

    Selecting the right wallpaper adhesive is critical; look for products specifically designed for your wallpaper type.

    Generate an image of a recommended wallpaper adhesive product.

    Buy Now

    Additional Helpful Items

    In addition to the basic repair kit, having a few extra items can be beneficial.

    Damp Sponge and Cloth

    A damp sponge is essential for cleaning excess paste from the wallpaper surface.

    Plastic Scraper

    For UK homes, having a plastic scraper can prevent accidental damage to both the wallpaper and underlying plasterwork.

    The Perfect Wallpaper Bubbling Solution: Step-by-Step Guide

    Repairing wallpaper bubbles requires a methodical approach to ensure a seamless finish. By following these steps, you can effectively fix bubbles and maintain the aesthetic appeal of your wallpapered walls.

    Identifying and Locating Bubbles

    The first step in fixing wallpaper bubbles is to identify and locate them. Carefully inspect your walls to determine the extent of the bubbling.

    Wet vs. Dry Bubbles

    It’s essential to differentiate between wet and dry bubbles. Wet bubbles indicate excess paste, while dry bubbles suggest insufficient adhesive.

    Surface Inspection Techniques

    Use both visual inspection in good lighting and tactile techniques to detect bubbles. Run your hand gently across the wall to feel for raised areas.

    Creating Access to the Bubble

    To repair a bubble, you need to create access to it. Use a sharp snap-blade knife to make a precise X-cut, following the wallpaper pattern where possible.

    Making the Perfect X-Cut

    Exercise caution when making the cut to avoid tearing the wallpaper or cutting too deeply into the wall surface.

    Removing Debris and Air

    After creating access, remove any debris or air pockets that may have caused the bubble.

    Applying Adhesive Correctly

    The right adhesive application is crucial for a successful repair. Use a glue syringe to apply the wallpaper adhesive precisely where needed.

    Image of a glue syringe being used to apply adhesive

    Learn More

    Filling the Syringe Properly

    Fill the syringe with the appropriate wallpaper paste or adhesive, ensuring you have the right amount for the repair.

    Injection Techniques

    Work methodically to inject the adhesive, ensuring complete coverage without oversaturating the paper or wall.

    Recommended Adhesive Products

    For UK homes, consider using adhesives specifically formulated for the local climate conditions.

    Smoothing and Finishing the Repair

    Use a smoothing tool with light, even pressure to eliminate air pockets and ensure proper adhesion.

    Using the Smoothing Tool Effectively

    Work from the centre of the repair outward to smooth out the area.

    Cleaning Excess Adhesive

    Use a slightly damp sponge to clean up any excess adhesive, preventing staining and ensuring a professional finish.

    Allowing Proper Drying Time

    Allow sufficient drying time before touching or decorating the repaired area. This typically takes 24-48 hours, depending on room temperature and humidity levels.

    Preventing Future Wallpaper Bubbles

    To keep your wallpaper looking its best, it’s crucial to prevent bubbles from forming in the first place. This involves a combination of proper wall preparation, correct application techniques, and consideration of environmental factors.

    Proper Wall Preparation Techniques

    Thorough wall preparation is essential for preventing wallpaper bubbles. This process begins with comprehensive surface cleaning to remove dust, grease, and loose material. Priming walls is also vital, especially for drywall or newly plastered surfaces, as it creates a uniform surface that promotes even adhesion.

    Surface Cleaning and Priming

    Surface cleaning must be thorough, removing all contaminants that could interfere with the adhesive. Priming helps to create a smooth surface, reducing the risk of bubbles forming due to uneven adhesion.

    Dealing with Textured Surfaces

    For textured surfaces or artexed ceilings, consider using a lining paper first to create a smooth base for your decorative wallpaper. This extra step can significantly reduce the risk of bubbles.

    Correct Wallpaper Application Methods

    When applying wallpaper, work methodically in sections, ensuring each piece is properly aligned and smoothed before moving to the next. Adhesive application best practices are crucial; using the correct amount for your specific wallpaper type is key to preventing bubbles.

    Adhesive Application Best Practices

    Too little adhesive can cause poor adhesion, while too much can create excess moisture leading to bubbling. Always follow the manufacturer’s instructions for the correct adhesive application.

    Smoothing Techniques During Installation

    Smoothing techniques should be consistent, working from the centre outward to push air bubbles toward the edges where they can escape. This helps to ensure a bubble-free finish.

    Environmental Considerations for UK Homes

    UK homes are subject to seasonal humidity changes, which can affect wallpaper performance. Consider using moisture-resistant wallpapers in areas prone to dampness to mitigate this risk.

    Prevention Method Description Benefit
    Surface Cleaning Remove dust, grease, and loose material Reduces risk of air bubbles
    Priming Walls Create a uniform surface Promotes even adhesion
    Lining Paper Use on textured surfaces Creates a smooth base for wallpaper
    Correct Adhesive Application Follow manufacturer’s instructions Prevents excess moisture and poor adhesion

    A pristine white wall, its surface unmarred, serves as the backdrop for a captivating display of wallpaper prevention techniques. In the foreground, a delicate hand carefully applies a thin layer of wallpaper paste, ensuring a seamless and secure bond between the paper and the wall. The lighting, soft and diffused, casts a warm glow, highlighting the intricate patterns and textures of the wallpaper as it is carefully smoothed into place. In the middle ground, a selection of tools, including a wallpaper scraper and a paste brush, stand ready, their precise placement and organization conveying a sense of order and professionalism. The overall mood is one of calm, methodical attention to detail, reflecting the care and expertise required to prevent future wallpaper bubbles and maintain the pristine appearance of the surface.

    Conclusion: Maintaining Flawless Wallpapered Walls

    To maintain flawless wallpapered walls in your UK home, it’s essential to address bubbling issues promptly. Regular inspection of your wallpapered surfaces, particularly after seasonal changes when moisture levels fluctuate, can help identify potential problems before they become serious.

    Prevention remains the best approach for long-term wall beauty. By taking care when applying the wallpaper and using a quality adhesive, you can help prevent bubbles from forming in the first place. Make sure to keep some matching wallpaper scraps and appropriate adhesive stored safely for future repairs.

    Different rooms in your home may experience different conditions; bathrooms and kitchens are particularly prone to moisture-related wallpaper issues and may require more frequent monitoring. With proper installation, quality materials, and the right repair techniques, your wallpapered walls can remain a beautiful feature of your home for many years to come.

    FAQ

    What causes air pockets under my wallpaper?

    Air pockets, also known as bubbles, are typically caused by trapped air or moisture between the adhesive and the wall surface. This can occur when the wallpaper paste is not applied evenly or when the wall is not properly prepared.

    How do I fix a bubble in my wallpaper?

    To fix a bubble, you’ll need to create a small incision in the wallpaper, then use a syringe to inject adhesive into the affected area. Use a damp sponge to smooth out the area, ensuring the adhesive is evenly distributed.

    Can I use a roller to remove bubbles from my wallpaper?

    While a roller can be used to smooth out the wallpaper, it’s not always effective in removing bubbles. For more stubborn bubbles, it’s best to use a syringe and adhesive to reattach the paper to the wall.

    How can I prevent bubbles from forming on my new wallpaper?

    To prevent bubbles, ensure your walls are properly prepared by cleaning and drying them thoroughly. Apply the wallpaper paste evenly, and use a brush or roller to smooth out the paper as you apply it.

    What should I do if the bubble reappears after I’ve fixed it?

    If the bubble reappears, it may be due to moisture or air pockets that were not fully addressed. Check the area for any signs of dampness and ensure the adhesive is fully dry. You may need to reapply adhesive or consult a professional for further assistance.

    Can I paint over a bubble in my wallpaper?

    It’s not recommended to paint over a bubble, as this can cause the paper to lift further or create more air pockets. Instead, address the bubble directly by reattaching the paper to the wall using adhesive.