Are you tired of the outdated textured pattern on your ceiling? If you’re a homeowner in the UK, particularly with a property built between the 1960s and 1990s, you’re likely familiar with Artex ceilings. The question on many minds is whether it’s feasible to update this feature without removing the entire ceiling.
Many UK homes feature Artex ceilings with distinctive textured patterns that are now considered outdated. Skim-coating over these ceilings is a popular solution for homeowners looking to modernise their interior spaces. However, before you start, it’s crucial to understand the potential presence of asbestos, particularly in ceilings installed before 2000.
This comprehensive guide will explore the process of skim-coating over Artex, from safety considerations to step-by-step application techniques. We’ll examine when this method is appropriate, what materials you’ll need, and how to achieve a professional-looking smooth finish that transforms your home’s appearance.
Key Takeaways
- Skim-coating over Artex ceilings can be a cost-effective way to update your home’s interior.
- It’s essential to check for asbestos before starting the project.
- The process requires careful preparation and technique.
- A successful skim-coat can significantly improve your ceiling’s appearance.
- Understanding the composition of your Artex ceiling is crucial for a safe and effective renovation.
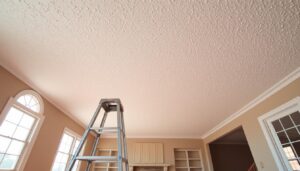
Understanding Artex Ceilings
Artex, a brand name for textured finishes, has a rich history in UK homes, dating back to its introduction in the 1930s. Initially, it was valued for its ability to cover imperfections and create decorative patterns on ceilings and walls.
What Is Artex and Its History in UK Homes
Artex was originally developed in 1935 as an “Asbestos Reinforced TEXtured coating.” It became extremely popular in UK homes from the 1960s through the 1990s, creating distinctive textured patterns on ceilings and walls. The product was used not only for decoration but also as a practical solution to cover ceiling imperfections, cracks, and uneven surfaces.

Why Homeowners Want to Remove or Cover Artex
Modern interior design preferences have shifted dramatically towards smooth, seamless surfaces, making Artex ceilings appear dated and undesirable in contemporary homes. Many property owners seek to remove or cover Artex to increase their home’s value, as these textured ceilings can detract from a property’s marketability. The distinctive patterns can dominate a room visually, making spaces feel smaller and more cluttered than they actually are.
- Artex ceilings can make a room appear outdated.
- Removing or covering Artex can increase a property’s value.
- Smooth finishes are now preferred in modern interior design.
The Asbestos Concern: Safety First
When dealing with Artex ceilings, a critical concern is the potential presence of asbestos, a substance that was commonly used in these products until its ban in the UK in 1999.
The primary issue with Artex ceilings is that they may contain asbestos, particularly in properties built or decorated before 2000. Artex produced after the ban should be asbestos-free, but older finishes may still contain this hazardous material.
Does Artex Contain Asbestos?
Not all Artex contains asbestos, but many older properties may still have it. Typically, white asbestos (chrysotile) is found in Artex, making up between 1-4% of the material. However, identifying asbestos in Artex is challenging due to its mixture with other materials and the microscopic size of chrysotile fibres.
Testing Your Ceiling for Asbestos
The only reliable method to determine if your Artex ceiling contains asbestos is through laboratory testing of samples. You have two main options: using home testing kits to take and send samples yourself, or hiring professional asbestos surveyors to collect and analyze samples from your property.
Options for Dealing with Artex Ceilings
When faced with an Artex ceiling, you have several options to consider for renovation or removal. The best option for you will depend on various factors, including planned follow-on works, the quantity to be removed, ease of removal, and your budget.
Complete Removal
One option is to completely remove the Artex ceiling, including the textured finish. This method is thorough but also disruptive and expensive. If your Artex contains asbestos, removal requires professional contractors with proper safety equipment to prevent fibre release.
Installing a False Ceiling
Another option is to install a false ceiling below the existing Artex. This involves fitting a new plasterboard ceiling, effectively hiding the Artex without disturbing it. This method is particularly suitable if your Artex contains asbestos, as it avoids direct contact. You can use a wood or metal track to suspend the new ceiling.
Skim-Coating: The Popular Option
 Skim-coating is a popular choice for many homeowners as it’s less invasive than removal and doesn’t reduce room height. This technique involves applying a thin layer of plaster directly over the Artex to create a smooth surface. However, it’s only suitable if the existing ceiling is in good condition and free from asbestos.
Can You Skim-Coat Over Artex Ceiling?
Skim-coating over an Artex ceiling is a viable option, but its success depends on several key factors. You need to assess the condition of your ceiling and determine if it’s suitable for skim-coating. This process involves evaluating the presence of asbestos, the overall condition, and the type of Artex finish.
When Skim-Coating Is Appropriate
Skim-coating is most suitable when your Artex ceiling is in good condition and firmly adhered to the substrate. It’s also crucial that the ceiling is asbestos-free, as confirmed through proper testing. If your ceiling meets these criteria, skim-coating can be a successful and cost-effective solution.
| Ceiling Condition | Suitability for Skim-Coating |
|---|---|
| Good condition, asbestos-free | Highly suitable |
| Damaged or contains asbestos | Not recommended |
| Painted with glossy paint | May require special preparation |
When to Avoid Skim-Coating
You should avoid skim-coating if your Artex ceiling contains asbestos, as the preparation work can disturb asbestos fibres and pose a health hazard. For more information on the costs associated with plastering over an Artex ceiling, you can visitMyJobQuote. Additionally, if your ceiling has significant damage or large cracks, skim-coating is not recommended. It’s also not advisable if the Artex is peeling or coming away from the substrate.
Tools and Materials Needed for Skim-Coating
The key to successfully covering an Artex ceiling lies in selecting the appropriate tools and plaster products. To achieve a smooth finish, you’ll need to prepare the right equipment and materials.
Essential Plastering Tools
To begin with, you’ll require essential plastering tools including a plasterer’s trowel, hawk, bucket, mixing paddle, serrated and smooth skimming tools, and a roller for application. A long-handled floor scraper is also necessary for removing high points on the ceiling.

Recommended Plaster Products
For a successful skim-coating, you’ll need plaster products specifically designed for covering textured surfaces. Toupret is a popular brand that doesn’t require a PVA bonding coat. The quantity of plaster needed will depend on the room size and pattern depth. It’s also crucial to have clean water buckets for mixing plaster and cleaning tools. Don’t forget to use a good quality dust mask (preferably FFP3 rated) to protect yourself from dust.

Step-by-Step Guide to Skim-Coating Artex
To transform your Artex ceiling, you’ll need to follow a step-by-step guide to skim-coating, ensuring a professional-looking result. Before you begin, it’s crucial to ensure your Artex ceiling has been tested for asbestos, a critical safety precaution that cannot be overlooked.
Preparation Work
Start by protecting your room with dust sheets, removing or covering furniture thoroughly. Scrape off the high points of the Artex pattern using a floor scraper. For non-asbestos Artex, lightly dampen the ceiling with water or a vinegar solution to reduce dust. Then, apply a coat of PVA bonding agent to the entire ceiling, adding a bit of food colouring to track coverage. Allow it to become tacky before proceeding.
Applying the First Coat
Mix your first coat of plaster and start applying it from one corner, working methodically across the ceiling. Ensure you mix enough plaster to cover a manageable area within 10-15 minutes. Apply the plaster firmly to fill in the pattern, and after it begins to firm up, flatten it lightly.
Applying the Second Coat
For the second coat, mix a slightly wetter plaster and apply it more thinly, focusing on creating a smooth surface. This coat should be applied more delicately, ensuring an even finish across the ceiling.
Finishing Touches
The finishing touches involve multiple troweling passes as the plaster dries. Use a clean trowel with light pressure and occasionally mist the surface with water. Pay special attention to corners and edges, using a wet brush to clean ceiling/wall angles and ensure a crisp finish.
| Step | Description | Tips |
|---|---|---|
| 1. Preparation | Protect the room, scrape off high points of Artex | Use dust sheets, floor scraper |
| 2. First Coat | Apply PVA, then plaster | Add food colouring to PVA, mix plaster to right consistency |
| 3. Second Coat | Apply a thinner layer of plaster | Mix slightly wetter plaster, apply evenly |
By following these steps and tips, you can successfully skim-coat your Artex ceiling, achieving a smooth and professional finish.
Conclusion: Is Skim-Coating Right for Your Artex Ceiling?
When it comes to updating your home, the decision to skim-coat an Artex ceiling depends on several key factors. You must consider the condition of your ceiling, the presence of asbestos, and your DIY skill level.
Skim-coating can be a cost-effective option that transforms the appearance of your room. However, it requires a significant amount of time and effort. If your Artex contains asbestos, you may want to consider alternative solutions like installing a false ceiling.
Ultimately, addressing outdated Artex ceilings can modernize your property and potentially increase its value. Whether you choose DIY skim-coating or hire a professional for the job, the result can be a smoother, more contemporary surface that improves the overall feel of your room.