Are you struggling to illuminate your workbench or desk adequately? Proper lighting is crucial for productivity and eye health. Whether you’re working on a hobby project or a professional task, having the right lighting solution can make all the difference.
Effective task lighting can help reduce eye strain and improve your work quality. In this comprehensive guide, we’ll walk you through the process of setting up the perfect lighting for your workbench. You’ll learn about the benefits of different lighting solutions and how to choose the right one for your needs.
Key Takeaways
- Understand the importance of proper task lighting for your workbench.
- Learn how to choose the right lighting solution for your specific needs.
- Discover the benefits of using LED lighting for your workbench.
- Find out how to position and install your lighting system for optimal results.
- Avoid common pitfalls when setting up your task lighting.
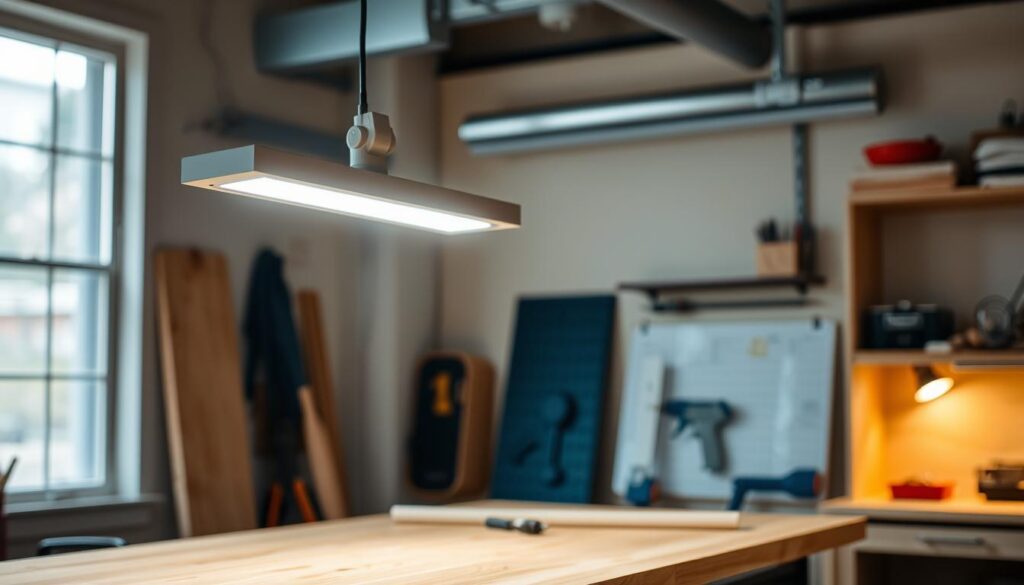
Why LED Task Lighting Is Essential for Your Workbench
Effective task lighting is crucial when working on detailed projects or using potentially hazardous tools. Proper lighting around your workbench helps prevent eye strain and reduces the risk of accidents.
Here are some key benefits of using LED task lighting:
- LEDs provide superior illumination while consuming less energy.
- Even light distribution eliminates shadows, making precision work easier.
- Good task lighting improves accuracy and efficiency, allowing you to work for longer periods without fatigue.
- LEDs are versatile in brightness and colour temperature, customisable for different projects.
| Benefits of LED Task Lighting | Traditional Lighting | LED Lighting |
|---|---|---|
| Energy Consumption | High | Low |
| Flicker | Often flickers | No flicker |
| Customisation | Limited | Highly customisable |
By choosing LED task lighting, you can enhance your workbench experience, making it safer and more efficient. LEDs don’t flicker, reducing eye strain during extended work sessions.
Understanding Different Types of Task Lighting
Understanding the nuances of task lighting can significantly enhance your working environment. Task lighting is not a one-size-fits-all solution; it varies based on the specific requirements of your workspace.
Workbench Lighting Requirements
Workbench lighting often demands bright, focused light to illuminate detailed tasks. LED strip lighting is particularly effective for workbenches as it provides clear, shadow-free illumination. When choosing workbench lighting, consider the type of tasks you’ll be performing and the level of brightness required.
Desk Task Lighting Considerations
Desk task lighting, on the other hand, needs to be more nuanced. It should complement screen use without causing glare. Adjustable brightness is crucial for desk lighting, allowing you to modify lighting levels based on the time of day and ambient light in the room. Proper positioning is also key to avoid reflecting light off screens or creating harsh shadows.
For both workbench and desk lighting, LED options are highly recommended due to their energy efficiency and flexibility. The right lighting can significantly reduce eye strain and improve your overall work experience.
Planning Your LED Task Lighting Setup
Proper planning is essential for an effective LED task lighting setup over your workbench. To achieve the best results, you need to consider several factors that impact the quality of light in your workspace.
Measuring Your Workspace
To plan your LED task lighting effectively, start by measuring your workspace. This involves determining the size of your workbench and the area where you need focused lighting. Accurate measurements will help you decide on the number and placement of lights required to illuminate your work area sufficiently.
Determining Light Placement for Shadow Elimination
Strategic placement of lights is crucial for eliminating shadows that can hinder your work. Position lights opposite your dominant hand to prevent your body from casting shadows on your work. Consider using multiple light sources from different angles to ensure comprehensive illumination. For instance, an under-cabinet LED strip can be used to place light directly on the work surface, reducing shadows cast by overhead lamps.
| Lighting Strategy | Benefit |
|---|---|
| Positioning lights opposite your dominant hand | Reduces shadows on your work area |
| Using multiple light sources | Provides comprehensive illumination and eliminates shadows |
| Under-cabinet LED strips | Directly illuminates the work surface, reducing shadows |
Essential Materials and Tools Needed
To effectively set up LED task lighting over your workbench, you’ll need to gather the right materials and tools. This will ensure a successful installation that meets your lighting needs.
LED Strip Options for Workbenches
When it comes to LED strip options for your workbench, consider using high-quality LED strips with a high Colour Rendering Index (CRI). Most LEDs aren’t rated higher than 95 CRI, but a CRI of at least 90 is recommended. Full spectrum or SAD lamps are ideal as they closely mimic natural light.
Tools Required for Installation
To install your LED task lighting, you’ll need a variety of tools. The basic tools required include a measuring tape, scissors or a cutting tool for the LED strips, a screwdriver, wire strippers, and electrical tape.
- Depending on your mounting surface, you may need a drill with appropriate bits for creating pilot holes.
- A voltage tester is recommended for safety when working with electrical connections.
- Cable management tools such as cable clips or conduit will help create a neat, professional installation.
- For custom installations, you might need additional tools like a soldering iron for connecting separate LED strips.
- Safety equipment including gloves and eye protection should be considered essential tools for any installation project.
Choosing the Right Colour Temperature
When setting up LED task lighting over your workbench, one crucial factor to consider is the colour temperature of the LEDs. Colour temperature is measured in Kelvin (K) and can significantly impact your work quality and comfort.
Warm vs Cool Light for Different Tasks
Different tasks require different colour temperatures. Warm white light (2700K-3000K) is often used for relaxation and can be suitable for tasks that don’t require high concentration. Cool white light (3500K-5000K) is more energizing and is typically used for tasks that require attention to detail.
Colour Rendering Index (CRI) Explained
The Colour Rendering Index (CRI) measures how accurately a light source reveals the true colours of objects compared to natural sunlight. For workbench applications where colour accuracy is important, look for LEDs with a CRI of 90 or higher.

High CRI lighting is particularly important for tasks involving painting, staining, electrical work, or any project where colour identification is crucial. The combination of appropriate colour temperature and high CRI provides the most effective lighting for detailed workbench tasks.
Optimal Positioning to Setup LED Task Lighting Over Bench
To achieve optimal illumination for your workbench, it’s crucial to position your LED task lighting correctly. Even lighting is essential to remove shadows and clearly see what you’re working on.
Height and Angle Considerations
For fixed lights, place a lamp opposite your dominant hand to ensure that the lighting shines toward your hand rather than from behind the shoulder you’re actively using. This helps prevent shadows from obscuring your work.
Eliminating Shadows and Glare
Strategic positioning of multiple light sources can help eliminate shadows. Consider how your body position might create shadows during different tasks and position lighting accordingly. Diffused lighting helps reduce harsh shadows and creates more even illumination across your work surface.
Step-by-Step Installation Guide
A well-planned LED task lighting installation can transform your workbench into a highly efficient area. To achieve this, follow a systematic approach to ensure a successful setup.
Preparing the Surface
Before installing LED strips, clean the surface thoroughly to ensure a strong adhesive bond. Remove any dirt, dust, or grease that might interfere with the installation.
Mounting the LED Strips
Mount the LED strips according to your planned layout, ensuring they are straight and evenly spaced. Use appropriate adhesive or mounting clips if necessary.
Securing the Wiring
To keep the wiring tidy, use cable management solutions like clips, conduit, or cable channels. Secure all connections properly to prevent accidental disconnection. Keep wiring away from moving parts and heat sources.
- Use cable clips to secure the wiring.
- Label connections for future reference.
- Test all connections before finalizing the installation.
By following these steps, you can ensure a safe and effective LED task lighting installation, providing you with reliable power and optimal lighting.
Power Supply and Wiring Considerations
When setting up LED task lighting over your bench, it’s crucial to consider the power supply and wiring. A well-designed power supply system ensures that your LED lights operate efficiently and safely.
Calculating Power Requirements
To determine the appropriate power supply, you need to calculate the total power required by your LED lights. This involves summing up the wattage of all the LED strips or fixtures you plan to install. For instance, if you’re using three 5-meter LED strips, each consuming 10 watts per meter, your total power requirement would be 150 watts.
| LED Strip Length (meters) | Wattage per Meter | Total Wattage |
|---|---|---|
| 5 | 10 | 50 |
| 10 | 10 | 100 |
| 15 | 10 | 150 |
Safe Wiring Practices
Safe wiring practices are essential to prevent electrical hazards. Always disconnect power before working on any electrical connections. Use appropriately rated connectors and terminals, and secure all wiring to prevent accidental disconnection or damage. Consider using junction boxes for connections rather than leaving splices exposed.
By following these guidelines, you can ensure a safe and efficient LED task lighting setup that meets your needs.
Advanced Lighting Features to Consider
You can further enhance your LED task lighting by incorporating advanced features that offer greater control and flexibility.
Dimmers and Controls
Adding dimmers and controls to your LED task lighting setup allows you to adjust the lighting levels according to your needs. This feature is particularly useful for tasks that require different levels of brightness.
Smart Lighting Options
Smart lighting systems provide the ability to control your LED lights via smartphone apps, voice commands, or automation based on schedules or triggers. Some benefits include:
- Motion sensors that automatically activate lighting when you approach your workbench.
- Programmable scenes that allow you to switch between different LED strip configurations.
- Remote access capabilities, making it possible to control your lights even when you’re away.
For instance, having smart controls lets you adjust the lights from your phone and set schedules for automatic turn-on, which is perfect for a kitchen workbench or avoiding fumbling in the dark. This can give your workspace a modern look and enhance functionality.

Creative Placement Ideas for Enhanced Functionality
To maximise the effectiveness of your LED task lighting, consider creative placement ideas that enhance functionality. You can achieve this by adopting various installation strategies that cater to your specific workbench needs.
Under-Cabinet Installation
Under-cabinet LED lighting is an excellent way to illuminate your work surface without taking up valuable space. This type of installation is particularly useful for workbenches with cabinets or shelving units above them. By placing LED strips under these units, you can create a well-lit workspace that reduces eye strain.
Overhead and Side Lighting
Combining overhead and side lighting can create a comprehensive lighting solution that minimizes shadows from all angles. Overhead lighting provides general illumination, while side lighting helps eliminate shadows created by your body or tools. For workbenches against a wall, vertical light strips mounted on the wall can provide effective side lighting.
| Lighting Type | Benefits | Ideal Placement |
|---|---|---|
| Under-Cabinet Lighting | Space-saving, reduces eye strain | Under cabinets or shelving units |
| Overhead Lighting | General illumination, reduces shadows | Above the workbench |
| Side Lighting | Eliminates shadows, enhances visibility | On walls adjacent to the workbench |
Troubleshooting Common LED Lighting Issues
When setting up LED task lighting, you may encounter a few issues that can be easily resolved with some troubleshooting. LED lighting installations can be prone to problems such as flickering or connection failures, but understanding how to address these issues can save you a lot of time and frustration.
Flickering and Dimming Problems
Flickering and dimming are often symptoms of underlying issues with your LED strip. Check for loose connections or damaged sections of the strip, as these can cause inconsistent lighting. Ensuring that your power supply is providing the correct voltage is also crucial, as under or over-voltage can lead to flickering.
Connection and Power Issues
Connection failures often occur at solder joints or clip-on connectors. Inspect these points if sections of your LED lighting fail. Verify that your power supply is providing the correct voltage using a multimeter if you suspect power issues. Additionally, check for signs of overheating, which may indicate resistance problems or overloading. Water or moisture ingress can also cause connection failures in non-waterproof LED installations.
Maintenance Tips for Long-Lasting LED Task Lighting
To keep your LED task lighting in optimal condition, regular maintenance is crucial. This involves simple steps to ensure your LED strip continues to function effectively.
Cleaning Your LED Strips
Cleaning your LED strips regularly is vital. Use a soft cloth to gently wipe away dust and debris. Avoid using harsh chemicals or abrasive materials that could damage the LED tape.
When to Replace Components
Know when to replace components to maintain optimal performance. If multiple LEDs have failed or brightness has diminished, consider replacing the affected section. Also, replace power supplies if you notice flickering or inconsistent performance, and check LED lights for signs of wear or damage.
Conclusion
Investing in proper LED task lighting pays dividends in comfort and productivity. By following the guidelines outlined in this article, you can create a customised lighting solution that perfectly suits your specific needs and working style. The right lighting setup transforms your workspace, making detailed tasks easier and reducing eye strain during extended work sessions.
With LED strip installations and proper planning, you can achieve a well-designed task lighting system. Consider your lighting as an essential tool in your workshop, one that deserves the same attention to detail as your other equipment. By doing so, you’ll enhance your work experience and create a more comfortable working environment.