Are you tired of feeling the chill of a draughty window on a cold winter’s day? Leaking window frames are a common issue in homes across the UK, leading to increased energy bills and potential moisture damage.
As window seals have an average lifespan of 10-20 years, it’s not uncommon for older buildings to experience faults. However, resealing your windows isn’t as complicated as you might think, and it can make a significant difference in your home’s comfort and energy efficiency.
By learning how to effectively reseal your window frames, you can save money on professional services and enjoy a warmer, more comfortable living space. In this guide, we’ll walk you through the process, covering the right tools and materials to use, specifically for uPVC windows, to achieve a professional-quality result that lasts.
Key Takeaways
- Identify the signs of a leaking window frame and understand the importance of resealing.
- Learn the step-by-step process of resealing your uPVC windows effectively.
- Discover the right tools and materials needed for a professional-quality result.
- Understand the benefits of proper sealing, including improved energy efficiency and reduced bills.
- Save money by tackling this home maintenance task yourself with confidence.
Understanding Window Seal Failure
Understanding why your uPVC window frame leaks is crucial for effective repair. Window seal failure can lead to various issues, including energy loss and water ingress, making it essential to address the problem promptly.
What Causes uPVC Window Frames to Leak
Several factors contribute to the failure of uPVC window seals. The quality of the seal, exposure to extreme temperatures, and maintenance practices all play a role in determining the lifespan of your window seals. When these factors combine, they can cause the seal to deteriorate, leading to leaks.
The Lifespan of Window Seals
Typically, quality window seals last between 10 to 20 years before showing signs of deterioration. However, the actual lifespan can vary depending on several factors, including the quality of materials used and exposure to elements. Regular inspection can help identify early signs of failure, allowing for timely replacement and preventing more serious issues.
| Factors Affecting Seal Lifespan | Impact on Seal |
|---|---|
| Quality of Materials | High-quality materials can extend the lifespan of window seals. |
| Exposure to Elements | Extreme temperatures and weather conditions can cause seal deterioration. |
| Maintenance Practices | Regular cleaning and inspection can help prolong the life of window seals. |
By understanding the causes of window seal failure and the factors that affect their lifespan, you can take proactive steps to maintain your uPVC window frames and plan for timely replacement when necessary.
Why Resealing Your Windows Matters
By resealing your windows, you can enjoy a more comfortable living space, reduced energy bills, and a decrease in condensation and mould. Properly sealed windows play a crucial role in maintaining your home’s overall comfort and energy efficiency.
Reducing Energy Bills
Drafts from leaky window seals can significantly increase your energy bills. By resealing your windows, you can eliminate these drafts, ensuring your heating and cooling systems work more efficiently.
Preventing Condensation and Mould
Condensation and mould are common issues associated with poorly sealed windows. Resealing helps prevent moisture buildup, reducing the risk of mould growth and the associated health risks.
Improving Home Comfort
Leaky windows can lead to cold spots and drafts, making your home uncomfortable. By resealing your window frames, you can eliminate these issues, ensuring a more consistent and comfortable indoor climate.
| Benefits of Resealing Windows | Description |
|---|---|
| Energy Efficiency | Eliminates drafts, reducing heating and cooling costs |
| Condensation Reduction | Prevents moisture buildup, reducing mould risk |
| Improved Comfort | Ensures consistent indoor temperatures, eliminating cold spots |

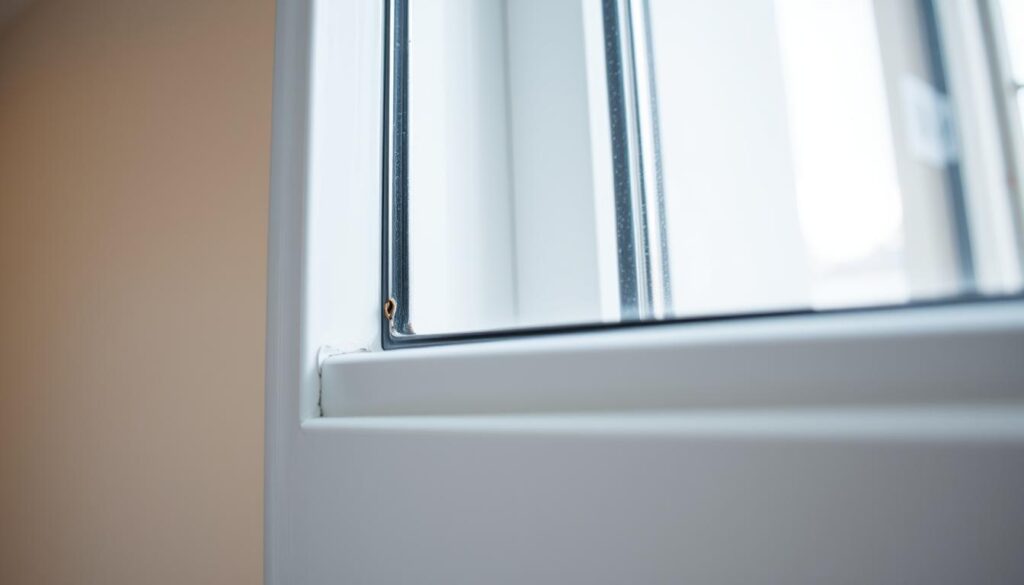
Signs You Need to Reseal Your uPVC Window Frame
uPVC window frames are prone to seal failure over time, and there are several signs to look out for. As the seal deteriorates, you may notice various issues that can impact the overall performance of your windows.
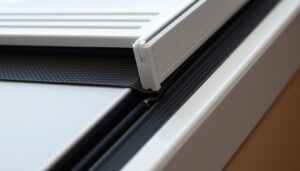
Visible Damage to Existing Sealant
One of the most obvious signs that your uPVC window needs resealing is visible damage to the existing sealant. If you notice cracks, gaps, or deterioration around the edges of your windows, it’s likely that the seal is compromised.
Draughts Around the Window
If you feel draughts around your windows, it could indicate that the seal has failed, allowing cold air to penetrate. This not only makes your home less comfortable but also increases your energy bills.
Increased Condensation
Condensation forming between double-glazed panes is a definitive sign of window seal failure. When moist air gets in and condenses, it reduces visibility and can lead to water damage if left unaddressed. Check for excessive condensation on the interior surface of your windows, particularly during colder months, as it suggests poor thermal performance due to seal issues.
Essential Tools and Materials for Resealing
To reseal a leaking uPVC window frame effectively, you’ll need the right tools and materials. Having the correct equipment ensures a successful DIY project.

Sealant Options for uPVC Windows
Choosing the right sealant is crucial. For uPVC windows, a silicone-based sealant is recommended due to its durability and flexibility. Silicone sealants are resistant to weathering and can withstand extreme temperatures.
Required Tools Checklist
You’ll need a utility knife to remove old sealant and prepare the surface. Other essential tools include a sealant gun for applying new sealant and a cleaning solvent to remove dirt and debris.
Safety Equipment
Safety is paramount when resealing windows. Protective gloves are essential for handling sealants and cleaning chemicals. Safety glasses and a dust mask are also recommended to protect against debris and chemical exposure.
Additional safety measures include knee pads for comfort during prolonged work and ensuring proper ventilation to prevent respiratory irritation.
Preparation Before Resealing
Proper preparation is key to successfully resealing a leaking uPVC window frame. This involves several crucial steps that ensure the new sealant adheres well and lasts longer.
Checking Weather Conditions
Before starting the resealing process, check the weather forecast to ensure you’re working in optimal conditions. A dry, mild day is ideal for applying new sealant, as extreme temperatures or wet conditions can affect its adhesion and drying time.
Cleaning the Window Frame
Clean the window frame thoroughly to remove dirt, grime, or old debris. This step is essential for ensuring the new sealant adheres properly to the uPVC surface.
Removing Old Sealant Properly
To remove old sealant, use a utility knife to carefully cut along both edges of the existing sealant. This helps to loosen the old caulk without damaging the uPVC frame. Once loosened, pull the sealant away in long strips. For stubborn areas, a dedicated sealant removal tool can be helpful. After removing the bulk of the old sealant, use a plastic scraper to gently remove any remaining residue. Finally, wipe down the area with an appropriate solvent to remove any silicone residue, ensuring a clean surface for the new sealant
Step-by-Step Guide to Reseal a Leaking uPVC Window Frame
To effectively reseal a leaking uPVC window frame, follow these detailed steps. Resealing your windows is crucial for maintaining energy efficiency and preventing further damage.
Removing the Old Sealant
Start by removing the old sealant using a utility knife. Safety is paramount, so ensure you’re wearing protective gloves.
Using a Utility Knife Safely
Carefully cut along the edge of the sealant to loosen it from the window frame. Avoid applying too much pressure, which could damage the uPVC surface.
Cleaning Residue
After removing the old sealant, clean the area thoroughly to remove any residue. This ensures a clean surface for the new sealant.
Preparing the Surface
Before applying new sealant, the surface must be prepared. Ensure the area is dry and free of dust or debris. This step is crucial for the new sealant to adhere properly.
Applying New Sealant
Now, you’re ready to apply the new sealant. Loading the caulking gun correctly is essential for a smooth application.
Loading the Caulking Gun
Cut the nozzle at an angle to allow for precise application. Squeeze the trigger gently to start the flow of sealant.
Creating a Smooth Finish
Apply the sealant in a steady, continuous motion. Use a damp finger or tool to smooth out the sealant, ensuring a neat finish.
Allowing Proper Drying Time
The final step is to allow the sealant to dry. Different formulations have varying curing times, typically between 24-72 hours. Avoid exposing the sealant to moisture during this period to ensure optimal performance.
- Different sealant formulations have varying curing times.
- Avoid exposing the newly applied sealant to moisture.
- Temperature and humidity affect curing times.
Troubleshooting Common Resealing Issues
Even with careful preparation, issues can arise when resealing a uPVC window frame; this section will guide you through troubleshooting some of these common issues.

Dealing with Gaps and Uneven Application
Gaps and uneven application can compromise the effectiveness of your window seals. To address this, ensure the surface is clean and dry before applying sealant. Use a steady hand and maintain a consistent bead of sealant. If gaps persist, consider using a backing rod to fill larger gaps before applying sealant.
Addressing Sealant That Won’t Adhere
If the sealant doesn’t adhere properly, check the surface preparation. Dirt, moisture, or old sealant can prevent adhesion. Clean the area thoroughly and ensure it’s dry before reapplying sealant. You may also need to use a primer to enhance adhesion.
Fixing Sealant Shrinkage
Sealant shrinkage occurs as the material cures and loses volume. To minimize this, apply sealant in cooler, less humid conditions. For persistent shrinkage, apply a second thin bead of sealant over the affected area after the first application has partially cured.
Maintaining Your Window Seals
Maintaining your window seals is crucial for ensuring they continue to function effectively. A good seal is essential for reducing heat loss and keeping energy bills in check. By following some simple maintenance tips, you can extend the lifespan of your window seals and keep your windows functioning properly.
Regular Inspection Tips
To maintain your window seals, regular inspections are necessary. You should check your window seals at least twice a year for any signs of damage or wear. Look for any visible cracks, gaps, or deterioration in the sealant.
- Clean window seals gently with mild soap and water to remove dirt and pollutants.
- Avoid using harsh chemical cleaners or abrasive tools that can damage the sealant.
Extending Seal Lifespan
To extend the lifespan of your window seals, apply a silicone-based protectant to rubber gaskets and seals annually. This will help prevent drying and cracking, particularly in older windows. Additionally, keep drainage channels clear in uPVC windows to prevent water accumulation that can damage seals.
- Apply a silicone-based protectant annually to prevent drying and cracking.
- Keep drainage channels clear to prevent water accumulation.
- Address minor seal issues promptly with appropriate repair products.
Conclusion
The process of resealing your windows is simpler than you might think, and the benefits are substantial. By undertaking this DIY project, you can significantly improve your home’s comfort and reduce your heating bills. Resealing your uPVC window frames can be a manageable task that pays for itself through energy efficiency. Properly sealed windows also contribute to a more environmentally friendly home. With the right sealant, you’ll enjoy a warmer home and lower energy costs.