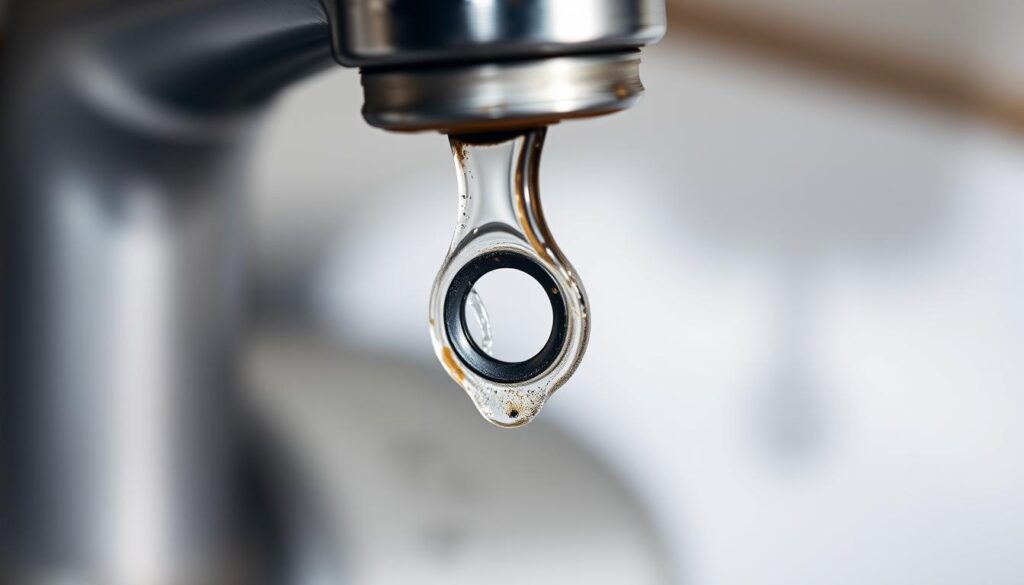
Are you tired of the incessant drip, drip, drip from your tap? It’s not just a nuisance; a leaky tap can lead to significant water wastage and increased utility bills.
The good news is that fixing this common issue is relatively straightforward. Often, the problem lies with a worn-out washer that needs to be replaced. By learning how to change the tap washer, you can save money on both water bills and professional plumbing services.
This guide will walk you through the simple process, helping you to tackle the problem effectively and efficiently.
Key Takeaways
- Understand the cause of a dripping tap and its implications.
- Learn the simple steps to replace a worn-out washer.
- Save money on water bills and plumbing services.
- Reduce water wastage by fixing the leaky tap.
- Gain confidence in tackling common household plumbing issues.
Understanding Tap Washers and Why They Leak
Understanding how tap washers work is essential for maintaining a leak-free tap. Tap washers are crucial components that control the flow of water from your tap.
What Is a Tap Washer and How Does It Work?
A tap washer is a small rubber disc located inside tap that creates a watertight seal when the tap is turned off. When you turn on the tap, the washer moves away from the seat, allowing water to flow through the gap and out of the spout. The washer’s movement is crucial for controlling water flow.
Signs Your Tap Washer Needs Replacing
Over time, tap washers endure substantial wear and tear from constant use, water pressure, and mineral deposits, causing them to harden, crack, or become misshapen. The most obvious sign that your tap washer needs replacing is a persistent drip when the tap is fully turned off. Other signs include having to tighten the tap handle more than usual to stop water flow or noticing that the tap is becoming increasingly difficult to turn. Modern taps may use ceramic disc cartridges instead of rubber washers, which work differently and tend to last longer but still require replacement eventually.
Tools and Materials You’ll Need
Having the right tools and materials on hand will make replacing a tap washer a straightforward task. You’ll need a few basic items to get started.
Essential Tools for the Job
To replace a tap washer, you’ll need a flat-headed screwdriver and an adjustable spanner or wrench. Pliers can also be useful for handling small components. An old towel or cloth is necessary to protect your sink surface and catch any small parts that might fall during the repair.
Choosing the Right Replacement Washer
Replacement tap washers come in various sizes and materials. It’s crucial to either match your old washer exactly or take it to a hardware store to find the correct replacement. Consider purchasing a pack of assorted washers if you’re unsure about the exact size.
Preparation Steps Before You Start
To ensure a smooth and hassle-free experience, follow these preparation steps before replacing your tap washer.
Turning Off Your Water Supply
The first step is to turn off the water supply to prevent flooding and make the job much easier. Locate the isolation valve underneath the sink and turn it clockwise to shut off the water supply to that specific tap. If you don’t have an isolation valve, you’ll need to turn off your property’s main water supply. For hot water taps, also turn off your boiler and immersion heater, then allow sufficient time for the system to cool down.
Protecting Your Sink and Workspace
Protecting your workspace is crucial. Place the plug in the sink’s drain to prevent small parts from being lost. Lay down an old towel in the sink basin to catch any dropped components and protect the surface from damage. Clear the area around the sink of any items that could get wet or be in your way, giving yourself plenty of space to manoeuvre.
| Preparation Step | Purpose |
|---|---|
| Turn off water supply | Prevent flooding |
| Use isolation valve or main water supply | Control water flow |
| Protect sink and workspace | Prevent damage and loss of parts |

By following these preparation steps, you’ll save yourself from potential disasters and make the entire process much smoother.
Replacing a Worn-Out Washer in a Tap: Step-by-Step Guide
A leaky tap can be frustrating, but replacing the washer is a simple DIY task that you can accomplish in just a few steps. Before you start, ensure you have the necessary tools and a replacement washer that matches the size and type of the old one.
Step 1: Removing the Tap Head
Begin by removing the decorative cap or button on top of your tap. This is usually marked with ‘hot’ or ‘cold’ and can be gently pried off using a flat-headed screwdriver. Once removed, you’ll see a small screw that secures the tap handle; unscrew this carefully and lift off the handle to expose the tap body underneath.
Step 2: Accessing the Valve and Washer
Next, use your spanner to loosen and remove the tap bonnet or headgear. This might require some force if it hasn’t been removed for a while. Hold the tap body steady with another wrench if necessary to prevent damage.
Step 3: Removing the Old Washer
After removing the bonnet, you’ll be able to see the jumper valve and the washer, which is typically held in place by a small screw or nut at the bottom of the valve. Carefully remove this screw or nut and take out the old washer, noting its position and orientation.
Step 4: Installing the New Washer
Place the new washer in exactly the same position as the old one, secure it with the screw or nut, and ensure it sits flat and even against the valve surface. It’s also a good opportunity to inspect the valve seat for any signs of damage or limescale buildup that might prevent a proper seal; clean it gently if necessary.
By following these steps, you can successfully replace a worn-out washer in your tap, stopping the leak and saving water. Ensure that the new washer is an exact match for the old one in terms of size and thickness to guarantee a watertight seal.
Reassembling Your Tap Correctly
The final step in fixing your leaky tap is to reassemble it correctly. This process involves reversing the steps you took to disassemble it, ensuring all components are securely back in place.
Putting the Components Back Together
Start by screwing the valve back into the tap body, being cautious not to overtighten, which could damage the threads or the new washer. Next, reattach the tap bonnet or headgear, again avoiding overtightening. Finally, replace the tap handle and secure it with the screw you removed earlier.
Testing Your Repair
Once you’ve reassembled your tap, it’s crucial to test it. Turn on the water supply slowly and check for leaks around the areas you’ve worked on, particularly around the tap base and spout. If you notice any leaks, turn off the water supply and make the necessary adjustments to ensure a watertight seal.
With the tap reassembled and tested, you can now enjoy a leak-free water flow, proud of the DIY job you’ve accomplished.
Troubleshooting Common Issues
If your tap continues to leak after replacing the washer, there are several potential causes to investigate. A thorough examination is necessary to resolve the issue effectively.
Tap Still Leaking After Washer Replacement
One common cause of persistent leaks is damage to the valve seat—the metal surface against which the washer forms its seal. Over time, valve seats can become pitted, scratched, or corroded, preventing a new washer from creating a watertight seal. Inspecting the valve seat is crucial; if it’s damaged, you may need to reseat the tap or use a seat grinder to resurface it.
| Cause of Leak | Solution |
|---|---|
| Damaged Valve Seat | Reseat the tap or use a seat grinder |
| Stuck or Corroded Parts | Apply penetrating oil and allow it to soak |
Dealing with Stuck or Corroded Parts
Another issue you might encounter is stuck or severely corroded parts, particularly in older taps. To avoid damaging the tap body or pipework, apply penetrating oil and let it soak for several hours or overnight before attempting to remove the stubborn components.
Sometimes, the problem isn’t with the washer but with other components like O-rings, spindles, or the tap body itself. Inspecting these parts and replacing them if necessary can resolve the leak.
Understanding Different Types of Taps
The first step in fixing a tap is identifying whether it’s a traditional compression tap or a modern ceramic disc tap. This distinction is crucial because the repair approach differs significantly between the two types.
Traditional Compression Taps vs. Modern Ceramic Disc Taps
Traditional compression taps use a rubber washer to control water flow. When you twist the tap, it compresses the rubber washer against a metal seat to stop the water. In contrast, modern ceramic disc taps operate with two ceramic discs that align to allow water flow and misalign to stop it, eliminating the need for a rubber washer.

When You Need a Different Approach
Knowing your tap type is vital before attempting repairs. For instance, mixer taps, thermostatic taps, and sensor taps have unique mechanisms that may require specialist knowledge. If you’re unsure, consult the manufacturer’s information to avoid causing damage or wasting time on an inappropriate fix.
Preventing Future Tap Leaks
A little maintenance can go a long way in keeping your taps leak-free. By following some simple tips, you can significantly extend the life of your tap washers and prevent the frustration of sudden leaks.
Maintenance Tips
Regular maintenance is crucial. Avoid overtightening your taps, as this puts excessive pressure on the washers. In hard water areas, consider installing a water softener to reduce limescale buildup.
Upgrading Your Taps
Consider upgrading to ceramic disc taps when your current taps reach the end of their useful life. These taps offer superior durability and require less maintenance over time. Modern tap designs also often incorporate water-saving features that can reduce your water consumption.
Conclusion
Having completed this DIY task, you’ll appreciate the satisfaction of fixing a leaky tap on your own. Replacing a worn-out washer in your tap is a straightforward task that can save you money and the inconvenience of a persistently dripping tap. With the right tools and a little patience, you’ve tackled a common household repair.
Remember, regular maintenance and proper use of your taps will extend the life of your washers and reduce the frequency of replacements needed. If you encounter significant difficulties or if the leak persists, consider consulting a professional plumber. By mastering this simple repair, you’ve added a valuable skill to your DIY repertoire.