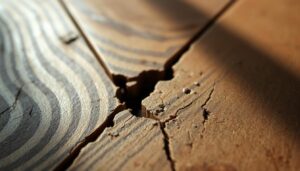
Have you ever accidentally dropped something on your tiled floor, only to watch in dismay as it cracks under the impact? If so, you’re not alone. A broken tile can be an eyesore, but fortunately, it’s a relatively simple fix.
Replacing a damaged tile is a DIY task that requires minimal tools and about an hour of your time. With the right guidance, you can restore your floor or wall to its original condition, avoiding the expense of hiring a professional.
By following our comprehensive guide, you’ll learn how to remove the damaged tile, prepare the area, and install a new one seamlessly. This step-by-step process is designed to be straightforward, making it accessible to DIY enthusiasts of all skill levels.
Key Takeaways
- Learn the step-by-step process of replacing a damaged tile.
- Understand how to safely remove a broken tile without causing further damage.
- Discover how to prepare the surface for a new tile.
- Find out how to install a new tile that blends with your existing tiles.
- Save money by doing it yourself with our easy-to-follow guide.
Why You Should Address Broken Tiles Promptly
Damaged tiles are not just a cosmetic issue; they can also pose significant safety risks. You need to address them promptly to prevent further complications.
Safety Concerns and Aesthetic Issues
Broken or damaged tiles create significant safety hazards in your home, including sharp edges that can cause cuts and uneven surfaces that present tripping hazards. Moreover, the aesthetic impact of broken tiles shouldn’t be underestimated, as even a single damaged tile can diminish the overall appearance of your entire floor or wall.
Signs of Damaged Tiles
To identify damaged tiles, look for visible cracks, chips, or discoloration. In some cases, you might hear a hollow sound when you tap on a damaged tile, indicating it’s loose. Check the surrounding tiles for any signs of damage or looseness, as an impact strong enough to break a tile can also weaken adjacent tiles.

- Cracked tiles allow water to penetrate beneath the surface, potentially leading to mould growth and structural damage.
- Learning to identify early signs of tile damage is crucial for preventing the problem from spreading.
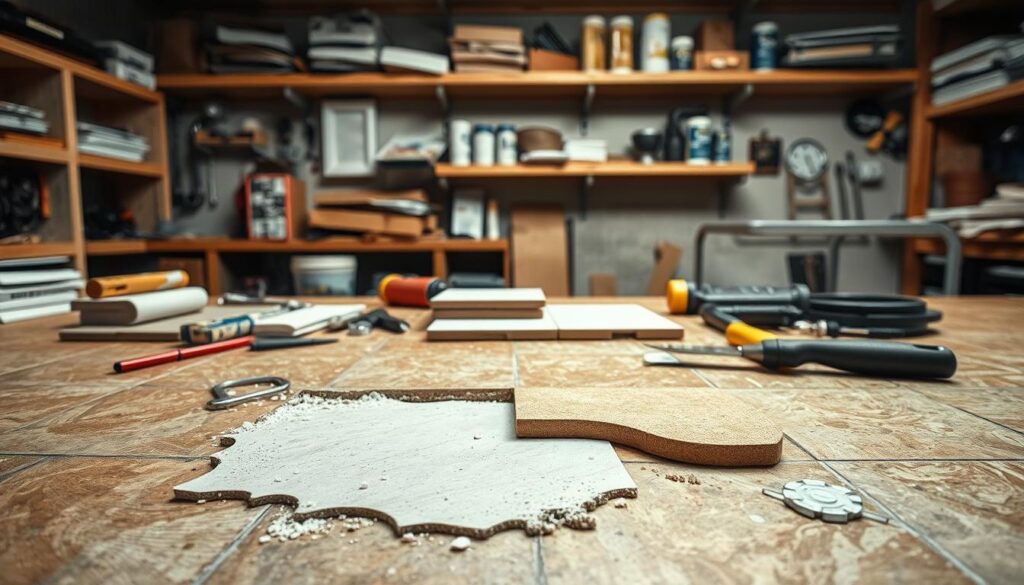
Essential Tools and Materials for Replacing a Broken Tile

The key to a successful tile replacement lies in having the correct tools and materials at your disposal. Gathering the right tools before starting your project is essential for efficiency and safety.
Safety Equipment
When working with broken tiles, safety is paramount. You’ll need heavy-duty gloves to protect against sharp edges and safety goggles to shield your eyes from debris.
Removal Tools
For removal, you’ll require a grout saw or grout remover to clear the surrounding grout, a hammer and chisel for breaking and removing the damaged tile.
Installation Materials
Installation materials include the replacement tile, adhesive suitable for your tile type, and spacers to ensure even grout lines.
Finishing Supplies
Finishing supplies include grout that matches your existing grout colour, a rubber float for application, a notched trowel for spreading adhesive, and a damp sponge for cleaning excess grout.
Preparing for the Tile Replacement Process
A successful tile replacement project begins with proper preparation. To ensure a smooth process, you need to assess the situation carefully, select the right materials, and set up your work area effectively.
Assessing the Damage
Start by assessing the damaged tile and the surrounding area to determine the extent of the problem. Make sure you’re not dealing with a more significant issue, like water damage or structural problems.
Selecting the Right Replacement Tile
When choosing a replacement tile, ensure it matches the existing tiles in size, colour, pattern, and texture. Having spare tiles from the original installation can be very helpful.
Setting Up Your Work Area
Clear the space around the damaged tile, protect adjacent tiles with painter’s tape, and ensure you have adequate lighting. Verify that there are no electrical wires or plumbing pipes beneath the surface where you’ll be working.

By following these steps, you’ll be well-prepared to replace the broken tile efficiently and effectively, ensuring a professional-looking finish on the surface.
Removing the Broken Tile
Carefully extracting the broken tile is crucial for a successful replacement. This process involves several steps that require attention to detail and the right tools.
Removing the Surrounding Grout
Start by scraping away the old grout with a back-and-forth motion along all sides of the broken tile using a grout saw or grout remover tool. Wear safety glasses and durable gloves to protect yourself from the mess. This step is essential to avoid damaging the surrounding tiles.
- The first step in removing a broken tile is to carefully cut away the surrounding grout.
- Maintain a steady hand when using a grout saw to avoid damaging the edges of adjacent tiles.
Breaking and Extracting the Damaged Tile
Once the grout is removed, use a hammer and chisel to break the damaged tile into smaller pieces, starting from the centre and working outward. For stubborn tiles, drilling small holes with a ceramic drill bit can help create breaking points.
- Break the damaged tile into smaller pieces using a hammer and chisel.
- Drilling small holes in stubborn tiles can facilitate their removal.
Cleaning the Exposed Surface
After removing all pieces of the broken tile, thoroughly clean the exposed surface. Use a chisel to remove old adhesive and a vacuum to clean up dust and debris, ensuring a smooth surface for the new tile.
By following these steps, you can ensure a clean and smooth foundation for the new tile, making the replacement process easier and more effective.
Installing the New Tile
Installing a new tile requires careful preparation and attention to detail to ensure a secure and lasting installation. You need to apply the adhesive correctly, position the tile accurately, and allow sufficient drying time.
Applying Adhesive Correctly
To apply the adhesive correctly, use a notched trowel to spread an even layer onto the clean floor. The notches in the trowel allow air to escape when you lay the tile, preventing air pockets that could weaken the bond. Hold the trowel at a 45-degree angle to create evenly spaced, parallel ridges in the adhesive.
Positioning and Setting the Tile
While holding the edges of the new tile, position it flat above the notched adhesive and gently lower it into place. Avoid angling the tile, as this can disrupt the ridges and compromise the bond. Once the tile is set, apply even pressure across its surface and gently wiggle it to ensure complete contact with the adhesive.
Allowing Proper Drying Time
Allow the adhesive to cure completely, following the manufacturer’s instructions, typically 24 hours. Avoid any pressure or foot traffic on the new tile during this time. Use a damp sponge to wipe away excess adhesive that has squeezed out beyond the tile’s edges.
- Use a notched trowel to spread adhesive evenly, creating ridges that help prevent air pockets.
- Position the new tile carefully, holding it by the edges and lowering it flat onto the adhesive.
- Apply even pressure and wiggle the tile gently to ensure it is level and aligned with surrounding tiles.
Finishing Touches and Maintenance
Now that you’ve successfully installed the new tile, it’s time to focus on the finishing touches. To complete the process, you’ll need to grout the joints around your newly installed tile. Using a rubber hand float, apply pre-mixed grout to the joints, working it in with a sweeping arc motion at a 45° angle.
After allowing the grout to set for about 15 minutes, use a damp sponge to gently remove excess grout from the tile surface. To maintain your newly replaced tile, consider applying a grout sealer after 72 hours to protect against moisture and staining. Regularly inspect your tiling for signs of damage or wear to ensure the longevity of your tile floor.