Are you experiencing unpleasant odours or water damage in your bathroom? It could be a sign that your shower waste trap needs replacing.
A shower waste trap is an essential component of your bathroom plumbing system, preventing sewer gases from entering your home. However, over time, it can become damaged or worn out, requiring replacement.
If you’re unsure whether you need to replace your shower waste trap, look out for signs of wear and tear, such as leaks or blockages. Replacing it yourself can be a cost-effective solution, but it’s crucial to do it correctly to avoid further issues.
Key Takeaways
- Understand the importance of a shower waste trap in your bathroom plumbing system
- Identify signs that indicate your shower waste trap needs replacing
- Learn the tools and materials required for a successful replacement
- Discover how to remove your old trap and install a new one properly
- Gain confidence in tackling this plumbing job yourself
Understanding Shower Waste Traps
Your shower waste trap is a crucial component of your bathroom’s plumbing system, playing a vital role in preventing foul odours from entering your home. It is designed to maintain proper drainage and prevent sewer gases from entering your bathroom.
What Is a Shower Waste Trap and How It Works
A shower waste trap, also known as a P-trap or U-bend, is a curved pipe under your shower tray that holds a small amount of water, creating a seal that blocks sewer gases. This water seal is essential for maintaining a healthy and odour-free bathroom environment.
Signs Your Shower Waste Trap Needs Replacing
If you notice slow drainage, persistent bad smells, or visible leaks, it may be a sign that your shower waste trap needs replacing. These issues can be indicative of a faulty or damaged waste trap that requires attention.
Different Types of Shower Waste Traps
Shower waste traps come in various materials, including plastic, chrome, and stainless steel options. Each material has its advantages, with stainless steel typically offering the best durability and corrosion resistance.
Plastic vs Chrome vs Stainless Steel Options
When choosing a shower waste trap, consider the material that best suits your needs. Stainless steel is durable and resistant to corrosion, while chrome offers a sleek finish. Plastic options are often more affordable but may not be as durable.
Standard vs Low-Profile Designs
Shower waste traps also come in different designs, including standard and low-profile options. Low-profile designs are ideal for shower trays with limited clearance underneath, while standard designs are suitable for most installations.

Understanding the different types of shower waste traps and their materials can help you make an informed decision when replacing your shower waste trap. Consider factors such as durability, corrosion resistance, and aesthetic appeal to ensure you choose the right waste trap for your bathroom.
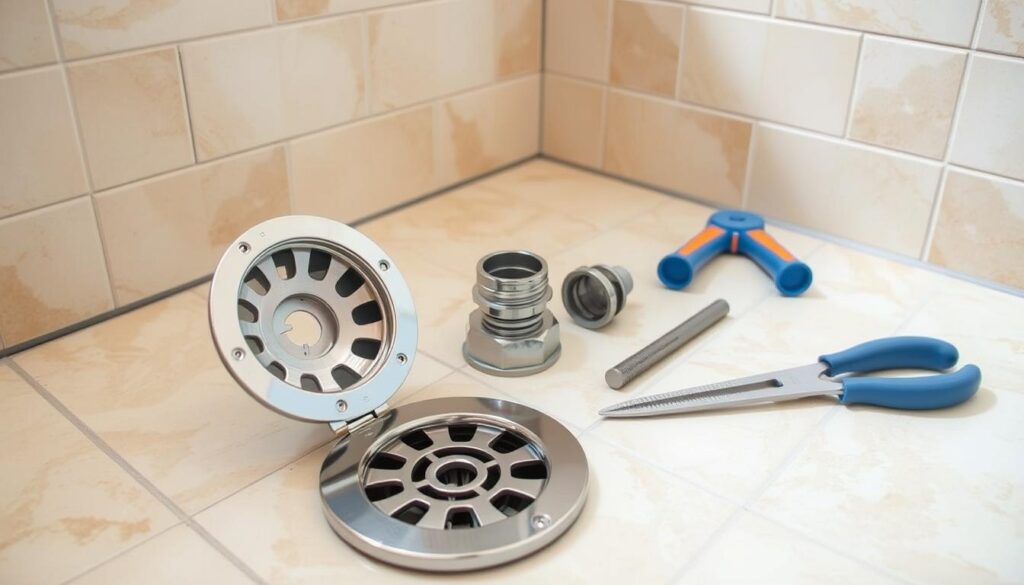
Tools and Materials Needed to Replace Shower Waste Trap
The key to a successful shower waste trap replacement lies in having the correct tools and materials at your disposal. Before starting the project, ensure you have everything needed to avoid unnecessary delays.
Essential Tools for the Job
Gathering the right tools is crucial for efficiently replacing your shower waste trap. You’ll need:
- Adjustable wrenches for handling different sizes of fittings
- Screwdrivers for removing screws and other fasteners
- Pliers for gripping small objects
- A putty knife for removing old sealants
Choosing the Right Replacement Trap
Selecting the appropriate replacement trap involves considering several factors, including the material, connection type, and space constraints beneath your shower tray.
- Measure your existing waste trap carefully to ensure the replacement is the correct size and configuration.
- Choose a material that suits your needs: plastic for economy, chrome for a sleek finish, or stainless steel for maximum durability.
- Understand the different connection types (compression, push-fit, solvent weld) and select one that matches your existing plumbing.

By carefully selecting the right tools and materials, you’ll be well-prepared to replace your shower waste trap efficiently and effectively.
Step-by-Step Guide to Replace Shower Waste Trap
A step-by-step approach is essential when replacing your shower waste trap to avoid potential pitfalls. This guide will walk you through the process, ensuring that you can complete the task efficiently and effectively.
Preparing Your Bathroom for the Job
Before starting, clear the bathroom area and gather all necessary tools and materials to ensure an efficient workflow. Turn off the water supply to your bathroom to prevent any accidents or water damage.
Accessing the Waste Trap
Determine the best access point to reach your shower waste trap, which may be from above through the shower drain or from below through an access panel. You may need to remove the shower drain cover or access panel to gain access to the waste trap.
Dealing with Limited Access Points
If you have limited access to the waste trap, consider using specialized tools or consulting a professional plumber for assistance.
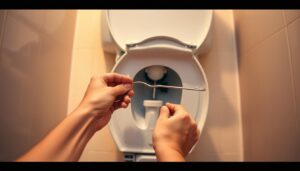
Removing the Old Waste Trap
To remove the old waste trap, you will need to break the silicon seal around the existing trap. Use appropriate techniques to safely break the seal without damaging the shower tray.
Breaking the Silicon Seal Safely
Apply a gentle yet firm motion to break the silicon seal, taking care not to damage the surrounding area.
Rotating the Base While Holding the Top Section
Have an assistant hold the top section in place while you rotate the base to remove the old trap with minimal resistance. This will help prevent any damage to the surrounding area.
Cleaning the Shower Tray Area
Thoroughly clean the shower tray area, removing all old sealant, debris, and buildup to ensure a proper seal for the new waste trap.
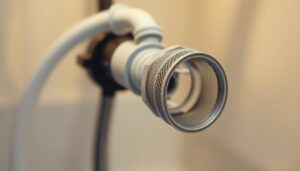
Installing the New Waste Trap
Install the new waste trap following the manufacturer’s instructions, paying particular attention to proper alignment and sealing techniques.
Proper Alignment and Sealing Techniques
Ensure that the new waste trap is properly aligned with the shower drain and that the seal is secure to prevent any leaks.
Securing the Flange and Strainer
Secure the flange and strainer correctly, ensuring they’re tight enough to prevent leaks but not so tight as to crack components.
Testing for Leaks
Test the installation by running water through the system and checking carefully for any leaks at connection points. Verify that water drains properly and that the trap creates an effective seal against odours.
| Step | Description | Key Considerations |
|---|---|---|
| 1 | Prepare the bathroom | Clear the area, gather tools, and turn off the water supply |
| 2 | Access the waste trap | Determine the best access point, remove shower drain cover or access panel |
| 3 | Remove the old waste trap | Break the silicon seal, rotate the base while holding the top section |
| 4 | Clean the shower tray area | Remove old sealant, debris, and buildup |
| 5 | Install the new waste trap | Follow manufacturer’s instructions, ensure proper alignment and sealing |
| 6 | Test for leaks | Run water through the system, check for leaks, verify proper drainage |
Troubleshooting Common Problems
Common problems often arise during the replacement of a shower waste trap, requiring careful troubleshooting. When issues emerge, it’s essential to identify the source and apply the appropriate fix to ensure a leak-free and functional shower system.
Identifying the Source of Leaks
Leaks can be a significant issue after replacing a shower waste trap. To address this, you must first identify the source of the leak. Leaks often originate from either the top seal or the outlet connection.
Top Seal vs Outlet Leaks
Distinguishing between a top seal leak and an outlet leak is crucial. A top seal leak typically occurs when the seal around the waste is compromised. In contrast, an outlet leak happens when there’s an issue with the connection to the drainage system. Checking the top section and ensuring it’s properly secured can often resolve top seal leaks.
Floor and Base Connection Issues
Another common issue arises from the connection between the shower tray and the floor or base. Ensuring a watertight seal at this junction is vital to prevent water seepage and potential structural damage. Inspecting the flange and surrounding areas can help identify any gaps or weaknesses.
Dealing with Difficult-to-Remove Traps
Sometimes, the old waste trap can be challenging to remove due to corrosion or mineral buildup. Using penetrating oil on corroded parts can help loosen the trap. If the trap is still stubborn, consider seeking assistance to avoid damaging the shower tray or surrounding areas.
| Issue | Possible Cause | Solution |
|---|---|---|
| Leak from top seal | Compromised seal | Replace top seal |
| Outlet connection leak | Loose or damaged connection | Tighten or replace connection |
| Difficult-to-remove trap | Corrosion or mineral buildup | Use penetrating oil |
When to Call a Professional Plumber
If you encounter significant difficulties or if the issue persists after attempting to fix it, it may be time to call a professional plumber. They can provide the necessary expertise to resolve complex problems, ensuring your shower waste trap functions correctly and safely.

Conclusion
Maintaining a functional shower waste trap is crucial for the overall health of your bathroom. A properly functioning trap prevents water damage and maintains hygiene, making it an essential component of your bathroom’s plumbing system.
Replacing your shower waste trap can seem daunting, but by following the steps outlined in this guide, you can achieve a successful installation. From preparing your bathroom to testing for leaks, each step is crucial in ensuring a leak-free and efficient shower system. You can find a variety of shower waste traps and related products online.
By tackling this job yourself, you can save on labour costs associated with hiring a professional plumber. However, it’s essential to know your limits and seek professional help if you encounter any complex issues during the replacement process.
To extend the lifespan of your newly installed waste trap, regular maintenance is key. This includes checking for blockages and ensuring the tray and surrounding area are clean. By doing so, you’ll be able to enjoy a trouble-free showering experience for years to come.
In conclusion, replacing your shower waste trap is a manageable DIY task that requires the right tools and a bit of know-how. With the right approach, you can ensure your bathroom remains hygienic and functional.