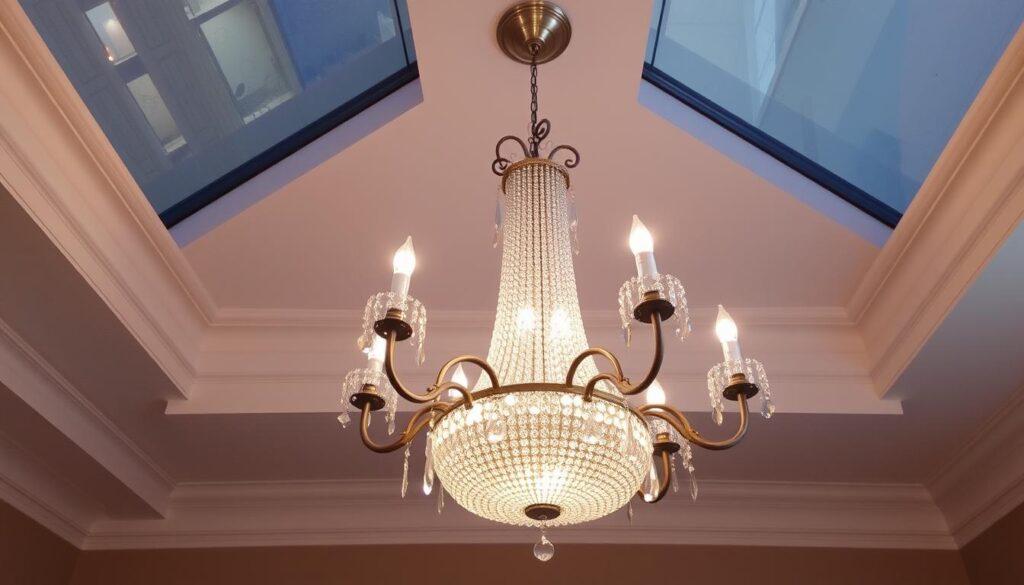
Are you considering upgrading your home lighting to create a more dramatic ambiance in your living space? If you’re pondering whether to swap your existing pendant lights for a more elaborate chandelier, you’re not alone.
This comprehensive guide will walk you through the key considerations and steps involved in making such a change. We’ll explore the differences between pendant lights and chandeliers, including their structural requirements and installation considerations, to help you decide if this upgrade is right for your home.
Key Takeaways
- Understand the key differences between pendant lights and chandeliers.
- Learn about the aesthetic and functional benefits of upgrading.
- Discover the safety precautions to take before attempting electrical work.
- Assess whether your current ceiling fixture can support a chandelier.
- Determine if replacing your pendant light is feasible for your space and skill level.
Understanding the Differences Between Pendant Lights and Chandeliers
Lighting your home with style involves understanding the unique characteristics of pendant lights and chandeliers. These two types of lighting fixtures can significantly impact the ambiance and functionality of a room.
Physical and Design Differences
Pendant lights are typically simpler in design and smaller in scale compared to chandeliers. They usually hang from the ceiling by a cord, chain, or rod, and their shape and type can vary greatly, from sleek and modern to ornate and traditional.
Weight and Support Requirements
One of the critical differences between pendant lights and chandeliers is their weight. Chandeliers are generally much heavier due to their complex design and multiple bulbs. This added weight means that your ceiling’s support structure may need to be reinforced to safely hold the chandelier.
| Lighting Fixture | Average Weight | Support Requirement |
|---|---|---|
| Pendant Light | 2-5 kg | Standard electrical box |
| Chandelier | 10-20 kg | Reinforced junction box |
Understanding these differences is crucial before deciding to replace your pendant light with a chandelier, ensuring that your ceiling can support the weight of the new fixture.
Benefits of Replacing Your Pendant Light with a Chandelier
Chandeliers offer a multitude of benefits when replacing pendant lights, making them a worthwhile investment for homeowners. By upgrading to a chandelier, you can enhance the overall look and feel of your space.

Enhanced Aesthetic Appeal
Replacing your pendant light with a chandelier can significantly enhance the aesthetic appeal of your home. Chandeliers come in a variety of styles, materials, and colours, allowing you to choose one that complements your existing décor. Whether you’re looking for a modern, sleek design or a more traditional, ornate piece, there’s a chandelier to suit your taste.
Improved Lighting Quality
Chandeliers not only add a touch of elegance to your space but also provide improved lighting quality. With multiple light sources, chandeliers can illuminate a room more effectively than a single pendant light. This can be particularly beneficial in larger rooms or areas with high ceilings.
Increased Property Value
Installing a chandelier can be a worthwhile investment that increases your home’s market value. Quality lighting fixtures are noticed by potential buyers and can make your property more appealing during viewings. Chandeliers are considered desirable features in certain rooms, particularly dining rooms and entryways. The type of chandelier you choose can also impact the return on investment, with high-quality materials and craftsmanship commanding a higher price.
Safety Considerations Before You Begin
When replacing a pendant light with a chandelier, it’s crucial to prioritise safety. Electrical work can be hazardous if not done correctly.
Turning Off Electrical Power
Before starting any electrical work, remember to switch off the mains power at the consumer unit. This step is crucial to prevent any accidental electrical shocks. Locate your circuit breaker or fuse box and switch off the relevant breaker or remove the fuse that controls the power to the light fixture you’re working on.
Using a Voltage Tester
A voltage tester is an essential tool to confirm whether the circuits are dead and safe to work on. To use a voltage tester, first, ensure it’s set to the correct voltage range. Then, touch the tester’s probes to the wires or terminals you’re about to work on. If the tester indicates any voltage, do not proceed until you’ve resolved the issue. After completing the installation, use the voltage tester again to verify that everything is functioning safely.
Essential Tools and Materials Needed
Before you start replacing your pendant light with a chandelier, it’s crucial to gather all the necessary tools and materials.
Basic Tools for Installation
For a successful installation, you’ll need basic tools such as a pencil, a drill with appropriate drill bits, an electrical screwdriver, a hammer, and safety glasses. A voltage tester is also essential to ensure your safety while working with electrical components.
Additional Materials You May Need
Beyond the basic tools, you may require additional materials like wall plugs, screws, wire nuts, and electrical tape. Depending on your chandelier’s weight and your ceiling’s construction, you might also need reinforced mounting brackets or ceiling anchors. Ensuring you have the right materials will make the installation process smoother and safer.
Assessing Your Ceiling’s Compatibility
Before installing a chandelier, it’s crucial to assess whether your ceiling can support its weight. This involves checking the structural integrity of your ceiling and ensuring that it can safely hold the fixture.
Weight Support Capabilities
You need to determine if your ceiling can support the weight of the chandelier. Check the manufacturer’s specifications for the weight of the fixture. Typically, a standard ceiling box is designed to support a certain amount of weight, usually around 23-34 kg. If your chandelier exceeds this weight, you’ll need to take additional measures to reinforce your ceiling.
Electrical Box Requirements
The type of electrical box required for a chandelier installation is critical. There are different types of ceiling boxes available, including standard, pancake, and fan-rated boxes. You’ll need to check if your existing box is rated for the weight of your chandelier. A metal box is usually recommended as it provides better support. Ensure the box is properly secured to the ceiling structure and is deep enough to accommodate all wiring connections safely.
To verify if your electrical box is properly secured, check that it’s firmly attached to a ceiling joist or other structural element. If necessary, reinforce the box to prevent it from falling or becoming dislodged over time.
How to Replace Pendant Light with Chandelier
Changing your pendant light to a chandelier can enhance the aesthetic of your room, but it requires careful planning. Before you start, ensure you have the necessary tools and materials.
Removing the Existing Pendant Light
To begin, turn off the power to the light fixture at your circuit breaker or fuse box. Use a voltage tester to confirm the power is off. Then, remove the shade or glass cover, and unscrew the light bulbs. Carefully lower the pendant light fixture, taking note of the wiring. If the fixture is heavy, consider using a piece of coat hanger wire bent into an “S” shape to support it while you disconnect the wires.
Preparing the Ceiling for the Chandelier
Inspect the electrical box to determine if it needs to be replaced or reinforced to support the heavier chandelier. Clean the ceiling area and repair any minor damage. Prepare the wiring by extending wires if necessary and ensuring proper grounding. Install any new mounting hardware that came with your chandelier. Finally, touch up any paint or deal with size differences between fixtures.
| Task | Description |
|---|---|
| Inspect Electrical Box | Check if the box needs to be replaced or reinforced for the chandelier. |
| Clean Ceiling Area | Remove dirt and repair any damage from the previous installation. |
| Prepare Wiring | Extend wires if necessary and ensure proper grounding. |
| Install Mounting Hardware | Use the new hardware provided with the chandelier. |
Step-by-Step Chandelier Installation Guide
With the right guidance, you can install your chandelier safely and efficiently. This step-by-step guide will walk you through the process, ensuring that you can enjoy your new lighting fixture without any hassle.
Mounting the Ceiling Bracket
To begin, you’ll need to mount the ceiling bracket. Mark the bracket’s position on the ceiling, about 1.5 to 2 centimeters from the existing electrical hole. Ensure the mounting holes are aligned with your marks, then drill into these positions. Insert the wall plugs provided with your light kit into the drilled holes and tap them flush with a hammer. Refer to your instruction manual to confirm that the wall plugs are suitable for your ceiling material before screwing the bracket into place.
Connecting the Wiring Safely
When connecting the wiring, it’s essential to follow the correct procedure to ensure safety. First, connect the supply cable to the terminal block inside the light fitting, using the correct colour coding: brown for live, blue for neutral, and green/yellow for earth. Use wire nuts or terminal blocks to secure the connections safely. Proper wire stripping and connection techniques are crucial to prevent short circuits. For chandeliers with features like dimmers or remote controls, special wiring considerations may apply. Always tuck the wiring neatly into the junction box to prevent pinching or damage.
As a general rule, it’s crucial to follow the manufacturer’s instructions for specific wiring requirements. “Electrical connections should be made with caution, ensuring that all wires are securely connected and that the connections are clean and free from damage,” as emphasized by electrical safety guidelines.
Adjusting Your Chandelier to the Perfect Height
Adjusting your chandelier to the perfect height is crucial for both aesthetic appeal and functional lighting. The height at which your chandelier is hung can make or break the ambiance of a room. To achieve the ideal lighting, you need to consider the ceiling height and the type of chandelier you’re installing.
Recommended Heights for Different Rooms
The ideal height for your chandelier largely depends on the room’s purpose and ceiling height. For instance, a dining room chandelier should typically hang between 30-36 inches above the table surface. In contrast, a chandelier in a foyer or entrance hall can be hung higher, often between 7-8 feet from the floor to allow for clearance. Refer to the table below for more specific guidelines.
| Room Type | Recommended Height |
|---|---|
| Dining Room | 30-36 inches above table |
| Foyer/Entrance Hall | 7-8 feet from floor |
| Living Room | Dependent on seating and layout |
How to Adjust Chain Length or Cable
To adjust your chandelier’s height, you’ll need to modify the chain length or cable. For chain systems, remove or add links as necessary, using pliers to secure the chain. For cable systems, adjust the cable to the desired length and lock it in place using the cord anchorage. Ensure the chandelier is safely supported during adjustments to prevent damage or injury.

Troubleshooting Common Installation Problems
You may encounter a few challenges when installing your new chandelier. Understanding how to address these issues is crucial for a successful installation.
Dealing with Weight Issues
If your chandelier is particularly heavy, ensuring that your ceiling can support its weight is vital. Check that the electrical box is securely fastened to a structural element, such as a joist, to prevent the fixture from falling. If you’re unsure about the weight limit, consult a professional to assess your ceiling‘s capabilities.
Fixing Wiring Problems
Wiring issues can be a common problem when installing a chandelier. First, check for any loose connections or tripped breakers. Ensure that the wiring is correctly connected to the light fixture and that all wires are securely fastened. If a bulb isn’t working, try replacing it or checking the socket for issues. For flickering lights, verify that you’re using compatible dimmers and that connections are secure.
When to Call a Professional Electrician

While many homeowners can install a chandelier on their own, certain situations demand the expertise of a professional electrician. For your safety, these products must be installed in accordance with local Building Regulations. If in any doubt, or where required by the law, hire a professional.
Signs the Job Is Beyond DIY
If you’re dealing with complex wiring, an outdated electrical circuit, or a chandelier that is particularly heavy, it’s a sign that the job is beyond DIY. Additionally, if you’re unsure about the voltage or lack experience with electrical installations, it’s best to seek professional help. Using a voltage tester can help identify potential issues, but interpreting the results requires experience and knowledge.
What to Expect from Professional Installation
A professional electrician will assess the job, taking into account the specific requirements of your chandelier and the electrical setup of your home. They will ensure that the installation is done safely and efficiently, and that it complies with all relevant regulations. You can expect a thorough inspection of the existing electrical setup, including the circuit and wiring, to determine the best course of action.
The average cost for professional chandelier installation in the UK can vary, depending on factors such as the complexity of the job, the electrician’s experience, and the location. To streamline the process and potentially reduce costs, it’s advisable to prepare your home by ensuring easy access to the installation area and having the necessary information ready.
Professional electrical work typically comes with warranties or guarantees, providing peace of mind and protection for your investment. To ensure that your chandelier is installed exactly as you envision, it’s crucial to effectively communicate your expectations to the electrician.
Conclusion
With the right preparation and care, you can successfully replace your pendant light with a stunning chandelier. This upgrade not only enhances the aesthetic appeal of your home but also improves the overall lighting quality.
Throughout this article, we’ve covered the key differences between pendant lights and chandeliers, the benefits of making the switch, and the essential safety considerations, including the use of a voltage tester. By understanding these factors, you can ensure a smooth installation process.
While replacing a pendant light with a chandelier can be a DIY project, it’s crucial to know when to seek professional help. With patience and attention to detail, you’ll be able to enjoy your new chandelier for years to come, enhancing your home’s ambiance and potentially increasing its value over time.


