Are you wondering how to update your home’s electrical fittings safely and effectively? A damaged or outdated light switch can be a eyesore, but replacing it is a relatively simple task.
To ensure your safety, it’s crucial to understand the importance of proper electrical safety procedures before attempting to replace any light switch components. This guide will walk you through the process, covering everything from identifying when a faceplate needs replacing to choosing the right replacement and installing it correctly.
By following this comprehensive guide, you’ll be able to tackle this common household repair task with confidence, eliminating potential safety hazards and improving the appearance of your room.
Key Takeaways
- Understand the importance of proper electrical safety procedures
- Identify when a faceplate needs replacing
- Choose the right replacement faceplate
- Isolate your lighting circuit properly to ensure safety
- Install the new faceplate correctly
- Eliminate potential safety hazards and improve the appearance of your room
Understanding Light Switch Faceplates and When to Replace Them
Understanding the different types of light switch faceplates is essential for homeowners looking to replace or upgrade their existing switches. Light switch faceplates come in various styles, materials, and functionalities, making it crucial to identify the right type for your needs.
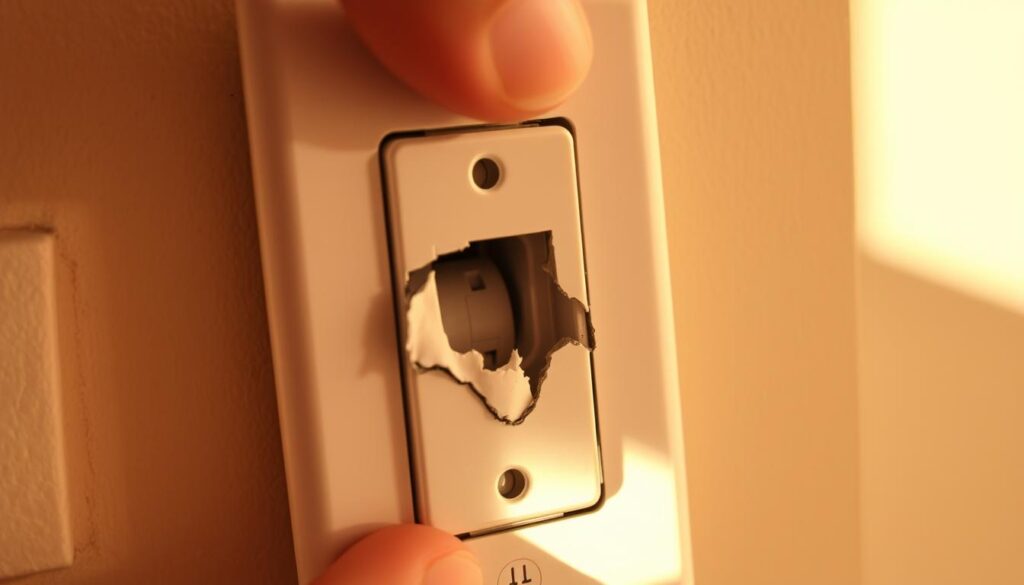
Signs Your Light Switch Faceplate Needs Replacing
If your light switch faceplate is cracked, worn out, or no longer matches your home’s décor, it’s time to consider replacing it. Moreover, if you’ve upgraded to smart lighting or changed your lighting configuration, your existing faceplate might not be compatible. As Electrical Safety First suggests, “any damage to electrical components, including faceplates, should be addressed promptly to avoid potential hazards.”
Different Types of Light Switch Faceplates
There are numerous types of light switches available, catering to different needs and preferences. Some of the most common include:
- Standard toggle switches with a simple up/down lever mechanism.
- Rocker or paddle switches offering a modern appearance and easier operation.
- Dimmer switches that allow you to adjust the light level, saving energy and creating ambiance.
- Multi-gang faceplates housing multiple switches in a single unit.
- Decorative faceplates made from various materials like plastic, metal, wood, and ceramic.
- Smart switch faceplates incorporating technology for remote control and scheduling.
As shown in the image below, different faceplates can significantly impact the aesthetic and functionality of your lighting system.
Understanding the type of switch you currently have is essential for selecting a compatible replacement faceplate. Whether you’re upgrading to a smart switch or simply replacing a cracked faceplate, choosing the right type ensures a seamless integration with your existing lighting system.
Essential Safety Precautions Before Starting
To avoid electrical shock, it’s crucial to follow proper safety precautions before starting the replacement process. Ensuring your safety is paramount when working with electrical systems.
How to Properly Isolate Your Lighting Circuit
First, you need to isolate the circuit that controls the light switch you’re about to work on. This involves locating the correct breaker or fuse at your consumer unit and switching it off. It’s essential to make sure you’ve identified the right circuit to avoid any accidental power-ons.
To properly isolate your lighting circuit, you should refer to your circuit diagram or labelling on the consumer unit. If you’re still unsure, consider consulting a professional electrician.
Testing That the Circuit is Dead
After isolating the circuit, the next step is to verify that it’s dead using a voltage tester. This is a critical safety check to ensure you’re not exposed to electrical shock. You can use either a non-contact voltage tester or a multimeter for this purpose.
- Use a voltage tester to check for any voltage at the switch terminals.
- Some voltage testers come with audio alerts that beep when electricity is detected, providing an additional safety confirmation.
- Always test multiple points in the circuit to ensure there’s no residual power anywhere in the system.
By following these steps, you can ensure your safety while replacing the light switch faceplate. Always maintain safety practices as if the circuit were live, even after confirming it’s dead.
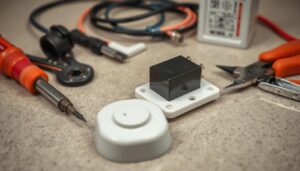
Tools and Materials You’ll Need

Gathering the correct tools and materials is the first step in replacing a damaged light switch faceplate. You’ll need a few essential tools to complete the job safely and efficiently.
Essential Tools for the Job
To start, you’ll need a screwdriver, preferably a flathead screwdriver, to remove the screws holding the faceplate in place. You may also require a voltage tester to ensure that the circuit is dead before you begin working on it. Additionally, having a pair of needle-nose pliers can be helpful for gripping small wires or components.
Choosing the Right Replacement Faceplate
When selecting a replacement faceplate, consider the number of gangs (switches) on your current faceplate and match it with your new one. The material choice between plastic and metal affects both aesthetics and installation requirements, particularly regarding earthing. Ensure your replacement faceplate is compatible with your existing back box depth and mounting configuration.
For bathrooms and outdoor areas, choose faceplates with appropriate IP ratings for moisture resistance. Consider upgrading to faceplates with additional features like USB charging ports or LED indicators if necessary.
How to Replace a Cracked Light Switch Faceplate
Replacing a cracked light switch faceplate is a straightforward DIY task that can enhance the safety and appearance of your home. This process involves several key steps, from removing the old faceplate to installing the new one.
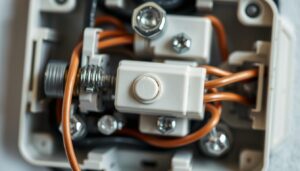
Removing the Old Faceplate
To start, you need to remove the old faceplate. Begin by switching off the power to the circuit at your consumer unit. Once you’ve confirmed the circuit is dead, you can proceed to unscrew the mounting screws that hold the faceplate in place. Gently pull the faceplate away from the wall, taking care not to damage the underlying wiring or the wires connected to the switch.
Documenting the Wiring Configuration
Before disconnecting any wires, it’s crucial to document the wiring configuration. Take a photo or make a note of how the wires are connected to the old faceplate, including which terminal screws they are attached to. This will be invaluable when connecting the wires to the new faceplate.
Disconnecting the Wires
Carefully disconnect the wires from the old faceplate by loosening the terminal screws. Once the wires are free, you can remove the old faceplate completely. Ensure that you handle the wires with care to avoid damaging them.
Installing the New Faceplate
To install the new faceplate, first compare it with the old one to ensure it has the same configuration of terminals. Then, connect each wire to its corresponding terminal on the new faceplate, following your documentation precisely. Wrap the wire clockwise around the terminal screws so that tightening the screw pulls the wire in rather than pushing it out. Ensure no bare copper wire is exposed beyond the terminal and tighten the screws firmly. Finally, push the cable back into the mounting box and fit the new faceplate, securing it with the mounting screws.
| Step | Description |
|---|---|
| 1 | Remove the old faceplate by unscrewing the mounting screws. |
| 2 | Document the wiring configuration before disconnecting any wires. |
| 3 | Disconnect the wires from the old faceplate. |
| 4 | Install the new faceplate, ensuring correct wire connections. |
Understanding Earthing Requirements for Light Switches
To ensure your light switch is installed safely, you need to understand the earthing requirements. Earthing is a critical safety measure in electrical installations, protecting against electrical shock. When it comes to light switches, the type of faceplate you’re using – whether it’s plastic or metal – affects the earthing requirements.

Earthing Plastic Faceplates with Metal Back Boxes
If you’re using a plastic faceplate with a metal back box, the earthing requirements are relatively straightforward. The earth core from your lighting circuit should be connected directly to the metal back box. This ensures that the metal components are safely earthed, even if the faceplate itself is plastic. It’s essential to check that the connection is secure and that the earth wire is of the appropriate gauge.
Key considerations include:
- Ensuring the earth core is connected to the metal back box.
- Verifying that the connection is secure and meets safety standards.
Earthing Metal Faceplates: Special Considerations
When using a metal faceplate, the earthing requirements become more complex. The main earth core must first connect to the metal faceplate’s earthing terminal. Then, a supplementary earth wire, often called a “flying earth,” should be run from the faceplate to the metal back box. This wire should be insulated with green and yellow sleeving to identify it as an earth connection. It’s crucial that both the faceplate and the back box are properly earthed to ensure maximum safety.
Important points to note:
- The main earth core connects to the metal faceplate first.
- A supplementary earth wire is required between the faceplate and the back box.
- The supplementary earth wire should be insulated with green and yellow sleeving.
Dealing with Different Switch Types
Before starting, identify the switch type to ensure a smooth replacement process. Different switches have unique characteristics that affect how you replace the faceplate.
Single-Pole Switches vs. Three-Way Switches
Single-pole switches control a light fixture from one location, whereas three-way switches control a light from two locations. When replacing a faceplate on a three-way switch, ensure you understand the wiring configuration, as it involves more complex wiring than a single-pole switch.
Dimmer Switches and Motion Sensor Switches
Dimmer switches and motion sensor switches require special consideration. Dimmer switches control light brightness, while motion sensor switches turn lights on or off based on movement. Replacing faceplates on these switches demands attention to their specific wiring and functionality to maintain their advanced features.
Special Requirements for Bathroom Light Switches
Bathroom light switches must comply with UK building regulations, which stipulate that only ceiling-mounted pull-cord switches are permitted within bathrooms and shower rooms due to safety concerns. Alternatively, a standard light switch can be installed outside the bathroom. Any switches in bathrooms must have appropriate IP ratings for moisture resistance, and the lighting circuit should have RCD protection for added safety.
Testing Your Newly Installed Light Switch
With the replacement process complete, testing your light switch is essential for safety and functionality. This step ensures that the newly installed switch operates correctly and safely.
Restoring Power Safely
Before testing your new light switch, you need to restore power to the circuit. Head to your consumer unit and switch the relevant circuit breaker back to the ‘on’ position. If you’ve used a fuse, replace it with a new one of the correct rating. Once power is restored, use a socket tester or voltage tester to verify that the circuit is live and functioning correctly. This step is crucial for your safety while testing the switch.
Checking for Proper Operation
Now that power is restored, it’s time to test the switch. Operate the switch multiple times to ensure it consistently turns the light on and off. Check that the switch mechanism feels solid and operates smoothly without any sticking or unusual resistance. For dimmer switches, test the full range of brightness control to ensure smooth operation throughout. With motion sensor switches, test the detection range and sensitivity to ensure it activates appropriately.
- Listen for any unusual sounds like buzzing or clicking that might indicate a problem with the installation.
- Feel the switch faceplate after several minutes of operation – excessive warmth could indicate an issue.
- For multi-gang switches, test each switch independently to confirm they control the correct lights.
- If the switch controls multiple lights, verify that all of them respond correctly to the switch operation.
- For three-way switches, test operation from both switch locations to ensure the light can be controlled from either point.
After successful testing, consider marking the date of replacement inside the switch cover for future reference. This practice can be helpful for maintenance and troubleshooting purposes.

Conclusion: Maintaining Your Light Switches for Safety and Longevity
Maintaining your light switches is crucial for electrical safety. To ensure their continued safe operation and extend their lifespan, regular maintenance is essential. This includes periodically checking for signs of wear, damage, or discolouration, and cleaning switch faceplates properly with the power isolated.
You should also be aware of the warning signs of switch failure and understand when to call a professional electrician. Keeping records of switch replacements and being informed about changes in building regulations will help you make informed decisions about future maintenance. By following these guidelines, you can ensure your light switches remain safe and functional.