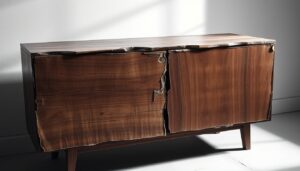
Are you tired of dealing with the frustration of a drawer bottom that has given way, causing inconvenience and potential damage? Over time, well-used wooden drawers can show significant wear and tear, leading to a range of problems.
Boards can warp, guides can slide poorly, and the frame of your furniture piece may become damaged. Fortunately, replacing a damaged drawer bottom is a manageable task that can restore functionality to your drawers and extend the life of your furniture.
By understanding the common signs that indicate your drawer needs replacement, you can tackle the issue before more serious damage occurs. Our comprehensive DIY guide will walk you through each step of the repair process, helping you to restore your drawers with confidence.
Key Takeaways
- Learn how to effectively replace a damaged drawer bottom with our step-by-step DIY guide.
- Understand the common signs indicating that your drawer bottom needs replacement.
- Discover how identifying the root cause of the problem can help you make more durable repairs.
- Restore functionality to your drawers and extend the life of your furniture.
- Tackle drawer bottom repairs with confidence, even with limited woodworking experience.
Understanding Why Drawer Bottoms Fail
Understanding why drawer bottoms fail is crucial for effective repair and maintenance. Drawer bottoms can fail due to various reasons, and identifying these causes is the first step towards a successful fix.
Common Causes of Drawer Bottom Damage
Several factors contribute to the failure of drawer bottoms. Excessive weight is a primary cause, as overloaded drawers put tremendous pressure on the thin bottom panel, causing it to bow and eventually pull out from its grooves. Additionally, moisture damage can weaken the connection between the drawer bottom and the frame over time due to fluctuating humidity levels causing wood to expand and contract.
Poor quality materials also play a significant role, with many mass-produced furniture pieces using thin hardboard that isn’t durable enough for regular use. The construction method matters greatly, with dovetail joints providing superior strength compared to butt joints that are merely glued and held with corrugated nails in newer furniture.
Signs Your Drawer Bottom Needs Replacement
You may need to replace your drawer bottom if you notice visible sagging when the drawer is pulled out, items falling through the bottom, or the drawer bottom visibly separating from the sides. These signs indicate that the drawer bottom is no longer securely in place and is in need of repair or replacement.

Types of Drawer Constructions and Their Vulnerabilities
Different drawer constructions have varying vulnerabilities. Traditional wooden runners wear down from constant use, while metal drawer slides can get bent or damaged if overloaded. Understanding how your drawer is constructed, whether with dados, rabbets, or simple nailing, will help you determine the most appropriate repair method for your specific situation.
By recognising the type of construction and the materials used, you can better address the issues affecting your drawer bottom and apply the most suitable fix.
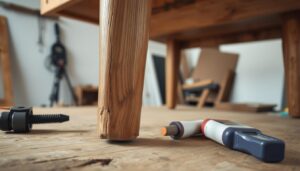
Tools and Materials You’ll Need
The key to a smooth drawer repair process lies in having the necessary tools and materials at hand. Gathering the required items will make your repair process smoother and more effective.
Essential Tools for Drawer Repair
For a successful drawer bottom replacement, you’ll need basic measuring tools including a tape measure, pencil, and square to ensure your new bottom panel fits precisely into the existing drawer frame.

Choosing the the Right Replacement Material
When choosing replacement material, consider using 1/4″ plywood for durability or hardboard if you prefer a lighter option. Plywood offers superior strength compared to the original 3mm hardboard typically used in mass-produced furniture.

Safety Equipment and Precautions
Safety equipment is non-negotiable—always wear safety goggles when using power tools, use a dust mask when sanding to avoid inhaling particles, and ensure your workspace is well-lit and clear of obstructions.
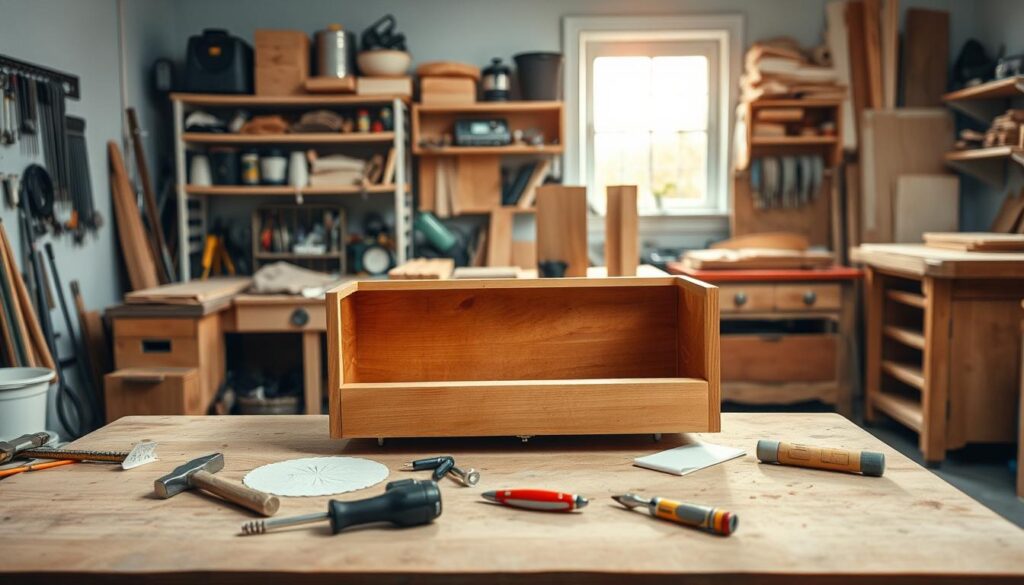
How to Replace a Broken Drawer Bottom
Repairing or replacing a drawer bottom is a manageable task when broken down into simple, manageable steps. To start, you need to carefully remove the drawer from the cabinet, taking care not to force it if it’s sticking, as this could cause additional damage to the drawer or its runners.
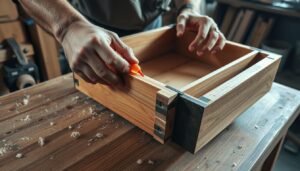
Removing and Disassembling the Drawer
Begin by completely removing the drawer from the cabinet. Carefully disassemble the drawer by removing any hardware, such as handles or knobs, and then separating the drawer sides from the front and back. Take photos during disassembly to help with reassembly later.

Measuring and Cutting the New Bottom Panel
Measure the dimensions of the original drawer bottom precisely, then transfer these measurements to your new plywood or hardboard, adding a small allowance (about 1-2mm) for the dado grooves. Use a straightedge guide to ensure clean, straight cuts.
| Material | Thickness | Recommended Use |
|---|---|---|
| Plywood | 6-12mm | Heavy-duty drawers |
| Hardboard | 3-6mm | Light-duty drawers |
Widening the Dadoes for Thicker Material
If you’re upgrading from thin hardboard to thicker plywood, you’ll need to widen the dadoes in the drawer sides, front, and back. This requires careful adjustment of your saw blade height and fence position.
Reassembling the Drawer Properly
When reassembling the drawer, apply a small amount of wood glue to the joints between the sides, front, and back. Ensure the drawer is square by measuring diagonally from corner to corner.
Alternative Repair Methods for Different Drawer Types
The type of drawer you’re dealing with can significantly influence the repair method you should use. Different drawers have unique characteristics that may require tailored approaches to maintain their functionality and aesthetic appeal.
Reinforcing Existing Drawer Bottoms
For drawers with bottoms that are beginning to sag but haven’t completely failed, consider adding support strips underneath the existing bottom to reinforce it without complete replacement. This method is particularly useful for drawers that hold lighter items but still need some extra support.
Using Support Blocks and Brackets
Installing metal L-brackets at the corners where the drawer sides meet the back can provide additional support and prevent the bottom from dropping out of its grooves. You can also use support blocks or brackets specifically designed for drawer bottoms, such as drawer bottom support brackets, to add extra strength.

Repairing Antique Drawer Bottoms
When dealing with antique furniture, preservation is key. Use matching wood species and traditional joinery methods rather than modern plywood to maintain the piece’s historical integrity and value. Consider using hide glue for repairs, as it remains reversible even after drying.
Other effective methods include adding a central support runner for heavy-use drawers, reseating and securing drawer bottoms that have pulled away from their dadoes, and upgrading to metal drawer slides for smoother operation. For cracked but not completely broken drawer bottoms, applying wood glue to the underside along with thin support strips can extend their lifespan.
Upgrading Your Drawer for Better Durability
Improving the durability of your drawers is achievable through simple upgrades. One effective way to enhance the performance of your drawers is by replacing the old wooden runners with metal slides.
Replacing Wooden Runners with Metal Slides
Upgrading to metal drawer slides can significantly improve the operation and longevity of your drawers. To do this, remove the old wooden runners from both the drawer and the cabinet. Measure and mark the positions where the new slides will be installed. Follow the manufacturer’s instructions to install the cabinet part of the slide, then attach the drawer part to the drawer. Finally, insert the drawer and check for smooth operation.
Strengthening Drawer Joints and Corners
To further enhance durability, consider strengthening the drawer joints and corners. Adding small hardwood corner blocks glued and screwed into the inside corners can provide additional support to the frame without being visible from the outside.
Material Upgrades for Heavy-Use Drawers
For drawers that hold heavy items, upgrading the drawer sides from softwood to hardwood can offer superior strength and resistance to warping under load. Additionally, replacing thin drawer bottoms with thicker material, such as 3/8″ plywood, can provide exceptional strength for drawers containing heavy items.
- Upgrading from wooden runners to metal drawer slides dramatically improves drawer operation and longevity.
- Strengthen drawer joints by adding small hardwood corner blocks.
- Consider upgrading drawer sides from softwood to hardwood for superior strength.
Preventing Future Drawer Bottom Problems
To keep your drawers functioning smoothly and prevent future issues, it’s crucial to adopt a proactive approach. By understanding the importance of proper maintenance and usage, you can significantly extend the life of your drawers.
Weight Distribution and Drawer Capacity
Proper weight distribution is vital to preventing drawer bottom failures. Always place heavier items towards the back of the drawer, where they are supported by both the bottom and the back panel. This helps maintain balance and reduces the strain on the drawer bottom.
Regular Maintenance for Longevity
Regular maintenance is key to ensuring your drawers continue to operate smoothly. Inspect your drawers regularly for signs of wear, ensure all hardware is secure, and clean the tracks to prevent debris buildup. Implementing a regular maintenance schedule can help identify potential issues before they become major problems.
Using Drawer Organisers to Reduce Stress
Drawer organisers are not just useful for keeping your belongings tidy; they also play a crucial role in distributing weight evenly across the drawer bottom. By using organisers, you can prevent heavy items from concentrating in one area, thereby reducing the risk of sagging or damage.
Additional tips include establishing weight limits for each drawer, lubricating drawer slides, and applying furniture wax to wooden runners to ensure smooth operation. For drawers containing heavy items, consider rotating their contents periodically to prevent constant stress on any single drawer.
Conclusion
Restoring your drawers to their former functionality is easier than you think. By following the step-by-step instructions outlined in this guide, you can successfully repair or replace your drawer bottoms, ensuring they remain safe and functional.
The repair process not only saves you the cost of professional repairs or replacement but also extends the life of your furniture. Whether you’re dealing with antique pieces or modern flat-pack furniture, the techniques outlined here can be adapted to suit your specific needs and skill level.
To prevent future problems, remember to distribute weight evenly in your drawers, perform regular maintenance, and use drawer organisers to reduce stress points. By taking the time to properly repair your drawer bottoms, you’ll enjoy the convenience and functionality they provide, eliminating the frustration of dealing with items falling through broken bottoms.
With the right tools, materials, and instructions, you’re well-equipped to tackle this common furniture problem. So, gather your tools, get started, and enjoy the satisfaction of a job well done!