You’re not alone in dealing with the annoyance of a stuck pop-up waste plug. Many people face this issue, where the basin waste won’t pop back up after being pressed down. In most cases, it’s usually a build-up of grime that causes the waste plug to stick.
If you’re tired of dealing with this problem, our comprehensive guide will walk you through the process of replacing a faulty waste mechanism, a common household plumbing task that can save you time and money.
Key Takeaways
- Understand why bath waste mechanisms fail, typically due to grime build-up or corrosion.
- Learn how to identify when replacement is necessary rather than simple cleaning.
- Follow a step-by-step approach to replace your bath pop-up waste mechanism.
- Restore proper functionality to your bath with our DIY guide.
- Save time and money by avoiding professional plumbing services.
Understanding Bath Pop-Up Waste Mechanisms
To comprehend the issues with your bath’s pop-up waste, it’s essential to understand how the mechanism functions. The bath pop-up waste mechanism is a system that controls the flow of water in and out of your bath.
How Pop-Up Waste Mechanisms Work
Bath pop-up waste mechanisms operate through a series of rods and linkages that connect the overflow control to the drain plug. When you operate the overflow control, it activates a spring-loaded mechanism that either raises or lowers the plug in the waste outlet, allowing water to drain or be retained in the bath.
Common Signs of Failure
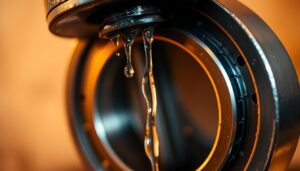
Common signs that your bath pop-up waste mechanism is failing include a plug that won’t stay down, won’t pop back up, or allows water to drain slowly even when closed. Other indicators include grinding noises, visible corrosion, or water leaking around the waste outlet. The spring mechanism is particularly vulnerable to failure due to constant exposure to water, which can cause corrosion over time, especially in hard water areas.
| Signs of Failure | Causes |
|---|---|
| Plug won’t stay down | Faulty spring mechanism |
| Water drains slowly | Grime buildup or corroded waste plug |
Tools and Materials Needed to Replace Bath Pop-Up Waste Mechanism

A successful bath pop-up waste replacement depends on having the right tools and materials, including adjustable wrenches and plumber’s putty. To ensure a smooth and efficient process, it’s essential to be well-prepared.
Essential Tools for the Job
To replace a bath pop-up waste mechanism, you’ll need several essential tools. These include adjustable wrenches for loosening and tightening various fittings, pliers for gripping small objects, and screwdrivers for removing screws. A basin wrench can be particularly useful for accessing tight spaces beneath the bath.
Replacement Parts Options
When selecting replacement parts, you’ll need to choose between direct manufacturer replacements or universal bath waste mechanisms that fit most standard baths. Consider the value proposition of different replacement options, with prices ranging from budget-friendly basic models (around £14) to premium bathroom fittings with enhanced durability and aesthetic appeal.
Some of the replacement parts you may need include the main waste mechanism, connecting rods, linkages, and seals. Ensuring that all components are compatible and of good quality is crucial for the proper function of the entire basin waste system.
Types of Bath Waste Mechanisms Available

The type of bath waste mechanism you choose can significantly impact your bathroom’s functionality and aesthetic. You have several options to consider, each with its unique features and benefits.
Pop-Up Wastes
Pop-up waste mechanisms are a traditional option that operates via a lever or knob on the overflow plate, connecting to the plug through a series of rods and linkages to raise and lower the plug. They are a popular choice for many bathrooms.
Click-Clack (Push Button) Wastes
Click-clack wastes offer a more modern alternative where the plug is operated by simply pushing it down to close and pushing again to release, eliminating the need for external controls. This design provides a sleek and minimalist look.
Choosing the Right Finish
When selecting a bath waste, you’ll also need to consider the finish. Options include chrome, gold, and black, with prices varying significantly between basic and premium options. Luxury waste mechanisms often feature enhanced designs such as mushroom dome tops and higher quality materials.
Consider how the waste mechanism’s appearance will complement your existing basin and bathroom fixtures for a cohesive design. Whether you opt for a pop-up or click-clack waste, the finish should align with your bathroom’s overall aesthetic.
Preparing for Replacement
To ensure a smooth replacement process, preparation is key. You need to take a few steps to prepare your bathroom before starting the replacement of your bath pop-up waste mechanism.
Turning Off Water Supply
Before beginning, turn off the water supply to your bath to prevent accidental flooding. This is a crucial step to avoid any water damage during the procedure.
Clearing the Work Area
Clear all toiletries, cleaning products, and decorative items from around the bath and basin area. Lay down old towels or protective coverings to catch any water spillage and protect your bathroom surfaces.
Removing Items from the Bath
Remove any bath mats, shower curtains, or other items that might get in the way. Take time to gather all your tools and replacement parts, ensuring everything is within easy reach. It’s also helpful to take photos of the existing waste mechanism setup before disassembly.

Removing the Old Bath Waste Mechanism
Removing the old bath waste mechanism is a crucial step in the replacement process. You will need to access the underside of the bath to begin this process.
Accessing the Underside of the Bath
Position yourself to access the underside of the bath, which may require lying on your back and using a torch to properly see the waste mechanism connections. Ensure you have enough space to work comfortably.
Disconnecting the Linkage Rod
Locate the linkage rod that connects the overflow control to the pop-up plug mechanism. Carefully disconnect the linkage rod from both the overflow control and the waste plug, noting how the pieces fit together for easier reassembly later. A Replacement Rod Set for Pop Up Basin Wastes is available for £6.85, which includes all rods and joiner linkage.
Unscrewing the Old Mechanism
Use an adjustable wrench to loosen and unscrew the retaining nut that holds the waste mechanism to the underside of the bath or sink. Remove any old plumber’s putty or sealant from around the waste opening, being careful not to scratch or damage the bath surface.
As you remove the old mechanism, inspect it to understand how it failed, which may help prevent similar issues with the new installation. Check for any spring components that may have become detached during removal, as these small parts can easily get lost. Examine the bath waste opening for any damage or wear that might affect the installation of the new basin waste mechanism.
| Task | Description | Tools Required |
|---|---|---|
| Accessing the underside of the bath | Position yourself to see the waste mechanism connections | Torch |
| Disconnecting the linkage rod | Locate and disconnect the rod from overflow control and waste plug | Adjustable wrench |
| Unscrewing the old mechanism | Loosen the retaining nut holding the waste mechanism | Adjustable wrench |
By following these steps, you can successfully remove the old bath waste mechanism, making way for the installation of a new one.
Cleaning the Bath Waste Area
Before installing a new bath waste mechanism, it’s essential to clean the bath waste area thoroughly. This step is crucial to ensure the proper functioning of the new basin waste and to prevent any issues caused by grime or residue.
Removing Grime and Residue
To clean the bath waste area, start by removing any accumulated grime, limescale, or old sealant around the waste plug. Use a non-abrasive bathroom cleaner and an old toothbrush to reach into crevices, ensuring all residue is removed. Pay particular attention to the overflow opening, as it can accumulate significant buildup over time.
- Use a non-abrasive cleaner to avoid damaging the bath surface.
- Employ an old toothbrush to clean hard-to-reach areas around the waste area.
- Consider using a limescale remover if you live in a hard water area.
Preparing the Surface for New Installation
After cleaning, dry all surfaces completely with a clean cloth to ensure the new sealant will adhere properly. Inspect the cleaned areas for any damage, cracks, or wear that might compromise the installation of the new basin waste. Cleaning any reusable parts of the old mechanism, such as decorative flanges or overflow covers, is also important.
| Cleaning Task | Purpose |
|---|---|
| Remove grime and limescale | Ensure a clean surface for the new waste plug |
| Dry the surface | Improve sealant adhesion |
| Inspect for damage | Prevent future issues with the basin waste |
Installing the New Bath Pop-Up Waste Mechanism
Now that you’ve removed the old mechanism, you can proceed to install the new bath pop-up waste. This process involves several key steps to ensure a watertight seal and proper operation.
Applying Plumber’s Putty or Silicone
Apply a generous amount of plumber’s putty or silicone sealant around the underside of the new waste mechanism flange to create a watertight seal. This is crucial for preventing leaks around the basin waste area.
Positioning the New Mechanism
Carefully position the new mechanism into the bath waste opening, ensuring it sits flush against the bath surface. Any rubber gaskets should be properly aligned to facilitate a smooth operation.
Securing the Mechanism in Place
From beneath the bath, attach and tighten the retaining nut onto the threaded portion of the waste mechanism. Be cautious not to overtighten, which could crack the bath. Ensure the waste plug creates a proper seal when closed.
Connecting and Adjusting the Mechanism
Connecting and adjusting the mechanism is a crucial step in ensuring your bath waste operates smoothly. After installing the new bath pop-up waste mechanism, you need to ensure all components are correctly connected and adjusted.
Attaching the Linkage Rod
Carefully attach the linkage rod to both the overflow lever mechanism and the pop-up waste plug. Ensure all connections are secure but not overly tight. If your replacement kit includes plastic or metal connectors, choose the appropriate option based on your water conditions and desired durability.
Testing the Pop-Up Function
Test the pop-up function by operating the overflow lever or control several times. Observe the smooth movement of the waste plug up and down. Fill the sink or bath with a small amount of water to test the seal of the waste plug when closed, checking for any leakage around the rubber gasket.
Making Necessary Adjustments
Make any necessary adjustments to the linkage rod length or connection points to optimize the opening and closing action of the mechanism. Ensure the spring mechanism operates correctly, providing enough tension to hold the plug in position when raised without being too difficult to operate.
- Check that the waste plug aligns perfectly with the drain opening when closed.
- Test the mechanism multiple times under different conditions to ensure consistent and reliable operation.

Conclusion
Taking on the task of replacing your bath pop-up waste mechanism can be a rewarding DIY project that adds value to your bathroom. By following the steps outlined in this article, you’ll be able to replace your basin waste with confidence and precision, saving you money compared to hiring a professional plumber.
Regular maintenance of your waste system, including occasional cleaning to prevent grime buildup, can extend its lifespan and prevent issues with the waste plug. Consider upgrading to a higher value mechanism when replacing your old one, as the difference in price is often minimal compared to the improved durability and functionality.
Remember to keep spare plastic links or spring components on hand for quick repairs in the future. With practice, you’ll find that subsequent replacements become much easier and faster to complete. If you encounter persistent problems after replacement, consider consulting a professional to address any underlying issues with your bathroom plumbing system.