Are you wondering if it’s possible to revive your favourite rattan chair that’s seen better days? Perhaps, after years of use, it’s started to show signs of wear, leaving you questioning whether to replace or restore it.
The good news is that with the right guidance, you can easily repair and maintain your rattan furniture, extending its lifespan and keeping it looking its best.
Key Takeaways
- Learn a step-by-step guide on how to repair your rattan chair weave.
- Understand when to repair and when to replace your rattan furniture.
- Discover sustainable approaches to furniture repair.
- Gain knowledge on maintaining your rattan furniture for the long term.
- Explore techniques applicable to various rattan furniture pieces beyond just chairs.
Understanding Rattan Furniture and Common Damage
To effectively repair rattan chair weave, it’s essential to comprehend the material’s characteristics and common types of damage. Rattan furniture is renowned for its durability, stylish appeal, and sustainability, making it a popular choice for both indoor and outdoor settings.
What Makes Rattan Furniture Special
Rattan furniture stands out due to its unique combination of durability, flexibility, and aesthetic appeal. The natural properties of rattan allow it to be woven into intricate patterns, creating both visual interest and structural support in furniture pieces. This versatility makes rattan furniture a favourite among homeowners seeking stylish and resilient pieces.
| Characteristics | Benefits |
|---|---|
| Durability | Withstands wear and tear effectively |
| Flexibility | Allows for intricate weaving patterns |
| Aesthetic Appeal | Adds visual interest to furniture pieces |
Types of Damage That Occur in Rattan Chair Weave
Common types of damage to rattan chair weave include broken strands, loosening weave patterns, discoloration, and structural weakening at stress points. Environmental factors such as humidity, direct sunlight, and temperature fluctuations can accelerate damage to rattan furniture, particularly affecting the integrity of the weave. Understanding the specific type of damage is crucial for determining the appropriate repair approach and necessary materials.
When to Repair vs. When to Replace
The decision to repair versus replace rattan furniture should consider factors such as the furniture’s age, sentimental value, replacement cost, and the extent of the damage. Minor repairs like reattaching loose strands or fixing small breaks can typically be handled as DIY projects, while extensive structural damage might require professional intervention. Assessing the overall structural integrity of the chair is essential before investing time and materials in repairing rattan furniture.
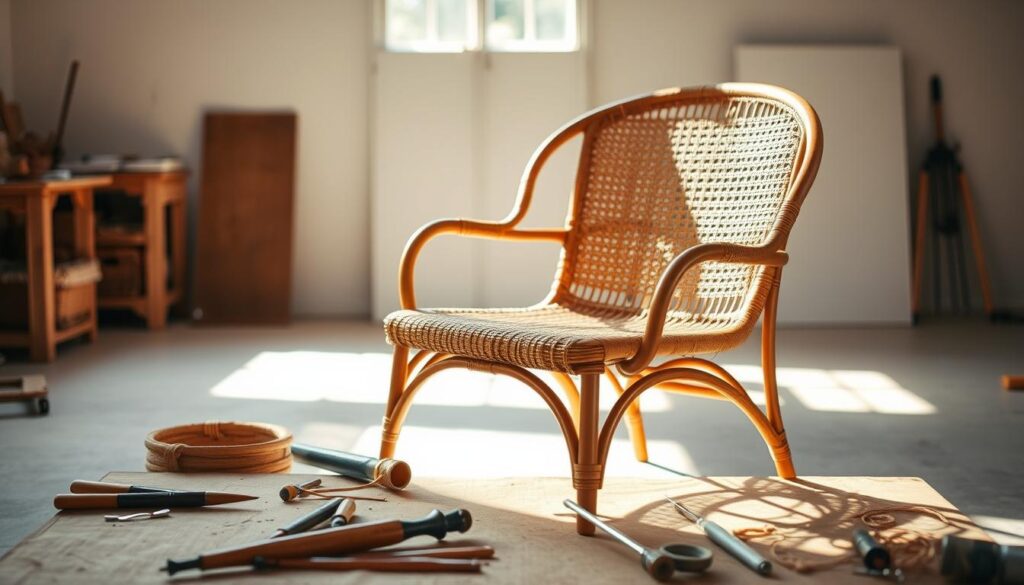
Essential Tools and Materials for Rattan Repair
The key to a successful rattan repair project lies in having the essential tools and materials ready. Before diving into the repair process, it’s crucial to understand what you’ll need to achieve a professional-looking result.
Basic Tools You’ll Need
To start, you’ll require a set of basic tools. These include fine-grit sandpaper for smoothing rough edges, needle-nose pliers for manipulating rattan strands, and sharp scissors for making clean cuts in the material. A

can be a convenient option.
Finding the Right Replacement Rattan Material
Finding the right replacement rattan material that matches your existing furniture in terms of thickness, colour, and flexibility is essential for an inconspicuous repair. You may need to source new rattan or a rattan patch that closely matches your chair’s original weave. A

can help you find the perfect match.
In addition to the materials, you’ll need a good quality adhesive, such as a specialised rattan adhesive or wood glue, to secure loose strands. Cleaning supplies like a soft cloth, mild soap, and warm water are also necessary for preparing the furniture before making repairs.
Other helpful items include toothpicks for applying glue in tight spaces, a spray bottle for moistening rattan to increase flexibility, and protective gloves to prevent splinters. For finishing touches, you may need wood stain or paint that matches your furniture’s colour, along with a clear protective sealant to protect the repaired areas.
Preparing Your Rattan Chair for Repair
A well-prepared rattan chair is the foundation for a successful repair. Before you begin the actual repair work, several important steps must be taken to ensure your chair is ready.
Thoroughly Cleaning Your Rattan Chair
The first step in repairing rattan furniture is to give it a thorough cleaning. Dirt and dust can accumulate on the surface of the rattan, making it harder for adhesives to stick. Start by brushing off any loose dirt or debris using a soft-bristled brush. Then, wipe the furniture down with soap and water. Mix a small amount of mild soap in a bucket of warm water, and using a soft cloth, wipe down the furniture, being careful not to soak it too much. Once you’ve wiped it clean, let it air dry completely before moving on to the next step.
| Cleaning Method | Purpose | Precautions |
|---|---|---|
| Soft-bristled brush | Remove loose dirt | Gentle strokes |
| Mild soap solution | Deep clean rattan | Avoid oversaturation |
Identifying and Assessing Damaged Areas
Carefully examine the entire chair to identify all damaged areas, including loose or broken strands, unravelling weave patterns, and structural weaknesses in the frame. Make sure to note the severity of each damaged area to prioritise repairs and determine the appropriate techniques needed for each section.
Taking Reference Photos of the Weave Pattern
Taking clear reference photos of the undamaged weave pattern from multiple angles will serve as a crucial guide when you begin reweaving sections. These photos will help you maintain the original pattern’s integrity and ensure your repairs blend seamlessly with the existing weave.
How to Repair Rattan Chair Weave: The Basic Process
To repair rattan chair weave, you’ll need to follow a systematic approach that involves careful preparation and attention to detail. This process begins with assessing the damage and preparing the necessary materials before moving on to the actual repair work.
Removing Broken or Damaged Strands
The first step in repairing your rattan chair is to remove any broken or damaged strands. Use sharp scissors to make clean cuts, and carefully extract the damaged pieces without disturbing the surrounding weave structure. This is crucial in maintaining the chair’s integrity and preventing further damage.
Preparing New Rattan Strands
Once you’ve removed the damaged strands, you’ll need to prepare new rattan strands for weaving. Soak the new strands in warm water for 30-60 minutes to make them pliable and easier to work with. This step is essential for achieving a seamless repair that matches the original weave.
Weaving Techniques for Different Patterns
Different rattan chairs feature various weaving patterns, including simple over-under weaves, herringbone patterns, and more complex decorative designs. To successfully repair rattan chair weave, you must understand the specific weaving technique used in your chair. For basic patterns, maintain an alternating rhythm as you weave replacement strands through the existing structure, ensuring consistent tension throughout.
For more complex patterns, you may need to weave multiple strands simultaneously or create decorative elements that match the original design. It’s advisable to practice on a small section or scrap material before attempting repairs on visible areas of your chair to perfect your technique.
By following these steps and paying close attention to the rattan strands and weave pattern, you can effectively repair rattan and restore your chair to its original condition.
Step-by-Step Repair Guide for Loose or Broken Strands
A thorough repair of your rattan chair involves meticulously fixing any loose or broken strands in the weave. This process requires patience and attention to detail, but with the right guidance, you can achieve professional-looking results.

Soaking New Rattan to Increase Flexibility
Before you can begin repairing the broken strands of rattan, it’s essential to soak the new rattan strips or pieces in water. Soaking the rattan helps to make it more pliable and easier to work with during the repair process. Soak the new rattan for about 30 minutes to an hour, or until it becomes flexible enough to work with. You’ll know it’s ready when it becomes more supple and bendy.
Securing Loose Strands with Adhesive
While your replacement strands are soaking, identify any loose strands in the existing weave and secure them with a small amount of wood glue or specialised rattan adhesive. When applying glue to loose strands, use a toothpick for precision application and hold the strands firmly in place for several minutes to ensure proper adhesion.
Weaving in Replacement Strands
After the loose strands are secured and your new rattan is properly soaked, begin weaving in the replacement strands following the pattern documented in your reference photos. Use needle-nose pliers to guide the flexible rattan through the existing weave, maintaining consistent tension throughout to ensure a tight, secure repair.
Trimming and Tucking Excess Material
Once the weaving is complete, trim away excess material using sharp scissors, cutting at an angle similar to the original ends for a professional finish. Carefully tuck the trimmed ends of the replacement strands beneath other strands in the weave to secure them and create a seamless appearance. Allow sufficient time for any adhesive to dry completely before using the chair, typically 24 hours, to ensure the durability of your repair.
Fixing Common Rattan Chair Problems
To keep your rattan chair in optimal condition, it’s essential to address common issues like sagging seats and surface scratches promptly. Rattan furniture can develop various problems over time, but many of these can be effectively repaired with the right techniques.
Repairing a Sagging Seat
A sagging seat can be quite uncomfortable and unsightly. One reason for this issue is that the rattan is stretching over time. As you sit in the chair repeatedly, the fibres in the rattan are pulled and eventually start to lose their elasticity. To remedy this, you can apply moisture to help the fibres expand and tighten, restoring the seat’s firmness and shape.
For minor sagging, use a plant mister to lightly dampen the underside of the seat and then gently push the fibres back into place, allowing them to dry in the correct position. More severe sagging may require additional support structures, such as adding cross-braces beneath the seat or installing new support strands in a grid pattern.
| Severity of Sagging | Recommended Repair |
|---|---|
| Minor | Lightly dampen underside and adjust fibres |
| Moderate to Severe | Add cross-braces or new support strands |
Addressing Wobbly Legs and Structural Issues
Wobbly legs often result from loosened joints or cracked rattan at stress points. To address this, clean the joint areas thoroughly, apply wood glue to the connections, and clamp them firmly until completely dry, which typically takes 24 hours. For cracked legs, apply wood filler to the affected area after cleaning, allow it to dry completely, then sand smooth and finish to match the rest of the furniture.
“The key to successful rattan repair is patience and attention to detail. By addressing issues promptly, you can extend the life of your furniture.”
Fixing Surface Scratches and Marks
Surface scratches and marks can be addressed by gently sanding the area with fine-grit sandpaper, followed by applying a matching stain or paint to restore the appearance. For deeper gouges, fill with wood putty that matches your rattan’s colour, allow to dry completely, then sand smooth and apply a protective finish.
- Regular maintenance after repairs will extend the life of your rattan furniture.
- Periodic cleaning and conditioning are essential to maintain the appearance of your rattan chair.
By following these repair techniques and maintaining your rattan furniture regularly, you can enjoy your chair for years to come.
Finishing Touches and Protective Measures
After fixing the damaged areas of your rattan chair, applying protective measures is vital to ensure the longevity of the repair. The final stages of the repair process are crucial in maintaining the integrity and appearance of your rattan furniture.
Sanding for a Smooth Finish
Begin by carefully sanding any rough edges or uneven areas with fine-grit sandpaper, working in the direction of the rattan grain to avoid causing additional damage. Pay special attention to areas where new rattan strands meet existing ones, as these junctions often need extra smoothing to create a seamless transition. Sanding is a critical step that ensures a professional finish and prevents further damage.

Applying Protective Coatings
Once sanding is complete, thoroughly clean the chair to remove all dust and debris before applying any protective coatings or finishes. Applying a protective coating such as clear polyurethane or specialised rattan sealant will help shield the repaired areas from moisture, UV damage, and general wear. For outdoor rattan furniture, choose a marine-grade sealant that offers enhanced protection against the elements, applying at least two coats for maximum durability.
Colour Matching and Touch-Up Techniques
Colour matching is crucial for repairs that are visible – use wood stains, tinted varnishes, or specialised rattan dyes to blend repaired sections with the original material. Test any colouring products on an inconspicuous area first to ensure they match before applying to prominent sections of the chair. Consider the following table when selecting colouring products:
| Product Type | Application | Drying Time |
|---|---|---|
| Wood Stains | Use on visible repairs | 2-4 hours |
| Tinted Varnishes | Apply for a glossy finish | 4-6 hours |
| Rattan Dyes | Ideal for colour matching | 1-2 hours |
After applying any protective coatings or colouring products, allow them to dry completely according to the manufacturer’s instructions, typically within 24-48 hours depending on humidity levels. Finally, consider applying a final coat of furniture wax to enhance the natural sheen of the rattan and provide an additional layer of protection against everyday wear.
Maintenance Tips to Extend the Life of Your Repaired Rattan
To enjoy your rattan chair for years to come, adopting a routine maintenance schedule is vital. Proper upkeep not only preserves the appearance of your rattan furniture but also prevents the need for future repairs, saving you time and effort in the long run.
Regular Cleaning Practices
Establish a regular cleaning routine that includes dusting your rattan furniture weekly with a soft brush or vacuum with a brush attachment to prevent dirt buildup in the weave. For deeper cleaning, use a solution of mild soap and warm water applied with a soft cloth, being careful not to oversaturate the rattan, and allow it to dry completely afterward.
Humidity and Temperature Considerations
Be mindful of humidity and temperature considerations, as rattan is particularly susceptible to environmental conditions that can cause it to expand, contract, or warp. In dry environments, consider using a humidifier or occasionally misting your rattan furniture lightly to prevent it from becoming brittle and prone to breaking.
Preventing Future Damage
Prevent future damage by placing your rattan chair away from direct sunlight, which can fade and weaken the material over time. Use appropriately sized cushions to distribute weight evenly across the seat and reduce stress on the weave pattern, particularly for frequently used chairs. Consider applying a fresh coat of protective sealant annually to maintain the integrity of the rattan and protect your repair work for years to come.
Conclusion: Enjoying Your Restored Rattan Chair
With the steps outlined in this guide, you’re well-equipped to tackle rattan chair repairs. By following this comprehensive guide, you’ve not only restored your rattan furniture but also gained valuable DIY skills.
Your newly repaired chair is a testament to your patience and skill. The repair process has preserved a piece of furniture that may hold sentimental value or unique design characteristics. With proper maintenance, your rattan chair will continue to provide comfortable, stylish service for years to come.
Take pride in your restored rattan furniture, knowing that you’ve extended its lifespan through careful repair work. The sustainable nature of repairing rather than replacing furniture aligns with environmentally conscious living practices. Enjoy the satisfaction of sitting in your restored chair, knowing that your efforts have resulted in a beautiful, functional piece of furniture.