Are you aware of the critical role ridge tiles play in maintaining the integrity of your roof? These tiles cover the apex where the two planes of a pitched roof meet, providing protection against leaks, heat, and wind.
A loose ridge tile can compromise this protection, leading to potential water damage and other issues. Understanding how to identify and repair such problems is crucial for homeowners.
Key Takeaways
- Understand the importance of ridge tiles in your roof‘s protection system.
- Learn to identify when ridge tiles are loose or damaged.
- Discover the potential consequences of ignoring loose or damaged tiles.
- Explore traditional mortar methods and modern dry ridge systems for effective repairs.
- Emphasise the importance of safety precautions when working at height.
- Assess whether you can handle the repair yourself or need professional help.
Understanding Roof Ridge Tiles and Their Importance
Roof ridge tiles play a crucial role in completing your roof’s structure and protecting your home from various elements. The roof ridge is where the two planes of a pitched roof meet at the apex, and ridge tiles cover this horizontal line, providing protection from leaks as well as heat and wind.
What Are Ridge Tiles and Why Do They Matter?
Ridge tiles are specialised roofing components that sit at the apex where two roof slopes meet, creating a weatherproof seal at this vulnerable junction. They serve multiple critical functions: preventing water ingress, providing additional structural stability, and allowing for proper ventilation at the roof’s highest point. Without properly secured ridge tiles, your roof becomes susceptible to leaks, which can lead to extensive internal damage, timber rot, and even compromise the structural integrity of your home.
Common Types of Ridge Tiles
Ridge tiles come in two main varieties: half-round and angled. Half-round ridges are the traditional choice, often seen on older, historic buildings. In contrast, angled ridge tiles provide a more contemporary, edgy look, especially on slate roofs. The choice of ridge tile affects not only the functionality of your roof but also contributes significantly to the overall aesthetic look of your property. 
Ridge tiles are typically secured either through traditional mortar bedding or modern dry ridge systems that use mechanical fixings to comply with current building regulations. Understanding the type of ridge tile and its securing method is vital for maintaining your roof’s integrity.
Signs of Loose or Damaged Ridge Tiles
If you’re wondering whether your roof’s ridge tiles are secure, it’s essential to inspect them regularly for signs of damage or displacement. Regular inspections can help identify potential issues before they become major problems.
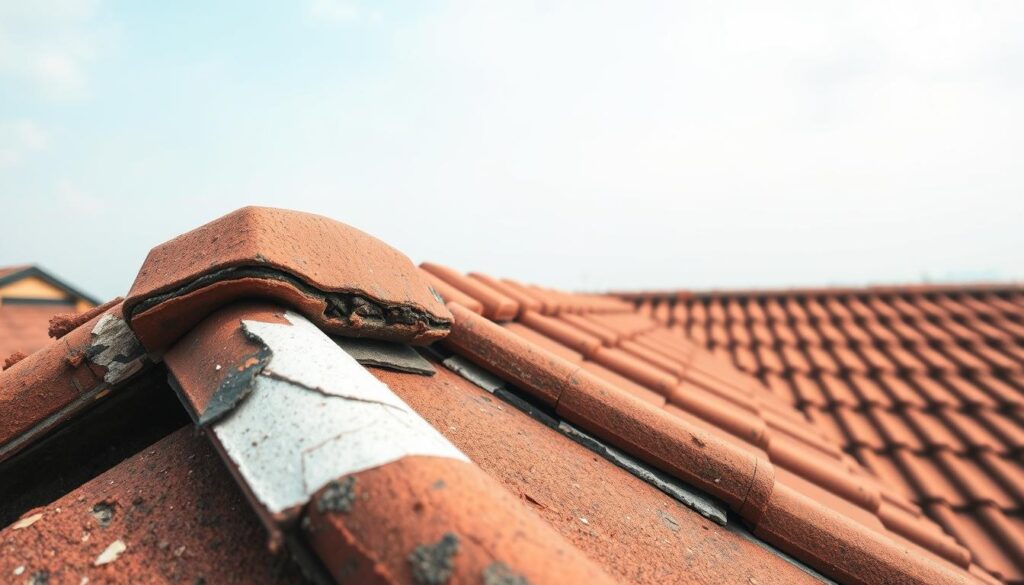
Visual Indicators to Look For
Visible signs of loose ridge tiles include slipped or misaligned tiles, cracked or crumbling mortar between tiles, and visible gaps along the ridge line. After severe weather events, inspect your roof from ground level using binoculars to check for any displaced ridge tiles or debris that may indicate damage.
Interior warning signs that may indicate loose or damaged ridge tiles include water stains on ceilings near the apex of the roof, damp patches in the loft space, or visible daylight when looking up at the ridge from inside the attic. These signs suggest that water is ingressing through the roof, potentially due to missing or damaged ridge tiles.
Potential Consequences of Ignoring the Problem
Ignoring loose or missing ridge tiles can lead to serious water ingress, which may damage roof timbers, ceiling joists, and insulation materials. Water penetration through damaged ridge tiles can cause mould growth, timber rot, and even compromise the structural integrity of your roof over time.
What begins as a simple loose tile can quickly escalate into a major repair project if left unaddressed, particularly after freeze-thaw cycles in winter months. Therefore, it’s crucial to address any issues with ridge tiles promptly to prevent further damage.
| Causes of Missing Ridge Tiles | Consequences of Ignoring the Issue |
|---|---|
| Severe weather conditions | Water ingress and damage to roof timbers |
| Mortar erosion | Mould growth and timber rot |
| Dislodged tiles leading to subsequent loosening | Compromised structural integrity of the roof |
As John Smith, a roofing expert, once said, “Regular maintenance is key to extending the life of your roof. Ignoring small issues can lead to significant problems down the line.” This emphasizes the importance of addressing loose or damaged ridge tiles in a timely manner.
Safety First: Preparing for Ridge Tile Repair
Before you start repairing your loose roof ridge tile, it’s crucial to prioritise safety measures. Working at heights on a pitched roof is extremely dangerous and requires proper safety equipment, including a secure ladder, scaffolding, safety harness, non-slip footwear, and protective headgear.
Essential Safety Equipment
To ensure your safety while repairing ridge tiles, you must have the right equipment. This includes a securely positioned ladder, professional scaffolding inspected by a competent person, a safety harness, and crawl boards or roof ladders to distribute your weight evenly across the roof surface. Never compromise on safety, even if it adds to the overall cost and time of the job.
Weather Considerations and Planning
It’s vital to plan your ridge tile repair during dry, calm weather with good visibility. Avoid working in wet, windy, or icy conditions as these significantly increase the risk of accidents and falls. Allow sufficient time to complete the job without rushing, and ensure someone knows you’re working on the roof and can check on you periodically or assist if needed.
- Working at height on a pitched roof is extremely dangerous and requires proper safety equipment.
- Never attempt ridge tile repairs in wet, windy, or icy conditions.
- Plan your repair work during dry, calm weather with good visibility.
- Use roof ladders or crawling boards to distribute your weight evenly.
- Ensure someone knows you’re working on the roof.
- Consider hiring professional scaffolding for extensive repairs.
- Assess the overall condition of your roof before beginning work.
By taking these precautions, you can minimise the risk of damage to your roof and ensure a safe repair process. Remember, safety should always be your top priority when working at heights.
Tools and Materials Needed for Ridge Tile Repair
Repairing a ridge tile requires the right equipment and materials to ensure a successful and long-lasting fix. To get started, you’ll need to gather the necessary tools and materials.
Basic Tools Required
The essential tools for ridge tile repair include a hammer, chisel, trowel, pointing tool, brush, bucket, spirit level, and safety equipment such as gloves and protective eyewear. For accessing the roof safely, you’ll need a sturdy ladder, roof ladder, and potentially scaffolding for more extensive repairs.
Materials Shopping List
You’ll need replacement ridge tiles that match your existing roof in style and approximate colour. For mortar bedding, you’ll require cement, sharp sand (in a 1:3 ratio of cement to sand), and clean water for mixing. If using a dry ridge system, you’ll need the appropriate kit, which typically includes batten straps, ridge unions, ventilation roll, and fixing screws.
How to Repair Loose Roof Ridge Tile: Mortar Method
The mortar method is a reliable way to repair loose roof ridge tiles, ensuring a watertight seal. This approach involves removing the damaged tile, preparing the surface, and applying new mortar to secure the tile in place.
Removing the Damaged Tile
Begin by carefully removing the damaged ridge tile using a hammer and chisel to break away the old mortar. Take care not to damage adjacent tiles or the underlying roof structure. Start from the opposite end of the roof from your ladder to ensure safety.
Preparing the Surface
Once the damaged tile is removed, thoroughly clean the area of all old mortar, debris, and dust. This ensures the new mortar will adhere properly to the surface.

Mixing and Applying the Mortar
Prepare a fresh batch of mortar using a 1:3 ratio of cement to sharp sand. Mix thoroughly until you achieve a workable consistency. Apply a generous bed of mortar along the ridge, approximately 25mm thick.
Securing the Ridge Tile in Place
Position the replacement ridge tile carefully onto the mortar bed, ensuring it aligns perfectly with adjacent tiles. Press the tile firmly into place and remove any excess mortar. Allow the mortar to cure properly, which can take up to 24 hours to reach 60% of its total compressive strength.
| Step | Description | Notes |
|---|---|---|
| 1 | Remove damaged tile | Use hammer and chisel |
| 2 | Clean the area | Remove old mortar and debris |
| 3 | Apply new mortar | 1:3 cement to sand ratio |
| 4 | Secure the tile | Press firmly into place |
Installing a Dry Ridge System: The Modern Alternative
Dry ridge systems have emerged as a modern and efficient way to secure ridge tiles, offering several advantages over traditional methods. Unlike traditional mortar bedding, dry ridge systems provide improved ventilation, compliance with current building regulations, and greater resistance to weather damage.
Benefits of Dry Ridge Systems
Dry ridge systems offer significant advantages, including improved ventilation and compliance with current building regulations. They use mechanical fixings that maintain their integrity regardless of temperature fluctuations and weather conditions, unlike mortar which can crack and deteriorate over time.
Step-by-Step Installation Process
The installation begins with securing a timber batten along the ridge line using metal brackets that attach to the rafters beneath. Next, roll out the ventilated ridge membrane along the length of the ridge, securing it to the battens. Ridge tiles are then secured using special union clamps or clips that mechanically fix them to the ridge batten. Throughout the installation, follow the manufacturer’s instructions precisely regarding spacing, fixing methods, and the number of mechanical fixings required per tile.
When to Call a Professional Roofer
While DIY repairs can be cost-effective, there are situations where hiring a professional roofer is the best course of action. A professional roofer has the necessary expertise and equipment to handle complex roofing jobs.
Signs the Job Is Too Complex
If your roof has multiple damaged ridge tiles, or if the underlying timber is compromised, it’s advisable to seek professional help. Additionally, if you’re uncomfortable working at heights or if your roof is particularly steep or has unusual features, it’s best to hire a professional roofer.
What to Expect from Professional Ridge Tile Repair
A professional ridge tile repair typically costs between £200-£300 in the UK, depending on accessibility, materials needed, and the extent of the damage. When hiring a professional, you can expect a thorough assessment of your entire roof, not just the ridge tiles. They will also have the proper safety equipment and access to high-quality materials.
Most professional ridge tile repairs can be completed in a single day, although more extensive damage may require additional time. A reputable roofer will provide a detailed quote before beginning work and offer a guarantee on both materials and workmanship.
Conclusion: Ensuring Long-Lasting Ridge Tile Repairs
Now that you’ve learned how to fix ridge tiles, you can ensure your roof remains secure and leak-free. Regular inspection of your roof ridge tiles, particularly after severe weather events, is crucial for identifying and addressing issues before they become serious problems.
Proper installation is key to the longevity and effectiveness of your repairs, whether you choose the traditional mortar method or a modern dry ridge system. Remember, building regulations now require mechanical fixing of ridge tiles in addition to or instead of mortar bedding.
By maintaining your ridge tiles, you not only prevent costly water damage but also extend the overall lifespan of your roof structure. If you’re unsure about tackling the repair yourself, consider investing in professional help to ensure the job is done correctly.
With the knowledge gained from this guide, you can make informed decisions about maintaining this critical component of your home’s protective envelope. Prioritise safety over cost or convenience when working on your roof, as no repair is worth risking personal injury.