Are unsightly bulges on your walls and ceilings ruining the aesthetic of your home? Bulging plasterboard seams can be a frustrating issue, but understanding the cause is the first step towards a solution.
Horizontal seams in stairways are particularly prone to problems as the drywall often crosses the rim joist between floors. When joists dry out or experience seasonal moisture changes, wood shrinkage or movement can cause drywall to crack or bulge.
Identifying and addressing the root cause of these issues is crucial for a lasting repair. This guide will walk you through the process of identifying, preparing for, and effectively repairing bulging plasterboard seams.
Key Takeaways
- Understand the underlying causes of bulging seams to ensure a lasting repair.
- Learn the necessary tools and materials needed for a professional-quality repair.
- Follow a step-by-step guide to achieve a seamless finish that blends with your existing wall surface.
- Discover how to prevent further deterioration of your plasterboard walls.
- Improve the aesthetic appearance of your home by properly repairing bulging seams.
Understanding Bulging Plasterboard Seams
Bulging plasterboard seams can be a frustrating issue for homeowners, often indicating underlying problems that need to be addressed. When you notice such bulges, it’s crucial to understand the causes to implement an effective repair.

Common Causes of Bulging Seams
Bulging plasterboard seams typically occur due to several common factors that affect the structural integrity of your walls over time. These include moisture infiltration, structural movement, and poor initial installation techniques.
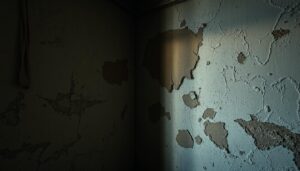
Moisture and Water Damage
Moisture is one of the primary culprits behind bulging seams. Water can weaken the adhesive properties of the joint compound, causing the paper tape to lose its bond with the plasterboard. This is often seen in areas prone to dampness or after water leaks.
Structural Movement and Expansion
Structural movement in your home, particularly where different building materials meet, can create stress on seams, leading to visible bulges. Seasonal changes cause expansion and contraction in building materials, which can be problematic in areas with extreme temperature fluctuations.
Assessing the Damage Severity
The severity of the damage can range from minor cosmetic issues to indications of more serious structural problems. Learning to assess the extent of the damage will help you determine whether a DIY repair is appropriate or if you need to consult a professional. Understanding the underlying causes of your specific bulging seam issue is crucial for implementing the most effective and lasting repair solution.
Tools and Materials Needed for Plasterboard Repair

When it comes to repairing bulging plasterboard seams, having the right tools and materials is crucial. A successful repair depends on using the correct equipment to achieve a seamless finish.
Essential Tools for the Job
For this repair job, you’ll need a utility knife for cutting and removing damaged tape, a putty knife or drywall knife in various widths for applying joint compound, and sandpaper or a sanding block for smoothing the finished surface. A drill with appropriate screwdriver bits is necessary if you need to secure loose plasterboard sections with additional drywall screws.
Other helpful tools include a sponge for wetting and removing old compound, a mixing container for preparing joint compound, and a dust mask to protect yourself during the sanding process.
Required Materials and Compounds
For materials, you’ll need joint compound (either pre-mixed or powder form), new paper or mesh joint tape, and primer and paint to match your existing wall finish. The type of joint compound you choose matters – setting-type compounds (like hot mud) are better for deeper repairs, while all-purpose compounds work well for finishing coats.
Consider investing in good quality joint compound and tape, as these materials directly impact the durability and appearance of your finished repair.
Preparing the Area for Repair
Proper preparation is key to a successful plasterboard seam repair. Before you begin the actual repair work, you need to prepare the area around the damaged drywall to ensure a smooth and efficient process.
Protecting Your Surroundings
Begin by clearing the area around the damaged wall and covering furniture and flooring with dust sheets to protect them from dust and compound splatters. This will prevent any additional damage and make the cleanup process easier.
Removing Paint and Existing Compound
Carefully scrape off the paint and mud as you can, being careful not to damage the wallboard itself. You can loosen up the mud by wetting it with a sponge. Keep wetting and scraping until you’re able to remove the paper tape. Use a utility knife to score around the edges of the bulging seam, being careful not to cut too deeply into the undamaged plasterboard surface.

Exposing and Examining the Damaged Seam
As you remove the old compound and tape, examine the exposed plasterboard edges to identify any additional damage that wasn’t initially visible. Look for signs of moisture damage, mould growth, or structural issues that might have caused the bulging in the first place.
| Preparation Step | Purpose |
|---|---|
| Clearing the area | Prevent additional damage and ease cleanup |
| Removing paint and compound | Expose the damaged seam for repair |
| Examining the damaged seam | Identify underlying issues causing the bulge |
Take time to thoroughly clean the exposed area, removing all dust and loose material to ensure the new compound will adhere properly to the surface. If you discover extensive damage or signs of persistent moisture problems, consider consulting a professional before proceeding with the repair.
Step-by-Step Process to Repair Bulging Plasterboard Seam
Repairing a bulging plasterboard seam requires a meticulous approach to restore the wall’s original smoothness. The repair process involves several key steps that, when followed correctly, result in a seamless finish.
Addressing Underlying Issues First
Before you start repairing the bulging seam, it’s essential to address any underlying issues that may have caused the problem. This could involve securing loose plasterboard or addressing any moisture issues that may be present. By doing so, you’ll ensure that the repair is long-lasting and effective.
Removing the Old Tape and Compound
The next step is to remove the old tape and compound from the damaged area. You can use a sponge to wet the area, making it easier to scrape off the old compound without damaging the plasterboard. Continue wetting and scraping until you’ve removed the paper tape completely.
Securing Loose Plasterboard with Screws
Once the old tape and compound are removed, examine the exposed seam carefully to identify any gaps or areas where the plasterboard has pulled away from the studs or joists. Use drywall screws to secure any loose sections of plasterboard, placing them about 2-3 inches away from the seam.
Applying New Joint Tape Properly
Apply a thin layer of joint compound to the clean seam using a putty knife, creating a bed for the new joint tape to adhere to. Press the new joint tape into the wet compound, centering it over the seam and using your knife to embed it fully.
Layering Joint Compound for a Smooth Finish
Allow the first layer to dry completely before applying a second coat of joint compound that extends 2-3 inches beyond the edges of the tape on each side. Each subsequent layer of compound should be wider than the previous one, feathering the edges to blend seamlessly with the surrounding wall surface. The final coat should be applied with a wide knife (10-12 inches) to create the smoothest possible finish.
- Start by completely removing the old tape and compound from the damaged area.
- Use drywall screws to secure any loose sections of plasterboard.
- Apply a thin layer of joint compound to the clean seam.
- Press new joint tape into the wet compound.
- Allow each layer to dry completely before applying the next coat.
By following these steps and using the right materials, you can effectively repair a bulging plasterboard seam and achieve a smooth, even finish.
Finishing and Surface Treatments
The final stages of repairing a bulging plasterboard seam involve meticulous finishing and surface treatments. To achieve a truly invisible repair, you must ensure that the treated area blends seamlessly with the surrounding wall surface.
Sanding Techniques for a Seamless Result
Begin sanding the dried compound using a fine-grit sandpaper (150-220 grit), working in circular motions to avoid creating flat spots or uneven areas. For better control around the edges of your repair, use a sanding sponge. Periodically check your progress by running your hand over the surface to feel for any remaining ridges or imperfections.
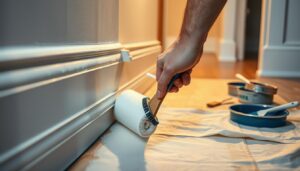
Priming the Repaired Area
Priming is essential as joint compound is more porous than the surrounding painted surface and will absorb paint differently. Use a high-quality primer designed for drywall repairs, applying it with a roller for larger areas and a brush for edges to match the texture of your existing wall.
Painting to Match Existing Wall Surface
When selecting paint for the final coating, ensure it precisely matches your existing wall colour and finish. Apply paint using the same technique as was used on the original wall – typically a roller for the main areas and a brush for edges and corners. For the most seamless result, consider painting the entire wall rather than just the repaired section.
To highlight any remaining imperfections, use a handheld light positioned at an angle to the wall. This will help you identify areas that need additional attention before applying the final coating. Allow each coat of paint to dry completely before assessing whether additional coats are needed for complete coverage.
Conclusion
The process of fixing bulging plasterboard seams involves more than just cosmetic repairs; it requires addressing the root causes of the issue. Successfully repairing these seams demands patience and attention to detail, but the results are well worth the effort for the improved appearance of your home.
Remember that maintenance is key to preventing minor issues from becoming major problems. Regularly inspecting your walls and ceiling for signs of damage can save you time and frustration in the long run. For persistent issues, consider alternative solutions like installing decorative chair rail moulding or adding an expansion joint.
By following the steps outlined in this guide, you’re now equipped to tackle bulging plasterboard seams confidently. The techniques learned can be applied to other common drywall issues, making this a valuable skill for any homeowner. Taking your time with each step of the repair process will ultimately lead to a lasting, invisible repair.