Are you tired of staring at unsightly bubbles on your wall , only to discover that the plaster beneath the paint is the culprit? Bubbling plaster can be a frustrating problem for homeowners, often resulting from underlying moisture or damp issues.
Understanding the root cause of this problem is crucial before attempting any repairs . Addressing the issue promptly can prevent more severe issues from arising, ensuring your wall surface remains flawless.
By identifying the source of the moisture and taking corrective action, you can successfully rectify the problem and achieve a professional-looking finish.
Key Takeaways
- Identify and address underlying moisture or damp issues to prevent Further damage.
- Prepare the surface properly before applying a new coat of paint .
- Use a suitable primer to ensure a long-lasting finish.
- Take corrective action to rectify the problem and achieve a professional-looking finish.
- Regularly inspect your wall to catch any potential issues early.
Understanding Bubbling Plaster: Causes and Types
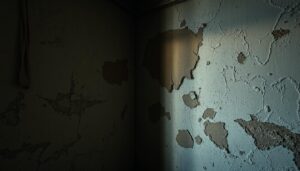
Bubbling plaster under paint is a common issue that can be both aesthetically displeasing and indicative of underlying problems. When you notice bubbles forming under the paint on your plaster walls, it’s essential to understand the causes and types of bubbling to address the issue effectively.
What Causes Plaster to Bubble Under Paint
There are two primary reasons why plaster bubbles under paint: moisture entrapment and solvent entrapment. Moisture entrapment occurs when water vapour becomes trapped between the paint and plaster layers, causing the paint to bubble as the moisture expands. Solvent entrapment happens when paint is applied in less-than-ideal conditions, trapping solvents that later attempt to escape, forming bubbles on the plaster wall surface.

Types of Bubbling Issues in Plaster Walls
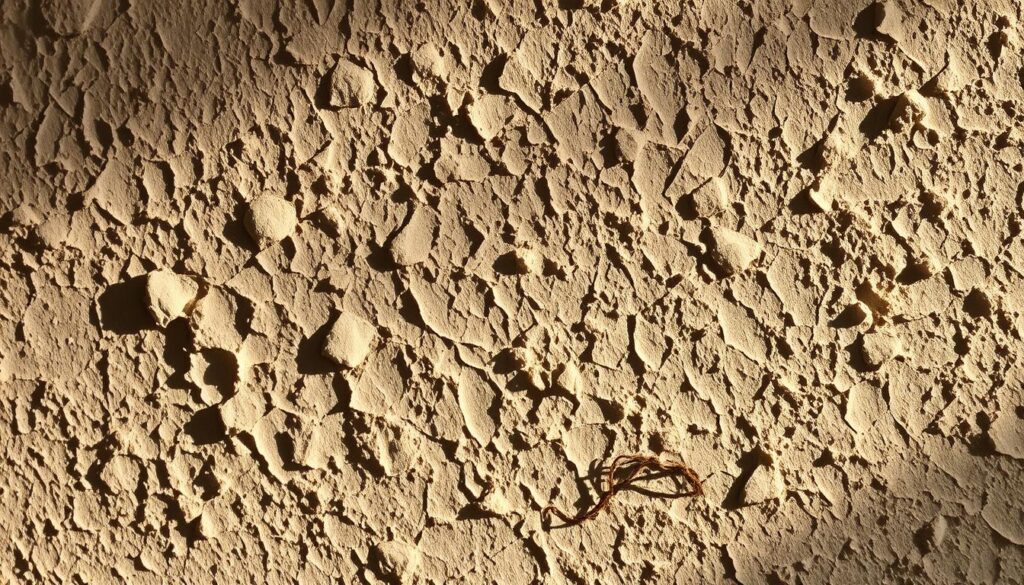
Bubbling plaster can manifest in different forms, each indicating a specific underlying issue. The main types include:
- Surface bubbling, which affects only the paint layer and is relatively easier to repair.
- Deep bubbling that penetrates the plaster itself, requiring more extensive repairs.
- Localised bubbling, often indicating a specific water source like a leaky pipe.
- Widespread bubbling, typically pointing to more systemic damp issues within the wall.
Understanding the type of bubbling affecting your walls is crucial for implementing the correct repair strategy and preventing future occurrences.
Identifying the Extent of Your Plaster Damage
To effectively repair bubbling plaster, you need to understand the full extent of the damage. This involves a thorough assessment to identify the root cause and the areas affected.
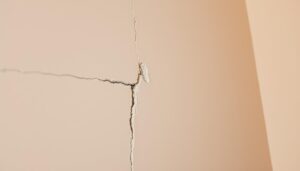
Visual Assessment of Bubbling Plaster
Begin by conducting a visual inspection of the affected plaster area. Look for signs of bubbling or blistering on the surface. Check if the damage is localized or if it extends to other parts of the wall. Note any cracks or areas where the plaster is separating from the wall.
Inspect the surrounding areas for any signs of water damage or damp patches, as these could indicate underlying moisture issues.
Testing for Underlying Moisture Problems
To determine if moisture is contributing to the bubbling plaster, you’ll need to conduct some tests. Use a moisture meter to measure the damp levels in your walls. Readings above 16% indicate problematic moisture that needs addressing.
- Check exterior walls for cracks or damaged pointing that might allow water to penetrate.
- Inspect plumbing fixtures near the damaged area for leaks or condensation problems.
- Consider hiring a professional surveyor for complex or extensive damp issues.
Essential Tools and Materials for Plaster Repair

Repairing plaster defects requires a thoughtful selection of tools and materials to achieve a durable and visually appealing result. To ensure a successful plaster repair, it’s crucial to be well-prepared with the right equipment and supplies.
Required Tools for the Job
To effectively repair plaster walls, you’ll need a set of basic tools. These include a putty knife for applying and smoothing plaster, a hammer for tapping and removing loose plaster, and a sanding block for achieving a smooth finish.
Recommended Materials and Products
Selecting the right materials is vital for a successful plaster repair. Consider the following:
- Choose a high-quality plaster specifically formulated for patching and repairs rather than all-purpose varieties for the best results.
- A good bonding agent or PVA primer is essential for ensuring new plaster adheres properly to the existing wall surface.
- Select a specialist damp-resistant primer if moisture has been an issue, as this provides an additional barrier against future problems.
- For small repairs, ready-mixed plaster compounds offer convenience, while larger jobs benefit from traditional powder plaster mixed on-site.
- Consider using a fibreglass mesh tape for reinforcing larger repair areas and preventing future cracking.
- A quality sealing primer designed specifically for new plaster is crucial before applying paint to ensure proper adhesion and a uniform finish.
- Choose breathable paint formulations for areas prone to dampness, as these allow moisture to escape rather than becoming trapped.
- For a long-term solution, invest in a good quality dehumidifier if the room has ongoing moisture issues that could affect your repair work.
How to Repair Bubbling Plaster Under Paint: Step-by-Step Guide
When dealing with bubbling plaster, it’s essential to follow a step-by-step guide to ensure a successful repair. The process of repairing bubbling plaster involves several key steps, starting with identifying the source of the moisture. Understanding the root cause of the problem is crucial to prevent further damage.

Preparing the Damaged Area
Before starting the repair, you need to prepare the damaged area. This involves clearing the surrounding space and protecting the floor and any remaining furniture with dust sheets or plastic covers. Ensuring the area is well-ventilated is also crucial for the repair process.
To prepare the area effectively, follow these steps:
- Clear the room of furniture or cover it with protective sheets.
- Cover the floor with a dust sheet or plastic cover.
- Ensure good ventilation to facilitate the drying process.
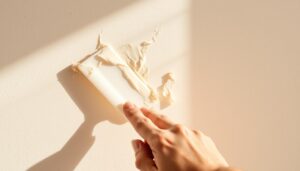
Removing Loose Plaster and Paint
The next step is to remove the loose plaster and paint. Use a scraper or a putty knife to gently scrape away the damaged plaster, taking care not to gouge the underlying surface. Remove any loose paint around the affected area to create a clean edge for the repair.
When removing loose plaster and paint, consider the following:
| Action | Purpose |
|---|---|
| Scrape away damaged plaster | Remove the source of the bubbling |
| Remove loose paint | Create a clean edge for repair |
Addressing Underlying Moisture Issues
Addressing the underlying moisture issue is critical to a successful repair. Identify and fix the source of the moisture, whether it’s a leaky pipe, poor ventilation, or rising damp. For areas affected by condensation, consider installing additional ventilation or using dehumidifiers.
“The key to a successful plaster repair is addressing the underlying cause of the dampness. Without this step, the repair is likely to fail.”
To address underlying moisture issues effectively:
- Identify and fix the source of moisture.
- Consider improving ventilation or using dehumidifiers.
- Apply a specialist damp-proofing treatment if necessary.
By following these steps and addressing the underlying moisture issues, you can ensure a successful repair of bubbling plaster under paint.
Applying New Plaster and Finishing Techniques
To achieve a seamless repair, it’s essential to understand the techniques involved in applying and finishing plaster. The process begins with preparing the damaged area, followed by the application of new plaster to recreate a smooth surface that blends with the surrounding wall.
Mixing and Applying Plaster Correctly
When mixing plaster, it’s crucial to follow the manufacturer’s instructions to achieve the right consistency. The plaster should be applied in layers, allowing the first coat to become firm but not completely dry before applying the second coat. This ensures the best adhesion between layers.
- Use a clean trowel for the final coat, applying with smooth, even strokes.
- Avoid over-working the plaster as this can weaken the finish.
Creating a Smooth Surface for Painting
Once the second coat has begun to set, use a damp sponge to smooth out any trowel marks or imperfections. For a perfectly smooth surface, wait until the plaster is almost dry but still slightly damp, then use a clean trowel with a light misting of water to polish the surface.
- Allow the new plaster to dry completely before sanding or painting.
- Lightly sand any remaining imperfections with fine-grit sandpaper, and wipe the area with a slightly damp cloth to remove any dust.
By following these steps, you can achieve a professional-looking finish that blends seamlessly with the surrounding wall, ready for painting.
Priming and Painting the Repaired Area
After successfully repairing the damaged plaster, it’s essential to prime and paint the repaired area to achieve a seamless finish. A primer is a crucial step in this process as it ensures that the paint adheres well to the plaster and doesn’t bubble or flake off.
Choosing the Right Primer for Plaster Walls
When selecting a primer for your plaster walls, consider a product that is suitable for plaster surfaces. Look for a primer that is water-based or solvent-based, depending on your specific needs and the type of paint you plan to use.
Painting Techniques for a Seamless Finish
To achieve a seamless finish, paint the repaired area with the same type of paint as the surrounding wall. Apply paint in thin, even coats, allowing the first coat to dry completely before applying a second coat. Use a roller with the appropriate nap length for textured walls, and feather the edges to create an invisible transition.
Conclusion: Preventing Future Plaster Bubbling Problems
Proper maintenance is essential for preventing the occurrence of bubbling plaster under paint. To keep your plaster walls in good condition, it’s vital to address any signs of damp or water damage immediately. Improving ventilation throughout your home, especially in high-moisture areas like bathrooms and kitchens, can significantly reduce the likelihood of plaster bubbling due to condensation.
Consider installing extractor fans or dehumidifiers in areas prone to high moisture content to maintain optimal humidity levels. When redecorating, applying a coat of primer correctly creates a crucial barrier between plaster and paint, helping to prevent future bubbling issues. Regular building surveys, particularly after extreme weather, can help identify and address any exterior masonry problems that could lead to water ingress and plaster damage.
Ensuring your property’s damp-proof course is functioning correctly and addressing the underlying reason for any damp problems are also crucial steps. Using breathable paints and plasters in older properties and keeping gutters and downpipes clear can further protect your plaster walls. By following these tips, you can prevent future plaster bubbling problems and save on costly repairs.