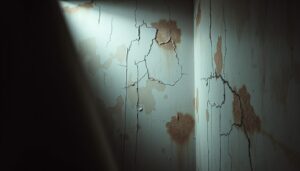
Are unsightly cracks and loose plaster on your walls a cause for concern? If you’re dealing with damaged plaster, you’re not alone. Many homeowners, especially those with older properties, face the issue of blown plaster, which can be both aesthetically displeasing and potentially damaging to the structure of your home.
Before you call in a professional, it’s worth understanding that plaster repair can be a manageable DIY task with the right guidance. This comprehensive guide will walk you through the step-by-step process of identifying problem areas, preparing the surface, and achieving a smooth finish that’s ready for decorating.
Key Takeaways
- Understand the causes of blown plaster to prevent future damage.
- Learn how to assess the condition of your wall before starting the repair.
- Follow a step-by-step guide to repair damaged plaster effectively.
- Discover the right materials and techniques for a seamless finish.
- Save time and money by tackling the repair as a DIY project.
Understanding Blown Plaster and Assessing the Damage
To repair blown plaster effectively, you need to understand what causes it and assess the damage accurately. Blown plaster typically occurs when the adhesion between the plaster and the underlying wall structure fails, causing sections to become loose or detached.

What Causes Plaster to Blow
Common causes of blown plaster include moisture penetration, structural movement, and age-related deterioration. Poor original application and temperature fluctuations can also contribute to the problem. Understanding these causes is essential to preventing future occurrences.
How to Identify Loose or Damaged Plaster
Identifying damaged plaster involves a visual inspection for cracks, bulges, or flaking, as well as tapping the wall surface to listen for hollow sounds. Testing the surrounding areas by tapping with your knuckles helps identify the full extent of the damage.
When to Call a Professional
If you discover extensive damage, signs of structural issues, or evidence of persistent moisture problems, it’s crucial to seek professional help. A professional can assess the situation and provide the necessary repairs to ensure the wall is structurally sound.
Essential Tools and Materials for Plaster Repair
A successful plaster repair requires careful preparation, including the right tools and materials. To achieve a professional finish, it’s crucial to understand what you’ll need before starting the project.
Required Tools for the Job
Basic tools required include a hawk for holding plaster, plastering trowels in different sizes, a bucket for mixing, a mixing paddle or whisk, a utility knife, sandpaper, a straight edge or derby for levelling, and a sponge for finishing.
Types of Plaster Products to Use
Understanding the differences between plaster types is crucial. Bonding plaster is ideal for areas where the original plaster remains partially intact, while hardwall plaster is better suited for exposed brickwork due to its ability to bond with high-suction surfaces.
Bonding Plaster vs Hardwall Plaster
For this repair, we’ll be using British Gypsum Bonding, which is a backing plaster ideal for medium to low suction backgrounds. On the other hand, if you have areas where the plaster has come off down to the bricks, you’ll want to use British Gypsum Hardwall instead.
Ready-Mixed Options
Ready-mixed plaster products offer convenience for smaller repairs but may not be cost-effective or suitable for larger areas compared to dry plaster that you mix yourself.
Safety Equipment
Safety equipment is non-negotiable when working with plaster. Dust masks protect your lungs from fine particles, safety goggles shield your eyes, and gloves prevent skin irritation from the alkaline properties of plaster.
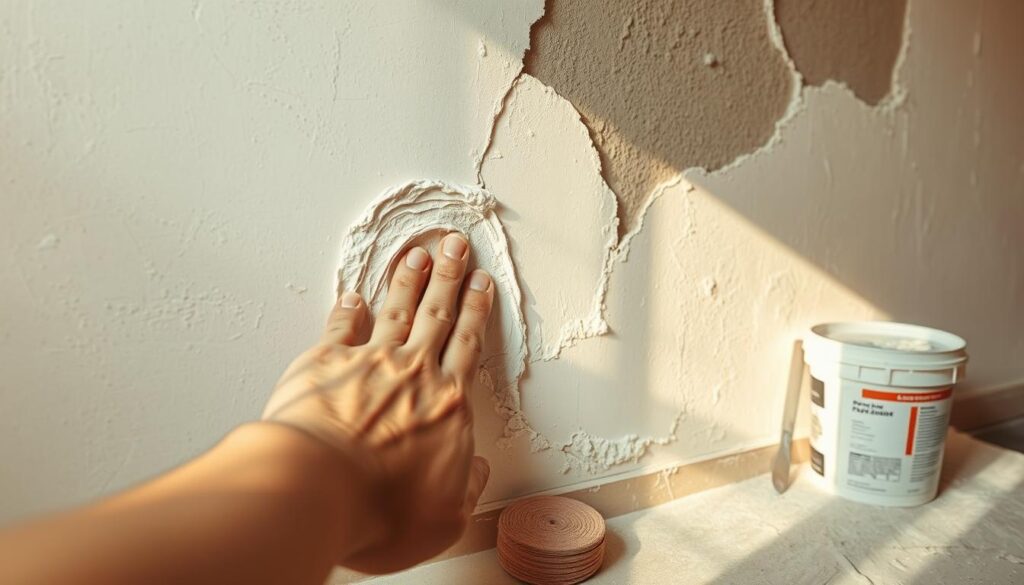
Step-by-Step Guide to Repair Blown Plaster Patches
The process of repairing blown plaster involves several key steps, from preparing the damaged area to applying the finishing coat. To achieve a professional-looking finish, it’s essential to follow these steps methodically.
Preparing the Damaged Area
Before applying any new plaster, the damaged area must be properly prepared. This involves removing loose plaster and cleaning the surface.
Removing Loose Plaster
Using a bolster chisel and club hammer, carefully remove all loose and damaged plaster. Ensure you create clean, squared-off edges around the repair area for better adhesion of new plaster. For larger holes in plasterboard walls, cut a replacement piece slightly smaller than the hole and secure it with adhesive or screws, making sure it sits slightly recessed from the wall surface.
Cleaning the Surface
Thoroughly clean the exposed surface, removing all dust and debris. Any remaining particles can prevent proper bonding of the new plaster to the wall substrate. For repairs on brickwork, apply a PVA bonding agent to control suction, except when using Hardwall plaster, which requires the natural suction of the bricks.

Applying the Base Coat
Apply a tight coat of bonding to the damaged areas, ensuring a thin, even layer. Use a straight edge or derby to smooth the surface, working both horizontally and vertically to ensure the repaired area will be flush with the surrounding wall.
Mixing the Plaster Correctly
When mixing plaster, follow the manufacturer’s instructions carefully to achieve the correct consistency. Too wet, and it will sag; too dry, and it will be difficult to work with and may not bond properly. For more information on mixing plaster, you can refer to this guide.
Application Techniques
Apply the base coat (bonding or hardwall plaster) in a tight, thin layer, pressing firmly to ensure good adhesion to the wall surface. Build up to the required thickness in layers if necessary.
Reinforcing Cracks with Scrim Tape
For areas with cracks, reinforce with scrim tape or mesh by embedding it into a slightly wetter mix of plaster. Work in small sections to prevent the plaster from drying too quickly before the reinforcement is properly set. Smooth it out with your straight edge again, making sure the mesh is fully embedded.
Applying the Finishing Coat
Mix the required amount of finishing plaster and apply it using a hawk and float. Hold the float at an angle that’s nearly flush with the wall but not quite, and apply consistent pressure. Polish the plaster by lightly spraying water and making final passes with the trowel to achieve a smooth finish.
Getting a Smooth Finish
Achieve a smooth finish by holding the trowel at the correct angle and applying consistent pressure. Common mistakes to avoid include mixing too much plaster at once, applying too thick a layer in one go, and not allowing sufficient drying time between coats.
Common Mistakes to Avoid
- Mixing too much plaster at once, which can cause it to dry out quickly.
- Applying too thick a layer in one go, which can lead to cracking.
- Not allowing sufficient drying time between coats, which can compromise the integrity of the repair.
By following these steps and avoiding common mistakes, you can achieve a professional-looking finish when repairing blown plaster patches.
Aftercare and Finishing Touches
Ensuring your plaster repair lasts begins with proper aftercare and attention to detail after the repair is complete. To achieve a professional finish, it’s crucial to allow the plaster to dry naturally, avoiding the use of heaters or fans that could cause it to dry too quickly.
Generally, you should allow at least 3-7 days for the plaster to dry completely, depending on the thickness of the application, room temperature, and humidity levels. Once dry, lightly sand the surface with fine-grade sandpaper to remove any minor imperfections or trowel marks. For more information on plastering techniques, you can visit This Old House for expert guidance.
Before painting or wallpapering, apply a plaster sealer or primer specifically designed for new plaster to create a barrier that prevents uneven absorption. For painted finishes, consider using a mist coat as your first layer to help seal the plaster. When painting, use a roller with a medium pile for the best coverage, working methodically across the wall in sections.
For areas subject to moisture, such as bathrooms or kitchens, consider using moisture-resistant paint or adding a waterproof additive to your plaster mix. By following these steps, you can ensure a long-lasting and professional finish for your plaster repair.