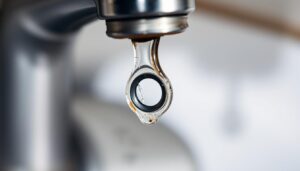
Are you tired of dealing with a leaking gate valve that’s wasting water and increasing your utility bills? A dripping gate valve can be a frustrating issue, but fortunately, it’s a problem you can resolve yourself with the right guidance.
Gate valves are crucial components in residential and commercial plumbing systems, designed to completely stop or allow fluid flow through a pipeline. However, when the packing material deteriorates, it can lead to valve leakage, disrupting the system’s efficiency and performance.
Learning to repack a gate valve yourself can save you the cost of calling a professional plumber and give you valuable DIY skills for future plumbing maintenance. This comprehensive guide will walk you through the entire process, from understanding why valves leak to testing your repair work.
Key Takeaways
- Understand the causes of a leaking gate valve and how to address them.
- Learn the step-by-step process of repacking a gate valve.
- Discover the importance of proper maintenance for gate valves.
- Gain valuable DIY skills for future plumbing maintenance.
- Save money by avoiding the cost of calling a professional plumber.
Understanding Gate Valves and Why They Leak
Understanding the operation and potential leaks of gate valves is essential for maintaining system integrity. Gate valves are a crucial component in many industrial and plumbing systems, controlling the flow of fluids. However, when they leak, it can lead to inefficiencies, safety hazards, and environmental issues.
What Is a Gate Valve?
A gate valve is a type of valve that uses a gate-like mechanism to control the flow of fluid through a pipe. It is designed to be fully open or fully closed, making it an effective shut-off valve. The gate valve’s simplicity and reliability make it a popular choice for various applications.
Components of a Gate Valve
The main components of a gate valve include the body, bonnet, gate, stem, and seats. The body and bonnet form the outer casing, while the gate and stem work together to control the flow. The seats provide a sealing surface for the gate when it is in the closed position. Damage to any of these components can lead to a leaking gate valve.

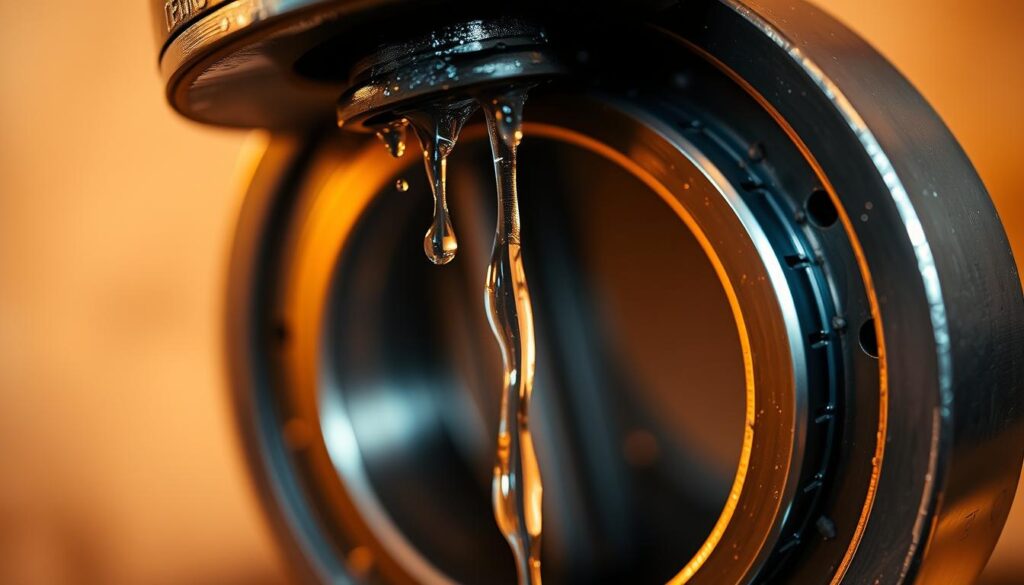
Signs of a Leaking Gate Valve
Identifying a leaking gate valve is crucial for preventing further damage. Some common signs include:
- Visible moisture or water droplets around the valve stem or bonnet.
- Water stains or mineral deposits on the valve body or surrounding pipes.
- Reduced water pressure downstream of the valve.
- Unusual sounds such as hissing or whistling from the valve.
- Increased water bills without a change in usage patterns.
- Corrosion or rust on the valve exterior.
These signs indicate that the gate valve is leaking and needs attention. A leaking gate valve can lead to fugitive emissions, where the process fluid leaks into the atmosphere, or internal leakage within the piping system.
| Type of Leakage | Description | Impact |
|---|---|---|
| Fugitive Emissions | Process fluid leaks into the atmosphere. | Environmental and safety hazards. |
| Internal Leakage | Leakage remains within the piping system. | Inefficiencies and potential damage to the system. |
By understanding the signs and types of leakage, you can take prompt action to address the issue and prevent further damage to your gate valve and the overall system.
Common Causes of Gate Valve Leakage
To address gate valve leaks, it’s essential to know their common causes. Gate valve leakage can lead to significant issues, including water waste and damage to surrounding structures. Understanding the root causes is crucial for effective maintenance and repair.
Corrosion and Material Deterioration
Corrosion and material deterioration are significant factors in gate valve leakage. Over time, the materials used in the valve can degrade due to exposure to various environmental factors, leading to leaks. Regular inspection can help identify potential issues before they become major problems.
Worn Valve Components
Worn-out components within the gate valve can also cause leaks. As parts wear down, the valve’s ability to seal properly is compromised. Replacing worn components can often resolve leakage issues.
Stem Packing Failure
Stem packing failure is another common cause of gate valve leakage. The stem packing is responsible for sealing the valve stem, and when it fails, leaks can occur. Inspecting and replacing the stem packing as needed can prevent such leaks.
Improper Installation or Valve Size
Using a valve that’s improperly sized for the application or incorrect installation techniques can lead to leaks. For instance, if the valve size is not appropriate for the pipe it’s connected to, or if the design is subpar, it can result in excessive pressure on internal components, leading to premature failure. Ensuring the correct valve size and proper installation is vital to prevent leaks.
Additionally, factors such as incorrect installation techniques, like over-tightening connections or misalignment with the pipe, can create stress points that eventually lead to leaks. Using the wrong valve size or a wrong valve for the specific application can also lead to leakage issues.
Tools and Materials Needed to Repack a Dripping Gate Valve
To successfully repack a dripping gate valve, you’ll need to have the right equipment and supplies on hand. This will ensure that the job is done efficiently and effectively.
Essential Tools for the Job
You’ll need a set of basic tools to start the repacking process. These include an adjustable wrench or spanner, a screwdriver (usually flathead), and possibly a valve stem removal tool, depending on your valve type.

Packing Materials and Replacement Parts
When it comes to packing materials, you’ll need to select the right type and size for your gate valve. Options include graphite string, PTFE (Teflon) packing, or pre-formed packing rings. It’s crucial to measure the stem diameter and packing area depth to ensure a proper fit.
- Valve stem packing material – available in various forms including graphite string, PTFE (Teflon) packing, or pre-formed packing rings.
- Plumber’s grease or pipe joint compound – helps create a better seal and makes future maintenance easier.
- Replacement washers or O-rings – may be needed if the existing ones are damaged or deteriorated.
Graphite packing is often preferred for hot water applications, while PTFE packing works well for cold water systems. Consider purchasing slightly more packing material than calculated to account for mistakes or future maintenance needs.

Step-by-Step Process to Repack a Dripping Gate Valve
Repacking a leaky gate valve is a straightforward task when done correctly. To achieve this, you need to follow a series of steps that ensure the valve is properly sealed and functions as expected.
Preparation and Safety Measures
Before starting the repacking process, it’s essential to take necessary safety precautions. This includes shutting off the water supply to the valve and draining the system.
Shutting Off Water Supply
Locate the main shut-off valve and turn it clockwise to shut off the water supply. This step is crucial to prevent water from flowing into the valve you’re about to repair.
Draining the System
Open the drain valve or faucet to drain the water from the system. This will reduce pressure and make it safer to work on the gate valve.
Disassembling the Gate Valve
To access the packing material, you need to disassemble the gate valve. Start by removing the handle and bonnet.
Removing the Handle and Bonnet
Unscrew the handle from the stem and then remove the bonnet that holds the stem in place. Be careful not to damage the threads or other components.
Accessing the Packing Nut and Gland
Once the bonnet is removed, you can access the packing nut and gland. Use a wrench to loosen the packing nut, taking care not to strip the threads.
Removing Old Packing Material
Carefully remove the old packing material from the stuffing box. You can use a packing removal tool or a small screwdriver to gently pull out the old packing.

Installing New Packing Material
To install new packing material, you can refer to the fitting instructions for gland packing for detailed guidance.
Proper Packing Technique
Wrap the new packing material around the stem, ensuring it’s evenly distributed and not twisted. Make sure to use the correct type of packing material suitable for your valve.
Tightening the Packing Nut
Tighten the packing nut securely, but avoid over-tightening, which can damage the stem or gland. The goal is to achieve a snug fit that prevents leaks.
Reassembling the Valve
Reassemble the gate valve in the reverse order that it was disassembled. Ensure all parts are clean and free of debris.
| Step | Description |
|---|---|
| 1 | Place the gate in the correct position in the valve’s body. |
| 2 | Tighten the bonnet until it is secure. |
| 3 | Turn the handle to test the valve’s functionality. |
After reassembly, test the valve to ensure it’s working correctly and not leaking. If everything is in order, reattach the valve to the pipeline.
- Careful reassembly of the valve components in the correct order and orientation is essential for proper function.
- Clean all parts thoroughly before reassembly to remove any debris that could affect the valve’s operation.
- Apply a small amount of appropriate lubricant to threads and moving parts to ensure smooth operation and prevent future corrosion.
Testing and Troubleshooting After Repacking
To guarantee the effectiveness of the repacking process, a comprehensive test of the gate valve is necessary. This step is crucial in ensuring that the valve operates smoothly and that there are no leaks.
Checking for Leaks
After repacking, the first step is to check the gate valve for any signs of leakage. This involves turning the valve on and off several times to ensure that it operates correctly and that the packing is properly seated. You should inspect the valve stem and body for any signs of moisture or dripping.
Common Issues After Repacking
Sometimes, despite proper repacking, issues can persist. Common problems include continued leakage, difficulty in turning the valve, or signs of wear on the valve stem. If you experience any of these issues, it may indicate a more serious problem with the gate valve that requires further investigation.
When to Consider Valve Replacement
If multiple attempts at repacking fail to stop the leakage, or if you notice significant corrosion or erosion of the valve body, it may be time to consider replacing the gate valve. Upgrading to a ball valve could be a viable option, as they typically offer better sealing and are more durable.
In some cases, valves that are older than 15-20 years may be better candidates for replacement rather than repair, especially in critical applications. You should also consider replacing the valve if you experience persistent difficulty in operating it, as this could indicate internal damage.
Conclusion
With the right tools and a bit of know-how, you can easily repack a dripping gate valve and restore your plumbing system to optimal function. By doing so, you’ll not only save money on plumbing repairs but also extend the life of your gate valve. Regular maintenance, including periodic inspection and repacking when necessary, is crucial for preventing unexpected failures and water damage.
Moreover, the skills you’ve acquired through this repair process can be applied to other valve types and plumbing maintenance tasks around your home. Understanding when to repair versus replace a valve ensures you make cost-effective decisions about your plumbing system maintenance. Proper valve maintenance also contributes to environmental compliance by reducing fugitive emissions and unnecessary resource consumption.
By adopting these practices, you’ll be able to maintain your gate valves effectively, minimizing the risk of valve leakage and ensuring the reliable operation of your plumbing system.