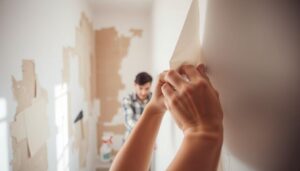
Removing wallpaper can be a satisfying home improvement project, but dealing with the leftover adhesive can be a challenge.
When you strip away the wallpaper, you’re often left with a sticky layer of glue on your walls. If not properly addressed, this residue can cause new paint or wallpaper to look uneven or peel off.
Don’t worry, we’ve got you covered. This comprehensive guide will walk you through effective techniques for removing stubborn glue from your walls. You’ll learn about simple homemade solutions and commercial products to achieve clean, smooth surfaces.
Key Takeaways
- Understand the importance of removing wallpaper adhesive residue for a smooth finish.
- Learn various techniques for removing stubborn glue.
- Discover homemade solutions and commercial products for effective removal.
- Prevent future wall damage and ensure a professional-looking finish.
- Achieve clean, smooth walls ready for painting or new wallpaper.
Why Removing Wallpaper Adhesive is Essential
Leaving wallpaper adhesive on your walls can lead to a host of problems when you decide to paint or re-wallpaper. The residue can affect the overall appearance and durability of your renovation efforts.
The Problems with Painting Over Adhesive
Painting over old wallpaper glue can create an uneven surface, leading to a poor finish. The adhesive can also interfere with the paint’s adhesion to the wall, causing it to peel prematurely.
- The old glue can cause paint to bubble and flake off.
- It can also lead to an uneven paint job, affecting the overall aesthetic.
| Issue | Effect on Painting |
|---|---|
| Uneven Surface | Poor Finish |
| Adhesive Interference | Premature Peeling |
How Residue Affects New Wallpaper Installation
Similarly, installing new wallpaper over old adhesive residue can compromise your renovation efforts. The old glue creates an uneven surface that can show through the new wallpaper, especially with thinner, modern wallcoverings.
- The old adhesive can prevent proper adhesion of the new wallpaper to the walls.
- It can also lead to bubbles, seam separation, and premature peeling of the new wallpaper.

Removing old wallpaper glue is essential to ensure a smooth surface for new finishes, whether you’re painting or installing new wallpaper. This step is crucial for a successful renovation.
Preparing for Wallpaper Adhesive Removal
To remove wallpaper adhesive effectively, you need to be well-prepared with the right tools and a protected workspace. This preparation is crucial for a smooth and efficient removal process.
Tools and Materials You’ll Need
Gathering the necessary tools and materials is the first step in preparing for wallpaper adhesive removal. You’ll need hot water, a sponge or cloth, and possibly a wallpaper adhesive remover or a homemade solution like fabric softener or a mixture of soap and vinegar.

Protecting Your Space
Protecting your room and furniture from damage is essential during the removal process. Start by moving as much furniture as possible out of the room or to the centre of the room and covering it with plastic sheeting. Cover your floors or at least the work area with plastic drop cloths or tarps, securing them with painter’s tape.
- Properly protecting your space before removing wallpaper glue will prevent damage and make cleanup much easier.
- Remove all furniture from the room if possible, or move items to the centre and cover completely with plastic sheeting.
- Cover flooring with plastic drop cloths or tarps, securing them with painter’s tape to prevent slipping and water damage.
- Protect all electrical outlets, switches, and fixtures by covering them with painter’s tape or plastic to prevent water damage and electrical hazards.
- Turn off electricity to the room at the circuit breaker for maximum safety, especially when working with water-based solutions.
- Ensure adequate ventilation by opening windows or using fans, as some adhesive removal methods can produce strong odours.
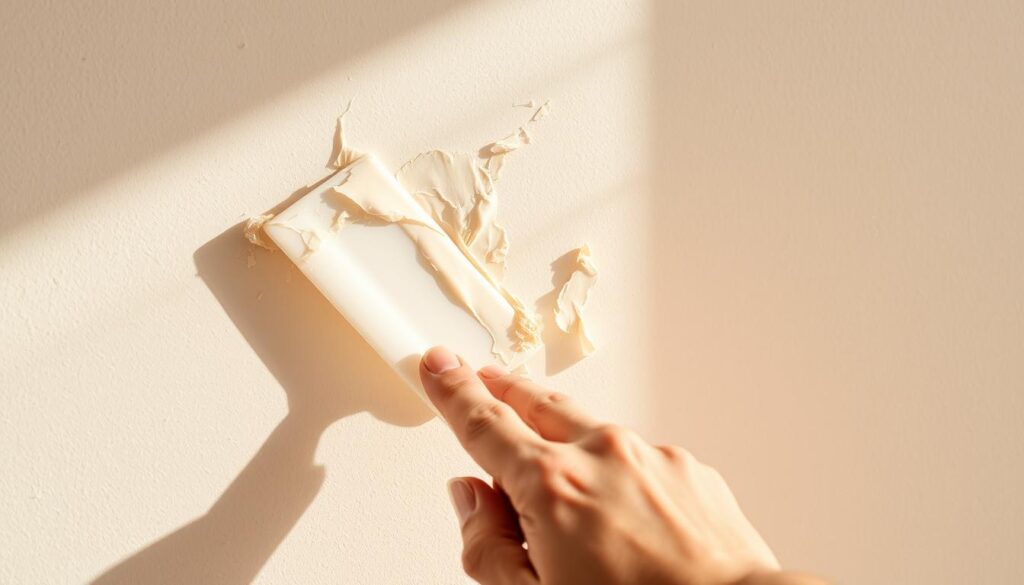
How to Remove Wallpaper Adhesive Residue
Removing wallpaper adhesive residue is a straightforward process if you have the right tools and follow the correct steps. You can choose from various methods, depending on the type of adhesive and the surface it’s on.
The Hot Water, Soap and Vinegar Method
One effective way to remove wallpaper adhesive is by using a mixture of hot water, soap, and vinegar. Mix a solution of warm water and a small amount of dish soap. Apply this solution to the adhesive using a sponge, allowing it to soak into the residue. The soap helps to break down the adhesive, making it easier to remove. After soaking, use a scraper or sponge to gently remove the loosened adhesive. For particularly stubborn areas, adding vinegar to the solution can enhance its effectiveness. The acid in the vinegar helps to dissolve the adhesive, making it easier to remove.
The Fabric Softener Technique
Another method for removing wallpaper adhesive involves using fabric softener. Mix fabric softener with warm water, and apply this solution to the adhesive. The ingredients in the fabric softener help to break down the adhesive, making it easier to scrape off. This method is gentle on the wall and can be effective for removing residue.
Commercial Wallpaper Adhesive Removers
For particularly difficult glue, you may need to use a commercial wallpaper adhesive remover. These products are specifically designed to break down and remove stubborn adhesive residue. When using a commercial remover, always follow the manufacturer’s instructions for application, dwell time, and any necessary safety precautions.

Commercial wallpaper adhesive removers provide a powerful option for aged or stubborn wallpaper glue. They are formulated with enzymes and solvents that quickly break down the adhesive. While more expensive than DIY solutions, commercial removers can save significant time and effort. After using these products, thoroughly rinse the walls with clean water to remove any chemical residue before painting or applying new wallpaper.
Tackling Stubborn Wallpaper Glue
Stubborn wallpaper adhesive can be particularly tricky to remove without the right approach. For those tough spots, you’ll need effective techniques and the right tools to get the job done.
Sanding Method for Persistent Residue
For particularly stubborn residue, using sandpaper can be an effective method. You can use a manual sanding block or an electric sander, depending on the size of the area you’re dealing with. Make sure to start with a coarse grit sandpaper and work your way down to finer grits to avoid damaging the wall.
Using Baking Soda Paste for Tough Spots
Another effective method for removing stubborn wallpaper glue is by using a baking soda paste. To create this paste, mix baking soda with just enough water to form a thick, spreadable consistency. Apply the paste directly to the tough spots of glue residue, pressing it firmly against the wall and letting it sit for 15-20 minutes. The alkaline properties of baking soda help break down the adhesive bonds, making it easier to remove the glue.
- For particularly stubborn spots of wallpaper adhesive, a concentrated baking soda paste can provide the extra cleaning power needed.
- After the paste has had time to work, use a putty knife to gently scrape away both the paste and the loosened adhesive residue.
- This method is particularly effective for small, concentrated areas of tough glue rather than entire walls, as it requires more effort to apply and remove.
For more information on removing wallpaper, you can visit This Old House for comprehensive guides and tutorials.
Special Considerations for Different Wall Types
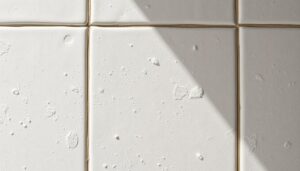
Different wall types require unique approaches to safely and effectively remove wallpaper adhesive residue. The technique that works for one type of wall may not be suitable for another, making it crucial to identify your wall type before starting the removal process.
Removing Adhesive from Drywall Safely
When dealing with drywall, it’s essential to be cautious to avoid damaging the surface. Drywall is more susceptible to water damage than other wall types, so you should use minimal moisture when removing wallpaper glue. Dampen the adhesive with a mixture of water and a mild detergent, then gently scrape it off with a putty knife or a specialized removal tool. Be careful not to gouge the drywall as you remove the adhesive.

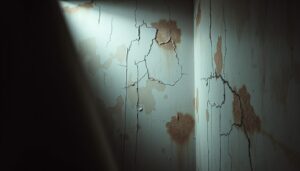
Techniques for Plaster Walls
Plaster walls are more durable and can withstand more aggressive removal techniques compared to drywall. When removing adhesive from plaster walls, you can use more liberal amounts of water or removal solution. It’s advisable to work in small sections to prevent the area from drying out before you’ve had a chance to scrape off the glue.
- Use a stiff-bristled brush to scrub away the adhesive, especially in textured areas where glue tends to accumulate.
- Inspect the wall for any cracks or weak spots before applying too much pressure or moisture.
- Allow ample time for the wall to dry completely before painting or applying new wallpaper, as plaster retains moisture longer than other materials.
By understanding the specific needs of your wall type, you can effectively remove wallpaper glue without causing damage, ensuring a smooth surface for your next decorating project.
Finishing Touches and Wall Preparation
Having successfully removed thewallpaper adhesive, the final steps will ensure a professional-looking result. To achieve this, it’s essential to inspect yourwallsthoroughly for any remaining traces ofglue. You can do this by running your hand over the surface; any sticky or slimy feeling indicates that there’s still work to be done.
To check for remaining adhesive, you can also use a flashlight to look for a dark sheen on the wet surface or apply a gel stripper to the affected areas. If you find any remaining glue, repeat the cleaning process until your walls are completely clean.
Once all adhesive is removed, make sure to clean your walls of any residual removal solutions and allow them to dry thoroughly. This may take at least 24-48 hours, depending on the humidity levels. It’s also crucial to repair any imperfections revealed during the removal process before applying new finishes.
By taking the time to properly prepare your walls after removing wallpaper, you’ll ensure the best possible results for your next decorating project. The satisfaction of completing this challenging job properly will be evident in the professional quality of your newly painted or papered walls.