Are you struggling with loose or damaged dovetail joints in your antique furniture?
Dovetail joints are renowned for their durability and aesthetic appeal, but they can become worn out over time. When this happens, it can be challenging to know whether to repair or replace them entirely.
Fortunately, with the right techniques and a bit of patience, you can successfully reglue your dovetail drawer joints and restore your furniture’s original strength and appearance.
Key Takeaways
- Learn how to assess damaged dovetail joints and determine the best course of action for repair.
- Discover the importance of proper regluing techniques for ensuring the longevity of your furniture.
- Find out how to choose between traditional and modern repair methods.
- Understand the benefits of restoring your furniture rather than replacing it.
- Gain confidence in your ability to tackle this delicate repair job with our step-by-step guide.
Understanding Dovetail Drawer Joints
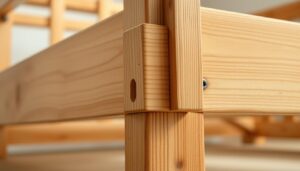
Dovetail joints have long been a symbol of quality in furniture making, providing a mechanical interlock that is both strong and visually appealing. You might encounter these distinctive joints in your home, particularly in drawers and other furniture pieces where durability and craftsmanship are essential.
What Makes Dovetail Joints Special
Dovetail joints represent the pinnacle of traditional woodworking craftsmanship, creating a beautiful and incredibly strong connection without relying solely on adhesives. The characteristic “tails” and “pins” of dovetail joints create a secure connection that resists pulling apart in one direction. At home, you might encounter both through dovetails and half-blind dovetails, commonly used in drawer construction.
Common Problems with Dovetail Joints
Common issues with dovetail joints include loosening over time due to wood shrinkage, glue failure, or physical damage from improper use or moving furniture. Understanding the structure of dovetail joints is essential before attempting any repair work, as their complex geometry requires specific techniques for proper restoration. The timber used in the original construction plays a significant role in how dovetail joints age and what problems they might develop over time.
| Type of Dovetail | Description | Common Issues |
|---|---|---|
| Through Dovetails | Visible from both sides | Loosening, glue failure |
| Half-Blind Dovetails | Visible from one side | Physical damage, wood shrinkage |

Tools and Materials Needed to Reglue Dovetail Drawer Joints
Gathering the appropriate tools and materials is a crucial step in the process of regluing dovetail drawer joints. To ensure a successful repair, you’ll need to have the right equipment and supplies.

Essential Adhesives for Joint Repair
Selecting the right glue is crucial for successful dovetail drawer joint repair. Options include traditional hide glue, PVA wood glue, and liquid hide glue, each with its own advantages.
Necessary Tools for the Job
You’ll need a small hammer or mallet for gentle tapping, fine chisels for cleaning joint surfaces, and clamps to hold everything in position while the glue sets.
Preparation Materials
Preparation materials such as fine sandpaper (220-400 grit) for cleaning joint surfaces, a small brush for applying glue, and clean rags for wiping away excess adhesive are also necessary.
When repairing dovetail drawer joints, it’s essential to match the timber species and grain pattern as closely as possible to the original construction for an invisible repair. You can find various tools and materials on woodworking websites or specialised sites offering content related to woodworking techniques.
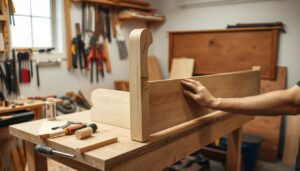
Step-by-Step Guide to Regluing Dovetail Drawer Joints
Regluing dovetail joints is a delicate task that demands patience and the right techniques to achieve a strong and lasting bond. Whether you’re dealing with loose connections, visible gaps, or broken tails/pins, this guide will walk you through the process of restoring your dovetail drawer joints to their original state.
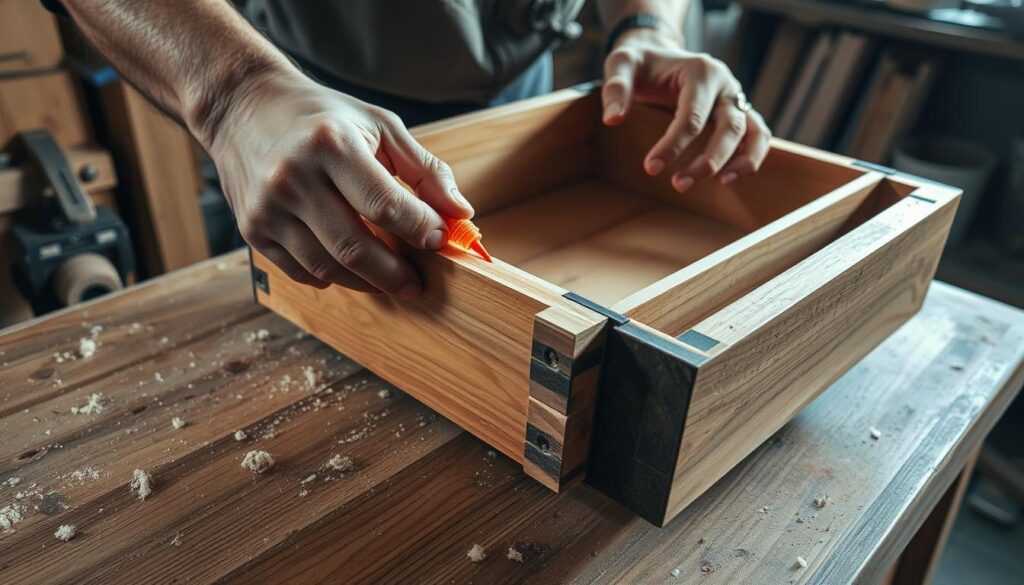
Assessing the Damage
Begin by carefully assessing the damage to your dovetail drawer joints. Look for specific issues such as loose connections, visible gaps, or broken tails/pins that will determine your repair approach. It’s essential to understand the extent of the damage to choose the right repair techniques.
Disassembling the Joint
For disassembling the joint, work slowly and methodically, using gentle taps with a mallet rather than forcing the joint apart, which could cause additional damage to the delicate dovetails. This careful approach will help prevent further damage and make the reassembly process smoother.

Cleaning the Joint Surfaces
When cleaning joint surfaces, remove all traces of old glue and debris using the appropriate tool for the adhesive type—a chisel works well for most dried glues, while warm water can help soften old hide glue. Ensuring the surfaces are clean and free of debris is crucial for a strong bond.
Fixing Gaps with Wedge Inserts
If you discover gaps in your dovetail joints, creating custom wedge inserts from matching timber is one of the most effective repair techniques used by experienced woodworkers. Selecting the right timber for inserts is crucial—the repair will be virtually invisible if you match both the wood species and grain direction of the original drawer construction.
Selecting the Right Timber
Try to get inserts that come from the same timber stock used for the job – this will give the best colour match. Pay attention to the grain direction – match this as closely to the pins in the joint as possible, for the best results.
Cutting and Fitting the Insert
Trim the insert to fit the gap – careful cutting with a chisel is the best way, followed up by fine-tuning against a sheet of sandpaper held flat on the bench. Work gradually and test the fit frequently to avoid removing too much material.
Applying Glue and Reassembling
For applying glue and reassembling, use a small brush to ensure even coverage without excess, focusing particularly on the mating surfaces where the dovetails interlock. Many woodworking websites recommend clamping the reassembled joint from multiple directions to ensure proper alignment while the glue dries at home.
- Carefully assess the damage to your dovetail drawer joints to determine the best repair approach.
- Disassemble the joint slowly and methodically to avoid causing additional damage.
- Clean the joint surfaces thoroughly to ensure a strong bond.
- Create custom wedge inserts from matching timber to fix gaps in the dovetail joints.
- Apply glue evenly and clamp the reassembled joint from multiple directions.
By following these steps and using the right techniques, you can successfully reglue your dovetail drawer joints and extend the life of your furniture. If you have specific questions about your particular repair job, many specialist sites offer forums where you can post photos of your work for tailored guidance.
Conclusion
By following the steps outlined in this article, you’ll be able to restore your dovetail drawer joints to their former glory. Regluing dovetail joints is a valuable skill that can significantly extend the life of your furniture while preserving its structural integrity and aesthetic appeal.
The techniques covered represent time-tested approaches that balance traditional craftsmanship with practical solutions for modern home furniture repair. Your experience with repairing dovetail joints will grow with each project, gradually building your confidence to tackle more complex furniture construction and restoration challenges.
For further learning, many woodworking websites offer instructional videos and articles that demonstrate these techniques in action. With patience and the right tools, you can achieve professional-looking results and ensure the longevity of your timber furniture.