Can you accurately measure the length of a room or the width of a piece of furniture without hesitation? For many DIY enthusiasts and professionals alike, understanding how to read a tape measure is a fundamental skill that ensures precision in various projects.
Whether you’re working on home improvements, construction projects, or simply rearranging your living space, being able to interpret measurements correctly is crucial. This guide will walk you through the process of reading fractions on a tape measure, covering both imperial and metric systems, and explaining the different markings you’ll encounter.
Key Takeaways
- Understand how to read fractions on a tape measure accurately.
- Learn the differences between imperial and metric tape measures.
- Identify various markings on a tape measure, including inch marks and smaller divisions.
- Improve your precision in measuring for DIY projects and construction work.
- Gain confidence in taking accurate measurements for your needs.
Understanding Tape Measure Basics
Before you can master the art of measuring with a tape measure, you need to grasp its basic components and features. A tape measure is a versatile tool used in various industries, including construction, carpentry, and tailoring.
Types of Tape Measures and Their Uses
Tape measures come in various types, including retractable pocket tapes, long measuring tapes, and specialised tapes for specific trades. For instance, a retractable tape measure is ideal for DIY projects, while a long measuring tape is used for measuring larger distances.
Anatomy of a Tape Measure
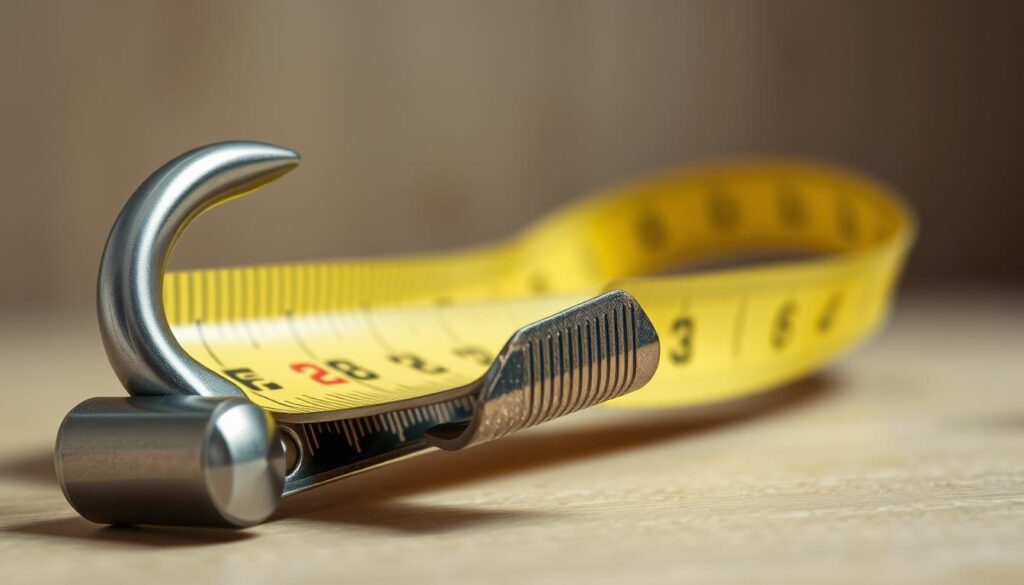
The anatomy of a standard tape measure includes the case, blade (or ribbon), hook (or tang), lock button, and various markings along the blade. Understanding these components is crucial for accurate measurements.
Imperial vs Metric Measurements
Most tape measures in the UK feature both imperial and metric scales. Understanding the difference between imperial measurements (feet, inches, and fractions) and metric measurements (metres, centimetres, and millimetres) is essential for accurate readings.
Reading a Tape Measure Fractions: The Fundamentals
The ability to read a tape measure is a fundamental skill that every homeowner, DIY enthusiast, and professional should possess. To do so effectively, you need to understand the various markings on a tape measure.
Identifying the Inch Marks
The inch marks on a tape measure are the longest lines and are typically numbered sequentially. These marks represent the largest unit of measurement on the tape. On a standard tape measure, the biggest marking is the inch mark, and the space between two consecutive inch marks is 1 inch.

Understanding Half-Inch Markings
Half-inch markings are the second-longest lines, positioned exactly halfway between each inch mark. These represent 1/2″ increments, making it easier to measure objects that are not whole inches.
Quarter-Inch Markings Explained
Quarter-inch markings are the third-longest lines and appear at the 1/4″ and 3/4″ positions between each inch mark. These markings further divide the inch into smaller fractions, enhancing measurement precision.
Eighth and Sixteenth-Inch Divisions
Eighth-inch divisions are shorter lines that divide each quarter-inch into two equal parts, resulting in markings at 1/8″, 3/8″, 5/8″, and 7/8″ positions. The sixteenth-inch divisions are the shortest lines, dividing each eighth-inch into two equal parts and creating 16 equal divisions within each inch. Understanding these markings is crucial for accurately reading fractions on a tape measure.
By grasping the hierarchy of line lengths and the corresponding fractions they represent, you can quickly and accurately read measurements on a tape measure.
Mastering the Imperial System on Your Tape Measure
Accurate measurements depend on your ability to read and understand the imperial system on your tape measure. The imperial system organises measurements into feet and inches, with special markings appearing at every foot increment on longer tapes.
Reading Feet and Inches
Understanding how to read combined feet and inches is essential for larger measurements. For example, 5’6″ represents 5 feet and 6 inches, or a total of 66 inches. You need to be able to identify the foot marks and the inch marks to take accurate measurements.
Converting Fractions to Decimals
Converting fractions to decimals can simplify calculations when working with imperial measurements. For instance, 3/4″ equals 0.75″, and 7/16″ equals 0.4375″. This conversion is particularly useful when performing arithmetic operations with measurements.
Common Imperial Measurements in DIY Projects
Common imperial measurements in DIY projects include standard stud spacing (16″ or 24″ on centre), standard door heights (6’8″), and standard ceiling heights (8′). Familiarity with these measurements can streamline your work and reduce errors.
By mastering the imperial system on your tape measure, you can ensure accuracy and efficiency in your projects. Understanding fractions and how to convert them to decimals is also crucial for precise calculations.
How to Read Metric Measurements

The metric system is widely used in the UK, and being able to read metric measurements is essential for professionals and DIYers alike. A metric tape measure is a fundamental tool in various applications, including construction, DIY projects, and technical work.
Understanding Centimetres and Millimetres
On a metric tape measure, centimetre marks are typically the longest lines and are numbered sequentially. Each centimetre is divided into 10 equal millimetre spaces. Understanding this basic principle is crucial for accurate measurements.
Reading Metric Markings Accurately
When reading metric markings, each small line between centimetre marks represents one millimetre. Every fifth millimetre sometimes has a slightly longer line for easier reading. This makes it easier to take precise measurements.
Converting Between Metric and Imperial
Converting between metric and imperial measurements is a useful skill. As a quick reference, 1 inch equals approximately 2.54 centimetres, and 1 foot equals approximately 30.48 centimetres. This conversion is essential for projects that require measurements in both systems.
Practical Measuring Techniques
Mastering the art of measuring with a tape measure requires understanding its various components and techniques. A crucial aspect of this is using the tape measure correctly to ensure accurate results.
Using the Tape Measure Hook Correctly
The hook or ‘tang’ at the end of the tape measure is designed to “float” slightly, moving in and out by exactly the thickness of the metal hook itself. This feature is intentional and not a defect. When measuring external dimensions, hook the end over the edge of the object and pull the tape taut for an accurate reading. For internal measurements, push the hook against one surface and extend the tape to the opposite surface.

Taking Internal vs External Measurements
When taking internal measurements, such as between two internal walls, the hook is pushed against the surface, and the tape is extended to the opposite surface. For external measurements, the hook is placed around or behind the object, and the tape is pulled gently towards you. Understanding the difference between these two techniques is vital for achieving accurate measurements.
Ensuring Accuracy in Your Measurements
Maintaining proper tension on the tape is crucial for accuracy. Too much slack can result in incorrect measurements, particularly over longer distances. Consider using a helper or a tape measure with a lock feature to prevent the tape from bending or sagging. Additionally, when measuring to a mark rather than an edge, align the appropriate increment on the tape with your mark.
| Measurement Type | Tape Measure Technique | Key Considerations |
|---|---|---|
| Internal Measurements | Push hook against surface, extend tape | Account for case width on some models |
| External Measurements | Hook end over edge, pull tape taut | Ensure proper tension, avoid slack |
Common Mistakes and Troubleshooting
Mastering the use of a tape measure involves recognising and avoiding common mistakes. When reading measurements, it’s easy to misinterpret markings, particularly with smaller divisions.
Misreading Fraction Markings
A common error is confusing different fraction markings on your tape measure, especially when working with smaller divisions like 1/16″ or 1/32″. To avoid this, take your time to understand the markings on your tape.
Tape Measure Accuracy Issues
Tape measures can lose accuracy over time due to wear and tear. Ensure your tape is certified for accuracy and check it periodically against a known standard to maintain precision in your measurements.
Safety Tips When Using Tape Measures
When using a tape measure, always control the retraction of the blade to prevent injuries. Additionally, wearing safety glasses is recommended to protect your eyes from the rapidly retracting metal tape and hook.
Conclusion
As you’ve learned, reading a tape measure fractions is a straightforward process that requires practice to master. With this skill, you’ll become more confident in taking accurate measurements, a crucial aspect of any DIY or construction project. To achieve precision, it’s essential to understand both imperial and metric measurement systems, as well as how to use your tape measure correctly.
Accuracy in measuring is vital; even small errors can lead to significant problems. By mastering the skill of reading a tape measure, you’ll be more versatile and efficient in your projects. Remember to keep your tape measure clean and in good condition to maintain its accuracy and extend its lifespan.
With continued practice, you’ll develop an intuitive understanding of common measurements and fractions, making the process even faster and more efficient. By following the guidelines outlined in this article, you’ll be well on your way to becoming proficient in reading a tape measure and achieving success in your projects.


