Are you struggling to achieve a smooth finish when working with filler compound on your DIY projects? The key to a professional-quality result lies in understanding the fundamentals of mixing this versatile material.
Whether you’re repairing minor damage or undertaking a comprehensive wall finishing project, proper mixing techniques are crucial for success. Filler compound, also known as joint compound or mud, is used to skim coat walls and ceilings, hiding seams, finishing joints, and concealing fasteners.
To achieve the perfect consistency for your specific job requirements, it’s essential to select the right type of filler compound and mix it correctly. In this guide, we’ll walk you through the step-by-step process, sharing professional tips and common mistakes to avoid.
Key Takeaways
- Understand the different types of filler compounds and their applications.
- Learn the essential tools and materials needed for mixing filler compound.
- Discover the step-by-step process for achieving the perfect consistency.
- Identify common mistakes to avoid when working with filler compound.
- Explore professional tips for a smooth, professional finish.
>
Understanding Different Types of Filler Compounds
The world of filler compounds is diverse, with different types catering to specific needs. When working on a project, you need to choose the right type of filler compound to achieve the desired finish.
Filler compounds are available in two primary forms: ready-mixed and powdered. Each type has its advantages and is suited to different applications.
Ready-Mixed Filler Compounds
Ready-mixed filler compounds are convenient and easy to use. They come pre-mixed and ready to apply, saving you time and effort. This type is ideal for smaller projects or when you’re short on time. However, they can be more expensive and may result in waste if not used efficiently.

Powdered Filler Compounds
Powdered filler compounds require mixing with a specific amount of water to achieve the optimal mixture. To mix a “powdered drying-type compound,” add the compound to the specified amount of water and mix well until the powder is completely damp. Let the mixture stand for 15 minutes and then remix. This type of compound doesn’t set; it needs to air dry, so it can be stored for extended periods when covered. The drying process is crucial, as it affects the final result.
Powdered compounds offer flexibility and cost-effectiveness, especially for larger projects. You can mix only what’s needed, reducing waste. The ratio of powder to water is critical, impacting both working time and final strength. Some powdered compounds are designed for quick drying, setting in as little as 20 minutes.
Essential Tools and Materials for Mixing Filler Compound
Before you begin mixing your filler compound, ensure you have the essential tools and materials at hand. This preparation is crucial for achieving a high-quality finish.
Choosing the Right Bucket and Mixing Tools
Selecting the appropriate bucket and mixing tools is vital for effectively mixing filler compound. You should use a sturdy bucket that can withstand the mixing process without compromising its integrity. A robust mixing paddle attached to a power drill can significantly ease the mixing process, ensuring a consistent and thorough blend of the compound.

Water Quality and Temperature Considerations
The quality and temperature of the water used can significantly impact the performance of your filler compound. It’s essential to use clean, cool water that is free from contaminants. The ideal temperature for mixing and applying filler compound is between 5°C and 30°C. Extreme temperatures can affect the drying time and integrity of the mixture.
| Factor | Ideal Condition | Impact |
|---|---|---|
| Water Quality | Clean, Cool | Affects compound performance |
| Water Temperature | Not cold or hot | Influences setting time |
| Room Temperature | 5°C to 30°C | Ensures proper drying |
Step-by-Step Guide to Mixing Filler Compound Basics
Before you start your work, it’s vital to understand the basics of mixing filler compound. This guide will walk you through the process, ensuring you achieve a smooth finish for your project.
Preparing Your Workspace
To begin, clear your workspace of any debris or dust. This will prevent contamination of the filler compound. Ensure you have all necessary tools within reach, including a mixing bucket, a masher-type mixer, and a measuring jug. Having a clean and organised workspace is crucial for efficient work.
Measuring the Correct Proportions
For powdered compounds, accurate measurement is key. Follow the manufacturer’s instructions for the correct ratio of powder to water. Use a clean measuring jug to measure the water, and a separate container for the powder. This ensures you achieve the right consistency for your job.
Mixing Technique for Powdered Compounds
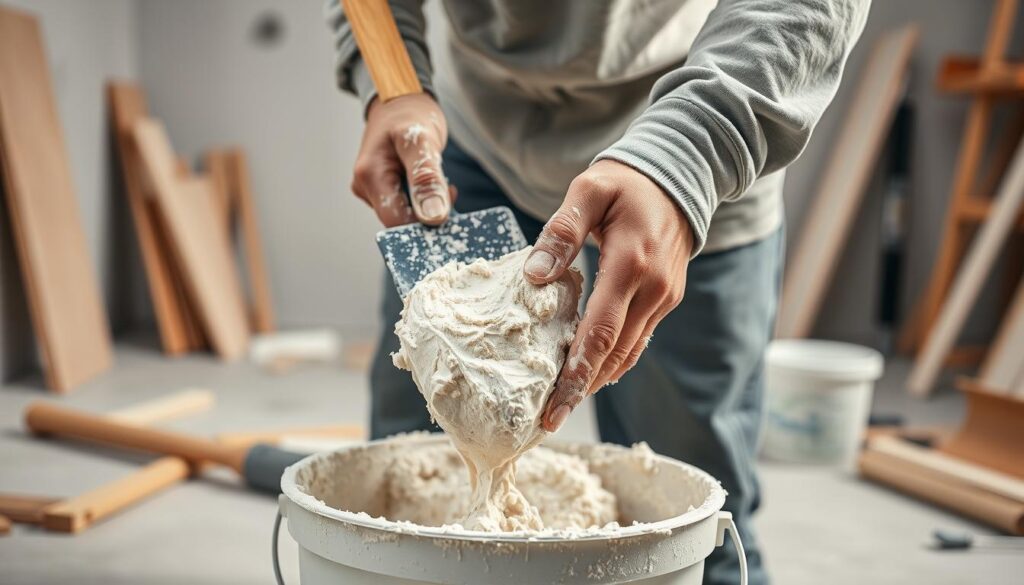
When mixing powdered compounds, start by adding the measured water to the mixing bucket. Gradually add the powder, mixing continuously with your masher-type mixer. Be sure to scrape down the sides of the bucket to prevent lumps.
Adjusting Ready-Mixed Compounds
If you’re using a ready-mixed compound, check its consistency. If it has been sitting for a while, you may need to loosen it with a little water. Stir thoroughly to ensure a consistent texture throughout. Ready-mixed compounds can be adjusted for different stages of the job. Use within a day or two for best results.
| Compound Type | Mixing Technique | Consistency Adjustment |
|---|---|---|
| Powdered | Gradual addition of powder to water, continuous mixing | Adjust water ratio as needed |
| Ready-Mixed | Stir thoroughly, add water if necessary | Adjust for different job stages |
Achieving the Perfect Consistency for Your Project
To ensure a professional finish, it’s essential to get the consistency of your filler compound just right. The right consistency is crucial for a successful application and a high-quality finish.
How to Test for Proper Consistency
Testing the consistency of your filler compound is straightforward. You can perform a simple test by applying a small amount to a surface and observing its behavior. If it’s too runny, it will sag; if it’s too thick, it won’t spread evenly. The ideal consistency should be smooth and pliable, allowing for easy application and a smooth finish.
Adjusting Thickness for Different Applications
Different projects require different consistencies. For example, a thicker consistency is often needed for filling deep holes, while a thinner mix is better suited for skim coating large surfaces. Adjusting the mixing ratio or adding more powder can help achieve the desired consistency. It’s essential to understand the specific requirements of your project to adjust the compound accordingly.
Common Consistency Problems and Solutions
Several issues can arise if the consistency is not right. For instance, too-thin consistency can cause the compound to sag or shrink excessively. On the other hand, too-thick consistency can lead to difficult application and excessive sanding. Common problems include lumps, air bubbles, and separation. Solutions involve adjusting the mixing technique, using the right water quality, and ensuring thorough mixing. A table summarizing these issues and their fixes can be helpful:
| Problem | Cause | Solution |
|---|---|---|
| Too-thin consistency | Excessive water | Add more powder |
| Too-thick consistency | Insufficient water | Add a little water |
| Lumps | Insufficient mixing | Mix thoroughly |
By understanding these common issues and their solutions, you can achieve the perfect consistency for your project, ensuring a professional finish and a successful outcome.
Conclusion: Getting Professional Results with Properly Mixed Filler
A well-mixed filler compound is essential for achieving smooth, even walls and ceilings. By following this guide, you’ve learned the crucial steps to mix filler compound correctly for various applications, ensuring a professional-quality finish. Proper mixing saves you considerable time during application and sanding, allowing for a smoother paint job. Most wall fillers dry white, enabling you to paint over them directly or apply a primer first for the best results. Remember, different stages of your project may require adjusting the consistency of your compound. With practice, you’ll develop an intuitive feel for the perfect consistency for different jobs. For more detailed information on body filler application, you can visit Autobodytoolmart’s guide. Taking the time to mix your compound properly will result in walls that are ready to paint, achieving a flawless finish.


