Are you looking to transform your unused loft space into a valuable storage area or a functional room? Installing loft flooring panels is a practical DIY project that can help you achieve this goal.
With the right materials and a bit of know-how, you can successfully complete this project and create a durable, functional floor in your loft. At Roofing Superstore, you can find an array of boards to suit your needs, including OSB board, moisture-resistant chipboard, and general-purpose hardwood plywood.
By following this comprehensive guide, you’ll be able to navigate the process with confidence, from preparation to completion, and enjoy your newly created space.
Key Takeaways
- Transform your unused loft into valuable storage or a functional room.
- Choose the right materials for your loft flooring project.
- Ensure proper safety measures and follow industry best practices.
- Understand the structure of your loft and requirements for proper installation.
- Successfully complete your loft flooring project with confidence.
Benefits of Installing Loft Flooring Panels
By installing loft flooring panels, you can unlock the full potential of your loft space. This simple yet effective upgrade can transform your loft into a valuable area of your home, providing additional storage, improving energy efficiency, and increasing your property’s value.
Creating Valuable Storage Space
One of the primary benefits of installing loft flooring panels is the creation of valuable storage space. With a properly installed floor, you can safely store items such as seasonal decorations, out-of-season clothing, and other household goods. This can help to declutter your living areas and create a more organized home.
Improving Energy Efficiency
Loft flooring panels can also contribute to improving your home’s energy efficiency. By providing a stable surface for insulation, these panels help to reduce heat loss through the loft. This can lead to lower energy bills and a reduced carbon footprint.
Increasing Property Value
Installing loft flooring panels can significantly increase your property’s value. A properly boarded loft is viewed by potential buyers as a valuable feature, often willing to pay a premium for homes with accessible, usable loft space. Estate agents frequently highlight boarded lofts as a selling point, emphasizing the additional storage or potential for future development.
| Benefits | Description | Impact |
|---|---|---|
| Storage Space | Creation of additional storage | More organized home |
| Energy Efficiency | Reduced heat loss through loft | Lower energy bills |
| Property Value | Increased value due to usable loft space | Higher selling price |
The investment in quality loft flooring panels typically offers an excellent return when compared to many other home improvement projects. By enhancing your loft space, you can enjoy the benefits of additional storage, improved energy efficiency, and a higher property value.
Essential Tools and Materials for Loft Boarding
Before you start your loft boarding project, it’s vital to understand what tools and materials you’ll need.

Required Tools Checklist
To begin your loft boarding project, you’ll need a few essential tools. These include a tape measure, a circular saw, a drill, and a hammer. Ensuring you have these tools on hand will make the installation process smoother.
Additionally, consider having safety equipment such as gloves, safety glasses, and a dust mask to protect yourself during the project.
Choosing the Right Loft Boards
Selecting the appropriate loft boards is crucial for a successful loft boarding project. You need to consider the type of boards and their thickness based on the spacing of your joists.
Tongue and Groove Options
Tongue and groove chipboard is a popular choice for loft flooring due to its ease of installation and snug fit. This type of boarding ensures a secure and stable floor.
Board Thickness Considerations
The thickness of your loft boards is directly related to the spacing between your joists. For instance:
- For joists up to 450mm centres, an 18mm chipboard is recommended.
- For joists at 600mm centres, a 22mm board is typically suggested to prevent sagging.
When choosing your boards, consider the intended use of your loft space. If you plan to store heavy items or use the space frequently, opt for the maximum recommended thickness to ensure durability.
Safety Precautions Before You Begin
As you prepare to install loft flooring panels, taking necessary safety precautions is vital. Installing loft boards can be a challenging task, and ensuring your safety is crucial to avoid accidents and injuries.
Personal Protective Equipment
Wearing the right personal protective equipment (PPE) is essential when working in your loft. You should wear a dust mask to prevent inhaling dust and debris, safety glasses to protect your eyes, and gloves to improve grip and prevent injuries. Additionally, consider wearing a hard hat to protect your head from falling objects or low-hanging beams.

Working Safely in Confined Spaces
Working in a loft can be challenging due to the confined space. Ensure you have adequate ventilation to prevent inhaling dust or fumes. Take regular breaks to avoid fatigue, and consider having someone assist you when working in tight spaces. Be aware of your surroundings, and avoid overreaching or stretching, which can lead to loss of balance.
Weight Distribution and Movement
Weight distribution and movement in the loft are crucial for safety. Never step or stand between joists where there is no support, as ceiling materials are not designed to bear weight and could collapse. To move safely, follow these guidelines:
- Distribute your weight across multiple joists by using temporary boards or platforms.
- Move methodically and deliberately, keeping your centre of gravity low.
- Maintain three points of contact when possible, such as two hands and one foot.
- Be cautious when carrying tools or materials, as this changes your balance.
- Plan your installation sequence to minimize excessive movement across unboarded areas of the loft.
By following these safety guidelines and being mindful of your weight distribution, you can ensure a safe and successful installation of your loft boards.
Preparing Your Loft for Flooring Installation
Preparing your loft for flooring installation is a crucial step that ensures a safe and successful project. Before you start, it’s essential to get your loft space ready for the installation process.
Clearing and Cleaning the Space
The first step in preparing your loft is to clear and clean the space. Remove any stored items, debris, or old insulation to give you a clear working area. This will not only make the installation process easier but also help you identify any potential issues with the loft space.
Ensure the area is well-lit and ventilated to make your work safer and more efficient.
Assessing Joist Condition and Spacing
Next, you need to assess the condition and spacing of your joists. Check for any signs of damage, rot, or wear. The joists should be sturdy enough to support the weight of the flooring and any additional storage. Measure the spacing between the joists to determine the best layout for your flooring panels.
Proper assessment will help you identify any necessary repairs before proceeding with the installation.
Creating a Temporary Working Platform
To work safely in the loft, you’ll need to create a temporary working platform or platform. Use a sturdy board that is at least 18mm thick and wide enough to kneel on comfortably. Place this board across multiple joists to distribute your weight evenly.
- Position the platform strategically to access different areas of the loft.
- Ensure the platform is stable before trusting it with your full weight.
- Consider creating multiple platforms if you’re working with a helper.
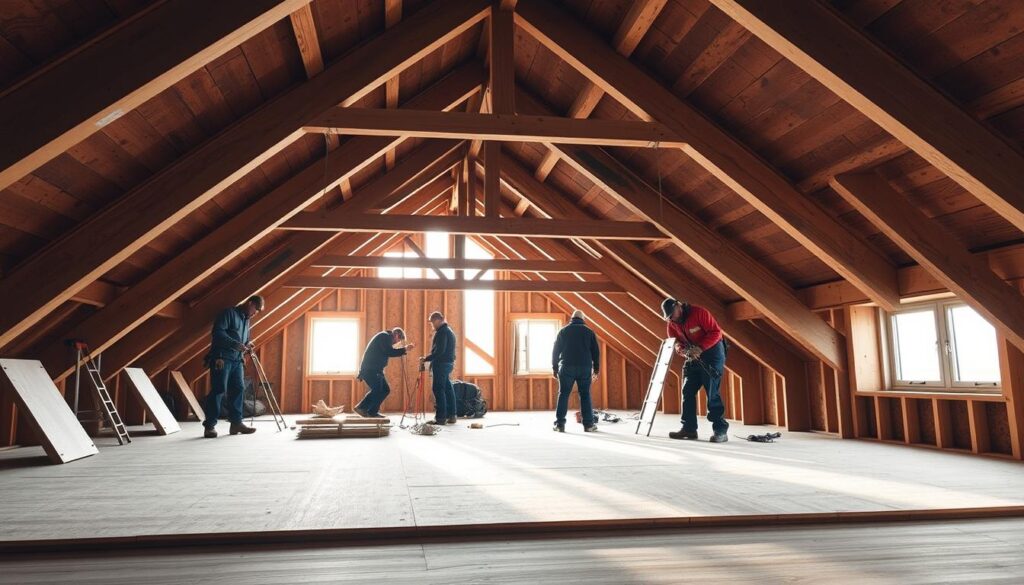
How to Install Loft Flooring Panels Step-by-Step
Before you start installing loft flooring panels, it’s essential to understand the step-by-step process involved. Installing loft flooring panels can be a rewarding DIY project, allowing you to create valuable storage space or a functional area in your UK home.
Measuring and Planning Your Layout
To begin, measure your loft space accurately to determine the number of boards you’ll need. Ensure you account for any obstructions, such as ventilation pipes or electrical components. Plan your layout to minimize waste and optimize the use of materials. Position the first board in the corner of your planned layout, ensuring the grooved edge faces the wall with a 10mm expansion gap.

Cutting Boards to Size
Once you have your measurements, cut the loft boards to size using a suitable saw. If a board overhangs the joist, trim it to reach the centre point of the joist. This ensures a secure fixing for the adjacent board. When cutting tongue and groove boards, maintain the tongue intact to facilitate a snug fit with the next board.
Securing Boards to Joists
Now, lay the first loft board across the joists, ensuring it’s properly aligned. Use 50-60mm screws for 22mm boards, making sure they penetrate at least 25mm into the joist. Drive screws at a 45-degree angle through the tongue for a hidden fixing, or directly through the board surface for added strength. Space screws approximately 150mm apart along each joist, keeping them at least 25mm from the board’s edge to prevent splitting. As you lay subsequent boards, stagger their joints to enhance the floor’s overall stability and appearance. Check that each board is fully seated against the previous one before securing, using a hammer and block if necessary to ensure tight joints.
By following these steps and using the correct materials, you’ll be able to install loft flooring panels efficiently and effectively, creating a sturdy and functional loft space in your UK home.
Working with Loft Insulation

As you prepare to install loft flooring, understanding how to work with existing insulation is key to a successful project. Loft insulation is a critical component in maintaining your home’s energy efficiency, and it’s essential to handle it correctly during the installation process.
Understanding Insulation Requirements
In the UK, there are specific regulations regarding loft insulation to ensure energy efficiency and reduce carbon emissions. You should check the current insulation level in your loft against these standards. Typically, the recommended depth for loft insulation is between 250mm to 300mm. Ensuring your loft meets these requirements can significantly impact your home’s overall energy efficiency.
Preventing Insulation Compression
When installing loft flooring, it’s vital to avoid compressing the insulation material, as this can significantly reduce its effectiveness. To prevent this, ensure that the insulation is not compacted during the installation process. You can achieve this by using appropriate techniques and tools that allow you to work around the insulation without compressing it. Leaving sufficient space for the insulation to expand and maintain its thickness is crucial.
Maintaining Ventilation
Maintaining ventilation in the loft space is crucial when installing insulation and flooring to prevent condensation issues. Proper ventilation is essential in loft spaces to prevent condensation, which can lead to damp problems and timber decay. When installing loft flooring and insulation, ensure you don’t block eaves ventilation points that allow air to circulate through the loft space. Leave a gap of at least 50mm between the insulation and the roof felt to maintain an airflow path from the eaves to the ridge.
By following these guidelines, you can ensure that your loft insulation works effectively with your new flooring, enhancing your home’s energy efficiency and comfort.
Using Loft Legs and Support Systems

To ensure your loft flooring is secure and level, you’ll need to install a support system using loft legs. This is particularly important if you’re planning to store heavy items or use the loft space frequently.
Calculating How Many Loft Legs You Need
The number of loft legs required depends on the size of your loft and the spacing of the joists. Typically, loft legs are positioned at intervals of approximately one metre along each joist. To determine the exact number needed, measure the length and width of your loft space and calculate the joist spacing.
Proper Installation of Support Systems
When installing loft legs, ensure they are firmly attached to the top of the joists using appropriate screws. It’s crucial that each loft leg is perfectly vertical and securely fastened before proceeding to install the next. When installing loft legs across joists, maintain consistent height and alignment to create a level surface for the flooring panels.
Most loft leg systems include a flat top plate that provides a wider surface area for supporting boards where they meet, ensuring proper support at critical joining points. After installing the support system, check the stability by applying pressure to several loft legs before proceeding with board installation.
Common Mistakes to Avoid When Installing Loft Boards
To ensure a sturdy and long-lasting loft floor, it’s crucial to be aware of the common mistakes made during the installation of loft boards. Installing loft flooring panels can be a straightforward process if you’re aware of the pitfalls that can lead to a subpar installation.
Incorrect Board Orientation
One of the initial mistakes to avoid is incorrect board orientation. When installing loft boards, it’s essential to ensure they are laid perpendicular to the joists. This orientation provides the necessary support and stability to the floor. Laying boards parallel to the joists or at an angle can lead to an unstable surface, potentially causing accidents or damage.
Failing to Stagger the Boards
Failing to stagger the boards is another common error. Staggering the joints of the boards enhances the overall strength of the floor and improves its appearance. When the joints are aligned, it can create a weak point in the floor, making it more susceptible to stress and potential failure.
Inadequate Expansion Gaps
Inadequate expansion gaps around the perimeter of the loft floor can cause the boards to buckle or warp due to thermal expansion and contraction. Leaving sufficient gaps allows for the natural movement of the materials, ensuring a flat and stable surface.
Improper Joint Support
Improper joint support is a critical mistake that can compromise the integrity of the loft floor. Every board joint must be properly supported, ideally by falling directly over a joist or purpose-installed noggin. When board joints cannot align with existing joists, install additional noggins between joists to provide support, especially when laying boards across joists.
| Common Mistake | Consequence | Solution |
|---|---|---|
| Incorrect Board Orientation | Unstable surface | Lay boards perpendicular to joists |
| Failing to Stagger Boards | Weak points in the floor | Stagger board joints |
| Inadequate Expansion Gaps | Buckling or warping | Leave sufficient gaps around the perimeter |
| Improper Joint Support | Floor instability | Support joints with joists or noggins |
Creating Access Points and Hatches

A well-designed access point is essential for safe and convenient loft space utilisation. When installing loft flooring panels, it’s crucial to consider how you will access the newly created space.
Reinforcing the Opening Area
To create a sturdy loft hatch, you first need to reinforce the opening area. This involves cutting an old gravel board in half and using it to create an internal frame inside the opening. This step ensures the structural integrity of the hatch and the surrounding area.
Building a Secure Hatch
The hatch itself should be constructed from materials matching your loft flooring for consistency and strength. For instance, you can construct a new loft hatch out of 6×2 timber and screw the other half of the gravel board to this. Ensuring the hatch is well-insulated and fits snugly but can be operated easily is vital.
When building your access hatch, consider the following:
- The hatch panel should be insulated to the same standard as the rest of your loft to prevent heat loss.
- Consider installing a hatch with an integrated ladder for convenient access, particularly if you’ll be using the loft space frequently.
- Ensure the hatch fits snugly but can be operated easily – too tight and it will be difficult to use, too loose and it may allow draughts.
- Add weatherstripping or draught excluder around the hatch perimeter to prevent warm air escaping from the living space below.
- The hatch should be constructed to provide secure access to the loft area, using a sturdy board to support its weight.
By following these guidelines, you can create a safe, secure, and functional hatch that complements your loft flooring installation.
Costs and Considerations for Different Loft Types
Understanding the specific requirements and costs of your loft type is essential for a successful loft flooring installation. The type of loft you have can significantly impact the complexity and cost of the project.
Typical Costs for DIY Loft Boarding
When installing loft flooring panels yourself, you need to consider the costs of materials and tools. The cost can vary depending on the type and quality of the materials you choose. On average, the cost for DIY loft boarding can range from £500 to £2,000, depending on the size of your loft and the complexity of the installation.
It’s also important to factor in the time and effort required for the project. While DIY loft boarding can be cost-effective, it may require significant labor, especially if you’re new to such projects.
Special Considerations for New Builds
If you have a new build property, there are specific considerations to keep in mind when installing loft flooring. New build properties often have trussed roof structures that require special consideration. It’s crucial to check your new build warranty before proceeding with loft boarding, as improper installation could invalidate your warranty.
- Many new build developers specify that loft spaces are designed for light storage only, with weight restrictions typically around 25kg/m².
- Modern build properties often have deeper insulation requirements, making raised boarding systems essential.
- Some new build warranties require professional installation of loft boarding with certification to maintain warranty validity.
Conclusion
With the right tools and knowledge, you’re poised to successfully complete your loft boarding project.
By following this guide, you can transform unused space into valuable storage or a potential living area.
Proper preparation and attention to detail are key to creating a safe, durable loft floor with the right boards.