Poor ventilation in bathrooms can lead to a host of problems, including mould, mildew, and condensation damage. Effective ventilation is crucial for maintaining air quality and preventing these issues. One effective solution is the installation of an inline extractor fan with a timer, which can significantly improve airflow and reduce moisture.
By following this step-by-step guide, you’ll learn how to improve your bathroom’s ventilation and prevent moisture-related issues. Inline extractor fans offer several advantages over standard models, including quieter operation and more powerful extraction.
Key Takeaways
- Understand the importance of proper bathroom ventilation
- Learn the benefits of using an inline extractor fan
- Discover how to improve airflow and reduce moisture
- Follow a step-by-step guide to installing an extractor fan with a timer
- Identify when professional help may be necessary
Understanding Inline Bathroom Extractor Fans and Timers
For those looking to improve their bathroom’s ventilation system, understanding inline extractor fans is crucial. Inline extractor fans are designed to be installed within the ducting system, typically between the bathroom and the external vent, allowing for enhanced performance and quieter operation.
What Are Inline Extractor Fans?
Inline extractor fans are a type of ventilation fan that is installed in the ductwork of a bathroom’s ventilation system. Unlike standard extractor fans that are mounted on walls or ceilings, inline fans are positioned within the ducting, making them a more discreet option. This positioning also allows for greater versatility in installation locations.
Benefits of Installing a Timer Function
Installing a timer function with your inline extractor fan can offer several benefits. It allows you to control how long the fan operates, ensuring that your bathroom is adequately ventilated without wasting energy. A timer function can also help in reducing moisture buildup, thereby decreasing the risk of mould and mildew.
How Inline Fans Differ from Standard Extractor Fans
Inline fans differ significantly from standard extractor fans in several key areas. Here are some of the main differences:
- Inline extractor fans offer higher extraction rates, typically moving between 85-180 cubic metres of air per hour, compared to standard fans which move around 15-30 cubic metres per hour.
- The noise level of inline fans is considerably lower due to their remote positioning, often in loft spaces or ceiling voids.
- Inline fans can be installed in any bathroom, regardless of the wall’s position, as the ducting can run to an external point.
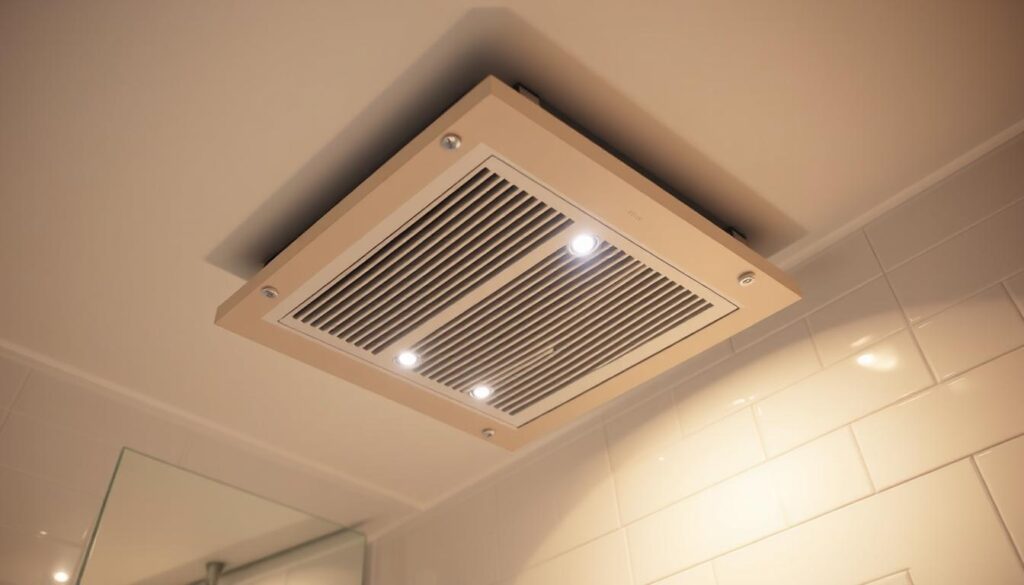
- They have a more discreet appearance, with only a simple grille visible in the bathroom.
- The motor’s remote positioning protects it from direct moisture exposure, potentially extending its lifespan.
Safety Considerations Before Installation
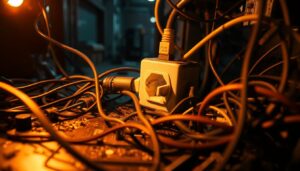
To ensure a safe installation, you must be aware of the electrical safety regulations applicable to UK bathrooms. Installing an inline extractor fan requires careful consideration of these regulations to avoid any potential hazards.
Electrical Safety Regulations for UK Bathrooms
In the UK, bathrooms are subject to specific electrical safety regulations due to the presence of water, which increases the risk of electrical shock. “The IET Wiring Regulations (BS 7671) provide detailed guidance on the electrical installation requirements for bathrooms, including the use of inline extractor fans.” It is essential to comply with these regulations to ensure your safety and the safety of others.
When installing an extractor fan in your bathroom, you must consider the bathroom zones and IP ratings of the equipment. The regulations specify different zones within the bathroom and the corresponding electrical installation requirements for each zone.
When to Call a Professional Electrician
You should always call a professional electrician when installing a new inline extractor fan system that requires new wiring, as this work must be certified under Part P of Building Regulations. If your installation involves connecting the fan to a light switch or creating a new circuit, a qualified electrician is essential to ensure the work meets safety standards and building regulations.
- Professional electricians can provide the necessary certification for your installation, which is important for home insurance validity and future property sales.
- While replacing an existing extractor fan with a like-for-like model is permitted under DIY exceptions to Part P, any significant changes to the electrical system require professional installation.
- A qualified electrician will understand the specific requirements for installing 3-pole isolation switches outside bathroom areas and ensuring all wiring is correctly positioned according to bathroom zones.

Tools and Materials Needed to Install Inline Bathroom-Fan Timer
Before you start installing your inline bathroom-fan timer, it’s crucial to gather all the necessary tools and materials. Having everything on hand will make the process smoother and more efficient.
Essential Tools for the Job
To begin the installation, you’ll need some essential tools. A cable detector tool is vital for identifying hidden wiring or pipes in walls and ceilings before drilling, thus preventing potentially dangerous or costly accidents. Additionally, a headlamp or portable work light is invaluable when working in poorly lit areas such as loft spaces where inline extractor fans are typically installed.
Other essential tools include a drill with various bits for making holes for ducting and wiring, and a screwdriver set for securing the fan unit and other components.
Required Materials and Components
The required materials include the inline extractor fan itself, along with ducting to connect the fan to the outside vent. You’ll also need Aluminium tape and large jubilee clips to secure the ducting in place. Ensure you have the correct type and size of ducting for your specific installation.
Optional Equipment for Easier Installation
For a more straightforward installation, consider having some optional equipment on hand. Dust sheets and protective equipment, including safety goggles, a dust mask, and gloves, will protect both you and your bathroom during the installation process, particularly when drilling.
Other useful tools include telescopic inspection mirrors and flexible grabber tools for working in confined spaces, and a stable loft ladder with boards for safe movement above ceiling joists when accessing loft spaces.
Preparing for Installation
Preparing for the installation of an inline bathroom-fan timer involves several critical steps. You need to ensure that you have chosen the optimal location for the fan, understand the bathroom’s electrical zoning and IP ratings, and safely isolate the power supply.
Choosing the Optimal Fan Location
When deciding where to install your inline extractor fan, consider the ventilation requirements of your bathroom. The fan should be positioned to effectively remove moisture and air from the bathroom. Typically, this means installing it in a location that is central to the area you want to ventilate, such as near the shower or bathtub.
Understanding Bathroom Zones and IP Ratings
Bathrooms are divided into zones, each with specific electrical installation requirements. The IP (Ingress Protection) rating of your inline extractor fan must be suitable for the zone in which it is installed. For example, areas closest to water sources require higher IP ratings. Ensure your fan meets these requirements to maintain safety and compliance with regulations.

Isolating the Power Supply
Before beginning any electrical work, you must isolate the power supply to the circuit you will be working on. This involves switching off the appropriate circuit breaker or removing the relevant fuse at the consumer unit. Verify that the circuit is dead using a voltage tester on the wires you’ll be working with. It’s also a good practice to place a warning notice on the consumer unit to prevent others from restoring power while you’re working.
| Task | Description |
|---|---|
| Isolate Power Supply | Switch off the appropriate circuit breaker or remove the fuse. |
| Verify Circuit is Dead | Use a voltage tester to ensure the circuit is safe to work on. |
| Post Warning Notice | Place a notice on the consumer unit to prevent accidental power restoration. |
Step-by-Step Installation Process
The installation process of your inline bathroom extractor fan with a timer is straightforward if you follow these steps carefully. This guide will walk you through installing the 3-pole isolation switch, mounting the inline fan unit, installing ducting and vents, wiring the fan and timer, and finally setting the timer function.
Installing the 3-Pole Isolation Switch
Begin by installing the 3-pole isolation switch, which is crucial for safety during the installation process. Ensure that the power supply is isolated before starting work. The switch should be installed according to the manufacturer’s instructions and local electrical regulations.
Mounting the Inline Fan Unit
Mounting the inline fan unit requires careful consideration of its location. Ideally, it should be positioned to minimize noise and optimize airflow. Use the mounting brackets provided with the fan and secure it firmly to the structure.
Installing Ducting and Vents
Proper ducting and vent installation are critical for effective moisture removal. Ensure that the ducting is appropriately sized for your fan and that it’s installed with minimal bends to reduce resistance. Secure the ducts firmly and seal any joints to prevent leaks.
Wiring the Fan and Timer
Wiring the fan and its timer is a crucial step. You’ll need to connect the fan to the power supply and integrate it with the timer function. This may involve connecting to an existing light switch or setting up an independent switch control.
Connecting to an Existing Light Switch
If you’re connecting your fan to an existing light switch, ensure that the wiring is compatible and that the switch can handle the additional load. Follow the wiring diagram provided with your fan for specific instructions.
Setting Up Independent Switch Control
For an independent switch control, you’ll need to run separate wiring from the fan to the switch location. This provides more flexibility in controlling the fan operation. Again, refer to the manufacturer’s wiring diagram for guidance.
Setting the Timer Function
The inline fan comes with a timer that can be set to a maximum of 20 minutes. To set the timer, locate the adjustment mechanism on your fan unit, typically a small dial or screw. Most timers can be adjusted between 1-20 minutes, with 15 minutes being optimal for average-sized bathrooms.
- Consider the size of your bathroom and typical moisture levels when setting the timer.
- Test the timer function after setting to ensure it runs for the desired duration.
- Adjust the timer as needed based on your bathroom’s specific requirements.
Testing and Troubleshooting Your Installation
After completing the installation of your inline bathroom-fan timer, it’s essential to test the system to ensure it’s working correctly. This step is crucial for verifying that your inline extractor fan is functioning as expected and providing the desired air extraction.
Performing a Safe Initial Test
Before testing, make sure that the power supply is turned on and that the circuit breaker or fuse hasn’t tripped. Check the isolation switch to ensure it’s in the ‘on’ position. If your fan isn’t running, verify that the wiring connections are correct and secure. For detailed wiring diagrams, you can refer to the manufacturer’s instructions or visit https://knowledgebase.vortice.ltd.uk/ for additional resources.
Checking Airflow and Timer Function
To check the airflow, you can use a simple test: hold a piece of tissue paper near the vent to see if it’s being drawn in. For the timer function, adjust the timer settings and observe if the fan turns on and off accordingly. Ensure that the timer is set correctly and that it’s functioning as per your requirements.
Common Installation Problems and Solutions
If you encounter issues during testing, here are some common problems and their solutions:
- If your extractor fan isn’t running, check the power supply, fuse, circuit breaker, and isolation switch before investigating wiring issues.
- Poor airflow is often due to ducting problems; check for crushed sections, excessive bends, or blockages, and ensure the external vent flap isn’t stuck closed.
- Excessive noise can indicate improper mounting, contact between the fan and surrounding structures, or ducting that’s too narrow or has too many bends.
- Timer function failures are commonly caused by incorrect wiring connections; verify that the permanent live wire is connected to the timer circuit and matches the manufacturer’s wiring diagram.
- If the fan runs continuously, check for wiring errors that might be bypassing the switch or timer function, or consider replacing a faulty timer component.
By following these steps, you can identify and resolve common issues with your inline fan installation, ensuring it operates efficiently and effectively over time.
Conclusion
With your new inline extractor fan installed, you’ll enjoy a drier, healthier bathroom environment, thanks to the enhanced ventilation. Installing an inline bathroom-fan timer is a valuable investment that significantly improves your bathroom’s ventilation, preventing moisture damage and enhancing overall air quality in your home. Throughout this guide, we’ve walked you through the entire process, from understanding inline extractor fans and their benefits to the final testing and troubleshooting of your installation. Proper maintenance of your inline extractor fan, including regular cleaning of vents and checking ducting connections, will ensure optimal performance and extend the system’s lifespan. For those who are not comfortable with electrical work, hiring a qualified electrician for your inline extractor fan installation is a worthwhile investment that ensures safety, compliance with regulations, and peace of mind.