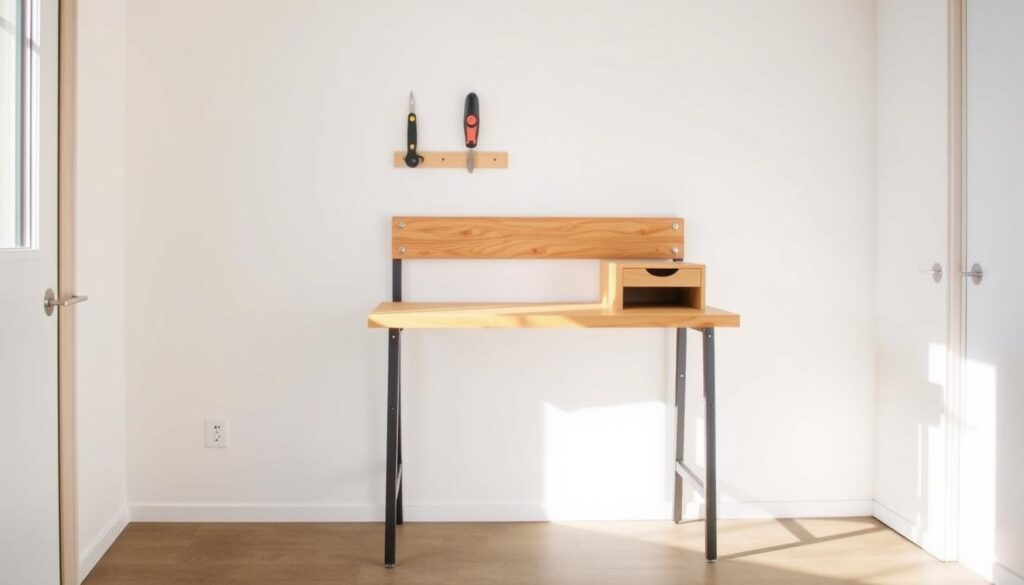
Are you tired of cluttered workshops or garages? Do you struggle to find space for your DIY projects? A folding workbench against a wall can be the perfect solution, maximising your space while providing a versatile workspace.
Creating a DIY folding workbench is a practical project that can be completed in a weekend. This guide will walk you through planning, gathering materials, and step-by-step installation, making it accessible to both beginners and experienced DIYers with basic woodworking skills.
By the end of this project, you’ll have a functional workspace that can be folded away when not in use, keeping your area tidy and organised. Whether you’re working on small DIY projects or need a dedicated workshop area, a wall-mounted folding workbench is a great way to enhance your working environment.
Key Takeaways
- Maximise your workshop or garage space with a folding workbench.
- Create a versatile workspace that can be customised to your needs.
- Complete this DIY project over a weekend with basic woodworking skills.
- Keep your workspace tidy by folding the workbench away when not in use.
- Suitable for both beginners and experienced DIYers.
Benefits of a Wall-Mounted Folding Workbench
When space is at a premium, a wall-mounted folding workbench offers versatility and convenience. This type of workbench is particularly beneficial for DIY enthusiasts who need a reliable workspace without the permanent footprint.
Space-Saving Solution for Small Workshops
A wall-mounted folding workbench maximises limited space in small workshops or garages by folding flat against the wall when not in use. This allows for a multi-purpose space that can serve various functions, such as parking vehicles in a garage or using a spare room for different activities.
Versatility and Convenience
The folding workbench is versatile and suitable for various DIY projects, from woodworking to crafting. It provides a sturdy work surface that can be deployed quickly when needed and tucked away just as easily, making it ideal for different types of DIY enthusiasts.
Cost-Effective Workshop Addition
Building a folding workbench is a cost-effective solution compared to permanent workbenches or commercial alternatives. It can be constructed using basic materials like plywood and 2x4s, and customised to fit specific wall spaces and height requirements.
| Benefits | Description |
|---|---|
| Space-Saving | Folds flat against the wall when not in use |
| Versatility | Suitable for various DIY projects |
| Cost-Effective | Built with basic materials like plywood and 2x4s |
Planning Your Folding Workbench Project
To ensure your folding workbench serves its purpose, thorough planning is necessary. This involves several key considerations to make your DIY project a success.
Determining the Ideal Location and Height
Selecting the right location for your folding workbench is crucial. Consider factors such as available wall space, proximity to power outlets, and natural light. The height of your workbench should be determined based on your height and the types of projects you’ll be working on. Typically, a height of 36 inches from the floor is considered standard for a counter height workbench.
Measuring and Marking Your Wall Space
Accurate measurement of the wall space is essential. Ensure there’s enough clearance for the workbench when it’s folded down and sufficient space for storage when it’s folded up. Use a level to ensure your mounting board is straight, and mark the wall accordingly.

Finding and Marking Wall Studs
Locating the wall studs is a critical step. Use a stud finder, such as a Franklin Pro Sensor, to identify the studs behind your wall. Mark the stud locations, as mounting to these studs will provide the necessary support and stability for your workbench. When dealing with concrete or masonry walls, use concrete screws or expansion anchors for a secure mount.
By carefully planning your DIY folding workbench project, you’ll be able to create a functional and convenient workspace that meets your needs. Consider the dimensions of your workbench based on the available space and intended use, and sketch a simple plan before beginning to avoid potential mistakes.
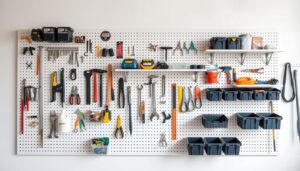
Essential Tools and Materials to Install Folding Workbench Against Wall

Before you start your DIY folding workbench project, it’s crucial to gather the right tools and materials. Having everything you need at hand will make the process smoother and ensure a sturdy, functional workbench.
Required Tools for the Job
To begin, you’ll need a variety of tools. These include measuring tools like a tape measure, level, and square to ensure accurate measurements. For cutting, you’ll require a circular saw, jigsaw, or mitre saw. Drilling equipment such as a drill/driver and various bits will be necessary for making holes and driving screws. Finally, assembly tools like screwdrivers and wrenches will help you put everything together securely.
Materials Shopping List
The materials needed for your DIY folding workbench include 2x4s for the frame, a 3/4″ plywood sheet for the top, a piano hinge, hex bolts with washers and nylon lock nuts, and screws. It’s essential to select straight, knot-free lumber for the frame to avoid any issues during assembly. A Kreg pocket hole jig can be very useful for creating strong joints.
Optional Accessories and Upgrades
To enhance the functionality of your workbench, consider adding optional accessories such as a T-track system, bench vise, or built-in storage solutions. Different types of hinges, like folding brackets, can also be used, each with their pros and cons. These upgrades can improve your workbench’s versatility and make your DIY projects more efficient.
By carefully selecting your tools and materials, you’ll be well-prepared to complete your DIY folding workbench project successfully. Estimated costs for the basic materials and optional upgrades can vary, so it’s a good idea to budget accordingly and explore different sources for materials, from traditional hardware stores to specialty woodworking suppliers.
Step-by-Step Installation Process
Now that you have gathered all the necessary tools and materials, it’s time to dive into the step-by-step installation process of your DIY folding workbench. This process involves several key steps that will ensure your workbench is sturdy, functional, and securely attached to the wall.
Mounting the Support Ledger to the Wall
To begin, you’ll need to mount a support ledger to the wall. This involves drawing a straight line using a level, locating and marking the wall studs, and then attaching a brace to the wall using appropriate screws. Ensuring the ledger is perfectly level and securely attached to the wall studs is crucial for the stability of your workbench. You can find a suitable wall-mounted work table, such as the VEVOR Wall Mounted Folding Table, which can serve as a reference for your project.

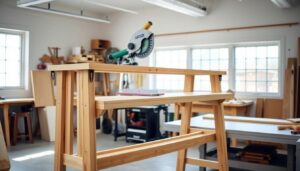
Building the Workbench Frame and Top
Next, you’ll build the workbench frame by cutting the lumber to size and creating pocket holes for strong joints. Assemble the frame with the correct dimensions, ensuring it is square and sturdy. After the frame is built, prepare and attach the plywood top, ensuring a smooth, flat surface. You may also consider adding edge banding or chamfering the edges for comfort.
Installing the Folding Mechanism and Hinges
Installing the folding mechanism is a critical step. You can use a piano hinge along the back edge or specialised folding brackets. Proper alignment is key to ensuring the workbench folds and unfolds smoothly. Cut the piano hinge to size using a handsaw or reciprocating saw with cutting fluid, and attach it securely.
Creating and Attaching the Folding Legs
To create the folding legs, cut 2x4s to the required length, shape one end into a half-circle using a jigsaw, and drill a hole at the center. Attach the legs to the workbench frame using hex bolts. Ensuring the legs are securely attached and fold neatly against the wall is essential for the workbench’s functionality.
Adding Stop Blocks for Stability
Finally, add stop blocks or braces to prevent the legs from folding past the desired position, ensuring stability when the workbench is in use. Testing the folding mechanism and making adjustments as needed will ensure smooth operation. Consider finishing touches such as sanding edges, applying finish or paint for protection, and potentially adding accessories like hooks or tool holders.
Conclusion: Enjoying Your New Folding Workbench
Congratulations on successfully completing your DIY folding workbench project, bringing versatility and efficiency to your workspace. With your new workbench installed, you can now enjoy a more organised and functional workshop or garage.
The space-saving advantages of your wall-mounted folding workbench mean you can now undertake various DIY projects without the clutter of a permanent work surface. To maximise the use of your new workbench, consider organisation tips for your tools and materials to keep your workspace efficient.
As you continue to use your folding workbench, you may want to consider enhancements such as adding lighting, power strips, or custom storage solutions. Regular maintenance will ensure the folding mechanism works smoothly and the work surface remains in good condition.
You’re now ready to tackle a range of DIY projects, from woodworking to home repairs. Share your completed projects or ask questions about the installation process. Your new workbench is just the start of optimising your workshop space – consider other complementary DIY storage solutions to further enhance your workspace.