Are you aware that a leaky connection under your sink can lead to significant water damage and increased bills? Properly connecting your tap to the water supply is crucial for any homeowner. A hose that is not fitted correctly can be the source of many problems, including leaks and damage to your home.
Understanding how to correctly attach a hose to your tap and water supply pipes can save you money on professional plumbing services and prevent potential issues. This guide will walk you through the process, from selecting the right pipe connections to testing your installation.
Key Takeaways
- Properly connecting your tap to the water supply pipes can prevent leaks and water damage.
- A correctly fitted hose reduces vibration and the risk of plumbing problems.
- Regular maintenance of your plumbing system can save you money in the long run.
- Replacing your hose every 5-10 years can prevent unexpected bursts or leaks.
- This job can typically be completed in under an hour with the right tools and preparation.
Understanding Flexible Sink Hoses
Flexible sink hoses are designed to provide a durable and flexible connection between your tap and water supply. These hoses are essential for a leak-free and efficient plumbing system.
What Are Flexible Sink Hoses?
Flexible sink hoses are plumbing components that connect your tap to the water supply lines. They are designed to be flexible, allowing for easier installation and more movement than rigid pipes.
Types of Flexible Sink Hoses and Their Lifespan
There are various types of flexible sink hoses available, including braided and rubber hoses. The lifespan of these hoses can vary depending on the material and usage, typically lasting between 5 to 10 years. Regular inspection can help identify signs of wear and tear.
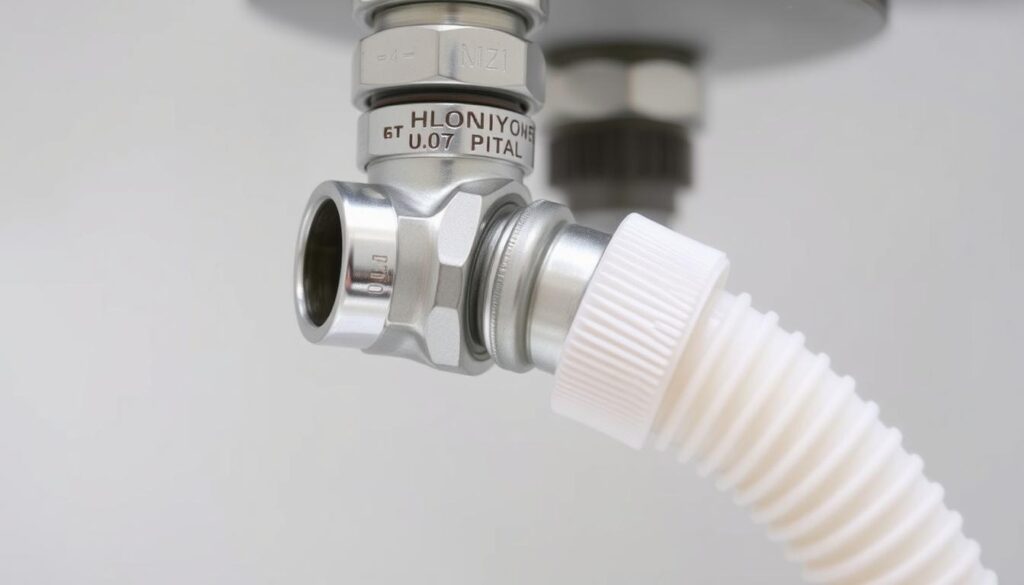
Common Connection Methods: Screw-On vs Push-Fit
The connection method is a crucial aspect of flexible sink hoses. You can choose between screw-on and push-fit connectors. Screw-on connections require tightening the hose onto threaded fittings using a wrench, while push-fit connectors allow for tool-free installation by simply pushing the hose end into the fitting until it clicks securely.
| Connection Type | Description | Advantages |
|---|---|---|
| Screw-On | Requires tightening onto threaded fittings | More widely available, often less expensive |
| Push-Fit | Tool-free installation by pushing the hose end into the fitting | Faster to install, easier to use |
Understanding the type of tap connector you need is crucial before purchasing replacement hoses. JG Speedfit offers push-fit tap connectors that simplify the installation process.
Tools and Materials Needed for Installation
To ensure a smooth installation process, you’ll need to have the right tools and materials at your disposal. Installing a flexible sink hose requires some essential tools and additional materials to ensure a watertight seal and proper functioning.
Essential Tools for the Job
You will need a set of basic plumbing tools, including an adjustable wrench and a basin wrench, to loosen and tighten the connections. Make sure you have these tools ready before starting the job to avoid interruptions once your water supply is turned off.
Selecting the Right Flexible Hose for Your Sink
Various flexible hoses are available, including different lengths (300mm, 400mm, 900mm, 1000mm) and connection types (G1/2″ BSP, M10, 10mm). Choose a hose that fits your sink’s inlet configuration and is suitable for hot water if necessary.
Additional Materials You Might Need
Additional materials that may be required include isolation valves, washers and O-rings, pipe jointing compound, pipe clips or supports, leak detection solution, and pipe insulation. Having these materials on hand can help ensure a successful installation and prevent future issues.
- Isolation valves: Allow you to shut off water to individual fixtures without turning off the main supply to your entire home.
- Washers and O-rings: Replace any damaged sealing components.
- Pipe jointing compound: An alternative to PTFE tape for creating watertight seals in threaded connections.
- Pipe clips or supports: Secure pipe in place and prevent movement.
- Leak detection solution: Helps identify small leaks in the connection area.
Preparation Before You Install Flexible Sink Hose
To avoid potential issues during the installation of your flexible sink hose, it’s essential to prepare your sink area adequately. This preparation ensures a smooth and successful installation process.
Turning Off Water Supply and Safety Precautions
Before starting the installation, turn off the water supply to your sink. Locate the shut-off valves under the sink and turn them clockwise to shut off the water supply. It’s also a good practice to open the tap to drain the water from the pipes. This step is crucial for preventing water damage and ensuring your safety during the installation.
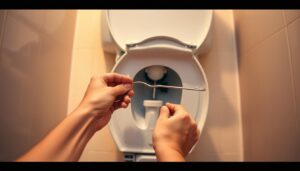
Removing the Old Hose Properly
Carefully remove the old flexible sink hose. If it’s been in place for a while, it might be stuck due to mineral deposits or grime. Use a gentle twisting motion to loosen it. Once removed, inspect the connection points. The top part of the hose typically screws onto the tap, while the bottom part connects to the water pipe, often a copper pipe.
| Connection Point | Inspection Criteria |
|---|---|
| Tap Connection | Check for mineral deposits, corrosion, or damage on the threads. |
| Pipe Connection | Inspect for signs of leaks, corrosion, or wear on the rubber washers or O-rings. |
Inspecting Connection Points for Damage
Inspect the connection points for any signs of damage or wear. Check the threads on both the tap and the water pipe for corrosion or mineral buildup. Also, examine the rubber washers and O-rings for cracks or deformation. If you find any damage, consider replacing these parts before installing the new hose to prevent future leaks. 
By following these preparatory steps, you can ensure a successful and leak-free installation of your new flexible sink hose.
Step-by-Step Process to Install Flexible Sink Hose
To ensure a leak-free connection, follow the step-by-step guide for installing a flexible sink hose. This process involves several key steps that, when executed correctly, will provide a secure and functional water supply connection to your sink.
Installing Screw-On Connections
When installing screw-on connections, it’s crucial to ensure that the threads are clean and free from debris. You should apply a suitable sealant to the threads to prevent leaks. Tighten the connection firmly, but avoid over-tightening, which can damage the threads or the hose.
For screw-on connections, check that the hose is not twisted or stressed, as this can lead to premature wear or failure. Ensure the hose has a natural curve and is not stretched between the tap and the supply connection.
Working with Push-Fit Connections
Push-fit connections offer a simpler alternative, requiring less technical knowledge. To install a push-fit connector, ensure the pipe is clean and free from debris. Push the hose onto the fitting until it clicks, indicating it’s securely in place.
To verify that the push-fit connection is secure, gently tug on the hose. If you’re unsure, consult the manufacturer’s instructions or seek advice from a local DIY expert.
Testing for Leaks and Making Adjustments
After installation, slowly turn the water supply back on, first opening the valve partially to allow water to flow gradually through the new connections. Watch carefully for any signs of leaking around both the tap end and supply connections for at least 5 minutes.

If you notice any leaks, turn off the water supply immediately and check that all connections are properly tightened and aligned. For hot water connections, be aware that the hose and fittings may expand slightly as they warm up, so check again after running hot water through the system.
Test the water pressure by turning the tap on fully to ensure the flexi hose can handle the maximum flow without leaking. Many people make the mistake of not checking for slow leaks; place paper towels under connections and check them after a few hours to detect minor seepage.
Make sure new installations are free from stress or tension – the hose should have a natural curve without being stretched. If leaks persist after tightening, you may need to add more sealing materials or replace washers, available at your local DIY store.
Conclusion: Maintenance Tips and When to Replace
Proper maintenance of your flexible sink hose is crucial for preventing water damage and ensuring the longevity of your plumbing system. Regular inspections are key to identifying potential issues before they become major problems.
Regular Checks and Maintenance: It’s recommended to inspect your flexible hoses every 1-2 years for signs of wear, such as corrosion on the braid, bulging, or discolouration. Pay particular attention to the end fittings and the area where the rubber inner tube meets the connector. Replacing any hose showing signs of deterioration immediately can prevent water damage.
Additional Tips: Consider installing water leak detectors, especially in areas that aren’t frequently visible. Noting the installation date on the hose or keeping a home maintenance log can also be helpful. Even high-quality flexible hoses should be replaced every 5-10 years as a preventative measure. Understanding how to shut off your main water supply quickly is an essential part of home ownership.
By following these maintenance tips and being proactive about replacing your flexible sink hoses, you can ensure the continued integrity of your home’s plumbing system.