Are you struggling to achieve a smooth, professional finish on your drywall corners? Installing corner bead is a crucial step that can make all the difference in protecting vulnerable corners from damage and creating clean, straight edges.
You’ve likely encountered the frustration of uneven or damaged drywall corners, but with the right guidance, you can achieve a flawless finish. This comprehensive guide will walk you through the process of selecting, preparing, and installing corner bead on drywall edges, ensuring a durable and visually appealing result.
Key Takeaways
- Understand the different types of corner beads available for your drywall project.
- Learn proper preparation techniques for a successful installation.
- Discover how to achieve perfectly straight corners with corner bead.
- Enhance the durability and appearance of your drywall installation.
- Achieve professional-quality results with our step-by-step guide.
Understanding Corner Beads and Their Purpose
To achieve professional-looking drywall corners, it’s essential to understand the purpose of corner beads. Corner beads are a critical component in drywall finishing, providing a durable and clean edge where two drywall panels meet.
What Are Corner Beads?
Corner beads are specialised strips designed to reinforce and protect the vulnerable outside corners of drywall. They come in various materials, including metal, vinyl, and composite, each offering different benefits for durability, ease of installation, and finished appearance. By using corner beads, you can create a smooth, even seam and an attractive finish.
Why Corner Beads Are Essential for Drywall Finishing
Corner beads are essential because they protect drywall corners from dents, chips, and damage from everyday impacts. They also establish perfectly straight lines at wall intersections, which is difficult to achieve with joint compound alone. Furthermore, corner beads serve as guides for applying joint compound, making the finishing process more efficient and helping achieve consistent results across all corners in your project.

Types of Corner Beads for Different Applications
The world of corner beads offers a variety of options, each designed to cater to specific needs and applications. When selecting a corner bead, it’s essential to consider the particular requirements of your project.
Metal Corner Beads
Metal corner beads have been the traditional choice for decades, offering excellent rigidity and creating crisp, sharp 90-degree corners that stand up well to high-traffic areas and potential impacts.

Vinyl Corner Beads
Vinyl corner beads have gained significant popularity for their flexibility, resistance to rust and corrosion, and ability to conform to corners that aren’t perfectly square, making them ideal for older homes with settling issues.

Bullnose Corner Beads
Bullnose corner beads create a rounded, softer edge rather than a sharp 90-degree corner, adding an elegant, contemporary look that’s particularly popular in modern homes and upscale renovations.

When choosing the appropriate corner bead, consider factors such as moisture exposure, traffic patterns, aesthetic preferences, and whether you need special applications like off-angle corners or three-way intersections.
Essential Tools and Materials for Installing Corner Bead

The key to a professional-looking drywall finish lies in having the correct tools and materials for corner bead installation. To ensure a smooth and efficient process, you’ll need to gather a few essential items.
Required Tools
You’ll need a utility knife and straight-edge for cutting, a chalk line for alignment, and taping knives (4 to 6 inches) for applying joint compound. A heavy-duty stapler with 1⁄2-inch staples is necessary for securing the corner bead. Additionally, a hammer may be required for tapping the bead into place.
Materials Checklist
To complete the installation, you’ll need drywall corner bead, Trim-Tex 847 Spray Adhesive, and joint compound (mud). It’s also a good idea to have spare corner bead pieces on hand to account for potential mistakes or miscalculations. A mud pan, sandpaper or sanding blocks, and a selection of taping knives will also be necessary for finishing the job.
Preparing Your Drywall Corners for Installation
To achieve professional-looking results, you must prepare your drywall corners correctly before installing corner beads. Proper preparation is half the task when it comes to installing drywall corner beads.
Ensuring Proper Drywall Placement at Corners
Begin by examining your drywall corners to ensure they’re properly installed. One sheet should lap over the other and be securely fastened to the framing studs. Check that the lapped sheet doesn’t extend beyond the face of the adjacent wall. If it does, use a rasp or sanding block to remove the excess material until it’s flush with the adjoining surface.
Cleaning and Inspecting Corner Edges
Thoroughly clean the corner edges to remove any dust, debris, or loose paper that could interfere with adhesion. Inspect for and address any protruding fasteners, damaged drywall edges, or uneven surfaces that might prevent the corner bead from sitting flush against both walls and creating a straight, level corner.
| Preparation Task | Description |
|---|---|
| Check drywall placement | Ensure one sheet laps over the other and is fastened to framing studs |
| Clean corner edges | Remove dust, debris, or loose paper |
| Inspect for obstructions | Address protruding fasteners, damaged drywall edges, or uneven surfaces |

How to Install Corner Bead on Drywall Edges Step-by-Step
Properly installing corner beads on drywall edges is a skill that can be mastered with practice. This process involves several key steps to ensure a smooth and professional finish. By following these steps, you can achieve a high-quality result that enhances the overall appearance of your drywall.
Measuring and Cutting Corner Beads to Size
Begin by measuring the height of your corner and cutting the corner bead to the appropriate length, leaving a small gap at the floor to accommodate baseboards. Use tin snips to cut the corner bead, ensuring a clean cut. This gap will be concealed by the baseboard molding.
Positioning and Aligning the Corner Bead
When positioning the corner bead, apply light, even pressure toward the corner to ensure it sits flush against both walls. This helps create a straight line from top to bottom. Misalignment can cause the bead to twist, so it’s crucial to get it right the first time.
Securing Metal Corner Beads
For metal corner beads, secure them by driving nails or staples through the pre-punched holes at approximately 8-inch intervals along both flanges. Be careful not to dent the bead or drive fasteners too deeply. Using a drywall corner bead clincher can help squarely position the metal strip and fasten it securely.
Installing Vinyl Corner Beads
When installing vinyl corner beads, apply a thin layer of spray adhesive to both the corner and the bead’s flanges. Press the bead firmly into place and secure it with staples spaced about 6 to 8 inches apart on each side. This ensures a strong bond and a smooth finish.
Handling Three-Way Corners and Special Situations
For three-way corners, dry-fit the pieces first and cut 45-degree angles on the adjoining ends to create a clean intersection. This technique helps avoid overlapping material and ensures a professional finish. Take your time to step back and visually inspect your work as you progress, checking that corners are straight, level, and properly aligned.
By following these steps and paying attention to detail, you can achieve a professional-looking finish on your drywall edges. Remember to work methodically and check your work regularly to ensure the best results.
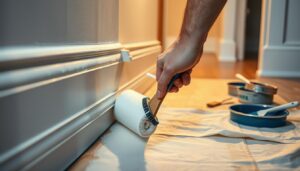
Finishing and Mudding Corner Beads for a Professional Look
The key to a flawless drywall finish lies in the proper application of joint compound to the corner beads, a process that requires patience and precision. You need to apply multiple coats, allowing each to dry before sanding to achieve a smooth finish.
Applying the First Coat
To start, use a 6-inch drywall knife to apply the first coat of compound to the corner, gliding the blade along the raised bead and the wall. Focus on filling the recessed areas without building up too much thickness, which can lead to cracking.
Subsequent Coats
For the second coat, switch to a 10-inch knife and apply compound beyond the edges of the first coat, feathering it outward to create a gradual transition. The third and final coat should be applied with a 12-inch knife, extending the compound further onto the wall for an imperceptible blend.
Sanding for Smoothness
Between each coat, lightly sand to remove any imperfections. For the final sanding, use fine-grit sandpaper (150-220 grit) and a sanding sponge for corners, being cautious not to sand through the paper facing of the bead. For more detailed guidance on mudding and taping drywall corners, you can visit This Old House for expert advice.
Conclusion
By following the steps outlined in this guide, you’ll be well on your way to creating strong, attractive corners on your drywall. Installing corner beads is a manageable DIY project that enhances both durability and aesthetic appeal. Taking the time to select the right type of corner bead ensures the best results. Proper preparation and attention to detail during installation save time and frustration during finishing stages. With practice, you’ll achieve professionally done corners that stand the test of time.