Are you tired of using pull chains to control your ceiling fan? Installing a universal remote control can be a game-changer, making it easier to adjust the fan speed and lighting from anywhere in the room.
Adding a remote module to your existing ceiling fan is a practical home improvement project that enhances convenience and functionality. This comprehensive guide will walk you through the installation process, ensuring you can enjoy the benefits of a modernised fan without the need for professional assistance.
Key Takeaways
- Enhance your ceiling fan with a universal remote control for added convenience.
- Learn the step-by-step process to install a remote module in your home.
- Discover how to eliminate pull chains and adjust fan speed and lighting with ease.
- Understand the necessary tools and safety precautions required for the installation.
- Troubleshooting tips to ensure your ceiling fan remote works perfectly.
Understanding Ceiling Fan Remote Modules
To fully appreciate the benefits of a ceiling fan remote module, it’s essential to understand its components and functionality. A ceiling fan remote module consists of two main components: a receiver that installs inside the fan canopy and a handheld remote control that communicates with the receiver.
Benefits of Installing a Remote Module
The primary benefit of installing a remote module is convenience—controlling fan speed and lights without getting up or reaching for pull chains. Remote modules can add functionality to basic ceiling fans, including multiple speed settings, light dimming capabilities, and timer functions. This added functionality can significantly enhance your home’s comfort and ambiance.
Types of Ceiling Fan Remote Controls Available
There are two main types of ceiling fan remote controls: brand-specific models designed for particular fan manufacturers and universal remotes compatible with most standard ceiling fans. When selecting a remote module, consider whether you need basic functionality (on/off, speed control) or advanced features like light dimming, reverse function control, or programmable settings. Some modern remote modules offer smart home integration, allowing you to control your ceiling fan via smartphone apps or voice commands through home assistants.
Safety Precautions Before Installation
To ensure a safe installation process, follow these critical safety precautions before installing your ceiling fan remote module. Safety must be your top priority when working with electrical components.
Turning Off Power Supply
Always turn off the power to the ceiling fan at both the wall switch and the circuit breaker panel before beginning any installation work. This is a crucial step to prevent any accidental start-ups or electrical shocks.
Ensure you’re working with a stable stepladder that provides secure access to the ceiling fan without stretching or reaching.
Verifying Power Is Off
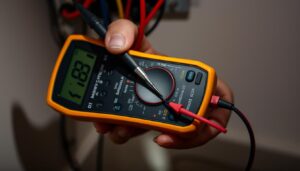
After turning off the power, use a non-contact voltage tester to verify that no current is flowing to the fan—this step is crucial and should never be skipped. You can find a suitable non-contact voltage tester in the UK by searching online or visiting your local hardware store.
Never rely solely on the wall switch being off, as wiring mistakes in the home could mean power is still present even when the switch is in the off position. Wait at least 10 minutes after turning off power before beginning work to allow any stored electrical charge in the fan’s capacitors to dissipate.
Keep all tools and parts organised on a nearby table or tray to avoid dropping items or making multiple trips up and down the ladder, ensuring a smooth and safe installation process for your ceiling fan remote module.
Tools and Materials Required for Installation
The installation of a ceiling fan remote module necessitates having the right tools and materials at hand. To ensure a smooth and efficient process, it’s essential to be well-prepared.
Essential Tools Checklist
To successfully install a ceiling fan remote module, you’ll need several essential tools. These include a 4-in-1 screwdriver, electrical tape, needle-nose pliers, a non-contact voltage tester, and wire stripper/cutter. A sturdy stepladder is also crucial for safely accessing the ceiling fan.
Key Tools:
– 4-in-1 screwdriver
– Electrical tape
– Needle-nose pliers
– Non-contact voltage tester
– Wire stripper/cutter
Choosing the Right Remote Kit
When selecting a remote kit, ensure it’s compatible with your specific ceiling fan model. Universal kits work with most fans, but it’s essential to check the manufacturer’s specifications. Consider the features you want: basic models offer simple on/off and speed control, while advanced options include light dimming, reverse function, and timer settings.
Quality Matters: Opt for reputable brands with good reviews to avoid reliability issues and frequent battery replacements.
How to Install Ceiling Fan Remote Module
Accessing the ceiling fan canopy is the initial step in installing a remote module. This process involves a few crucial steps to ensure a successful installation.
Accessing the Ceiling Fan Canopy
To access the canopy, you’ll need to loosen the screws around it. This will allow you to lower the canopy and expose the wiring inside. Be careful not to remove the screws completely to avoid any accidents.
Identifying and Disconnecting Existing Wires
Once the canopy is lowered, identify the existing wires. Typically, you’ll find hot (black), neutral (white), ground (green or bare copper), and possibly a blue wire for the light kit. Disconnect these wires by unscrewing the wire nuts, taking note of which wires were connected to each other.

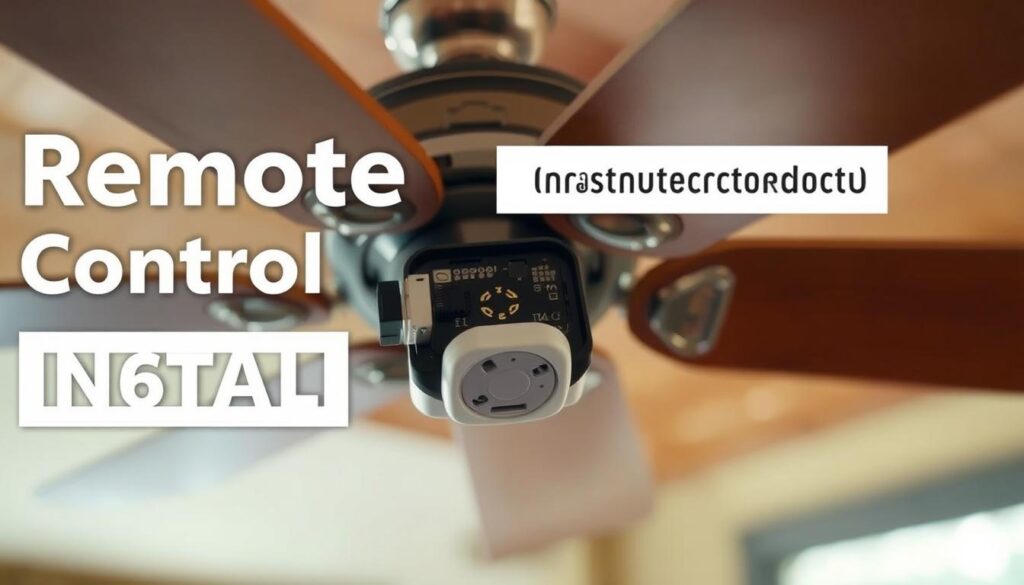
Positioning the Remote Receiver
Position the remote receiver inside the canopy with the antenna pointing away from the motor. This usually means inserting it into the mounting bracket with the flat side facing the ceiling.
Connecting the Wires Correctly
Follow the wiring diagram provided with your remote kit to connect the receiver’s wires to the corresponding fan and supply wires. Typical connections include the receiver’s black wire to the black supply wire, and the receiver’s white wire to the white supply wire.
| Receiver Wire | Supply/Fan Wire |
|---|---|
| Black (AC IN L) | Black (hot/power) supply wire |
| White (AC IN N) | White (neutral) supply wire |
| Black (TO MOTOR L) | Black fan wire |
| White (TO MOTOR N) | White fan wire |
| Blue (FOR LIGHT) | Blue fan wire (if applicable) |
Setting Up the Remote Control
To complete the installation, you need to set up the remote control for your ceiling fan. This involves a few straightforward steps to ensure your fan is ready for use.
Installing Batteries in the Remote
First, you need to insert batteries into the remote control. Most remotes use either AAA batteries or button cell batteries like CR2032. Check your specific model requirements and ensure the batteries are inserted with the correct polarity.
- Remove the battery door from the back of the remote using a flat-head screwdriver.
- Insert the batteries, ensuring the positive pole faces up.
- Replace the battery door and test the remote by pressing the HIGH SPEED button.
Configuring Dip Switches
Many ceiling fan remote systems use dip switches to create a unique frequency code between the remote and receiver. To configure them, locate the dip switches on both the remote and the receiver, and set them to matching positions using a small screwdriver or pen tip.
Mounting the Wall Bracket (Optional)
If your remote kit includes a wall bracket, you can mount it on a wall for convenience. Decide on a location that’s accessible but won’t be bumped accidentally. Install the wall bracket using the provided screws, ensuring it’s securely attached.

Before finalising the installation, test all functions of the remote control, including fan speeds, light operation, and any special features like timers or reverse function.
Testing and Troubleshooting Your Installation
Testing your ceiling fan remote installation is a straightforward process that helps you identify any potential issues early on. To start, restore power to the ceiling fan at both the circuit breaker and wall switch. This will allow you to begin testing your new remote control system.
Initial Testing Procedure
For the initial test, stand directly beneath the fan and press the power button on the remote. The fan should respond immediately by starting at the default speed. Test each speed setting on the remote to ensure the fan responds appropriately. If your fan has a light kit, test the light on/off and dimming functions as well.
Common Issues and Solutions
Common issues include the remote not controlling the fan despite having power, indicated by the LED light on the remote illuminating when buttons are pressed. This often means the remote and receiver need to be re-synced. If the fan operates erratically or at incorrect speeds, check that any pull chains on the fan are set to their highest settings, as these can override or interfere with the remote control’s operation.
Re-syncing Your Remote and Receiver
To re-sync your remote and receiver, turn off power to the fan at the circuit breaker, wait 30 seconds, restore power, and within 30 seconds press and hold the designated sync buttons (often the high and low speed buttons together) for 5 seconds. Make sure the receiver is positioned properly inside the canopy without being pressed against the ceiling or tangled in moving parts, as this can interfere with signal reception.
Universal Ceiling Fan Remote Options
Universal ceiling fan remotes provide a versatile solution for fans without original remotes. They are compatible with almost any ceiling fan, making them especially useful if your fan’s brand-specific remote is unavailable or non-existent.
Compatibility with Different Fan Models
When shopping for universal ceiling fan remotes, look for models that explicitly state compatibility with a wide range of ceiling fans, including both AC and DC motor types if applicable. Most universal receivers are designed to fit inside standard ceiling fan canopies, but always check the dimensions if you have a particularly compact or unusual fan design.
Advanced Features to Consider
Advanced features to consider when choosing universal fan remote controls include light dimming capability, timer functions, reverse direction control, and memory settings that remember your preferences. Some premium universal ceiling fan remotes now offer smart home integration, allowing you to control your fans through smartphone apps or voice assistants like Alexa or Google Home.
Conclusion
Installing a ceiling fan remote module is a worthwhile home improvement project that significantly enhances the convenience and functionality of your existing ceiling fans. With the right tools and by following this guide, most homeowners can complete the installation successfully, enjoying the comfort and convenience of controlling their fan from anywhere in the room.
Proper positioning of the remote receiver inside the canopy is crucial for optimal signal reception and reliable operation of your ceiling fan remote. If you encounter any difficulties during installation or operation, most issues can be resolved through simple troubleshooting steps like re-syncing the remote or checking wire connections.
Universal ceiling fan remote options provide flexibility for upgrading almost any ceiling fan, regardless of age or brand, making them an excellent choice for modernising older fans. Consider the specific features you need in a remote control, from basic speed and light control to advanced functions like timers and smart home integration.
By upgrading to a ceiling fan remote, you’ll not only improve daily convenience but also add value to your home by modernising your existing ceiling fixtures with minimal investment. This simple yet effective upgrade can make a significant difference in your daily life, providing you with a more comfortable and controlled environment.