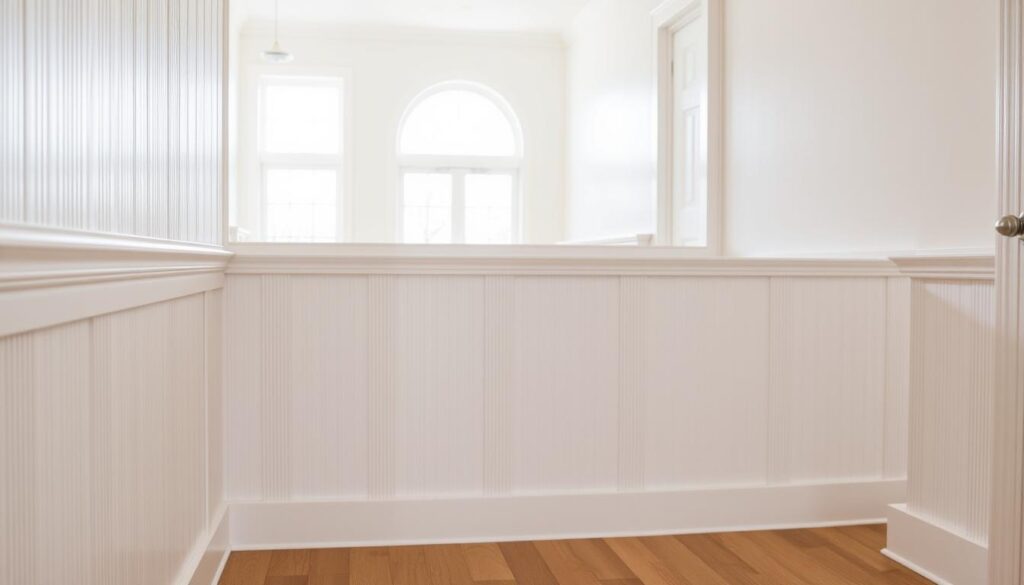
Are you looking to add a touch of classic charm to your home with a simple and cost-effective DIY project? Installing beadboard is an easy way to add texture and character to any room.
Beadboard wall panelling is a timeless addition to any home, offering a vintage charm that can transform a room in just a weekend. This comprehensive guide will walk you through the entire process, making it accessible even for DIY beginners.
Key Takeaways
- Beadboard adds a touch of classic charm to your space.
- It is a cost-effective DIY project that can be completed over a weekend.
- The guide covers everything from selecting materials to achieving professional finishing touches.
- Beadboard can be used as wainscoting or as a full wall treatment.
- It is a relatively straightforward project for DIY beginners.
What You’ll Need: Materials and Tools
Gathering the essential materials and tools is the first step towards a successful beadboard installation. To achieve a professional finish, you’ll need to have the right materials and tools at your disposal.
Essential Materials
The quality of your beadboard panels significantly impacts the overall result. Typically available in 4’x8′ sheets, these panels are made from materials such as MDF, which is common but not ideal for very humid areas. You’ll also need construction adhesive to secure the panels to the wall, finish nails (1 3/4″) for added stability, and paintable caulk to fill any gaps.
The other essential materials include sandpaper for smoothing out rough edges, wood filler or spackle for filling nail holes, and paint to achieve your desired finish.
Required Tools
Your toolkit should include measuring implements such as a tape measure and level, cutting tools like a circular saw or table saw, and a caulk gun for applying adhesive. A finish nailer or hammer will be necessary for securing the panels, while paintbrushes and a paint roller will be used for the final coating.
Additionally, a stud finder is crucial for ensuring that your panels are securely attached to the wall studs, preventing future warping or separation.
Preparing Your Space Before Installation
To ensure a smooth installation process, prepare your space thoroughly. This crucial step will save you time and frustration during the beadboard installation.
Removing Existing Fixtures
Begin by removing all baseboards, switch plates, outlet covers, and any other fixtures or hardware that might interfere with the beadboard placement. Assess your walls for any damage or uneven areas that might affect the installation.
Wall Preparation Tips
Check for any excessive texture on the walls that may need to be removed. It’s also a good idea to plan your panel layout, taking into account corners, windows, and electrical outlets to minimize awkward cuts.
Marking Stud Locations
Using a stud finder, locate and clearly mark all wall studs above the line where your beadboard will end. Draw a level reference line around the entire room at this height to ensure your panelling is perfectly straight.
Following these tips and taking the necessary steps will ensure a successful installation.
Measuring and Cutting Beadboard Panels
Measuring and cutting beadboard panels correctly is the foundation of a successful installation. To achieve this, you need to take accurate measurements and use the right cutting techniques.
Accurate Measurements
To ensure a precise fit, measure your wall height at multiple points, as floors and ceilings are rarely perfectly level. When working with beadboard panels, always measure twice (or even three times) before making any cuts to avoid costly mistakes and material waste.
Cutting Techniques for Straight Edges
For straight cuts, a table saw provides the most precise results, but a circular saw with a straight-edge guide can also work effectively if you take your time. When cutting beadboard, always position it with the finished side up when using a circular saw, or finished side down when using a table saw, to prevent splintering along the cut edge.

Cutting Around Obstacles
When cutting around obstacles like electrical outlets and switches, first mark their precise locations, then use a drill to create starter holes at the corners before cutting out the shape with a jigsaw. For plumbing fixtures, use a hole saw or spade bit that matches the pipe diameter, making the hole slightly larger (about 1/4 inch) than needed to allow for adjustments.
Outlets and Switches
Carefully measure the location of outlets and switches to ensure accurate cuts. Use a drill and jigsaw to cut out the required shape.
Plumbing Fixtures
When dealing with plumbing fixtures, use a hole saw or spade bit to create a hole that is slightly larger than the pipe diameter.
| Cutting Tool | Cut Type | Tips |
|---|---|---|
| Table Saw | Straight Cuts | Use for precise cuts, finished side down |
| Circular Saw | Straight Cuts | Use with straight-edge guide, finished side up |
| Jigsaw | Curved Cuts | Use for cutting around obstacles |
How to Install Beadboard Wall Panelling Step-by-Step
To achieve a professional finish, follow these step-by-step guidelines on how to install beadboard wall panelling. The process involves several key steps that ensure a seamless and durable installation.
Applying Adhesive Correctly
Begin the installation by applying construction adhesive to the back of your first beadboard panel in a zigzag pattern. Ensure good coverage without using excessive amounts that might squeeze out from the edges.
- Apply the adhesive in a controlled manner to avoid mess.
- Hold the panel firmly in place for a few seconds to ensure it adheres properly to the wall.
Positioning Your First Panel
Position your first panel carefully in a corner or at your predetermined starting point, aligning the top edge with your previously marked level line. This first panel sets the alignment for all subsequent panels.

Securing Panels with Nails
Press the panel firmly against the wall to ensure good adhesive contact, then secure it with finish nails, focusing on the stud locations you marked earlier. Place nails near the top, middle, and bottom of the panel.
Joining Multiple Panels Seamlessly
When joining multiple panels, ensure the edges match perfectly (bead to non-bead) and keep seams tight. Any gaps between panels will be highly visible in the finished installation.
- Work systematically around the room, completing one wall before moving to the next.
- For more information on the installation process, you can refer to our detailed guide on how to install beadboard.
Finishing Touches for a Professional Look
The finishing touches you apply to your beadboard installation can elevate it from a DIY project to a beautiful feature in your home. To achieve a professional finish, several key steps are essential.
Installing Trim and Moulding
Begin by installing any trim pieces such as chair rail along the top edge of wainscoting-height beadboard or crown moulding for full-wall installations. These elements frame your beadboard beautifully.

Filling Nail Holes and Gaps
Fill all nail holes with wood filler or spackle, allowing it to dry completely before sanding smooth with fine-grit sandpaper for a flawless surface.
Caulking Seams and Edges
Apply paintable caulk to all seams, corners, and edges where the beadboard meets other surfaces. This crucial step creates seamless transitions and prevents moisture from getting behind the panels.
Painting Your Beadboard
When painting beadboard, start with a high-quality primer appropriate for your panel material. For pine beadboard, use a stain-blocking primer to prevent knots and oils from bleeding through your paint.
Primer Application
Apply a coat of primer to your beadboard, ensuring a uniform base for painting.
Paint Selection and Techniques
Use a small brush to apply paint to the grooves first, then follow with a roller on the flat surfaces. Consider using semi-gloss or satin finish paint for durability and ease of cleaning.
For a durable finish, apply at least two coats of paint, allowing adequate drying time between coats.
Conclusion
The classic charm of beadboard panelling can elevate the aesthetic of any room in your home. By following the steps outlined in this article, you’ll be able to achieve professional-looking results with your beadboard installation. This DIY project requires patience, particularly when taking measurements and ensuring panels are level before securing them to your walls.
With the right materials and attention to detail, you can create a beautiful and timeless texture that adds character to your space. Whether you’re renovating a bathroom or enhancing a hallway, beadboard wall panelling is a versatile and cost-effective solution. By taking your time and following the installation steps carefully, you’ll be able to enjoy a stunning finish that will last for years to come.