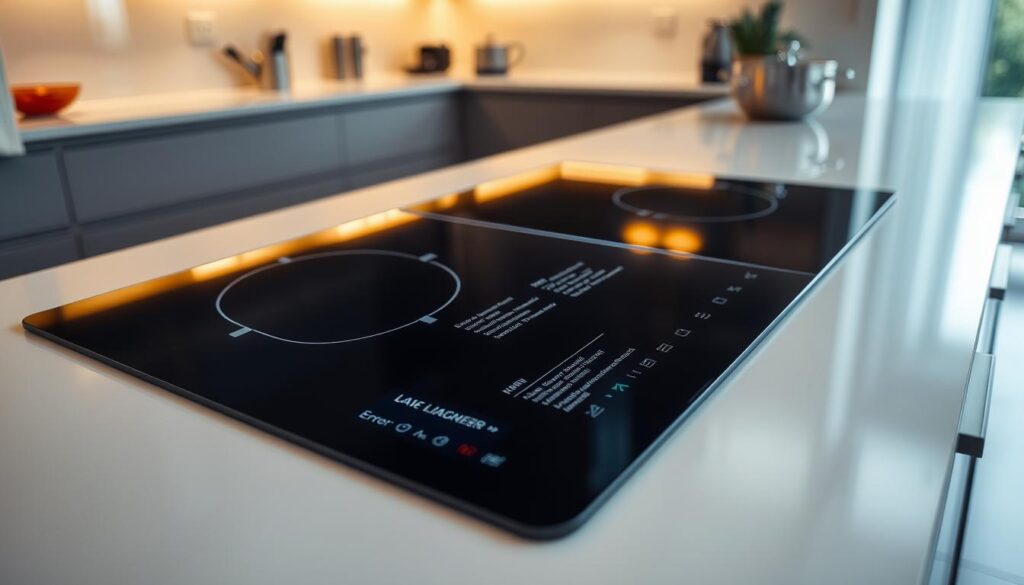
Are you frustrated with your induction hob displaying an error code, leaving you unsure of how to resolve the issue?
Encountering an error code on your hob can be a bewildering experience, but understanding what these codes signify is the first step towards troubleshooting and potentially fixing the problem.
Many common issues with your hob can be resolved without needing professional repair if you understand the meaning behind the error codes. This comprehensive guide will walk you through the most common error codes across major brands, providing step-by-step troubleshooting advice to get your hob functioning correctly again.
It’s crucial to prioritise safety when attempting to diagnose and fix issues with your hob, knowing when to attempt DIY solutions and when to seek professional help.
Key Takeaways
- Understanding error codes on your induction hob is crucial for effective troubleshooting.
- Many common hob issues can be resolved without professional repair.
- Safety should always be the top priority when diagnosing and fixing hob issues.
- This guide provides step-by-step troubleshooting advice for common error codes.
- Knowing when to attempt DIY solutions and when to seek professional help is essential.
Understanding Induction Hob Technology
To troubleshoot issues with your induction hob effectively, it’s crucial to understand how it works. Induction cooking technology is based on the principle of electromagnetic induction, which generates heat directly in the cookware rather than heating the cooking surface.
How Induction Cooking Works
Induction hobs consist of copper coils beneath the cooking surface. When you place a compatible pot or pan on the hob and turn it on, an electromagnetic field is generated. This field induces an electrical current in the metal cookware, causing it to heat up. The heat is produced directly in the cookware, making induction cooking highly efficient and responsive.
The components of an induction hob system include electronic controls and sensors that monitor performance and safety. These components work together to provide a cooking experience that is not only efficient but also safe, as they can detect when cookware is not compatible or when there is an issue with the hob.
Why Error Codes Appear on Induction Hobs
Induction hobs are designed with multiple safety features and diagnostic systems. When a problem is detected, the hob displays an error code to communicate the issue to the user. These codes can indicate a range of problems, from minor issues like incompatible cookware to serious faults that require professional attention.
| Error Code | Description | Solution |
|---|---|---|
| E0 | No cookware detected | Check cookware compatibility and placement |
| E1 | Overheating | Allow the hob to cool down |
Understanding the technology behind induction cooking helps you interpret error codes more effectively and troubleshoot problems with greater confidence. By familiarising yourself with how induction hobs work, you can resolve issues efficiently and enjoy a seamless cooking experience.
Common Induction Hob Error Codes Explained

Induction hobs, like any sophisticated kitchen appliance, use error codes to indicate problems, and deciphering these codes is key to resolving issues. When your induction hob displays an error code, it’s essential to understand what it means to take the appropriate corrective action.
Numerical Error Codes (E0-E9)
Numerical error codes ranging from E0 to E9 are displayed on your induction hob to indicate specific issues. These codes are crucial for diagnosing problems.
- E0: Configuration Error of Interface – This indicates a problem with the hob’s configuration.
- E1: Compatibility failure – The hob has detected a compatibility issue, possibly with the cookware or an internal component.
- E3: Over voltage; wrong connection – This suggests a power supply issue, potentially due to incorrect voltage or a wrong connection.
- E4: Temperature sensor coil defect – The temperature sensor is faulty, which could lead to overheating or failure to heat.
- E5: Supply voltage out of range – The voltage supply is not within the acceptable range for the hob’s operation.
- E6: Induction module defect – There’s a fault with the induction module, a critical component for heating.
- E7 and E8: Communication error with the power board – These codes indicate issues with the communication between the hob’s control unit and the power board.
- E9: Internal interface error – This suggests an internal problem within the hob’s electronics.
Understanding these numerical codes can help you identify the source of the problem and potentially rectify it or inform your decision when seeking repairs.
Letter Codes and Symbols
Besides numerical codes, letter codes and symbols also provide valuable diagnostic information. For instance:
- H: Residual heat warning – Indicates that the hob or a particular zone is still hot.
- F: Connection fault or pan recognition problem – Suggests an issue with either the cookware detection or a connection fault.
- L: Child safety device activated – The child lock feature is enabled, preventing accidental starts or changes to the hob’s settings.
- U: Keep warm function activated – Indicates that the keep warm function is in operation.
Symbols such as flashing lights or dashes can also be diagnostic. While the meaning of these can vary between brands, they often indicate specific conditions or faults. It’s always a good idea to consult your manufacturer’s manual for precise interpretations, as some brands may use proprietary codes.
Power Supply and Connection Issues
Understanding the power supply and connection issues affecting your induction hob is crucial for resolving error codes efficiently. Power supply problems are a common cause of malfunctions, and addressing these can often resolve the issue without needing further technical assistance.
Checking Your Power Supply
To systematically check the power supply to your induction hob, start by examining the plug connection. Ensure that the hob is properly plugged in and that there’s no damage to the plug or the socket. Next, check your circuit breaker or fuse box to confirm that the breaker hasn’t tripped or a fuse hasn’t blown. You can also test the wall socket by plugging in another appliance to see if it works.
If you’re experiencing error codes like E3 or E5, these specifically relate to power supply issues. E3 indicates over or under voltage of the supply power, which typically resolves once the voltage returns to normal. E5 suggests that one phase of the 230V power supply is missing, possibly due to a loose wire or a blown fuse.
Dealing with Voltage Fluctuations
Voltage fluctuations can trigger error codes on your induction hob. To address this, consider using voltage stabilisers, especially in areas known for unstable power supply. These devices can help regulate the voltage, providing a more stable supply to your hob and preventing errors caused by fluctuations.
Resetting Your Induction Hob
If you’ve identified a power supply issue, resetting your induction hob can often resolve the problem. To do this safely, disconnect the hob from the mains supply for several minutes before reconnecting. This simple step can reset the system and clear error codes related to power supply issues.
In some cases, power supply issues may indicate more serious electrical problems in your home. If you encounter persistent error codes or are unsure about how to address voltage fluctuations or missing phases, it’s advisable to consult a professional electrician. They can assess the situation and provide a solution that ensures your safety and the proper functioning of your induction hob.
| Error Code | Description | Solution |
|---|---|---|
| E3 | Over or under voltage of the supply power | Check voltage supply, use voltage stabilisers if necessary |
| E5 | One phase of the 230V power supply is missing | Check connections, fuses, and consult an electrician if needed |
For those comfortable with DIY checks, inspecting the wiring connections at the terminal block can be a useful step, but always ensure the power is disconnected first to maintain safety.
Control Panel Problems and Solutions
Control panel problems on induction hobs are common and can often be resolved with simple troubleshooting. The control panel is a sophisticated component that can sometimes be sensitive to user input and environmental factors.
Child Lock Activation
The child lock feature on your induction hob is a safety device designed to prevent accidental starts or changes in cooking settings. However, it can sometimes be activated unintentionally, causing confusion. To deactivate the child lock, you typically need to press specific button combinations. For example, switching the hob off and then back on, followed by pressing the “-” and “+” buttons simultaneously in the right front zone, and then pressing the “-” button again. This process should release the child lock, indicated by the disappearance of “C” on the display.
It’s essential to consult your user manual for model-specific instructions on how to activate and deactivate the child lock feature.
Unresponsive Touch Controls
Unresponsive touch controls can be a significant issue, often caused by liquid spills, food residue, or other contaminants on the control panel. To resolve this, first, ensure the control panel is clean and dry. If the issue persists, check if the sensor controls have been covered for an extended period, which might trigger an error code like “C”. Cleaning the controls gently with a soft cloth can often resolve the issue.

If cleaning does not work, you may need to test the touch control sensitivity and consider recalibration, especially after power fluctuations or system resets. In some cases, a reset procedure might be necessary to restore functionality.
| Issue | Possible Cause | Solution |
|---|---|---|
| Child Lock Activated | Accidental activation | Deactivate using specific button combinations |
| Unresponsive Touch Controls | Liquid spills or food residue | Clean the control panel |
| Error Code “C” | Sensor controls covered | Clean the sensor controls |
Cookware Compatibility Issues
To get the most out of your induction hob, it’s essential to understand the importance of cookware compatibility. Induction cooking relies on an electromagnetic field to heat up cookware, but this field only works effectively with ferromagnetic materials. This means that not all types of cookware are suitable for induction cooking.
Testing if Your Cookware is Induction-Compatible
Before using your cookware on an induction hob, it’s crucial to check if it’s compatible. A simple way to do this is by performing a magnet test. Hold a magnet to the base of the pan; if it sticks, the cookware is suitable for induction cooking. This is because the magnet is attracted to the ferromagnetic material in the cookware.
Suitable cookware includes: Stainless steel cookware with a magnetic base, enamelled steel cookware, and cast iron. On the other hand, cookware made from materials like aluminium, copper, ceramic, glass, or earthenware are not compatible with induction hobs unless they have a ferromagnetic bottom.
Pan Size and Placement Problems
The size and placement of your pan on the induction hob are also critical. The pan must be large enough to cover the cooking zone adequately. If the pan is too small, the induction process won’t work efficiently, and you might encounter errors like “u_” on your hob’s display. Ensure that your pan is centred on the cooking zone and covers the minimum diameter marked on the hob.
Resolving “No Pan Detected” Errors
If your induction hob displays a “no pan detected” error, there are several troubleshooting steps you can take. First, check that you’ve placed a compatible pan on the cooking zone. Ensure the pan is properly centred and that the cooking zone is clean and dry. If the issue persists, try using a different pan known to be induction-compatible to determine if the problem lies with the cookware or the hob.
By understanding the importance of cookware compatibility and following these guidelines, you can resolve many common issues with your induction hob and enjoy efficient cooking.
Overheating and Auto Shut-Off Problems
One of the safety features of induction hobs is their ability to detect overheating and automatically shut off. This mechanism is crucial for preventing damage to the hob and ensuring user safety. However, frequent overheating can be a sign of an underlying issue that needs to be addressed.
Causes of Overheating
Overheating in induction hobs can occur due to several reasons. Common causes include using empty pans, cooking at maximum power for extended periods, and inadequate ventilation around the appliance. For instance, if you heat an empty pan with the power level set to “P,” it can cause an over temperature at the coil temperature sensor, leading to an E4 error. Similarly, using an empty pot on a cooking zone can result in an E6 error due to over temperature. These errors typically resolve themselves after the hob cools down, usually within 15 minutes.
Cooling System Maintenance
Maintaining the cooling system of your induction hob is essential to prevent overheating. Ensure that the ventilation slots are clean and that there is adequate airflow around the appliance. Regular cleaning of the hob’s surface and vents can help maintain its efficiency and safety. For detailed guidance on maintaining your specific induction hob model, refer to the user manual, such as the one provided by Miele for their induction hobs, available here.
Resolving Temperature Sensor Errors
Temperature sensor errors can sometimes indicate a more serious fault, but often they are a response to temporary overheating. To resolve these errors, allow the hob to cool down and rectify the causes of overheating. Check that your cookware is compatible and appropriately sized for the cooking zone. Preventative measures include never heating empty pans, using the correct cookware size, and allowing sufficient cooling time between intensive cooking sessions.
| Error Code | Cause | Resolution |
|---|---|---|
| E4 | Over temperature due to empty pan or large pan bow | Allow hob to cool down; avoid heating empty pans |
| E6 | Over temperature of cooking zone due to empty pot | Allow hob to cool down; use appropriate cookware |
Brand-Specific Error Codes
Different brands of induction hobs display unique error codes that require specific troubleshooting. Understanding these codes is essential for diagnosing and resolving issues efficiently.
AEG Induction Hob Error Codes
AEG induction hobs display a range of error codes, including E0, E1, E3, E4, E5, E6, E7, E8, and E9. For instance, E0 indicates a configuration error of the interface, while E4 signifies a temperature sensor coil defect. Troubleshooting these codes involves checking the hob’s configuration, ensuring compatibility, and inspecting the temperature sensors.
For example, if your AEG hob displays E3, it could be due to overvoltage or a wrong connection. In such cases, verifying the power supply and connections can resolve the issue.
Miele Induction Hob Error Codes
Miele induction hobs use error codes like Err039, Err040, Err408, or Err412 to indicate electronic module faults. Err044 is displayed when the overheating protection mechanism is activated, often requiring the hob to cool down before resuming operation. Understanding these codes helps in identifying whether the issue is with the electronic module or the overheating protection.
If your Miele hob shows Err047, Err048, or Err049, it may indicate that the fan is blocked or defective. Checking and cleaning the fan or replacing it if necessary can resolve these errors.
Other Major Brands
Other prominent brands like Bosch, NEFF, and Hotpoint also have their own error code systems. While some error codes are standardised across brands, such as those indicating overheating or incompatible cookware, others are proprietary and require brand-specific knowledge.
For instance, Bosch and NEFF, being part of the same parent company, share some similarities in their error code systems. However, Hotpoint may use different codes for similar issues. Consulting the user manual or manufacturer’s website is advisable for accurate troubleshooting.
Understanding brand-specific error codes can save time and money by helping you determine whether you can resolve an issue yourself or need to contact the manufacturer for support.

Step-by-Step Troubleshooting Guide
Troubleshooting your induction hob requires a systematic approach to identify and resolve issues efficiently. When faced with an error code, it’s essential to follow a logical sequence of steps to diagnose and potentially fix the problem.
Initial Diagnostic Steps
The first step in troubleshooting is to note the exact error code displayed on your induction hob. Check if the issue is persistent or intermittent, as this information can be crucial in determining the cause. Consult your user manual to understand what the error code signifies. If the manual suggests initial troubleshooting steps, follow them carefully.
Systematic Problem Solving Approach
Adopt a methodical approach to isolate the problem. Start by testing different cookware on various cooking zones to determine if the issue is related to the pan or the hob itself. If the problem persists across different zones and cookware, it may indicate a more complex fault with the hob. Documenting your findings can help in further diagnosis.
Using the Manual and Online Resources
Your user manual is a valuable resource for interpreting error codes specific to your induction hob model. Follow the manufacturer’s recommended troubleshooting steps. Additionally, online resources such as manufacturer websites, forums, and video tutorials can provide further guidance. For instance, you can refer to
To effectively troubleshoot, you should also consider consulting online forums where users share their experiences and solutions to common problems. Manufacturer websites often have FAQs and troubleshooting guides specific to their products. By combining these resources with the steps outlined above, you can systematically diagnose and potentially resolve issues with your induction hob.
By following this step-by-step guide, you can determine whether the issue is a simple fix or a complex fault requiring professional repair. Documenting the troubleshooting steps taken will be invaluable if you need to consult a professional for further assistance.
Internal Faults and When to Call a Professional
If your induction hob is showing signs of serious internal problems, it’s crucial to understand when to seek professional help. Internal faults can manifest in various ways, including persistent error codes, unusual noises, burning smells, or visible damage to the hob or its components.
Signs of Serious Internal Problems
Certain error codes, particularly those related to electronic modules, communication systems, or internal sensors, typically indicate problems that require specialist knowledge and tools to repair. For instance, if your induction hob displays error codes that don’t resolve with basic troubleshooting, it may be a sign of a more complex issue. Other warning signs include:
- Unusual noises coming from the hob, such as grinding or clicking sounds
- Burning smells or signs of overheating
- Visible damage to the hob’s surface or components
Attempting DIY repairs on complex internal components can pose significant risks, including safety hazards, potential to cause further damage, and voiding your warranty. It’s essential to recognize when a problem is beyond your ability to fix safely and effectively.
Finding a Qualified Repair Technician
When you’ve determined that your induction hob needs professional repair, finding a qualified technician is the next step. Here are some tips to help you:
| Criteria | Description |
|---|---|
| Manufacturer Certification | Check if the technician is certified by the manufacturer of your induction hob |
| Reviews and Ratings | Look for technicians with positive reviews and high ratings from previous customers |
| Warranty on Repairs | Ensure the technician offers a warranty on their repairs |
Before booking a repair service, gather the following information: the model number, serial number, specific error codes displayed, and a detailed description of the problem. Understanding the typical costs associated with professional induction hob repairs and factors that might affect pricing will help you make informed decisions about repair versus replacement.
Preventative Maintenance Tips
Regular upkeep is essential for maintaining the performance and longevity of your induction hob. By following a few simple maintenance tips, you can ensure your hob continues to function effectively and efficiently.
Cleaning Your Induction Hob
Proper cleaning is vital to maintaining your induction hob’s appearance and functionality. To clean your hob effectively:
- Use a soft cloth and a gentle cleaning product specifically designed for glass ceramic surfaces.
- Avoid using abrasive materials or harsh chemicals that can damage the hob’s surface.
- Clean the hob when it’s cool but not cold to prevent streaks and damage.
- Use gentle circular motions to remove any food residue or stains.
Regular cleaning prevents build-up that can affect sensor function and control panel responsiveness, potentially preventing error codes related to these components.
Proper Usage Habits
In addition to regular cleaning, adopting proper usage habits can significantly extend the lifespan of your induction hob. To get the most out of your appliance:
- Use cookware that is compatible with induction cooking to prevent damage to the hob.
- Avoid dragging pans across the surface to prevent scratches.
- Prevent boil-overs by monitoring your cooking closely.
- Ensure adequate ventilation around the hob to prevent overheating issues.
By following these tips and maintaining a regular cleaning schedule, including daily wipe-downs and weekly deep cleaning, you can help prevent common issues and error codes, saving you time and money in the long run.
Conclusion
Understanding induction hob error codes is crucial for effective troubleshooting and repair. By grasping the meanings behind these codes, you’re better equipped to diagnose issues with your appliance.
Many common error codes relate to simple issues like cookware compatibility or power supply fluctuations, which can often be resolved without professional help advice. However, it’s essential to know when to attempt DIY fixes versus when to call a professional engineer to ensure safety.
To avoid many common problems and extend the lifespan of your induction hob, remember to perform regular maintenance. Keep your user manual accessible and document any error codes you encounter. With this knowledge, you’re now more confident in tackling induction hob issues. Bookmark this guide for future reference and share your experiences with induction hob error codes in the comments.