Are you tired of using dull hand tools that struggle to make precise cuts? Sharpening your own tools can be a game-changer for any woodworking enthusiast. Not only does it save time, but it also ensures cleaner results and enhances overall project quality.
Learning to maintain a razor-sharp edge on your chisels, planes, and other cutting tools is a valuable skill that pays dividends in the long run. With the right techniques and a bit of practice, you can achieve professional-grade results without relying on external services.
Key Takeaways
- Essential techniques for sharpening various hand tools at home.
- The importance of maintaining a sharp edge for quality woodworking.
- Different sharpening systems available for home use.
- Developing a personal sharpening routine tailored to your workflow.
- Tips for achieving a razor-sharp blade on your cutting tools.
Why Sharpening Your Hand Tools Matters
Keeping your hand tools sharp is essential for both safety and quality results. Sharpening is not just a maintenance task; it’s a crucial step that affects the outcome of your woodworking projects.
The Benefits of Sharp Tools
Sharp tools require significantly less effort to use, reducing fatigue and allowing you to work longer with greater precision and control. Well-maintained cutting edges produce cleaner surfaces that require less sanding, saving you considerable time in your woodworking projects. The benefits of sharp tools are multifaceted, enhancing both the quality of your work and your overall working experience.
Signs Your Tools Need Sharpening
Learn to identify when your tools need sharpening by recognising signs like increased resistance, tear-out in wood fibres, and poor surface quality. Dull tools can be dangerous as they require more force to use, increasing the risk of slips and accidents in your workshop.
The Paper Test Method
To test a chisel’s sharpness, use the Paper Test. Hold a piece of paper in one hand and try to slice off strips with the cutting edge of your chisel. The blade should slice effortlessly and leave clean edges, like a pair of scissors. If the paper is tearing, it’s time to sharpen.
| Sharpness Level | Paper Test Result | Action Required |
|---|---|---|
| Sharp | Cuts cleanly | None |
| Dull | Tears the paper | Sharpen the tool |
Regular sharpening extends the lifespan of your valuable tools by preventing the need for aggressive reshaping after significant damage occurs. By incorporating sharpening into your routine, you ensure that your tools remain in optimal condition, ready for any project.
Essential Sharpening Equipment for Home Use
The key to successfully sharpening hand tools lies in understanding the various types of sharpening equipment available for home use.

Types of Sharpening Stones
You have several options when it comes to sharpening stones, including water stones, diamond stones, and lapping sandpaper. Water stones are known for their excellent cutting ability and are favoured by many woodworkers, though they require regular flattening to maintain their effectiveness.
Diamond stones, on the other hand, provide exceptional durability and consistently flat sharpening surfaces, making them ideal for beginners despite their higher initial cost.
Honing Guides and Jigs
Honing guides help maintain consistent angles during sharpening, particularly valuable for beginners or when precise bevels are required. These guides can significantly improve the sharpening process, ensuring that your tools are sharpened to the correct angle.
Stropping Materials
Stropping with leather and polishing compounds creates a final micro-polish that refines the cutting edge to razor sharpness. This step is crucial for achieving a truly sharp edge on your tools.
Additional Supplies
Consider supplementary items like flattening plates, angle gauges, and non-slip mats that make the sharpening process more efficient and effective. These tools can help you achieve professional-grade results in the comfort of your own home.
Understanding the grit progression system and moving from coarse to fine abrasives is essential for developing truly sharp edges on your tools. By choosing the right equipment and following a systematic approach, you can keep your hand tools in top condition.
Understanding Sharpening Fundamentals
Effective sharpening of hand tools hinges on a thorough understanding of the fundamental concepts that drive the sharpening process. To achieve a razor-sharp edge, you need to comprehend the mechanics behind sharpening.
Bevels and Angles Explained
The concept of primary and secondary bevels is crucial for efficient sharpening. Understanding the appropriate angles for different tools and tasks helps optimise performance. For instance, steeper angles are ideal for durability, while shallower angles enhance slicing efficiency.
The Burr Formation Process
The formation of a burr during sharpening is a reliable indicator that you’ve sharpened to the edge. A burr is a nearly invisible sliver of metal that spans the width of your chisel, creating a microscopic speed bump. You can detect it by feel, and it makes a clicking sound when you run a fingernail over it.
Freehand vs. Guided Sharpening
Freehand sharpening offers speed and flexibility once mastered, while guided sharpening provides consistency and precision for beginners. Developing muscle memory through consistent practice will improve your sharpening skills, regardless of the method you choose.
- The concept of primary and secondary bevels allows you to remove less material during routine maintenance.
- Understanding the appropriate angles for different tools and tasks optimises performance.
- Detecting burr formation by feel is crucial for knowing when to progress to finer grits.
- Different tool steels respond differently to sharpening techniques, requiring adjustments based on the hardness of the metal.
By grasping these sharpening fundamentals, you’ll be well on your way to achieving a razor-sharp blade and enhancing your overall sharpening skills.
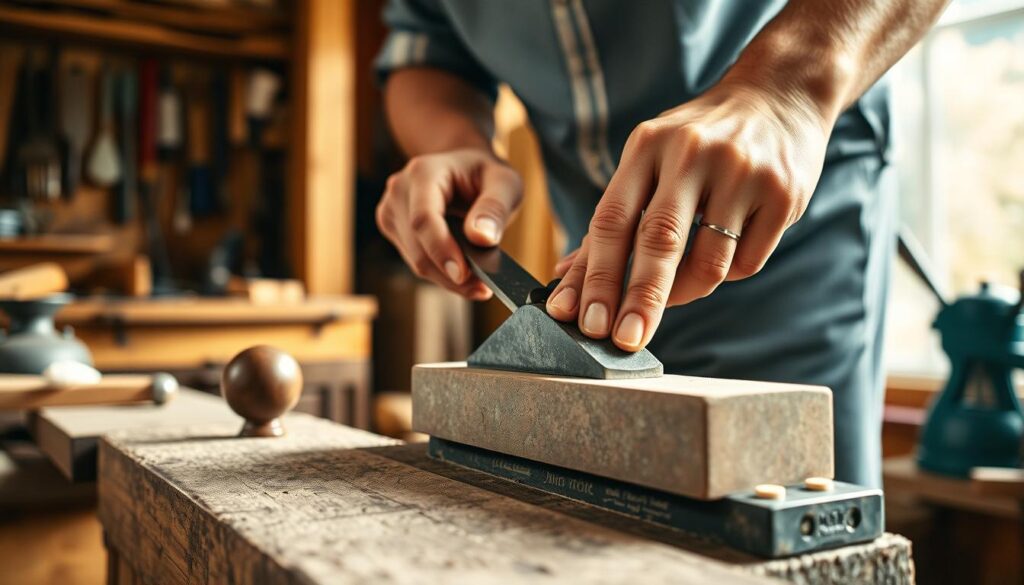
How to Sharpen Hand Tools at Home: Step-by-Step Method
Learning how to sharpen hand tools at home requires patience, the right equipment, and a clear understanding of the sharpening sequence. To begin, you’ll need to prepare your workspace properly.
Preparing Your Workspace
Begin by organising your workspace with good lighting, access to water, and a stable surface. This will help prevent accidents and improve efficiency during the sharpening process. Proper body positioning and hand placement during sharpening reduces fatigue and improves control, allowing for more consistent results.

The Basic Sharpening Sequence
The basic sharpening sequence follows a logical progression: assessment, coarse sharpening to establish the bevel, refining with medium grits, and polishing with fine abrasives. Understanding this sequence is crucial for achieving a razor-sharp edge on your chisel or blade.
Progressing Through Grits
Understanding when to progress through different grit levels saves time and produces better results. Move to finer grits only after establishing a consistent edge at each level. This step is essential for creating a sharp, durable edge on your hand tools.
Stropping for Razor Sharpness
Stropping on leather charged with polishing compound creates a final micro-polish that removes the last microscopic burr and refines the edge to razor sharpness. This final step is crucial for achieving a truly sharp edge on your chisel or blade.
By following these steps and developing a systematic approach, you can sharpen your hand tools efficiently and effectively, ensuring they remain in good condition for your woodworking projects.
Sharpening Chisels for Precision Work
To achieve precision in woodworking, sharpening your chisels is a crucial step that requires attention to detail. Chisels are a fundamental tool in woodworking, and their sharpness directly impacts the quality of your work.
Primary and Secondary Bevels
When sharpening chisels, it’s essential to understand the importance of primary and secondary bevels. Creating a primary bevel at approximately 25 degrees provides durability, while the secondary micro-bevel at 30 degrees creates the actual cutting edge. To set up your chisel in a honing guide, use a digital angle guide, bevel gauge, or set-up block to get it close to 30°. You can also set it so the primary bevel is flat, then pull the chisel back slightly until the back of the primary bevel raises slightly.
Flattening the Back
The back of a chisel must be flat near the cutting edge to allow for clean slicing action. Flattening the back of a chisel can be a time-consuming process, but understanding that only the first inch or so needs to be perfectly flat saves considerable time. You can use a sharpening stone or a flat surface to flatten the back of your chisel.
Testing Chisel Sharpness
Testing chisel sharpness using the paper test provides immediate feedback on your sharpening results. A truly sharp chisel will slice paper cleanly without tearing. To perform the paper test, hold the chisel at a shallow angle and gently slice through a sheet of paper. If the chisel is sharp, it should cut through the paper with ease.
By following these steps and paying attention to the bevel angle and the flatness of the back, you can achieve a razor-sharp edge on your chisels. This will enable you to perform precision woodworking tasks with ease and accuracy.
Plane Iron Sharpening Techniques
To get the most out of your hand planing, understanding how to sharpen plane irons effectively is key. Sharpening plane irons involves more than just honing a sharp edge; it requires creating the right camber and cutting angles for your specific woodworking needs.
Creating the Perfect Camber
The camber, or curvature, of your plane iron’s cutting edge is crucial for achieving the desired finish on your workpiece. Different types of planes—such as smoothing, jack, or jointer planes—benefit from different camber profiles. For instance, a smoothing plane might require a more subtle camber, while a jack plane can have a more pronounced one for efficient stock removal.
- Understand the function of your plane to determine the appropriate camber.
- Use a honing guide to help maintain consistency across the blade.
- Check the camber by placing the iron on a flat surface; the curvature should be even.
Optimising Cutting Angles
The bevel angle of your plane iron significantly affects its performance. A higher angle can provide a sharper edge but may be more prone to chipping. The ideal angle depends on the type of wood you’re working with and the specific task at hand.
For most woodworking tasks, a primary bevel angle between 25° and 35° is suitable. However, this can vary based on the wood’s hardness and grain direction. It’s essential to experiment with different angles to find what works best for your projects.
Reassembling the Plane
After sharpening your plane iron, reassembling the plane correctly is crucial for optimal performance. Ensure the chip breaker is positioned correctly relative to the cutting edge. A gap of about 0.1 mm is typically recommended, but this can vary depending on the plane’s design.
Proper reassembly not only affects the quality of your planing but also the longevity of your plane irons. Take your time to adjust the iron and chip breaker carefully, ensuring they’re securely locked in place.
Specialised Techniques for Other Hand Tools
Sharpening specialised hand tools requires a nuanced approach to maintain their unique profiles and cutting edges. While basic sharpening principles apply, certain tools demand specific techniques to remain effective.
Spokeshaves and Scrapers
Curved-edge tools like spokeshaves require careful sharpening to maintain their profile. Card scrapers, on the other hand, need a different technique entirely, focusing on creating and turning a burr that becomes the actual cutting edge.
Gouges and Curved Edges
Gouges, similar to chisels, require specially shaped strops to maintain their curved cutting edges. Understanding how to create and use these strops is crucial for keeping gouges sharp.
Woodworking Knives
Woodworking knives benefit from particular attention to the consistency of the bevel angle along the entire length of the blade. Maintaining this consistency is key to achieving a sharp, even edge.
By adapting basic sharpening principles to the unique geometries of these specialised hand tools, you can significantly enhance your woodworking capabilities. The table below summarises the key techniques for sharpening different types of hand tools.
| Tool Type | Sharpening Technique | Key Considerations |
|---|---|---|
| Spokeshaves | Maintain curved profile | Use appropriate sharpening stone |
| Card Scrapers | Create and turn burr | Avoid removing burr |
| Gouges | Use shaped strops | Maintain curved edge |
| Woodworking Knives | Consistent bevel angle | Check entire blade length |

By mastering these specialised sharpening techniques, you can expand your woodworking capabilities and improve the quality of your finished projects. Recognising when these tools are properly sharpened is also crucial, and appropriate testing methods for each tool type will help you achieve this.
Saw Sharpening Basics
Saw sharpening is a distinct skill that differs from sharpening edge tools, focusing on file work. To sharpen a saw effectively, you need to understand the intricacies of its teeth and how to manipulate them for optimal performance.
Understanding Saw Teeth
The teeth of a saw are its cutting bits, and their configuration determines how the saw will perform. The points per inch (PPI) or teeth per inch (TPI) is crucial in deciding the sharpening approach. For most saws, a sawset is used to set the teeth, while high PPI saws require a different method, such as using a hammer and nail punch.
Filing Techniques for Different Saws
Filing is a critical step in saw sharpening. The technique varies depending on whether you’re sharpening for a rip cut or cross-cut. Understanding the difference between these profiles is essential for effective saw sharpening and optimal cutting performance. You will need to select the appropriate file size and shape based on the saw’s TPI or PPI.
Setting the Teeth
Setting the teeth creates the necessary clearance for the blade to move through wood without binding. For most saws, a sawset tool is used for this purpose. However, for saws with high PPI, alternative methods must be employed. Developing a systematic approach to saw sharpening ensures consistent tooth height, angle, and set across the entire blade, which takes time to master but can dramatically improve saw performance.
Recognising when a saw needs sharpening is also crucial. Symptoms like wandering cuts, excessive effort, or burning during use indicate that it’s time to sharpen your saw. With practice, you’ll be able to maintain your saws in top condition, enhancing your overall woodworking experience.
Maintaining Your Sharpening System
Regular upkeep of your sharpening equipment is vital for its longevity and performance. A well-maintained sharpening system not only ensures that your tools are always sharp but also prolongs the life of the sharpening stones themselves.
Flattening Your Stones
Water stones require regular flattening to maintain their effectiveness. Use a dedicated flattening stone to keep them perfectly flat. Diamond stones, on the other hand, remain flat and require minimal maintenance.
| Stone Type | Maintenance Requirement | Cost |
|---|---|---|
| Water Stones | Regular Flattening | Fairly Affordable |
| Diamond Stones | Minimal Maintenance | Generally More Expensive |
Proper Storage of Sharpening Equipment
Storage of sharpening equipment is crucial to prevent damage and contamination. Store your stones in a dry place, away from direct sunlight, to maintain their effectiveness.
When to Replace Abrasives
Knowing when to replace your sharpening abrasives saves time and ensures effective sharpening. Look for signs of wear, such as dishing or glazing, to determine if your stones need replacement.
By following these maintenance tips, you can ensure your sharpening system remains in good condition, ready to work effectively whenever needed. Make sure your sharpening station is organised to encourage regular tool maintenance.
Conclusion: Developing Your Sharpening Routine
The key to maintaining peak tool performance lies in creating a sharpening routine that fits your workflow. To achieve this, you should integrate quick touch-up sharpening into your work sessions, rather than waiting for your tools to become severely dull.
Consider setting up a dedicated sharpening station that remains ready for use, making regular maintenance easier and less time-consuming. As you practice sharpening, you’ll find that your skills improve, and the process becomes more efficient.
Different woodworkers develop unique approaches to sharpening based on their specific needs and working styles. The goal is to make sharpening a habitual part of your woodworking process, allowing you to maintain consistently sharp tools without significant interruption.
By investing time in developing your sharpening skills, you’ll see improvements in the quality of your woodworking for years to come.