Are you tired of staring at a ceiling with unsightly peeling paint that’s making your home look neglected? You’re not alone. Peeling paint on ceilings is a common issue that can be caused by a variety of factors, including moisture, poor preparation, or simply wear and tear.
Fortunately, you don’t need to call in the professionals to tackle this problem. With the right guidance, you can fix peeling paint and achieve a smooth, attractive finish that enhances your room’s appearance. In this article, we’ll walk you through the entire process, from identifying the causes of the issue to applying the final coat of paint.
Key Takeaways
- Identify the causes of peeling paint on your ceiling.
- Learn the step-by-step process to fix the issue.
- Discover professional techniques for a long-lasting finish.
- Understand how to prevent future peeling problems.
- Transform your ceiling with a smooth, attractive surface.
Understanding Why Your Ceiling Paint is Peeling
The sight of peeling paint on your ceiling is not just aesthetically displeasing; it’s a sign of an underlying problem that needs attention. Peeling paint can be caused by various factors, and identifying the root cause is crucial for a lasting fix.
Common Causes of Ceiling Paint Peeling
Several factors contribute to ceiling paint peeling. These include excessive moisture, poor surface preparation before painting, using low-quality paint, and applying paint over existing peeling areas. High humidity environments, such as bathrooms and kitchens, are particularly susceptible to paint peeling due to constant moisture exposure.
| Cause | Description |
|---|---|
| Excessive Moisture | Weakens the bond between paint layers and the ceiling surface. |
| Poor Surface Preparation | Paint cannot adhere properly to dirty, greasy, or unprimed surfaces. |
| Low-Quality Paint | More prone to peeling and less durable. |
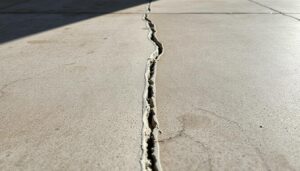
Identifying the Source of Moisture Problems
Moisture is a primary culprit behind peeling ceiling paint. It can stem from leaks in the roof, soffit, or gutter, or from permeable walls allowing water to penetrate the surface. To address the issue, you must identify and fix the source of the moisture. Check for signs of water damage or leaks, and ensure proper ventilation in high-moisture areas of your house.

By understanding the causes of peeling paint and addressing the underlying issues, you can prevent future problems and maintain a well-maintained ceiling.
Essential Tools and Materials for Fixing Peeling Paint on Ceilings
The key to a successful ceiling paint repair lies in having the correct tools and materials at your disposal. To efficiently fix peeling paint on your ceiling, you’ll need to arm yourself with the right equipment.
Required Tools for the Job
For removing paint from the ceiling, consider investing in a high-quality paint scraper that can efficiently remove peeling paint without damaging the surface. A putty knife is also essential for effectively removing loose and peeling paint.
Other necessary tools include:
- A proper paint scraper or putty knife
- Protective equipment including safety goggles, dust masks, and gloves
- Drop cloths or plastic sheeting to protect furniture and flooring
- Sandpaper in various grits (medium to fine)
- Extension poles for rollers and brushes
- Painter’s tape to achieve clean edges
- A good quality paint roller with the appropriate nap length
Recommended Materials and Paints
A high-quality primer specifically formulated for ceilings is crucial for proper adhesion of your new paint. Ceiling-specific paint with mould-resistant properties is recommended, especially for bathrooms and kitchens. You may also need spackling compound or plaster to fill any cracks or imperfections before painting.
When choosing your materials, consider the specific needs of your ceiling to ensure a long-lasting finish.
Preparing Your Space Before Starting the Repair
Preparing your space is a crucial step before you start fixing peeling paint on your ceiling. It involves clearing the area and taking necessary safety precautions to avoid damage and injury.
Protecting Your Furniture and Flooring
To protect your belongings from dust and paint particles, it’s essential to cover your furniture and flooring properly. You can use plastic sheeting or drop cloths to catch any debris that falls during the repair. This not only protects your belongings but also makes the cleanup process much easier.
- Lay down drop cloths or plastic sheeting on the floor.
- Cover furniture with plastic sheets or remove it from the room.
- Ensure all items are securely covered to prevent damage from falling paint chips.
Safety Precautions to Take
When working on your ceiling, safety should be your top priority. Wear protective gear, including gloves, safety glasses, and a dust mask, to protect yourself from paint particles and chemicals. Ensure proper ventilation in the work area by opening windows and using fans to circulate air.
- Wear protective gear such as gloves and safety glasses.
- Use a dust mask or respirator when working with paint or primers.
- Ensure good ventilation by opening windows and using fans.

By taking these precautions and preparing your space adequately, you can ensure a smooth and safe repair process for your ceiling. This preparation allows you to remove peeling paint effectively and achieve a professional finish.
Step-by-Step Process for Removing Peeling Paint
Removing peeling paint from your ceiling is a crucial step in achieving a smooth and well-adhered paint layer. To do this effectively, you’ll need to use the right techniques and tools.
Scraping Techniques for Different Ceiling Types
To remove peeling paint, start by identifying all areas of loose paint on your ceiling. Hold your paint scraper or putty knife at a 30-45 degree angle to gently scrape off the peeling paint without damaging the underlying surface. For textured ceilings, use a plastic scraper to preserve the texture pattern where possible.
| Ceiling Type | Recommended Scraper | Angle of Scraping |
|---|---|---|
| Smooth Ceiling | Metal Paint Scraper | 30-45 degrees |
| Textured Ceiling | Plastic Scraper | 30-45 degrees |
Cleaning and Preparing the Surface
After scraping off the peeling paint, lightly sand the edges of the remaining paint to create a smooth transition. Thoroughly clean the ceiling surface with a damp sponge to remove all dust, dirt, and grease. For water-damaged areas, consider applying a stain-blocking primer to prevent discolouration. You can test the remaining paint’s adhesion by applying masking tape and quickly pulling it away. For more information on repairing peeling paint, visit This Old House.
Repairing and Priming the Ceiling Surface
With the peeling paint removed, it’s essential to inspect and repair the ceiling surface before applying a new coat of paint. This step is crucial in ensuring a smooth and durable finish.
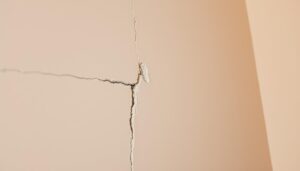
Filling Cracks and Imperfections
Carefully inspect the ceiling surface for cracks, holes, and imperfections that need to be addressed before priming. Apply a suitable patching compound or plaster to fill any damaged areas, using a flexible putty knife to ensure the filler is pressed firmly into cracks and depressions.
Sanding for a Smooth Finish
Once the patched areas are dry, sand them with fine-grit sandpaper until they’re level with the surrounding ceiling surface. This creates a smooth, uniform base for painting. Remember to wipe away the dust with a slightly damp cloth and allow the surface to dry completely before applying primer.
Applying the Right Primer
Choose a high-quality primer specifically formulated for ceilings and problem areas. If water damage was the cause of peeling, consider using a stain-blocking primer. Apply the primer evenly across the entire ceiling or at minimum to all repaired areas and a few inches beyond to ensure proper blending with existing paint.
By following these steps, you’ll be able to create a well-prepared surface for your new paint layer, ensuring a professional-looking finish that will last.
Painting Techniques for a Professional Finish
Achieving a professional finish when painting your ceiling requires careful planning and the right techniques. The type of paint you choose and how you apply it can significantly impact the final result.
Choosing the Right Paint for Your Ceiling
Selecting the appropriate paint for your ceiling is crucial. For most ceilings, a flat or matte finish is preferred as it hides imperfections well. However, for bathroom ceilings, consider using a semi-gloss or gloss paint due to its moisture-resistant properties. Additionally, mould-resistant paint can be beneficial in areas prone to high humidity.
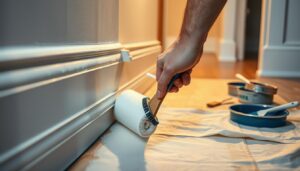
Proper Application Methods
To achieve a smooth finish, it’s essential to apply paint correctly. Start by stirring your paint thoroughly to avoid introducing air bubbles. Apply paint in thin, even coats rather than one thick layer, which can lead to drips and uneven drying.
Professional Tips for Avoiding Lap Marks
To avoid lap marks, use the “W” technique when rolling: apply paint in a W pattern, then fill in without lifting the roller. Maintain a “wet edge” by overlapping each roller pass with the previous one before the paint dries. For textured ceilings, use a roller with a longer nap (18-20mm) to ensure paint reaches into all crevices.
| Ceiling Type | Recommended Paint Finish | Special Considerations |
|---|---|---|
| Standard Ceiling | Flat or Matte | Hides minor imperfections |
| Bathroom Ceiling | Semi-gloss or Gloss | Moisture-resistant |
| High Humidity Areas | Mould-resistant | Reduces mould and mildew build-up |
By following these guidelines and choosing the right paint for your ceiling, you can achieve a professional-looking finish that enhances the overall appearance of your room.
Conclusion: Preventing Future Ceiling Paint Peeling
Preventing ceiling paint from peeling in the future involves a few simple yet effective measures. Proper ventilation is crucial, especially in high-moisture areas like bathrooms and kitchens. Installing exhaust fans and using them during and after showers can significantly reduce humidity levels.
To further prevent moisture buildup, it’s essential to address any leaks or water intrusion issues promptly. Using dehumidifiers in damp areas and choosing paints specifically designed for high-humidity environments can also help. Regular home maintenance, including checking for roof leaks and plumbing issues, is vital.
By following these steps and ensuring your ceiling is properly prepared, you can significantly extend the life of your paint job and keep your ceiling looking its best.