Are you tired of watching precious water go to waste as your outside tap leaks incessantly? Not only is it frustrating, but a leaking tap can also lead to increased water bills and potential damage to your property. The good news is that you don’t necessarily need to call a professional plumber to sort out the issue.
Most leaks are due to worn-out washers or loose packing nuts, making it a relatively straightforward DIY task to fix the problem. By identifying the source of the leak and applying the appropriate repair, you can save money and conserve water. In this article, we’ll guide you through the easy steps to repair your leaking tap, helping you to avoid the cost of replacing it entirely.
Key Takeaways
- Identify the common causes of a leaking outside tap, such as worn washers and loose packing nuts.
- Learn how to diagnose the exact location of the leak to apply the correct repair.
- Understand the tools and materials needed for a successful DIY repair.
- Recognise the benefits of fixing a leaking tap, including water conservation and cost savings.
- Determine when it’s more economical to replace rather than repair your outside tap.
Understanding Why Outside Taps Leak
Outside taps can be a nuisance when they start leaking, but understanding the cause is the first step to fixing the issue. Leaks are typically a result of wear and tear over time.
Common Causes of Leaking Outside Taps
There are usually two main reasons for a leaking outside tap: a loosened packing nut or a worn washer. The internal washer is crucial for sealing and stopping water flow when the tap is turned off. Repeated use causes the washer to wear down, eventually failing to stop water flow completely, resulting in a dripping outside tap.
- A loosened packing nut can cause leaks around the spindle or handle.
- A worn washer fails to seal properly, causing leaks from the spout.
Identifying the Exact Location of Your Leak
To fix the leak, you need to identify its exact location. Check if the leak is coming from the spout or around the handle. This will determine whether you need to replace the washer or tighten the packing nut. Understanding the source of the leak is crucial for an effective repair.
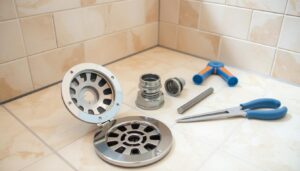
Tools and Materials You’ll Need to Fix a Leaking Outside Tap

Having the correct tools and materials on hand is vital for fixing a leaking outside tap. Gathering everything you need before starting the repair will save time and prevent interruptions.
Essential Tools for the Repair
You’ll need a few essential tools to complete the job. An adjustable spanner is crucial for loosening and tightening the various nuts on your outside tap. A flat-head screwdriver will help you remove the old washer, while an old toothbrush is useful for cleaning debris from the washer seat.
Types of Washers and Seals
Understanding the different types of washers and seals used in outside taps is important. Common types include rubber washers, fibre washers, and O-rings. If you’re unsure of the size you need, consider purchasing an assortment or taking the old washer to a DIY shop for a replacement. PTFE tape, also known as plumber’s tape, creates a watertight seal when applied correctly to threaded connections.
Using quality tools and materials will make the repair process smoother and ensure a longer-lasting fix. Consider having two adjustable spanners available to make it easier to hold the backplate in place while unscrewing components.
Safety First: Preparing for the Repair
Preparation is vital to a successful and safe repair of your outside tap. Ensuring your safety is crucial before you begin the repair process. This involves a few key steps to prevent accidents and ensure a smooth repair.
Turning Off Your Water Supply
To start, you need to turn off your water supply at the stopcock. The stopcock is usually located under the kitchen sink or where the main water pipe enters your property. Don’t proceed until you’ve done this.
“Always turn off the main water supply before starting any repair work on your outside tap.”
Locate your stopcock and switch off the water supply. If you haven’t used it in a while, the packing nut might leak when you turn it off. Simply tighten the packing nut with an adjustable spanner if necessary.
Draining the Tap Completely
After shutting off the water supply, open the the tap to drain it completely. This prevents water from spraying on your face during the repair. Consider placing a bucket under the tap to catch any residual water.
- Locate your home’s main stopcock, typically under the kitchen sink or where the main water pipe enters.
- Verify that the water supply is completely turned off by checking that no water flows from the tap.
- Prepare for the repair by having necessary tools within reach.
| Preparation Step | Purpose |
|---|---|
| Turn off water supply | Prevent water from flowing during repair |
| Drain the tap | Avoid unexpected sprays and splashes |

How to Fix a Leaking Outside Tap: Step-by-Step Guide
Before you call a plumber, try fixing your leaking outside tap yourself with our step-by-step guide. Fixing a leak can save water and reduce your bills.
Fixing a Leak from the Spindle/Handle
If your tap is leaking from the handle, the issue is likely related to the gland nut or packing nut. Tightening this nut can often resolve the leak.
Tightening the Packing Nut
Locate the packing nut at the base of the tap handle. Use an adjustable spanner to tighten it. Be cautious not to overtighten, as this can damage the tap.
Using PTFE Tape on Threads
If tightening doesn’t work, consider applying PTFE tape around the threads to create a watertight seal. This can help prevent leaks from around the spindle.
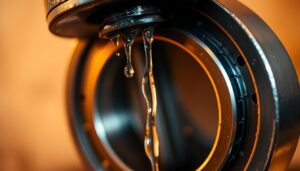
Repairing a Leak from the Spout
A leak from the spout usually indicates a worn-out or damaged washer inside the tap. Replacing this washer is a straightforward process.
Use an adjustable spanner to unscrew the larger nut until the tap head comes away. This exposes the valve and washer.
Replacing the Washer
Carefully remove the old washer with a flat-head screwdriver. Insert a new washer in its place, ensuring it’s properly seated.
Cleaning the Washer Seat
Before reassembling, clean the washer seat with an old toothbrush to remove any debris. This ensures a proper seal and prevents future leaks.
By following these steps, you can fix your leaking outside tap efficiently. Remember to turn off the water supply before starting and test the tap after reassembly to ensure the leak is fixed.
Reassembling Your Outside Tap
Carefully reassembling your outside tap is key to preventing future leaks. This process involves several crucial steps to ensure a watertight seal and proper function.
Applying PTFE Tape Correctly
To create a watertight seal, apply PTFE tape around the threads in the direction of tightening, usually clockwise. Ensure you wrap the tape correctly to prevent it from unwinding when the components are tightened.
Tightening Components Without Damage
Use an adjustable spanner to tighten components securely without overtightening, which can damage threads or crush washers. Hold the backplate steady with one spanner while tightening with another to prevent twisting the water pipe behind the wall.

By following these steps and using the right tools, you can ensure a successful reassembly and a leak-free outside tap.
Testing Your Repair
Once you’ve completed the repair, the next step is to turn the water supply back on and check for leaks. This crucial step ensures that your fix has been successful.
Turning the Water Supply Back On
To avoid sudden pressure changes or water hammer, turn the water supply back on gradually. This careful approach helps prevent further damage to the tap or pipes.
Checking for Persistent Leaks
After restoring water flow, carefully inspect the tap for signs of leaking. Check both the spout and the spindle/handle area, as leaks can occur in multiple locations. To identify even minor leaks, wipe the tap dry and watch for any water beading or dripping. Some leaks may only appear when the tap is turned on, while others will be evident when it’s turned off.
- Observe all parts of the tap for signs of leaking after restoring water flow.
- Check both the spout and the spindle/handle area for leaks.
- Wipe the tap dry to identify minor leaks by watching for water beading or dripping.
If you still notice leaks after your repair, you may need to tighten the joint or turn the water off to make additional repairs. Testing thoroughly after repairs can save you from water damage and the need for future repairs.
Fixing Leaking Hose Connections

When your outside tap is leaking, the problem might not be the tap itself, but the hose connection. Leaks can occur at the point where the hose attaches to the tap, often due to a worn-out O-ring.
Identifying O-Ring Problems
The O-ring in your hose connector can deteriorate over time, much like the washer in your outside tap. To identify if the O-ring is the source of the leak, look for water seeping from the connection point. Regularly inspecting your hose connections can help you catch such issues early.
Replacing the O-Ring
To replace the O-ring, start by removing the old one using a screwdriver. Be careful not to damage the connector. Next, select a new O-ring that matches the original in size and material. A slightly thicker or smaller O-ring may also work. Push the new O-ring into the groove, ensuring it’s fully seated. Finally, test the connection by attaching the hose to your outside tap and checking for leaks.
When to Replace Rather Than Repair Your Outside Tap

If your outside tap is beyond repair, it may be time to consider replacing it entirely. A tap that continues to leak despite multiple repair attempts may be signalling that it’s time for a new tap.
Signs Your Tap Needs Complete Replacement
Key indicators that your outside tap needs replacement include extensive corrosion, a cracked body, or damaged valve seats. If you notice any of these signs, it’s likely more cost-effective to replace your outside tap rather than continuing to repair it.
Basic Steps for Installing a New Tap
To install a new tap, start by shutting off the water supply. Then, remove the old tap and install the new one, ensuring all connections are secure. Modern outside taps often include features like double-check valves to prevent backflow contamination. If you’re unsure about any part of the process, it may be best to call a professional plumber.
Conclusion
Leaking outside taps can be a nuisance, but with our guide, you’re equipped to tackle the issue head-on. By understanding the common causes of leaks and following the simple DIY solutions outlined, you can fix your leaking outside tap efficiently. Regular maintenance is key to preventing leaks and extending the lifespan of your tap, saving you time and money. Don’t forget to turn off your water supply before starting repairs to your plumbing drainage system. Having the right tools on hand makes the process straightforward. Consider protecting your outside tap with an insulated cover during winter to prevent freezing damage. By addressing leaks promptly, you not only save water but also prevent potential damage to your property. For more tips on maintaining your outdoor tap, visit Argos Support.