Are you noticing creaks and unevenness in your flooring due to a damaged tongue on one of your floorboards? This can be a concerning issue, potentially leading to further damage if not addressed promptly.
The tongue and groove system is a popular method for installing floorboards, relying on the interlocking mechanism to create a stable and level surface. When the tongue component is compromised, it can jeopardise the integrity of the entire floor.
Fortunately, with the right guidance, you can effectively repair or replace the damaged component, restoring your floor to its original condition. Understanding the structure and repair options for tongue and groove flooring is crucial for maintaining a secure and visually appealing floor surface.
Key Takeaways
- Identify when a floorboard tongue is damaged and understand the implications for your flooring stability.
- Learn the steps involved in assessing and repairing or replacing a damaged tongue component.
- Discover cost-effective solutions to save on professional repairs or complete floor replacement.
- Gather the necessary tools and materials required for the repair project.
- Gain confidence in tackling this home improvement task with expert advice and step-by-step instructions.
Understanding Tongue and Groove Flooring Damage
While tongue and groove flooring is celebrated for its aesthetic appeal and longevity, it can still suffer from various types of damage. The interlocking design of this flooring system, where each board features a protruding “tongue” on one edge that fits into a corresponding “groove” on the adjacent board, creates a sturdy and attractive floor surface. However, this system can be susceptible to certain issues over time.
Common Types of Floorboard Damage
Several issues can arise with tongue and groove flooring, including gaps between boards, loose or squeaky boards, scratches and dents, warping or buckling, and water damage. If your floorboards have dried out or worked loose from their fittings, they could have started to creak. Understanding the common types of damage that affect wooden floorboards is crucial for maintaining your floor’s condition.
| Type of Damage | Causes | Effects |
|---|---|---|
| Water Damage | Leaks, spills, or high humidity | Warping, buckling, or rotting of wood |
| Physical Impacts | Drops, scratches, or heavy furniture | Dents, scratches, or cracks in floorboards |
| Natural Shrinkage | Drying out of wood over time | Gaps between boards, creaking |
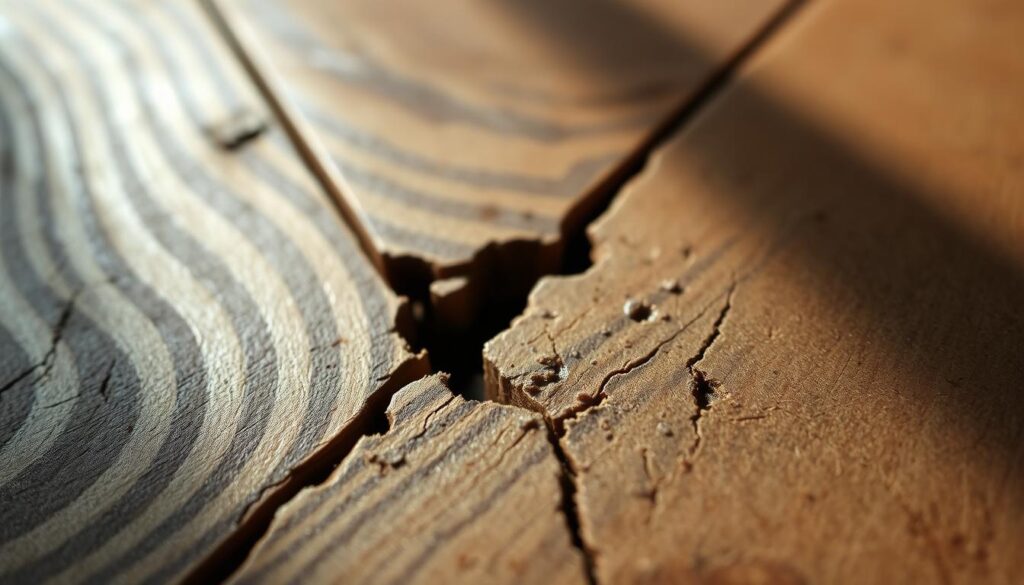
Identifying Issues with Broken Tongues
Recognizing the signs of broken or damaged tongues is essential for timely repairs. These issues often manifest as loose boards, excessive movement when walking, visible gaps between boards, or uneven edges. Environmental factors like humidity fluctuations can cause wood to expand and contract, potentially damaging the tongue and groove connections. Inspecting your floor systematically will help determine the extent of damage and whether repair or replacement is the most appropriate solution.
By understanding how damage to one section of flooring can affect adjacent boards and potentially compromise the stability of a larger floor area, you can take proactive measures to maintain your flooring in good condition.
Essential Tools and Materials for Fixing Broken Floorboard Tongue

To fix a broken floorboard tongue effectively, you’ll need to have the right tools and materials at your disposal. Repairing damaged tongue and groove flooring requires precision and the correct equipment to ensure a seamless fix.
Required Tools for the Job
Gathering the necessary tools is the first step in repairing your floorboards. You’ll need a 1-inch wood chisel to carefully remove damaged boards without harming adjacent flooring. Other essential tools include a circular saw, jigsaw, and table saw for precise cutting of replacement boards. A flat pry bar will help you lift damaged boards without causing additional damage.
Measuring and marking tools like a tape measure and pencil are crucial for accurate cuts and proper fitting of new floorboards. Consider renting specialised tools like a random orbit sander if you don’t own one, as this can be more cost-effective for one-time repair jobs.
Materials You’ll Need
Selecting the right materials is vital for a successful repair. You’ll need replacement floorboards that match your existing flooring. Wood filler and polyurethane varnish will help blend the new boards with the old ones. Ensure you have the correct fastening materials, such as finish nails or flooring screws, to secure replacement boards to the joists beneath.
Don’t forget to prepare cleaning supplies like a shop vacuum to remove dust and debris from the work area, ensuring proper adhesion of new materials. Having safety equipment like goggles, gloves, and knee pads will protect you during the repair process.
How to Fix Broken Floorboard Tongue: Step-by-Step Guide
The initial step in fixing broken floorboard tongue involves removing the damaged sections. This process requires careful planning and execution to avoid further damage to the surrounding flooring.
Removing the Damaged Floorboards
To remove the damaged floorboards, start by using a chisel and hammer to cut through the damaged board’s tongue at the joint. Hold the chisel away from the joint to avoid damaging the adjacent board. Cut straight down through the tongue at the end of the damaged board using the chisel. Then, pry the severed tongue from the groove of the adjacent board. Remove the damaged boards using a flat pry bar, gently lifting each section. This process helps minimize damage to the surrounding flooring.

Preparing the Area for New Boards
After removing the damaged floorboards, clean the exposed subfloor thoroughly to remove dust, debris, and old nails or fasteners from the joists. This step is crucial in creating a clean surface for the new installation. Measure the space precisely where the new board will be installed, accounting for expansion gaps that allow the wood to naturally expand and contract with humidity changes.
| Step | Description |
|---|---|
| 1 | Clean the subfloor |
| 2 | Measure the space for the new board |
| 3 | Cut the new board to size |
Installing Replacement Floorboards
Apply construction adhesive to the subfloor, keeping an even distribution. Place the new board, fitting its end tongue into the groove of the adjacent board. Press down on the new board and use a hammer with a scrap wood block to tap it into place, securing a tight fit. Continue installing new boards, using a jigsaw to notch around obstacles if necessary. For the last row, rip the boards to width using a table saw to ensure a perfect fit.
To secure the new board to the joists, use finish nails and countersink them slightly below the surface. You can then conceal the nail holes with wood filler. For the final board in a repair section, you may need to modify it by removing the bottom lip of the groove so it can be dropped into place over the tongue of the adjacent board.
Finishing and Blending Your Repaired Floorboards
Finishing the repaired area is a critical step that requires attention to detail to ensure a uniform appearance. After installing the new floorboards, you need to sand and apply finishing products to achieve a consistent look with the surrounding floor.
Sanding and Filling Techniques
To begin the finishing process, sand the newly installed floorboards using a random orbit sander with 120-grit sandpaper. This creates a smooth, even surface that blends with the surrounding floor. Fill all nail holes, joints, and any small gaps between boards with an appropriate wood filler that matches the wood tone, ensuring a seamless appearance when the repair is complete.

Matching Stain and Finish to Existing Floor
Apply a coat of shellac to the repaired area using a foam brush, which helps to seal the wood and provides a base for the stain to adhere evenly. Test your chosen wood stain on an inconspicuous area or scrap piece of the same wood to ensure it matches the colour of your existing floor before applying it to the visible repair. Once the stain is dry, apply two coats of polyurethane varnish for protection, adding a layer of durability and sheen.
To ensure a flawless finish, take your time to feather the edges of the sanded area to blend with the surrounding floor, and match the wood species and grain pattern of the original flooring. Use a filler strip if necessary to maintain consistent board spacing, avoiding noticeable gaps that can mar the floor’s look.
Conclusion: Maintaining Your Repaired Wooden Floor
Maintaining your newly repaired wooden floor requires attention to detail and a consistent care routine. To preserve the floor’s appearance and extend its lifespan, regular cleaning using products specifically designed for wood flooring is essential.
Protect your floor from scratches and dents by placing felt pads under furniture legs. You should also address any spills immediately to prevent moisture from seeping into the boards and joints. For more information on repairing damaged floorboards, you can visit this resource on wood flooring restoration.
By monitoring humidity levels, performing regular visual checks, and applying a fresh coat of polyurethane every few years, you can ensure the longevity of your wooden floor. Additionally, using area rugs in high-traffic zones and keeping pets’ nails trimmed will help maintain the floor’s integrity.