Are you tired of draining your entire hot water system just to replace a tap or repair a leak? Without isolation valves, even simple plumbing tasks can become cumbersome and wasteful.
Fitting isolation valves to your copper pipes is a straightforward process that can save you time, water, and frustration in the long run. This comprehensive guide will walk you through the steps to correctly install these essential components, ensuring your plumbing system operates efficiently and safely.
By understanding the role of isolation valves and following the step-by-step instructions, you’ll be equipped to handle plumbing maintenance with confidence.
Key Takeaways
- Understand the importance and function of isolation valves in plumbing systems.
- Learn the step-by-step process for fitting isolation valves to copper pipes.
- Discover the tools and materials required for the installation.
- Gain insights into UK water regulations governing isolation valve installation.
- Identify safety precautions to take before starting plumbing work.
What Are Isolation Valves and Why You Need Them
Isolation valves, also known as service or shut-off valves, play a vital role in maintaining your plumbing system. They are essential for controlling water flow to specific appliances or fixtures without affecting the entire home’s water supply.
Key Functions of Isolation Valves:
- Enable maintenance on individual fixtures like sinks, toilets, or washing machines without disrupting the whole system.
- Prevent extensive water damage by quickly stopping water flow in case of a leak.
- Simplify tasks such as replacing a tap by isolating the water supply to that specific area.
As emphasized by the Water Supply (Water Fittings) Regulations 1998, isolation valves are crucial for preventing water waste. By installing these valves on copper pipes, homeowners can create a more efficient and manageable plumbing system.
According to plumbing experts, “Isolation valves are a fundamental component of a well-designed plumbing system, allowing for easy maintenance and minimizing potential water damage.”
By incorporating isolation valves into your plumbing, you can save significant time and hassle during repairs and maintenance, ensuring your home’s water system operates smoothly.
UK Water Regulations for Isolation Valves
To ensure compliance and safety, it’s essential to familiarize yourself with the UK’s Water Supply regulations regarding isolation valves. The current Water Supply (Water Fittings) Regulations 1999 govern the installation of these valves.
The regulations specify that any isolation valve should be installed adjacent to the appliance it serves and be readily accessible. This ensures that in case of an emergency, the valve can be easily operated.
- The UK Water Supply (Water Fittings) Regulations 1999 dictate the installation requirements for isolation valves.
- Isolation valves must be installed near the appliance they serve.
- The product used, including isolation valves, must be of suitable quality and standard.
| Regulation Aspect | Requirement |
|---|---|
| Installation Location | Adjacent to the appliance |
| Accessibility | Readily accessible for emergency use |
| Product Quality | Must conform to relevant British standards or have a CE marking |
Understanding and adhering to these regulations is vital not only for legal compliance but also for ensuring the safety and efficiency of your home’s plumbing system. When installing isolation valves on copper pipes, ensure that the valves are compatible and meet the required standards.
Benefits of Installing Isolation Valves
The installation of isolation valves is a simple yet effective way to enhance your home’s water system. By doing so, you can perform maintenance on individual fixtures without disrupting the water supply to your entire house.
As noted by a plumbing expert, “Isolation valves are a game-changer for homeowners, providing convenience and reducing potential water damage.”
- Convenience during maintenance
- Reduced water wastage
- Prevention of airlocks
- Quick response to emergencies
- Long-term cost savings
By investing in isolation valves, you can enjoy a more efficient and stress-free plumbing system in your home.
Different Types of Isolation Valves Explained

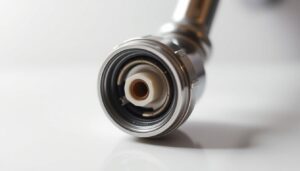
You can choose from several types of isolation valves depending on your plumbing requirements. Isolation valves come in various types designed for different applications, with the three main categories being traditional copper compression valves, push-fit valves, and flexible hoses with built-in isolation valves.
Traditional copper compression isolation valves are the most common type, featuring brass bodies with compression fittings that create a watertight seal when tightened around copper pipes. Push-fit isolation valves offer a quicker installation option without requiring soldering or extensive tools.
Flexible hoses with built-in isolation valves combine the functionality of a water supply hose and shut-off valve in one product, often used for connecting sinks and toilets. Each type of isolation valve has specific applications and benefits.
Handle vs Screw Valves: Making the Right Choice
When it comes to isolation valves, the choice between handle and screw valves can significantly impact both functionality and safety. Handle valves feature a lever that can be easily turned by hand, making them ideal for quick access in emergency situations.
Key Considerations:
- Handle valves are easily accessible and highly recommended for emergency situations.
- Screw valves require a flathead screwdriver to operate, providing added security against tampering.
- The placement of your valve may influence your choice between handle and screw valves.
The decision between handle and screw valves should be based on your specific needs, including the frequency of use and the level of security required. For instance, handle valves are more convenient for fixtures that require regular maintenance, while screw valves are better suited for rarely accessed isolation points.

Essential Tools for Fitting Isolation Valves

To fit isolation valves to copper pipes correctly, you’ll need the right tools. A pipe cutter or a small hacksaw is necessary for making clean cuts in the copper pipe.
Gathering the necessary tools before starting is crucial. You’ll need:
- Your chosen isolation valve
- Wire wool or fine sandpaper for cleaning and preparing pipe ends
- A permanent marker for marking cutting points on the pipe
- An adjustable spanner for tightening compression fittings
Having PTFE tape or jointing compound on hand is also advisable for creating additional sealing on threaded connections.
Safety Precautions Before You Begin
Before starting to fit isolation valves to copper pipes, it’s crucial to take necessary safety precautions. To ensure a safe working environment, follow these guidelines.
- Always turn off your main water supply at the stopcock before attempting to fit isolation valves to prevent flooding and water damage.
- Wear protective gear, including gloves and safety glasses, to protect yourself from sharp edges and metal filings.
- Ensure your work area is well-lit and dry to prevent slips and falls.
- Have towels or a bucket ready to catch any residual water that may drain from the pipes.
- If your plumbing system is connected to nearby electrical components, consider turning off relevant circuit breakers to eliminate electrical hazards.
| Safety Measure | Purpose |
|---|---|
| Turn off main water supply | Prevent flooding and water damage |
| Wear protective gear | Protect against sharp edges and metal filings |
| Ensure well-lit and dry work area | Prevent slips and falls |
| Have towels or bucket ready | Catch residual water from pipes |
| Turn off relevant circuit breakers | Eliminate electrical hazards |
By following these safety precautions, you can ensure a safe and successful installation of isolation valves on your copper pipes.
How to Fit Isolation Valves to Copper Pipe: Preparation
Preparation is key when it comes to successfully fitting isolation valves to copper pipes. To begin, you need to identify the optimal location for your isolation valve, ensuring it is easily accessible for future use.
First, turn off the mains water supply using the stopcock, typically found under your kitchen sink. Then, open taps throughout your home to drain the system of water and relieve pressure in the pipes.
- Measure and mark the section of copper pipe where you’ll install the valve, accounting for the valve body’s width and any additional space needed for fittings.
- Clean the area around your workspace to remove any items that might obstruct your access to the pipe or create hazards.
Here’s a summary of the preparation steps in a tabular format:
| Preparation Step | Description |
|---|---|
| 1. Turn off mains water supply | Use the stopcock to stop water flow. |
| 2. Drain the system | Open taps to relieve pressure. |
| 3. Measure and mark the pipe | Account for valve width and fittings. |
| 4. Clean the workspace | Remove obstructions and hazards. |
Step-by-Step: Cutting Copper Pipe Correctly
Cutting your copper pipe correctly is the first step in fitting an isolation valve. To achieve a clean cut, you can use either a pipe cutter or a small hacksaw. Ensure the cut is as clean as possible to avoid any jagged edges that could cause issues with the valve’s seals.
- Position your pipe cutter around the copper pipe at the marked cutting point, ensuring it’s perpendicular for a straight cut.
- Tighten the pipe cutter gradually while rotating it around the pipe until it’s completely cut through.
- If using a hacksaw, secure the pipe firmly and cut slowly with even strokes.
- After cutting, inspect both ends of the pipe for burrs or sharp edges.
As a professional would advise, “A clean cut is crucial for the proper fitting of isolation valves.” By following these steps, you can ensure a successful installation.
Cleaning and Preparing Pipe Ends for Installation
Before installing an isolation valve, it’s crucial to prepare the copper pipe ends properly. After cutting the copper pipe to the required length, you need to clean and prepare the ends where the valve will be fitted.
To do this, use fine sandpaper or wire wool to thoroughly clean both cut ends, removing any burrs, oxidation, or debris that could compromise the seal. Pay particular attention to both the inside and outside edges of the pipe, as even small burrs can prevent proper seating of the isolation valve and lead to leaks.
For compression fittings, ensure the pipe ends are perfectly round by gently reshaping any deformed sections using a pipe reamer or the back of your pipe cutter. Then, clean the pipe ends with a cloth to remove any metal particles or dust created during the sanding process.
If you’re using a compression valve, apply a small amount of plumber’s grease to the olive (compression ring). This will help create a better seal and make future removal easier if needed.

Installing Traditional Compression Isolation Valves
To ensure a leak-free connection, understanding how to install traditional compression isolation valves is crucial. You will need to start by preparing your copper pipes and the valve components.
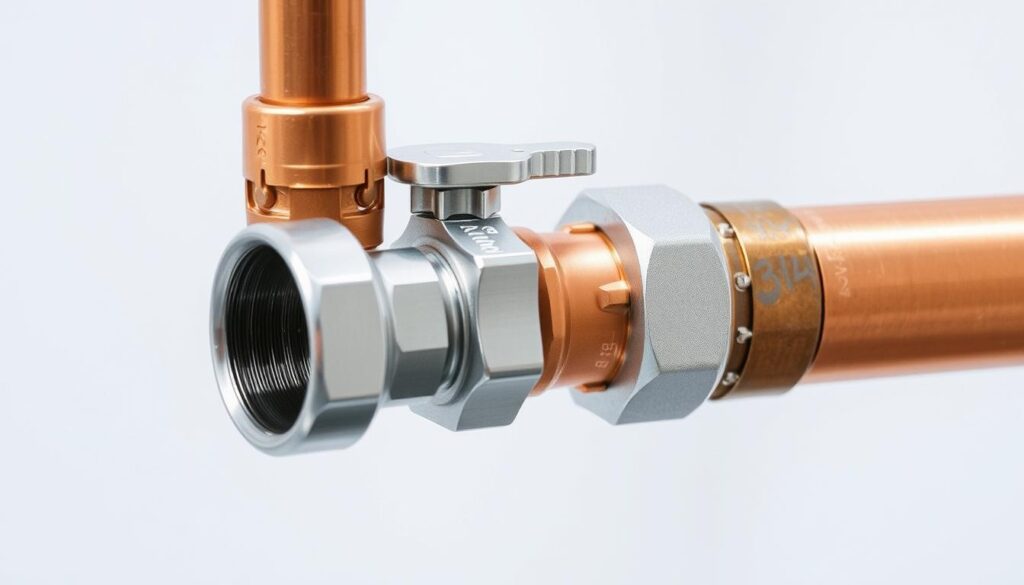
Begin by sliding the compression nuts and olives onto each end of the copper pipe. Then, position the valve body between the prepared pipe ends, ensuring it’s correctly oriented with the flow direction arrow pointing in the direction of water flow.
Next, slide the olives up to the valve body on both sides and thread the compression nuts over them. Hand-tighten initially to ensure proper alignment. Use an adjustable spanner to tighten each compression fitting, typically requiring 1-1.5 turns beyond hand-tight.
| Step | Description |
|---|---|
| 1 | Slide compression nuts and olives onto copper pipe ends. |
| 2 | Position valve body between pipe ends, aligning with flow direction. |
| 3 | Tighten compression nuts 1-1.5 turns beyond hand-tight. |
For a secure installation, hold the valve body steady with one spanner while tightening the compression nuts with another. This prevents twisting the valve out of position, ensuring a firm and leak-free connection.
Using Push-Fit Isolation Valves on Copper Pipes
Push-fit isolation valves have revolutionized plumbing work by providing a quick and easy solution for both copper and plastic pipes. You can install them without needing special tools or soldering, making the process efficient.
To ensure a proper seal, it’s crucial to cut the copper pipe ends squarely and deburr them thoroughly. Even small imperfections can prevent a secure connection.
- Mark the insertion depth on the pipe (typically 25-30mm) to ensure you push the valve fully onto the pipe.
- Push the valve firmly onto the pipe until it reaches your depth mark, then give it a gentle tug to confirm it’s properly secured.
Unlike traditional compression valves, push-fit valves can be rotated after installation without compromising the seal, allowing for optimal positioning of the handle or control.
| Benefits of Push-Fit Valves | Traditional Compression Valves |
|---|---|
| Quick and easy installation | Requires soldering or special tools |
| Can be used on both copper and plastic pipes | Limited to specific pipe materials |
| Allows for rotation after installation | Seal compromised if rotated after installation |
Testing Your Newly Installed Valve for Leaks
Once you’ve installed your isolation valve, it’s crucial to test it thoroughly to ensure there are no leaks.
To do this, gradually turn your main water supply back on to pressurize the system and begin testing for leaks. You should:
- Visually inspect all connection points around the newly installed valve, looking for any signs of water seepage or dripping.
- Use a dry tissue or paper towel to wipe around the connections, which will quickly show any moisture that might not be immediately visible to the naked eye.
- Test the functionality of the isolation valve by turning it on and off several times, ensuring smooth operation and checking for leaks in both positions.
If you discover any leaks, turn off the water supply again and tighten the connections slightly, being careful not to overtighten compression fittings which can damage the olives or deform the copper pipe.
Troubleshooting Common Installation Problems
The installation of isolation valves is a relatively straightforward process, but it’s not immune to potential problems. Issues can arise from various sources, including the type of pipe material and the fittings used.
- If you experience leaking from a compression valve, try tightening the compression nuts slightly more, but be cautious not to overtighten as this can crush the copper pipe or damage the olive.
- For persistent leaks from compression fittings, disassemble the connection, check that the olive is correctly positioned, and consider applying PTFE tape to the threads (not the olive itself).
- When push-fit valves leak, the most common cause is insufficient insertion depth or damage to the O-ring; remove the valve using the release collar, inspect the O-ring, and reinsert properly.
| Issue | Cause | Solution |
|---|---|---|
| Leaking Compression Valve | Overtightening or loose nuts | Tighten nuts carefully |
| Stiff Valve Handle | Lack of lubrication | Apply silicone-based lubricant |
| Leaking Plastic Pipe | Insufficient pipe inserts | Use appropriate pipe inserts |
For plastic pipe installations that leak, ensure you’ve used the appropriate pipe inserts to prevent the pipe from deforming under pressure, which is a common cause of failure with plastic pipework.
When to Call a Professional Plumber
If you’re unsure about any aspect of isolation valve installation, it’s best to consult a professional plumber. Certain situations demand their expertise, such as when dealing with corroded or damaged copper pipes that require extensive repair before valve installation can proceed.
You should also seek professional help for installations in high-pressure systems or where specialized brass fittings are required for pump connections or service lines. Additionally, if your home has older copper pipes that appear thin or fragile, a professional can assess whether they can safely support new valve installations.
- Complex installations involving multiple valves or those in difficult-to-access locations may be better handled by experienced plumbers with specialized tools.
- When installations involve critical systems like your main water service or home heating system, professional expertise ensures compliance with regulations and optimal performance.
Conclusion
With the knowledge gained from this guide, you’re now equipped to tackle isolation valve installation on your copper pipe. Whether you choose traditional or modern solutions, proper preparation and testing are key. This valuable DIY skill can save you time and money on future plumbing maintenance in your home.