Are you tired of rummaging through cluttered workspaces or spending too much time searching for the right tool?
Building a customised tool cart can transform your workshop organisation, making your projects more efficient and enjoyable. This comprehensive guide will walk you through the process, from planning and designing to the final touches that make your cart uniquely yours.
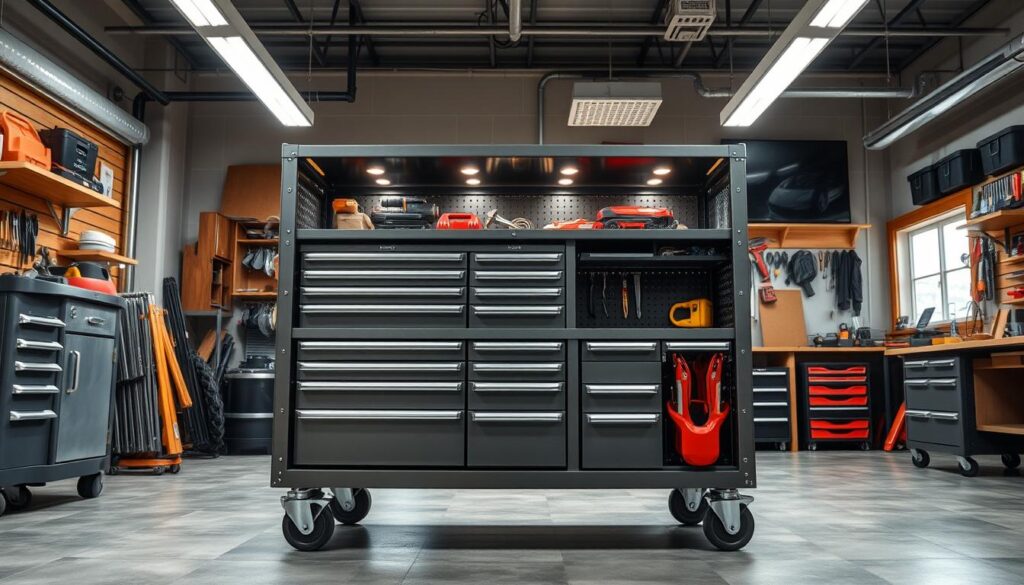
A well-designed cart provides storage for your tools, keeping them organised, protected from dust, and easily accessible. By the end of this guide, you’ll have a professional-quality cart that enhances your workshop efficiency.
Key Takeaways
- Create a customised tool cart tailored to your specific needs.
- Improve workshop organisation and efficiency.
- Protect your tools from dust and damage.
- Enhance accessibility to your tools.
- Customise your cart to fit your workspace.
Why You Need a Mobile Tool Cart in Your Workshop
A mobile tool cart is a game-changer for any workshop, providing flexibility and efficiency in tool organisation. With the ability to move your tools easily, you can optimise your workspace for various projects.
Benefits of a Custom Tool Organisation System
A custom tool organisation system on your mobile cart allows you to keep your tools tidy and within reach. This not only saves time but also reduces the risk of damage to your tools. By having a designated place for each tool, you can work more efficiently and effectively.
Advantages of Mobility in Your Workshop
The mobility offered by a tool cart with casters is a significant advantage. You can easily move your tool collection to different areas of your workshop or even outside for projects that require more space. This flexibility is particularly useful for woodworking projects that need to be done in a well-ventilated area or require a lot of space to manoeuvre.

Some of the key benefits of having a mobile tool cart include being able to position it next to your workbench, reconfigure your workshop layout as needed, and move it to storage when not in use. This level of flexibility can greatly improve your workflow and overall productivity in your woodworking projects.
Planning Your DIY Mobile Tool Cart Build

To create an effective DIY mobile tool cart, you need to plan carefully, considering your specific tool storage needs. A well-designed cart can significantly enhance your workshop’s efficiency.
Determining the Right Size and Configuration
When determining the size and configuration of your mobile tool cart, consider the types of tools you need to store. Think about incorporating a mix of drawer sizes to accommodate different tool types.
For instance, shallow drawers are ideal for hand tools, while deeper drawers can store power tools. Ensure adequate weight distribution by positioning heavier tools and drawers lower in the cart for improved stability.
Design Considerations for Maximum Efficiency
Design your cart with tool accessibility in mind, arranging frequently used tools in easily reached drawers or compartments. Consider including a flat top surface that can serve as an additional work area or temporary tool rest during projects.
Think about incorporating specialised storage solutions like foam tool organisers, dividers, or custom holders to keep tools secure and prevent them shifting when the cart is moved. Having a clear plans will help you achieve a lot in your workshop organisation.
Essential Tools and Materials

The success of your DIY mobile tool cart project hinges on having the essential tools and materials. To ensure a smooth build process, it’s crucial to be well-prepared.
Tool List for This Project
For this project, you’ll need a variety of tools. These include a saw for cutting plywood, a drill for driving screws, and a hammer for tapping nails into place. Having the right tools will make assembling your cart much easier.
Materials Shopping List
Your materials shopping list should include high-quality plywood for the main cabinet structure and drawer components. You’ll also need drawer slides in appropriate lengths, screws in various sizes, and nails for added reinforcement. Don’t forget wood glue to secure all joints and connections throughout the cart. You’ll need a lot of these materials to complete your project successfully.
Building the Main Structure
The main structure is the backbone of your DIY mobile tool cart, requiring accurate cuts and assembly. To begin, you will need to cut the side panels and dividers according to your planned design.
Cutting the Side Panels and Dividers
Cutting the side panels and dividers accurately is crucial for the stability of your tool cart. Use a sharp saw blade to make clean cuts, and double-check your measurements to avoid errors. “Precision in cutting is key to a successful build,” as it directly affects the assembly and overall functionality of your cart.
Assembling the Frame
To assemble the frame, start by applying glue to the joining edges of the sides, top, and bottom boards. Use clamps and 90-degree-angle jigs to hold the structure upright while you secure it with a brad nailer and screws. Ensure that the corners are perfectly aligned using corner clamps.
- Apply wood glue to all joining edges before assembly to create stronger bonds.
- Pre-drill holes for screws to prevent splitting the plywood.
- Install the back panel to add rigidity to the frame.
By following these steps and working on a flat, level surface, you can ensure that your cart frame is sturdy and functional.
Creating and Installing the Drawer System

As you continue building your DIY mobile tool cart, the next crucial step is creating and installing a functional drawer system. This will not only enhance the organisation of your tools but also improve the overall usability of your cart.
Building Custom Drawers
To build custom drawers, you need to ensure they fit perfectly within your cart’s frame. Use a story stick to mark precise locations for the drawer slides on both the cabinet sides and drawer sides. This ensures consistent placement and smooth operation.
Installing Drawer Slides and Runners
When installing drawer slides, start by attaching the cabinet-side portion, making sure they’re level and parallel to prevent binding. Then, attach the drawer-side portion, ensuring proper alignment with the cabinet-side components. If using wooden drawer runners, apply wax to the contact surfaces to reduce friction.
Key steps to follow:
- Mark precise locations for drawer slides on both the cabinet sides and drawer sides using a story stick.
- Install the cabinet-side portion of the drawer slides first, ensuring they’re level and parallel.
- Attach the drawer-side portion of the slides, ensuring proper alignment.
- Test the operation of each drawer before proceeding.
- Apply wax to wooden drawer runners to reduce friction.
By following these steps, you’ll be able to create a smooth-operating drawer system that will keep your tools organised and within easy reach.
Adding Functionality to Your Mobile Tool Cart
To maximise the utility of your DIY mobile tool cart, consider adding features that enhance organisation and mobility. A well-organised tool cart is the backbone of an efficient workshop, allowing you to focus on the task at hand rather than searching for misplaced tools.
Tool Storage Solutions and Organisation
Effective tool storage is crucial for maintaining a clutter-free and productive workspace. You can achieve this by incorporating custom drawers and dividers that cater to your specific tool collection. “A place for everything, and everything in its place” is a mantra that resonates well in workshop environments, enhancing productivity and reducing time wasted on searching for tools.
Consider the types of tools you use most frequently and design your storage solutions around them. For instance, you might allocate a specific drawer for hand tools and another for power tools. This segregation not only aids in organisation but also in maintaining the condition of your tools by preventing them from getting damaged or mixed up.
Installing Casters for Mobility
To ensure your tool cart is mobile and easy to manoeuvre, installing the right casters is paramount. You should select heavy-duty casters rated for at least 1.5 times the anticipated weight of your fully loaded tool cart. This ensures safety and durability. It’s also advisable to reinforce the bottom corners of the cart where the casters will be mounted to distribute the weight evenly and prevent structural failure.
- Choose casters with locking mechanisms on at least two wheels to keep the cart stationary when needed.
- Position the casters near the corners of the cart’s bottom for maximum stability.
- Consider using swivel casters for maximum manoeuvrability or fixed casters for more controlled movement.
Installing 4-inch caster wheels, as recommended, will provide the necessary mobility. Ensure that the casters are properly secured to the cart to prevent any accidents. As the saying goes, “A good workman is known by his tools,” and with the right mobility, you’ll be able to work more efficiently.

Finishing Touches and Customisation
The final stages of your project involve adding the finishing touches and making it truly yours. At this point, you’ve built the main structure of your mobile tool cart, and now it’s time to refine it.
Sanding and Finishing the Wood
Sanding is crucial to achieve a smooth finish. You should sand all the wooden surfaces to remove any splinters or rough edges. Consider applying a wood finish to protect the wood and enhance the appearance of your cart. This will also make it easier to clean and maintain.
Adding Personal Touches and Modifications
You can customise your mobile tool cart by adding features that suit your workflow. For instance, consider adding a pegboard to one side for hanging frequently used tools. You could also install a power strip on the side to create a charging station for your cordless tools. Drilling holes in the top surface can create a work platform compatible with bench dogs or other workholding devices. Additionally, you can add custom drawer pulls that reflect your personal style or are shaped for optimal grip. Incorporating LED lighting strips under shelves or inside drawers can improve visibility in low-light conditions. Some users even add fold-up miter-saw stand wings to their saw cart for added versatility.
Conclusion: Enjoying Your Custom Workshop Solution
You’ve successfully built a custom mobile tool cart, elevating your workshop’s organisation and efficiency. Your completed tool cart represents a significant upgrade, providing a reliable storage solution for your tools. As you continue to use your new cart, take time to refine your tool arrangement, placing frequently used tools in more accessible positions.
With proper care, your DIY mobile tool cart will serve as a trusted companion for many projects to come, enhancing your overall woodworking experience. Consider building additional carts for specific project types or tool categories as your workshop evolves, creating a tailored place for each task.