Are you tired of rummaging through cluttered toolboxes and disorganised workshops? Can a simple, DIY storage solution transform your workspace?
A well-organised workshop is essential for any DIY enthusiast or professional craftsperson. A dedicated storage system for your tools and fasteners can significantly enhance your workspace efficiency.
With this easy-to-follow guide, you’ll learn how to assess your storage needs, choose the right materials, and build a customised bolt-and-screw organiser that keeps your tools readily accessible.
Key Takeaways
- Assess your storage requirements to maximise space efficiency.
- Choose appropriate materials for your organiser wall.
- Follow step-by-step instructions to build your custom storage system.
- Enhance your workshop’s efficiency with a dedicated tool holder.
- Create a tidy workspace that improves productivity.
Why You Need a Bolt-and-Screw Organiser Wall
Creating a bolt-and-screw organiser wall is a simple yet effective way to boost your workshop’s efficiency. A cluttered workspace can lead to wasted time searching for the right fasteners and tools.
The Problem with Disorganised Fasteners
Disorganised fasteners can cause significant delays and frustration in your projects. Without a proper storage system, you may find yourself rummaging through boxes or drawers, wasting valuable time. This disorganisation can lead to mistakes, such as using the wrong type or size of fastener, potentially compromising your work.
Benefits of a Dedicated Storage System
A dedicated tool storage system on your wall can transform your workflow. By making every fastener visible and accessible, you save time on every project. Your system will allow you to quickly identify the exact type and size of fastener needed, making your work more efficient. As one expert notes,
“A well-designed storage system makes inventory management much easier, allowing you to see when supplies are running low.”
A bolt-and-screw organiser wall also frees up valuable workbench space, creating a more pleasant working environment.
| Benefits | Description |
|---|---|
| Improved Workflow | Makes every fastener visible and accessible |
| Time Efficiency | Saves time on every project by eliminating searches |
| Better Inventory Management | Easily see when supplies are running low |
By implementing a bolt-and-screw organiser wall, you make your workspace more efficient and enjoyable, allowing you to focus on your projects rather than searching for tools. Decide what you want to have easily accessible and what you want to store in your tool box for less frequent use. With a well-organised wall system, you’ll find that your workshop becomes a more pleasant place to work.
Planning Your Organiser System
Effective planning is the foundation of a functional and efficient bolt-and-screw organiser wall. To create a system that meets your needs, you must first assess your storage requirements and choose an appropriate location.
Assessing Your Storage Needs
Begin by evaluating the types and quantities of fasteners and tools you need to store. Consider the sizes and shapes of the items to determine the most suitable storage solutions. This assessment will help you design a tailored system that maximises your available space.
Choosing the the Right Location
When selecting a location for your organiser system, consider several key factors. Ensure the chosen wall is easily accessible and within arm’s reach of your primary work area. Verify that the garage or workspace has adequate lighting and structural support to hold the weight of your loaded organiser system.
- Select a location that is easily accessible and within arm’s reach of your primary work area for maximum efficiency.
- Ensure the chosen wall has adequate structural support to hold the weight of your loaded organiser system.
- Consider lighting conditions to easily identify small items.
- Avoid locations with exposure to moisture or extreme temperature fluctuations.
- If working in a shared space, choose a location that won’t interfere with other activities.
Different Types of Organiser Systems
Your bolt-and-screw organiser wall’s functionality is directly related to the organiser system you decide to use. There are various approaches to organising your tools and fasteners, each with its unique benefits and considerations.
Box-Based Systems
Box-based systems involve using individual boxes or containers to store different types of fasteners and tools. This approach allows for easy categorisation and accessibility. You can label each box to quickly identify its contents, making it simpler to find what you need.
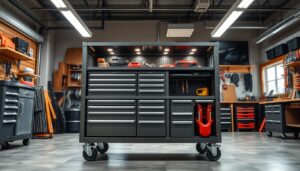
Wall-Mounted Systems
Wall-mounted systems make efficient use of your workshop’s vertical space. By mounting storage units directly to the wall, you keep your work surface clear and your tools within easy reach. This is particularly useful in smaller workshops where space is limited.
French Cleat Systems
French cleat systems utilise angled wooden strips mounted to the wall that interlock with matching cleats on storage containers. This modular approach offers incredible flexibility, allowing you to rearrange or remove containers without tools. French cleats provide a strong, secure mounting method capable of supporting substantial weight.
The following table summarises the key features of each organiser system:
| Organiser System | Key Features | Flexibility |
|---|---|---|
| Box-Based | Easy categorisation, labelled boxes | Moderate |
| Wall-Mounted | Efficient use of vertical space, accessible | High |
| French Cleat | Modular, strong, secure, adaptable | Very High |
When choosing an organiser system, consider the specific needs of your workshop and the types of tools and fasteners you need to store. By selecting the right system, you can create a more efficient and organised workspace.
Materials and Tools You’ll Need
Gathering the correct materials and tools is crucial for a successful organiser wall project. To ensure a smooth and efficient process, it’s essential to have the right equipment.
Essential Materials List
You’ll need materials such as plywood sheets, lumber, wood screws, washers, and scrap strip metal (optional). If you’re mounting your organiser to a brick wall, you’ll also require rawl plugs.
Required Tools
The following tools are necessary for the project:
– A table saw or circular saw for cutting plywood sheets and lumber to size.
– A drill with various drill bit sizes for pilot holes and assembly.
– A jigsaw for cutting curved sections or finger holes in boxes.
– Measuring tools including a tape measure, square, and level.
– Clamps to hold pieces together during gluing and assembly.
– Screwdrivers or an impact driver for fastening components.
– Sandpaper or a power sander for smoothing rough edges.
Optional tools include a router for creating dados and a drill press for precise holes.
How to Create a Bolt-and-Screw Organiser Wall
You can achieve a highly organised workspace by designing a suitable bolt-and-screw organiser wall. To do this effectively, you need to consider several key factors, including the type of storage system, the materials required, and the safety precautions to be taken.
Preparing Your Workspace
Before starting your project, ensure your workspace is clear and free from clutter. This will give you a clean slate to work on and help you focus on the task at hand. Make sure you have all the necessary tools within easy reach to streamline the process.
Measuring and Planning Your Layout
Accurate measurements are crucial when planning your organiser wall. Take precise measurements of the wall space available and decide on the optimal layout for your screws and other hardware. Consider the size and type of storage containers or compartments you will need.
Safety Considerations
When working on your organiser wall, safety should be your top priority. Always wear protective gear, including eye protection, gloves, and dust masks, when cutting materials. Ensure your power tools are in good condition and used according to the manufacturer’s guidelines. Secure your organiser system firmly to the wall studs or use appropriate anchors to prevent collapse. Consider creating a holder for your most frequently used items, placing them in an easily accessible place.
- Always wear appropriate safety gear, including eye protection, gloves, and dust masks when cutting materials.
- Ensure your power tools are in good working condition and used according to manufacturer guidelines.
- Secure your organiser system firmly to wall studs or use appropriate anchors to prevent collapse under weight.
For heavier items, make sure the screw is ¾ of the way through the wood, avoiding screws longer than the depth of the shed’s spars to prevent them from poking out of the wall.
Building the Main Storage Box
With your materials ready, you can begin constructing the main storage box by cutting the wood to size. This step is crucial as it lays the foundation for the entire organiser system.
Cutting the Wood to Size
To cut the wood accurately, use a table saw or a circular saw, ensuring that your pieces are cut to the precise dimensions required for the box. Double-check your measurements to avoid errors.
Creating Box Joints
The next step involves creating the box joints. You can use various joinery techniques such as dado joints or dovetail joints, depending on your preference and skill level. Ensure that your joints are strong and well-crafted to support the weight of the contents.
Cutting Dados for Shelves
To accommodate the shelves, you need to cut dados into the side panels. For instance, you can cut dados for five shelves on the 19.5-inch long side pieces using a table saw, making multiple passes to achieve a 3/8″ width. Alternatively, a router with a straight bit can be used for precise width and depth. Mark the locations for your dados on the inside of the side panels, spacing them evenly or according to your specific needs. Ensure the dados are sized to match the thickness of your shelf material for a snug fit.

After cutting the dados, test fit your shelves to confirm proper alignment before proceeding to the final assembly. This step is crucial to ensure that your storage system functions smoothly and efficiently, providing ample space for your tools and other equipment.
Assembling the Main Box Structure
Now that you have all the parts, let’s focus on assembling the main box structure. This step is crucial in creating a sturdy storage system for your tools and fasteners.
Gluing the Box Together
Begin by gluing the sides and bottom of the box together. Ensure all corners are aligned properly and clamp them securely until the glue dries. This will provide a solid foundation for your storage system.
Installing the Shelves
Once the main box is assembled, it’s time to install the shelves. If you haven’t already done so, secure the shelves in their designated place. You can use dados or small cleats to support each shelf. Here are some key considerations:
- Ensure each shelf is level before securing it permanently.
- For added stability, consider applying a small amount of glue to the shelf edges.
- Test the strength of each shelf by applying gentle pressure.
- Space shelves according to the height of the containers or items you plan to store.
By following these steps, you’ll create a robust and functional storage system that keeps your tools and fasteners organised and within easy reach.
Creating Individual Compartment Boxes
You are now ready to start assembling the individual compartment boxes that will keep your tools and parts organised. With the main storage box built, the next step is to create the smaller boxes that will fit inside it, providing a place for each type of fastener and tool.
Sizing and Cutting Materials
To begin, you need to size and cut the materials for the small boxes. Ensure that the dimensions are consistent so that they fit neatly within the main storage box. Accuracy is key in this step to avoid any issues during assembly.
Adding Finger Holes for Easy Access
To make the small boxes user-friendly, consider adding finger holes to the front of each box. This simple addition makes it easier to pull out the boxes when needed, enhancing the overall functionality of your organiser system.
Assembling the Small Boxes
Now, you can start assembling the small boxes. Follow these steps:
- Assemble each small box using the same joinery method as the main box for consistency and strength.
- Apply wood glue to all joints and use small clamps to hold the pieces together while drying.
- Work in batches to efficiently assemble multiple boxes, allowing one set to dry while preparing the next.
- Check each box for square corners and proper alignment before the glue sets.
- Test fit each box in the main structure to ensure a proper fit before proceeding.
By following these steps, you can create a set of sturdy, well-organised small boxes that will keep your workspace tidy and efficient.
Installing Dividers for Better Organisation
Once you have assembled the main box structure, the next step is to install dividers for better compartmentalisation. Dividers are essential for maximising the storage potential of your bolt-and-screw organiser wall. They allow you to separate different types of fasteners and tools, making them easier to find and access when needed.
Measuring and Cutting Dividers
To start, measure the interior of your storage box to determine the size of dividers required. Accuracy is crucial to ensure a proper fit. Cut the dividers to size using a saw, taking care to make clean cuts. The dividers should fit snugly within the box, so consider the thickness of the material when measuring.
Securing Dividers in Place
You can secure dividers using various methods, depending on whether you prefer them to be permanent or removable. For permanent dividers, apply a thin bead of wood glue along the edges and clamp them in place until dry. For removable dividers, create small dados in the box sides to allow for easy insertion and removal. Ensure dividers are perpendicular to the box sides for maximum strength and proper compartmentalisation.
Finishing Your Organiser System
To ensure your organiser system is both functional and durable, a proper finish is essential. Applying a finish not only enhances the appearance of your organiser but also protects it from the rigors of workshop conditions.
Sanding All Components
Begin by sanding all components to smooth out any rough edges or surfaces. This step is crucial for achieving a uniform finish.
Adding Bottoms to Small Boxes
Attach bottoms to the small boxes you’ve created. This will prevent your fasteners and tools from falling out, keeping your workspace organised.
Applying Finish for Protection
When it came to finishing the large box and the tiny boxes, I used an HVLP sprayer with polyurethane. This made the task much easier and saved a significant amount of time. Here are some key considerations:
- A protective finish extends the life of your organiser and makes it more resistant to workshop conditions.
- Choose a durable finish like polyurethane, shellac, or Danish oil depending on your preference and needs.
- Apply the finish in thin, even coats, allowing proper drying time between applications.
- An HVLP sprayer provides the most efficient application method for multiple boxes, though brushing is also effective.
Alternative: Simple OSB Tool Wall Method
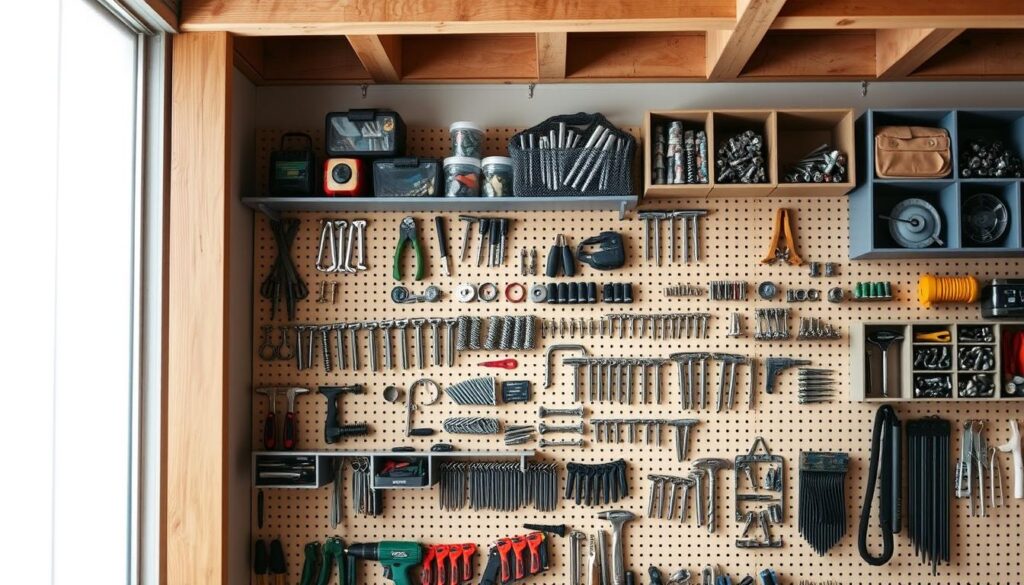
If you’re looking for a simple and effective way to organise your tools, an OSB tool wall with screw hangers is a viable option. This method involves cladding a section of wall with OSB and using screws as hangers for your tools and fasteners.
Cladding Your Wall Section
Begin by cladding the desired wall section with OSB. This will provide a sturdy surface for hanging your tools. Ensure the area is clear and ready for the OSB panel.
 wall serving as a versatile tool storage solution. The OSB surface features an array of neatly organized hand tools, power tools, and accessories, each secured by custom-made hooks and pegs. The lighting, a combination of overhead LED panels and task lamps, casts a warm, workman-like glow across the scene. The foreground showcases the clean, minimalist design of the OSB wall, while the middle ground presents the diverse tools in an orderly, visually appealing manner. The background blends seamlessly, hinting at the broader workshop environment without distracting from the main focal point.")
Using Screws as Hangers
To hang your tools, use screws of appropriate length and gauge. Install them at a slight upward angle into the OSB to create secure hanging points. Space them according to the size and shape of the items they’ll hold. For small containers, install pairs of screws to support the container’s bottom edge. This method allows for easy reconfiguration as your storage needs change.
Mounting Your Organiser to the Wall
To ensure your bolt-and-screw organiser wall remains secure, you need to mount it to the wall effectively. This involves choosing the right mounting method based on your wall type.
Using a French Cleat System
A French cleat system provides a sturdy and adjustable mounting solution. It involves attaching a bracket to the wall and another to the back of your organiser. This method allows for easy installation and adjustment. When using a French cleat, ensure the wall can support the weight.
Direct Wall Mounting Options
For a more straightforward approach, you can directly mount your organiser to the wall using screws. If you’re dealing with a masonry wall, use appropriate wall plugs or anchors. For stud walls, locate the studs to secure your screws properly. Consider adding a holder or hooks for additional storage.
| Mounting Method | Wall Type | Recommended Fixings |
|---|---|---|
| French Cleat | Masonry/Stud | Heavy-duty screws/bolts |
| Direct Mounting | Masonry | Wall plugs/screws |
| Direct Mounting | Stud | Screws into studs |
Creating Specialised Holders for Tools
To maximise your workshop’s efficiency, consider designing specialised holders for your tools. This approach not only enhances organisation but also ensures that your tools are easily accessible and securely stored.
Screwdriver and Drill Bit Holders
Creating holders for screwdrivers and drill bits can be achieved by repurposing plastic pipes or wooden dowels. For instance, cutting a PVC pipe at an angle allows you to create a snug fit for your screwdrivers, keeping them organised and within reach.
Pliers and Wrench Organisers
For pliers and wrenches, you can design custom holders using wooden or metal strips. Attaching hooks to a pegboard or a wall section can also provide a convenient storage solution for these tools.
Repururposing Items for Storage
Repurposing everyday items is an effective way to create storage solutions. For example, old plastic containers can be cleaned and used as small parts bins. Metal tins with lids are ideal for storing fasteners that need to remain dust-free. You can also use old mug hooks to hang measuring tapes or small clamps.
| Item | Repurposed Use |
|---|---|
| PVC Pipes | Screwdriver and chisel holders |
| Plastic Containers | Small parts bins |
| Metal Tins | Fastener storage |
By adopting these creative storage solutions, you can significantly enhance your workshop’s organisation and efficiency.
Organising Your Fasteners Effectively
To get the most out of your organiser system, you need to sort and label your fasteners properly. Effective organisation of your nails and screws is crucial for a clutter-free workshop. This involves categorising them into different compartments within your storage box.
Sorting by Type and Size
Begin by sorting your fasteners by type and size. For instance, you can separate nails of different lengths and screws of various thread patterns into distinct compartments. This makes it easier to find the right tool or fastener when needed, saving you time and reducing clutter in your workspace.
Labelling for Quick Identification
Clear labelling is essential for quick identification of stored fasteners. You can create durable labels for each compartment indicating the type, size, and thread pattern of fasteners stored. Consider using a consistent labelling system throughout your organiser for uniformity. For frequently accessed fasteners, position labels where they’re visible without removing the container. As one expert puts it,
“Clear labelling transforms a good organisation system into an excellent one by eliminating guesswork.”
Take a photo of your organised system as a reference for maintaining order over time.
Maintenance and Updating Your System
Your organiser wall is a dynamic system that requires periodic updates and cleaning to maintain its effectiveness.
To keep your storage system in top condition, consider the following aspects:
Regular Cleaning and Reorganisation
Regularly cleaning your organiser wall helps prevent dust buildup and keeps your tools in good condition. Reorganise your storage compartments periodically to ensure they remain relevant to your current needs.
- Remove any unnecessary items that have accumulated.
- Dust and clean the storage containers and dividers.
- Reassess the labelling to ensure it remains clear and accurate.
Expanding as Your Collection Grows
As your collection of fasteners and tools grows, your storage system should adapt. Design your initial system with expansion in mind, leaving space for additional modules or containers.
| Expansion Consideration | Description |
|---|---|
| Modular Design | Allows for easy addition of new modules or containers. |
| Vertical Expansion | Consider adding shelves or compartments upwards if wall space is limited. |
| Consistency | Maintain consistency with your existing organisation principles when adding new sections. |
By following these guidelines, you can ensure your organiser wall remains a valuable asset to your workshop, efficiently building upon your existing system.
Conclusion: Enjoying Your Organised Workshop
As you stand back to admire your handiwork, you’ll realise that the effort was well worth it for the efficiency you’ve gained. A well-organised bolt-and-screw wall transforms your workshop experience, making projects more efficient and enjoyable. The time invested in creating your custom organiser system pays dividends with every project you undertake.
Your organised workshop becomes a source of pride and satisfaction, encouraging more frequent and ambitious DIY projects. You can continually refine and improve your system as you discover what works best for your specific needs. By sharing your organisation solutions with fellow DIY enthusiasts, you can inspire others and gather new ideas for future improvements, making your workshop much easier to work in.
With your new storage system in place, you’ll find that managing your tools and materials on the wall becomes a breeze, saving you time in the long run.