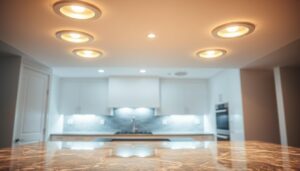
Are you tired of the dull glow and flicker of old fluorescent tubes? Do they make your home or office feel dreary and uninviting? It’s time to brighten up your space with the modern efficiency of LED batten lighting.
Upgrading your lighting can make a significant difference in the ambiance and functionality of your space. With LED technology, you can enjoy a brighter, more energy-efficient environment.
By upgrading to LED batten lighting, you’ll not only enhance the aesthetic of your space but also reduce your energy bills. Our comprehensive guide will walk you through the simple process of making the switch.
Key Takeaways
- Learn why LED battens are becoming the preferred choice for lighting.
- Discover the different types of LED battens and their compatibility.
- Follow a step-by-step guide for a safe and successful installation.
- Understand the benefits of upgrading to LED batten lighting.
- Enjoy the cost savings and improved performance of modern LED lighting.
Why Make the Switch from Fluorescent to LED Batten Lighting
Making the switch from fluorescent tubes to LED batten lighting is a decision that can significantly impact your energy consumption and lighting quality. LED tubes offer greater savings and efficiency compared to traditional fluorescent tubes, making them an environmentally friendly choice. With a lifespan of over 50,000 hours, LED tubes outlast fluorescent tubes, which typically last around 10,000 hours, by a significant margin.

Energy Efficiency and Cost Savings
One of the primary advantages of LED batten lighting is its energy efficiency. Unlike fluorescent tubes that require an external reflective hood to redirect light, LED tubes are directional, emitting light in one direction. This results in a significant reduction in wasted illumination and lower energy consumption. By switching to LED batten lighting, you can enjoy substantial cost savings on your energy bills.
Key benefits include:
- Reduced energy consumption due to directional lighting
- Lower energy bills resulting from increased efficiency
- Longer lifespan reducing replacement costs
Environmental Benefits and No Mercury
LED batten lighting is not only energy-efficient but also environmentally friendly. Unlike fluorescent tubes, LED tubes do not contain mercury, a toxic substance that poses health and environmental risks. By choosing LED lighting, you contribute to a reduction in hazardous waste and support a more sustainable future.
“LED lighting is a crucial step towards reducing our carbon footprint and creating a more sustainable environment.”
Improved Light Quality and Instant Illumination
LED batten lighting also offers superior light quality compared to fluorescent tubes. LED battens provide consistent, flicker-free illumination that reduces eye strain and creates a more comfortable environment. They reach full brightness instantly, eliminating the warm-up period associated with fluorescent tubes. Additionally, LED technology allows for better control over light distribution, creating more evenly lit spaces.
By switching to LED batten lighting, you can enjoy natural-looking illumination in various colour temperatures to suit different spaces, enhancing the overall ambiance and functionality of your area.
Understanding LED Batten Lights and Compatibility
To successfully convert your fluorescent tube lighting to LED batten, you need to grasp the fundamentals of LED tubes and their compatibility with your current setup. LED batten lights are designed to be a direct replacement for traditional fluorescent lighting, offering energy efficiency and improved light quality.
LED tubes eliminate the need for a ballast and starter, simplifying the installation process and reducing energy consumption. At first glance, it might be challenging to differentiate between old fluorescent tubes and new LED tubes, but the key lies in their operational characteristics.
Types of LED Batten Fixtures Available
The market offers a variety of LED batten fixtures, catering to different needs and applications. When selecting an LED batten, consider factors such as size, lumen output, and colour temperature to ensure it meets your lighting requirements.
Checking Compatibility with Your Existing Setup
Before making the switch, it’s essential to check the compatibility of LED tubes with your existing fluorescent fixture. This includes understanding whether your current setup uses a ballast and starter, and determining the type of LED tube that is compatible with your fixture.
Tandem Circuit Considerations
Tandem circuits, where one ballast operates two fluorescent tubes, require special consideration. Key points to note include:
- Tandem circuits need modification when converting to LED lighting.
- You can identify a tandem circuit by the presence of two starters connected to a single ballast.
- Standard LED tubes are typically not compatible with tandem circuits without rewiring.
- Check product specifications to see if the LED tubes are tandem-compatible.
- For tandem circuit installations, you may need to rewire the fixture or select specially designed tandem-compatible LED tubes.
By understanding these aspects, you can ensure a smooth transition to LED batten lighting, enjoying the benefits of energy efficiency, improved light quality, and reduced maintenance.
Choosing the Right LED Batten for Your Space

To ensure you get the best LED batten for your space, consider factors such as size, brightness, and colour temperature. Replacing your existing fluorescent tube with an LED tube can significantly enhance the lighting quality in your home or office.
Length and Size Considerations
When selecting an LED batten, it’s crucial to choose the correct length. Simply check the length of your existing fluorescent tube, usually printed on the tube itself, and find an LED batten light that matches this size. This ensures a seamless replacement process.
Brightness and Lumen Output
The brightness of an LED batten is measured in lumens. For areas requiring more light, such as kitchens or workspaces, opt for a higher lumen output. Conversely, for spaces like bedrooms, a lower lumen output may be more suitable, providing a softer, more relaxing light.
Colour Temperature Options
LED battens offer various colour temperature options, measured in Kelvins (K), allowing you to create the perfect atmosphere for different spaces. The options include:
- Warm white (2700K-3000K) for a cosy, yellowish light, ideal for living areas and bedrooms.
- Neutral white (3500K-4000K) for a balanced, natural light, suitable for kitchens, offices, and workspaces.
- Cool white/daylight (5000K-6500K) for a bright, bluish-white light, perfect for garages, workshops, and areas requiring high visibility.
Consider the primary activities in each space when selecting colour temperature, as lighting can significantly impact mood, productivity, and visual comfort.
How to Convert Fluorescent Tube to LED Batten
Converting your fluorescent tube to LED batten lighting is a straightforward process that can be completed with a few simple steps. This guide will walk you through the necessary tools, safety precautions, and installation steps to ensure a successful conversion.
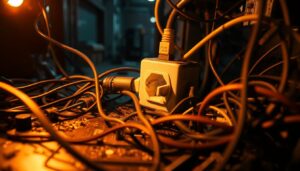
Tools and Materials Needed
Before starting the conversion, gather the necessary tools and materials. You will need a screwdriver, wire cutters, wire nuts or connectors, electrical tape, and your new LED batten fixture. Ensure that the LED batten is compatible with your existing setup and that you have the correct type of LED tube.
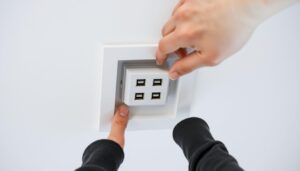
Safety Precautions Before Starting
Safety first: switch off the power to the lighting circuit at the mains. Verify that the power is off using a voltage tester to avoid any electrical shock. It’s also a good idea to lock the circuit breaker to prevent accidental reactivation.
Step1: Turn Off Power at the Mains
Ensure the power is completely off before starting the conversion. This is a crucial safety step to prevent electrical shock or injury. Double-check that the circuit is dead using a voltage tester.
Step2: Remove the Existing Fluorescent Fixture
To remove the existing fluorescent fixture, start by disconnecting the ballast and starter. Cut the neutral wire connected to the ballast and remove it. Repeat the same operation with the phase wire that connects the starter. Carefully remove the fluorescent tube from its holder.
Step3: Prepare the Ceiling for New Installation
Inspect the ceiling for any debris or old mounting hardware. Clean the area and ensure it’s free from dust. If necessary, repair any damaged areas before proceeding with the installation of your new LED batten.
Step4: Install and Wire the LED Batten
Mount the LED batten base to the ceiling using the appropriate screws and anchors. Connect the mains wiring to the LED driver, ensuring that the brown live wire and blue neutral wire are correctly connected to their corresponding terminals. For earthed fixtures, connect the green/yellow earth wire to the earth terminal. Secure all connections and attach the LED batten cover according to the manufacturer’s instructions.
| Step | Description |
|---|---|
| 1 | Mount the LED batten base to the ceiling |
| 2 | Connect the mains wiring to the LED driver |
| 3 | Secure all connections and attach the LED batten cover |
By following these steps, you can successfully convert your fluorescent tube to LED batten lighting, enjoying the benefits of energy efficiency, improved light quality, and a longer lifespan.
Troubleshooting Common Issues After Installation
Troubleshooting common problems is an essential step in ensuring your LED batten lighting functions correctly. After converting your fluorescent tube to LED batten, you may encounter some issues, but these can be resolved with the right guidance.

Dealing with Flickering or Dimming
If your LED batten is flickering or dimming, there are a few potential causes to investigate. Firstly, check that the LED tube is securely connected to the fixture and that there are no loose connections. Additionally, ensure that the LED batten is compatible with your existing dimmer switch, if you’re using one. Incompatible dimmer switches can often cause flickering or dimming issues.
Addressing Connection Problems
Connection problems can be a common issue after installing LED batten lighting. If you’re experiencing issues, check that all wires are securely connected and that the wiring configuration matches the manufacturer’s instructions. It’s also essential to verify that the wiring colours match the standard UK electrical codes. If you’re unsure, consult a qualified electrician to avoid any potential safety hazards.
- Check for loose connections or damaged wires.
- Verify that the wiring configuration matches the manufacturer’s instructions.
- Consult a qualified electrician if you’re unsure about any aspect of the installation.
When to Call a Professional Electrician
While many issues can be resolved through basic troubleshooting, there are times when it’s necessary to call a professional electrician. If you’re experiencing persistent flickering or dimming that doesn’t resolve with basic troubleshooting, or if your LED batten works intermittently or trips circuit breakers, it’s essential to seek professional assistance to ensure your safety and the integrity of your electrical system.
By following these troubleshooting tips, you can identify and resolve common issues with your LED batten lighting, ensuring that it continues to provide reliable and efficient lighting for years to come.
Conclusion: Enjoying the Benefits of Your LED Batten Conversion
Your decision to switch from fluorescent tubes to LED batten lighting is a step towards a more sustainable future. By making this change, you’ve invested in a solution that offers up to 80% less energy consumption compared to traditional fluorescent lighting. This not only reduces your electricity bills but also minimizes your environmental footprint.
The benefits of your new LED batten lighting extend beyond energy savings. You’ll enjoy superior light quality with consistent, flicker-free illumination, creating a more comfortable and productive environment in your home or workplace. For more information on how to make the most of your new LED lighting, you can refer to our guide on replacing fluorescent tubes with LED tube.
With the extended lifespan of LED products, you’ll have significantly reduced maintenance requirements, saving you time and money on replacement tubes. Additionally, by eliminating the disposal of mercury-containing fluorescent tubes, you’re contributing to environmental sustainability. As LED technology continues to advance, you’ll be well-positioned to take advantage of future innovations in lighting.