Are you tired of making drilling mistakes that lead to wasted time and money? Selecting the right drill bit is crucial for any DIY or construction project.
Having holes with the correct diameter is vital, especially when using screws or other fasteners. The right masonry drill bit ensures secure fixings and prevents damage to materials.
Whether you’re a DIY enthusiast or a professional, understanding how to select the appropriate drill bit size is essential. This guide will help you navigate the process, covering various materials like concrete, brick, and plasterboard.
Key Takeaways
- Understand how to select the correct drill bit size for various DIY and construction projects.
- Learn about the relationship between drill bits, wall plugs, and screws.
- Discover how to match drill bits correctly for optimal results.
- Explore the specific drill bit considerations for different materials.
- Gain confidence in selecting the appropriate masonry drill bit for any project.
Understanding Masonry Drill Bits
Understanding masonry drill bits is key to successful drilling in tough materials. You need to know what makes them different and how to choose the right size for your project.
What Makes Masonry Drill Bits Different
Masonry drill bits are designed to withstand the rigors of drilling through hard surfaces like brick and concrete. They are typically made with a robust tip and a strong shaft to resist wear and tear. The drill bit’s diameter is crucial as it determines the size of the hole and the type of fixings you can use.
Common Sizes and Their Applications
Masonry drill bits come in various sizes to suit different tasks. Common sizes range from 4mm to 16mm in diameter. For household DIY projects, sizes like 5mm, 6mm, 8mm, and 10mm are frequently used. Here are some common applications:
- Smaller bits (4-6mm) for lightweight fixings like picture hooks.
- Medium-sized bits (8-10mm) for standard wall plugs used with heavier items.
- Larger bits (12-16mm) for installing anchors for very heavy items or creating holes for cables or pipes.
Why Choosing the Correct Masonry-Drill Size Matters
Choosing the right drill bit size is a critical step in achieving a successful outcome for your project. Whether you’re hanging a picture or mounting a heavy shelf, the correct masonry-drill size ensures a secure and stable fix.
When you use the correct drill bit size, you prevent damage to the material and ensure that the fixing remains secure. This is particularly important for safety-critical installations.

Preventing Damage to Materials
Using the correct masonry-drill size prevents damage to the surrounding material. If the hole is too large, it can compromise the connection between the materials and the screw, leading to a weak fix.
A hole that is too small can also cause problems, as it prevents the wall plug from being fully inserted, leaving it unable to properly grip the screw.
Ensuring Secure Fixings
Secure fixings are essential for any project, especially for safety-critical installations like bathroom grab rails or kitchen cabinets. The correct drill bit size ensures that the wall plug fits snugly into the hole, allowing it to expand uniformly when the screw is driven in.
| Drill Bit Size | Wall Plug Size | Fixing Security |
|---|---|---|
| Correct Size | Fits Snugly | High |
| Too Large | Loose Fit | Low |
| Too Small | Protruding | Low |
Matching Drill Bit Size to Wall Plugs
To ensure a secure fixing, it’s essential to choose a drill bit that matches the size of your wall plug. This ensures a snug fit and prevents damage to the surrounding material.
The Golden Rule: Same Size as the Plug
The general rule of thumb is to use a drill bit that is the same diameter as the wall plug. For instance, if you’re using a 5mm wall plug, you should use a 5mm drill bit. This simple rule helps in achieving a precise fit.
Common Wall Plug Colours and Sizes
Wall plugs come in various colours and sizes, each suited for different screw gauges and drilling requirements. For example, yellow plugs typically accommodate 4mm gauge screws, while red ones are for 5mm screws. Here’s a breakdown:
- Yellow wall plugs (5mm) require a 5mm drill bit.
- Red wall plugs (6mm) need a 6mm drill bit.
- Brown wall plugs (7mm) demand a 7mm drill bit.
- Green wall plugs (8mm) require an 8mm drill bit.
- Blue wall plugs (10mm) need a 10mm drill bit.
How to Select the Right Drill Bit for Screws
The key to a successful screw fixation lies in choosing the right drill bit size. When you’re working with screws, it’s essential to understand that the drill bit you choose will directly impact the security and stability of the fix.
Understanding Screw Diameters
Screw diameters vary, and so do the drill bits needed to accommodate them. The diameter of the screw you’re using will dictate the size of the drill bit you need. For instance, the drill hole size should match the screw’s central core diameter or be slightly smaller.
Pilot Hole Sizing Guide
To determine the correct pilot hole size, consider the type of wood you’re working with. For softwoods, a pilot hole about 70% of the screw’s shaft diameter is recommended, while for hardwoods, it’s about 80%. Refer to the guide: #1 screw – 3/64″ for hardwoods, 1/32″ for softwood; #2 screw – 3/64″ for hardwoods, 3/32″ for softwood, and so on. Always test your pilot hole size on a scrap piece before drilling into your actual workpiece.
Drill Bit Selection for Different Materials
When working with various materials, selecting the right drill bit is crucial for a successful project. The effectiveness of your drilling operation largely depends on matching the drill bit to the material you’re working with.
Concrete and Brick
For drilling into concrete and brick, you need a drill bit that is robust and designed for masonry. These materials require carbide-tipped drill bits that can withstand their hardness. Using the correct drill bit ensures a clean hole and prevents damage to the surrounding material.
Wood and Timber
When drilling into wood and timber, a sharp, standard drill bit is usually sufficient. The key is to use a bit that is appropriate for the type of wood you’re working with, as different types of wood have varying densities.
Plasterboard and Drywall
For plasterboard and drywall, a multi-use drill bit is recommended. To avoid damaging the material, drill at a slow speed and use a bit that matches the size of your wall anchor. Avoid using hammer action, as it can damage the plasterboard’s structure.
By choosing the right drill bit for your specific material, you ensure a precise and clean drilling process, which is essential for the overall quality of your project.
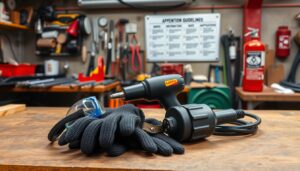
Using the Correct Drill for Your Bits

When it comes to masonry work, selecting the right drill is crucial for efficient and effective results. The correct drill not only enhances performance but also prolongs the lifespan of your drill bits.
Hammer Drills vs. Standard Drills
Hammer drills are designed specifically for masonry work, offering a hammering action that helps to penetrate hard materials like concrete and brick. Unlike standard drills, hammer drills provide the necessary force and vibration to drill into dense surfaces efficiently.
SDS Drills for Heavy-Duty Work
SDS drills are a type of hammer drill that is engineered for heavy-duty masonry applications. They feature a unique chuck system that allows for more efficient hammer action and reduced strain on the tool and user. SDS drills are ideal for demanding tasks, such as drilling large diameter holes or working with tough materials.
The SDS system comes in different classifications, including SDS Plus for general construction work and SDS Max for more demanding commercial applications. When using an SDS drill, it’s essential to use SDS-compatible bits with the correct shank type.
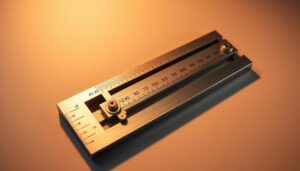
Step-by-Step Guide to Measuring and Testing
Before you begin drilling, it’s essential to know how to measure your drill bit size. Accurate measurement ensures a precise fit for your wall plug or fixing.
How to Measure Drill Bit Size
To measure your drill bit, you can use a digital caliper or a micrometer. Simply place the bit between the measuring jaws and take a reading. Ensure the measurement is taken at the widest part of the bit, typically at the outer edge of the cutting flutes. This method provides an accurate diameter measurement.

Testing Before Final Drilling
Testing your drill bit on a scrap piece of material before final drilling is crucial. It confirms that the bit creates the correct size hole for your wall plug. After drilling a test hole, insert the wall plug to check the fit. The plug should fit snugly without excessive force.
| Test Outcome | Action |
|---|---|
| Test hole too tight | Step up to the next drill bit size |
| Test hole too loose | Select a smaller bit or use a different wall plug |
Common Mistakes to Avoid When Choosing Drill Bits
Choosing the right drill bit is crucial for the success of your project. The right drill can make all the difference, but certain mistakes can lead to subpar results.
Two significant errors to watch out for are using the wrong size and ignoring material requirements.
Using the Wrong Size
Using a drill bit that is not the correct size can lead to damaged materials and poor fixings. Ensure that you match the bit size to the wall plug or screw to avoid such issues.
Ignoring Material Requirements
Different materials require specific types of drill bits. For instance, using a drill bit meant for timber on a concrete wall can damage both the bit and the wall. Be aware of the materials you are working with and choose the correct drill accordingly.
| Material | Recommended Drill Bit |
|---|---|
| Concrete | Masonry bits with tungsten carbide tips |
| Timber | Standard twist drill bits |
| Plasterboard | Specialist plasterboard drill bits |
By avoiding these common mistakes and using the right drill for the job, you can ensure more accurate and successful drilling.
Conclusion
By mastering the art of selecting the right masonry-drill size, you’ll elevate your DIY projects to a whole new level of professionalism. Choosing the correct drill bit size is fundamental to the success of any drilling project, ensuring secure fixings and professional results.
To achieve this, remember to match your drill bit diameter exactly to the wall plug size and ensure your screw is 1-2mm smaller than the plug diameter. Different materials require specific drill bits and techniques, so it’s essential to use the right approach for your project.
By following our practical tips and taking the time to measure accurately and test before final drilling, you’ll be able to achieve a secure and stable fix every time. Keep this guide handy as a reference for future projects, and don’t hesitate to invest in quality drill bits suitable for your common tasks.
With practice and attention to detail, choosing the correct drill bit size will become second nature, allowing you to tackle increasingly complex home improvement projects with confidence.