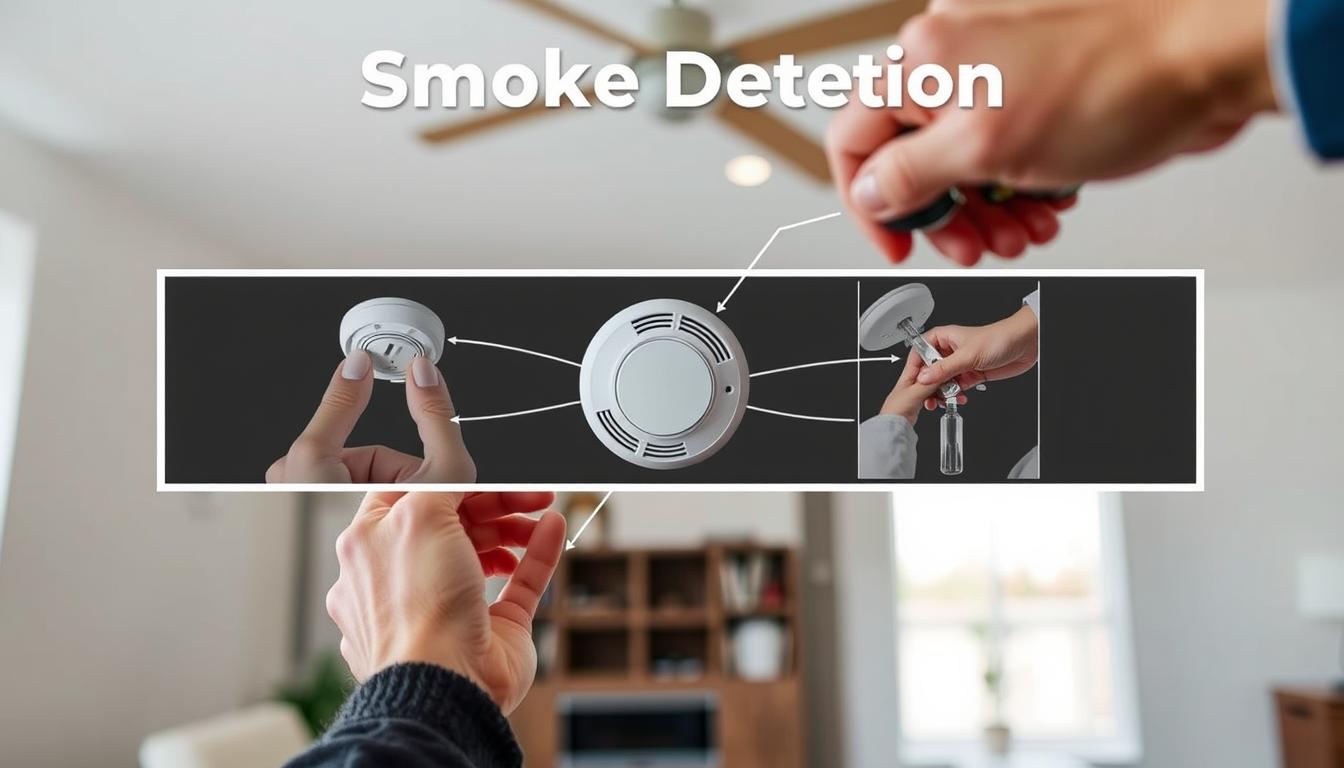
Category: Safety & Security

  • Fire Extinguisher Types and Uses Explained for Home and Business

    Fire Extinguisher Types and Uses Explained for Home and Business

    Having the right fire extinguishers in place is crucial for safety in both homes and businesses across the UK.

    Different classes of fires require specific types of extinguishers to effectively combat the blaze. Understanding these differences is key to ensuring you’re prepared for any potential fire hazard.

    With various fire extinguisher types available, selecting the most appropriate ones for your premises can be daunting. This guide aims to simplify the process, explaining the different extinguishers and their uses, to help you make informed decisions about your fire safety needs.

    Key Takeaways

    • Understand the different classes of fires and the appropriate extinguishers for each.
    • Learn about the various fire extinguisher types available for home and business use.
    • Discover how to choose the right extinguishers for your specific environment.
    • Gain insights into UK regulations regarding fire extinguishers.
    • Ensure compliance and enhance your fire safety measures.

    Understanding Fire Classifications

    Fire safety begins with understanding the different types of fires that can occur. Fires are classified based on the type of fuel that is burning, and this classification is crucial for selecting the appropriate extinguishing agent.

    Class A: Combustible Materials

    Class A fires involve ordinary combustible materials such as wood, paper, cloth, and plastics. These fires require extinguishers that cool and soak the materials to prevent re-ignition.

    Class B: Flammable Liquids

    Class B fires are caused by flammable liquids like petrol, oils, paints, and solvents. Extinguishers for Class B fires smother the fire and remove oxygen to prevent it from spreading.

    Class C: Flammable Gases

    Class C fires involve flammable gases such as propane, butane, and natural gas. The extinguishers used for Class C fires are designed to safely interrupt the combustion process.

    Fire Class Fuel Type Extinguishing Method
    Class A Combustible materials Cooling and soaking
    Class B Flammable liquids Smothering and removing oxygen
    Class C Flammable gases Interrupting combustion

    Class D: Combustible Metals

    Class D fires involve combustible metals like magnesium, titanium, and aluminium. Specialised extinguishers are required for Class D fires, designed specifically for metal fires.

    Electrical Fires

    Electrical fires involve energised electrical equipment. Non-conductive extinguishing agents are necessary to prevent electric shock to the user. Once the electrical item is removed, the fire can change class.

    Class F: Cooking Oils and Fats

    Class F fires involve cooking oils and fats, typically occurring in commercial kitchens. Specialised wet chemical extinguishers are used to prevent re-ignition.

    Fire Extinguisher Types and Uses: A Comprehensive Overview

    To ensure you’re prepared in case of a fire emergency, it’s essential to know about the different types of fire extinguishers and their applications. Fire extinguishers are not one-size-fits-all devices; they come in various types, each designed to tackle specific classes of fires effectively.

    Colour Coding System Explained

    The colour coding system for fire extinguishers in the UK follows British Standard EN3. All extinguishers have a red body, with a coloured label or band indicating the type: red for water, cream for foam, blue for powder, black for CO2, and yellow for wet chemical. This system helps you quickly identify the type of extinguisher.
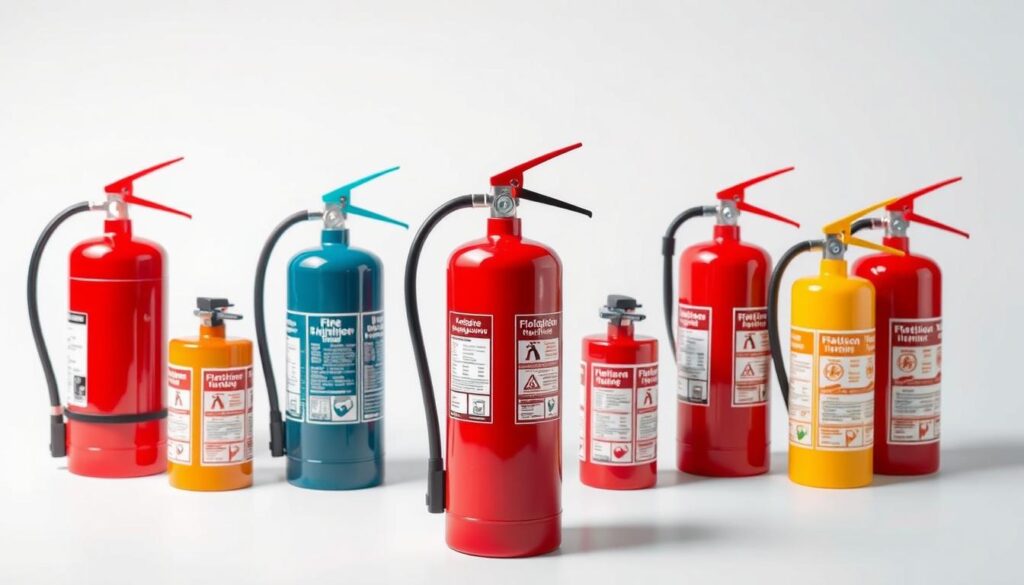
    A detailed, well-lit, high-resolution illustration of fire extinguisher colour coding for a comprehensive guide on fire extinguisher types and uses. The image should prominently feature several fire extinguishers, each with distinct colors corresponding to the different classes of fires they are designed to extinguish. The extinguishers should be arranged in a visually appealing layout, showcasing their distinctive shapes and designs. The background should be clean and minimal, allowing the fire extinguishers to be the focal point. The overall composition should convey a sense of order, safety, and technical expertise, reflecting the authoritative nature of the article's subject matter.

    Fire Ratings and What They Mean

    Fire extinguishers capable of extinguishing class A, B, or F fires carry a fire rating indicated by a number and letter (e.g., 13A, 55B). The number indicates the size of the fire it can extinguish under test conditions. The larger the number, the larger the fire it can combat.

    British Standards and Regulations

    Understanding British Standards and regulations is crucial for compliance with UK fire safety regulations. The Regulatory Reform (Fire Safety) Order 2005 and BS EN3 manufacturing standards outline the requirements for fire extinguishers. Ensuring your fire extinguishers meet these standards is vital for effective fire safety.

    As emphasized by fire safety experts, “Having the right fire extinguisher and understanding its use can significantly reduce the risk of fire-related injuries and damages.” Ensuring you’re well-informed about fire extinguisher types and uses is a critical step in maintaining a safe environment.

    Water Fire Extinguishers

    Water fire extinguishers are widely used for combating fires involving solid combustible materials. These extinguishers are easily identifiable by their bright red label.

    How They Work

    Water extinguishers work by cooling the fuel, thereby reducing the temperature below the combustion threshold. This is achieved through the discharge of water, which soaks the burning material.

    Suitable Applications

    Water fire extinguishers are suitable for use in various environments, including offices, schools, and retail spaces, where Class A fire risks are prevalent. They are effective against fires involving organic materials such as paper, cardboard, fabrics, textiles, wood, and coal.

    Limitations and Safety Considerations

    It’s crucial to note that water extinguishers should not be used on fires involving electrical equipment, kitchen fires, or those involving flammable liquids and gases, as this can exacerbate the situation or create additional hazards.

    Water Spray vs Water Mist Variations

    Water spray extinguishers cover a greater surface area more quickly than standard jet extinguishers, putting out fires more rapidly. Water mist extinguishers, with their finer droplets, can tackle a wider range of fires and, when certified, can be used on electrical fires.

    Extinguisher Type Suitable for Not Suitable for
    Water Fire Extinguisher Class A fires: paper, wood, textiles Fires involving electrical equipment, flammable liquids/gases
    Water Spray Extinguisher Class A fires, larger surface areas Electrical fires (unless certified), flammable liquids/gases
    Water Mist Extinguisher Class A fires, some electrical fires (if certified) Flammable liquids/gases

    Water Mist Fire Extinguishers

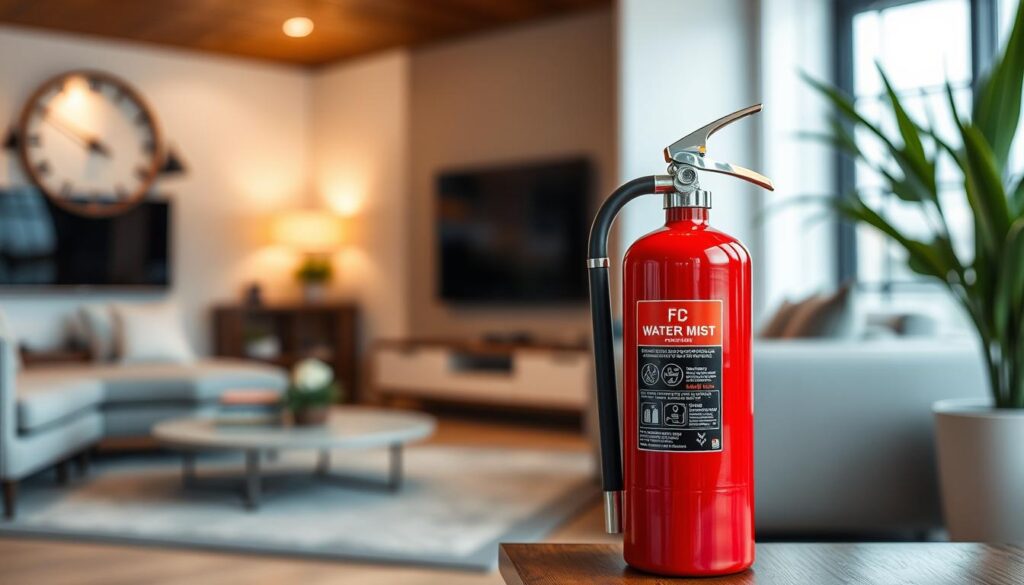
    An image of a water mist fire extinguisher in a home or office setting.

    Learn More

    Water mist fire extinguishers offer a sophisticated approach to fire suppression, suitable for a range of fire types. They use a special nozzle to create microscopic water particles that effectively combat fires.

    How They Work

    These extinguishers work by releasing microscopic water particles that ‘suffocate’ the fire and create a wall of mist between the fire and the user, reducing the feeling of heat.

    Suitable Applications

    Water mist fire extinguishers are highly effective on Class A, B, C, and live electrical equipment fires. They are versatile and contain only de-ionised water, making them suitable for various environments.

    Advantages Over Standard Water Extinguishers

    Unlike standard water extinguishers, water mist versions can be safely used on a wider range of fire types, including electrical fires when properly certified. The de-ionised water leaves no residue, ideal for environments with sensitive equipment.

    Use on Electrical Equipment

    Water mist extinguishers that have been di-electrically tested can be used on live electrical equipment up to 1000 volts from a distance of 1 metre, enhancing safety.

    Foam Fire Extinguishers
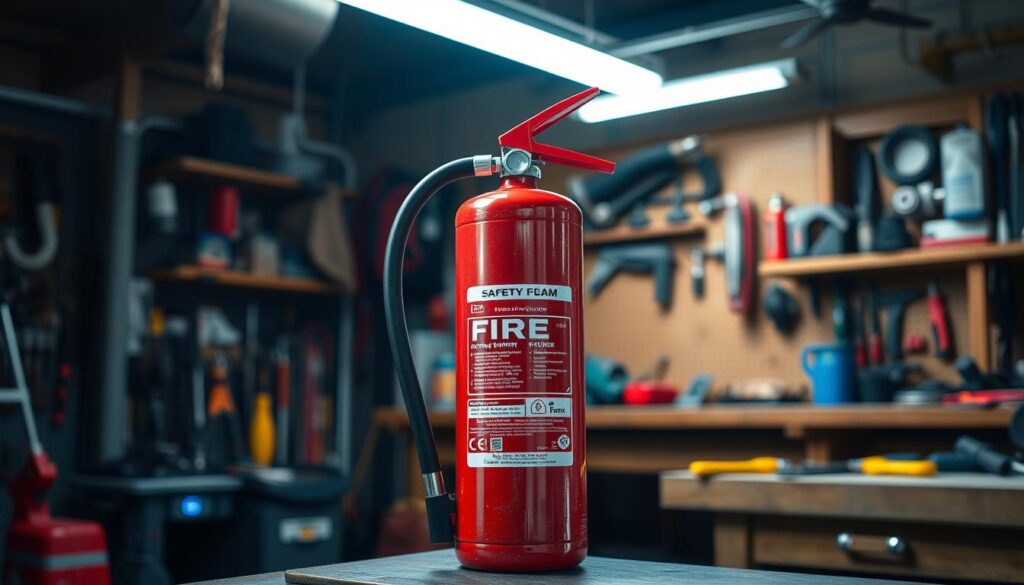
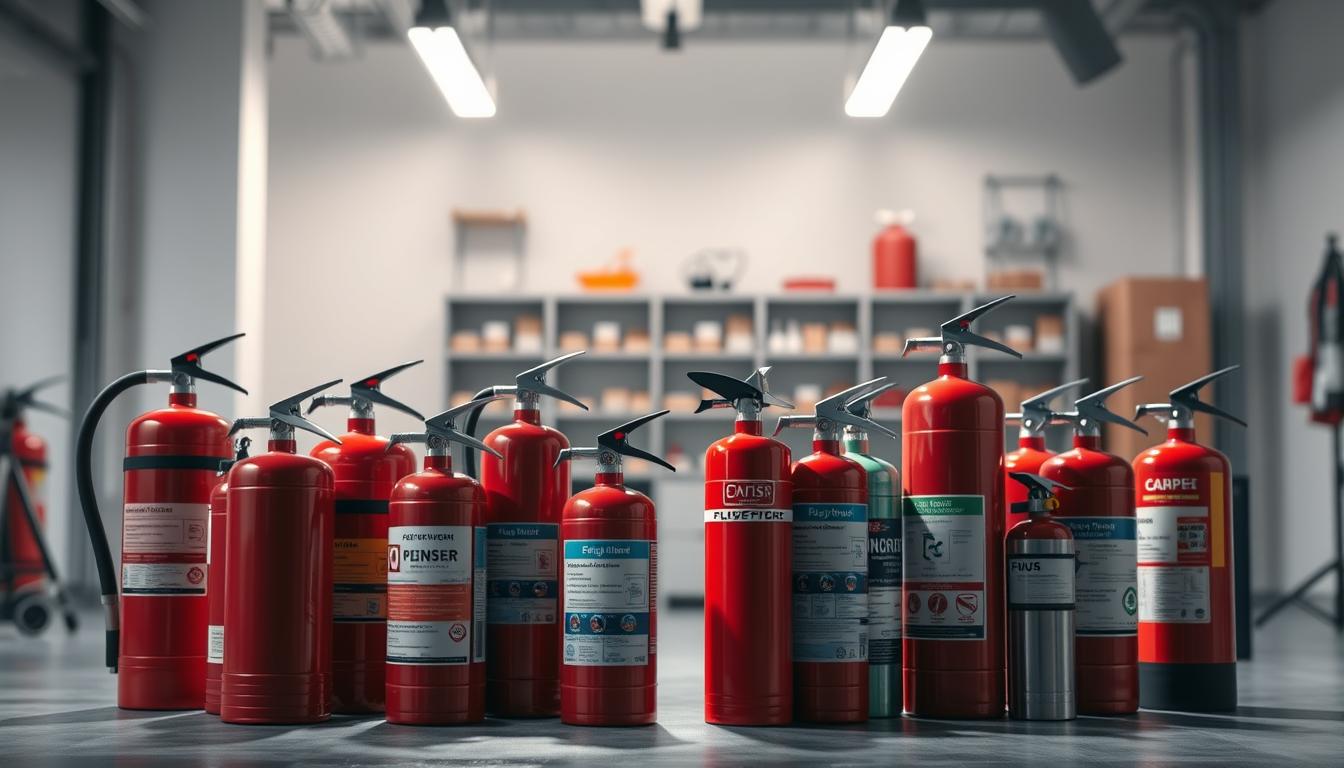
    Image of a foam fire extinguisher in a workshop setting

    Learn More

    For environments where both solid materials and flammable liquids pose fire risks, foam extinguishers are a vital piece of safety equipment. Foam fire extinguishers are identified by their cream-coloured label and are designed to tackle both Class A fires (solid combustibles) and Class B fires (flammable liquids).

    How They Work

    Foam extinguishers work through a dual-action approach: cooling the fire like water extinguishers while also creating a blanket of foam that seals the surface of flammable liquids, preventing the release of flammable vapours. This makes them effective for fires involving organic materials such as paper, cardboard, fabrics, and textiles, as well as flammable liquids like paint and petrol.

    Suitable Applications

    These extinguishers are particularly effective in environments where both solid combustibles and flammable liquids present fire risks, such as workshops, garages, and industrial settings. They are suitable for use on fires involving organic materials and flammable liquids.

    Limitations and Safety Considerations

    Users should be aware of limitations, including unsuitability for electrical fires (unless specifically tested), cooking oil fires, and flammable metal fires, where foam can be ineffective or potentially dangerous. It is crucial to follow the manufacturer’s guidelines and ensure that the extinguisher is appropriate for the specific fire risks present.

    Environmental Considerations: AFFF vs Fluorine-Free

    Traditionally, AFFF (Aqueous Film Forming Foam) containing PFAS chemicals was used, but these are being phased out by 2025 in favour of more environmentally friendly fluorine-free foam alternatives. The shift towards fluorine-free foam extinguishers reflects a growing emphasis on environmental safety and reducing the impact of firefighting measures on the environment.

    CO2 Fire Extinguishers
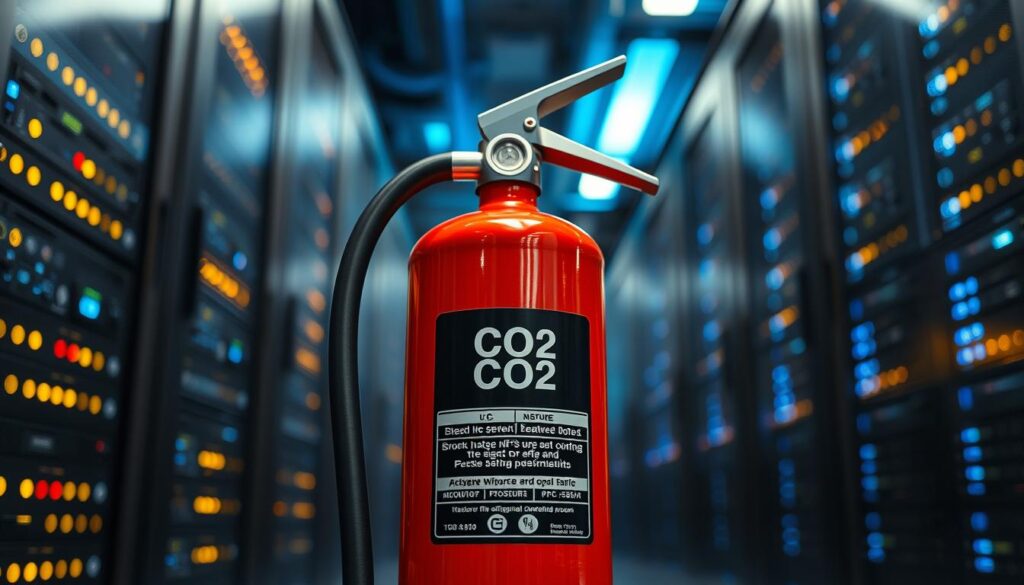
    Generate an image of a CO2 fire extinguisher with a black label in a server room.

    Learn More

    When it comes to tackling electrical fires and flammable liquids, CO2 fire extinguishers are the go-to solution. CO2 extinguishers are predominantly used for electrical fire risks and are usually the main extinguisher type provided in computer server rooms.

    How They Work

    CO2 extinguishers work by displacing oxygen from the fire area, effectively suffocating the fire by removing one of the essential elements needed for combustion. This makes them highly effective for electrical fires and Class B fires involving flammable liquids.

    Suitable Applications

    CO2 extinguishers are ideal for environments with valuable electrical equipment such as server rooms, offices, and areas with sensitive machinery. They are also effective for Class B fires involving flammable liquids like paint and petroleum.

    Limitations and Safety Considerations

    Users should be aware of important safety considerations, including the risk of cold burns from the extremely cold discharge, asphyxiation risk in confined spaces, and the possibility of re-ignition if the source of heat remains.

    Ideal Locations for CO2 Extinguishers

    The ideal locations for CO2 extinguishers include computer rooms, electrical distribution boards, server rooms, and alongside water or foam extinguishers to provide comprehensive fire protection coverage.

    Dry Powder Fire Extinguishers

    Dry powder fire extinguishers are identified by their blue label and are effective against Class A, B, and C fires, making them a versatile option for various fire types.
    Image of a dry powder fire extinguisher with a blue label

    Learn More

    How They Work

    Dry powder extinguishers work by releasing a fine chemical powder that interrupts the chemical reaction of the fire, effectively breaking the fire triangle and stopping combustion.

    Standard vs Specialist Powder Extinguishers

    Standard ABC powder extinguishers are suitable for multiple fire types, while specialist powder extinguishers are designed for Class D fires involving flammable metals like lithium, magnesium, and aluminium.

    Suitable Applications

    Dry powder extinguishers can be used on fires involving organic materials, flammable liquids, and flammable gases, as well as some electrical fires up to 1000v.

    Limitations and Safety Considerations

    Despite their versatility, dry powder extinguishers have limitations, including respiratory irritation, poor visibility after discharge, and potential damage to sensitive equipment. It’s crucial to avoid using them in enclosed spaces and to be aware of the limited cooling effect, which can lead to re-ignition.

    Wet Chemical Fire Extinguishers
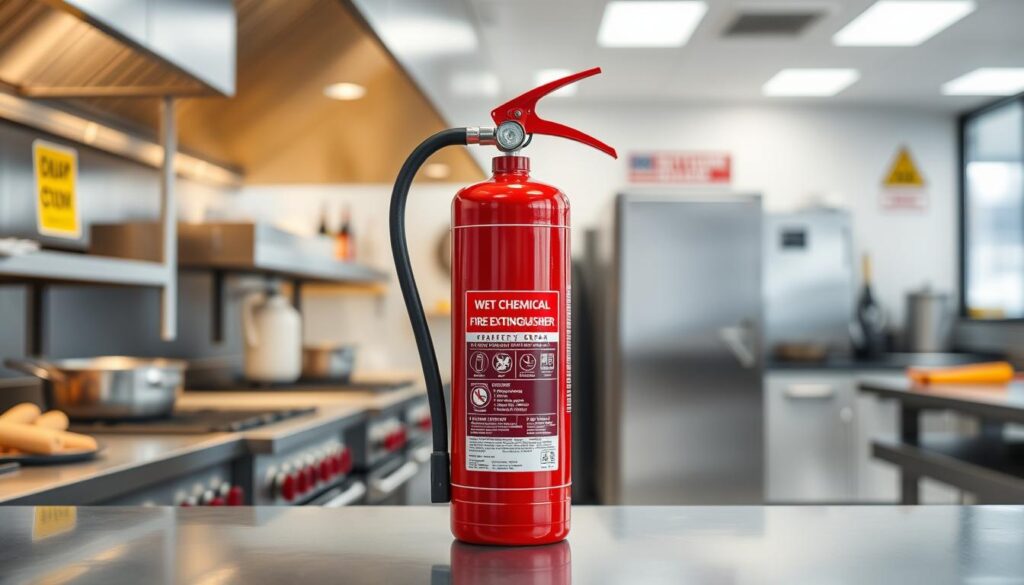
    Generate an image of a wet chemical fire extinguisher in a commercial kitchen setting.

    Learn More

    Wet chemical fire extinguishers are designed to tackle Class F fires involving cooking oils and fats. These specialised extinguishers are identified by their yellow label and are crucial for commercial kitchen environments.

    How They Work

    Wet chemical extinguishers create a layer of foam on the surface of the burning oil or fat, preventing oxygen from fuelling the fire. The spray also has a cooling effect, reducing the risk of re-ignition.

    Suitable Applications

    These extinguishers are ideal for commercial kitchens, canteens, and other environments where cooking oil and fat are used. They can also be effective on Class A fires involving solid combustible materials.

    Limitations and Safety Considerations

    Wet chemical fire extinguishers should not be used on flammable liquid or gas fires, electrical fires, or fires involving flammable metals. It’s essential to follow the manufacturer’s instructions and ensure that users are trained in their operation.

    Kitchen Fire Safety

    Kitchen fire safety is particularly important in commercial settings, where deep fat fryers and high-temperature cooking equipment present significant fire risks. Regular maintenance and inspection of fire extinguishers are crucial to ensuring they function correctly when needed.

    Choosing the Right Fire Extinguisher for Your Premises

    To mitigate fire risks, it’s essential to select the most suitable fire extinguisher for your home or business. The right choice depends on understanding the specific fire safety requirements for your premises.

    Home Fire Safety Requirements

    For home fire safety, a water mist extinguisher is often recommended due to its versatility and safety. In kitchens, pairing it with a fire blanket is advisable.

    Business Fire Safety Requirements

    Business fire safety requirements are more stringent, governed by the Regulatory Reform (Fire Safety) Order 2005. A comprehensive fire risk assessment is necessary.

    Risk Assessment Considerations

    When conducting a fire risk assessment, consider potential fire hazards, types of fires, building layout, occupancy levels, and user capabilities.

    Multiple Extinguisher Strategies

    In commercial environments, multiple extinguisher strategies are often necessary. Different types of fire extinguishers should be placed strategically to address various fire risks.
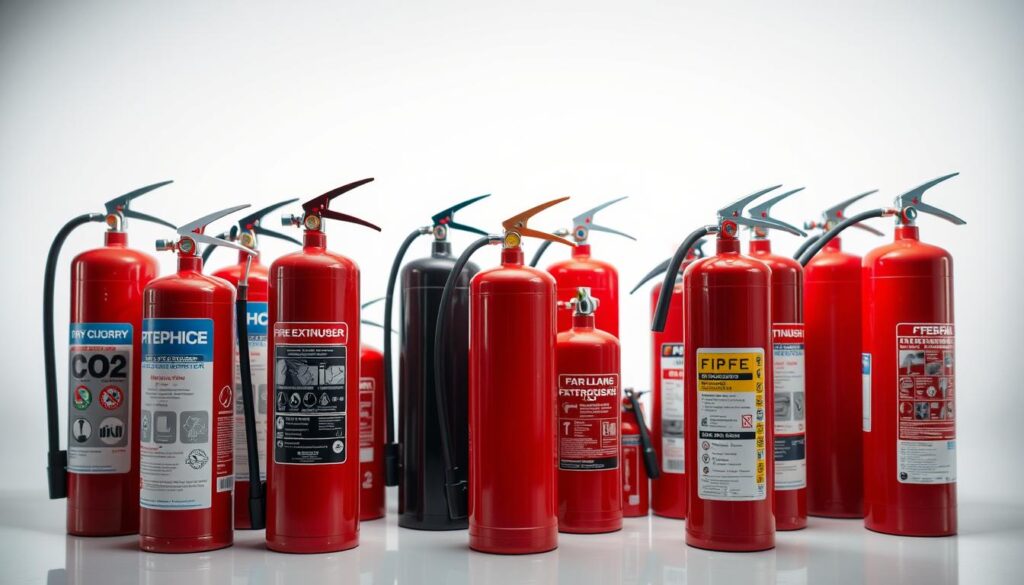
    A well-lit display of various fire extinguishers arranged on a clean, white background. In the foreground, the main focus is on several common types - dry chemical, CO2, and water-based - showcasing their distinct designs and colors. The middle ground features smaller specialized extinguishers like wet chemical and clean agent models. The background subtly fades into soft shadows, creating depth and highlighting the extinguishers' technical details. The lighting is balanced, with a soft, directional source that casts gentle highlights, conveying a sense of professionalism and utility. The overall mood is informative and practical, reflecting the importance of fire safety and the need to choose the appropriate extinguisher for specific premises.

    By understanding your specific fire safety needs and complying with relevant regulations, you can effectively choose the right fire extinguishers for your premises.

    Fire Extinguisher Placement and Maintenance

    To maximize fire safety, it’s essential to understand the importance of proper fire extinguisher placement and maintenance. Effective fire safety strategies rely on the correct positioning and regular upkeep of fire extinguishers.

    Optimal Placement Guidelines

    Extinguishers should be sited on escape routes on all floors at ‘fire points’. They should be fixed near a door leading to a place of safety or near a specific fire risk. Positioning them where they can be easily seen is crucial; avoid fixing them inside cupboards or behind doors.

    Monthly Visual Inspections

    You should conduct monthly visual inspections to check for signs of damage, tampering, or pressure loss. Ensure that extinguishers remain accessible and are not obstructed.

    Annual Servicing Requirements

    In the UK, annual servicing includes a thorough examination by a competent person in accordance with BS5306-3. Water, foam, and powder extinguishers require discharge and refilling every five years.

    Service-Free Options

    Service-free options like P50 extinguishers offer a 10-year lifespan without annual engineer servicing. However, they still require regular visual inspections by the owner.

    • Position extinguishers on escape routes and near exits.
    • Conduct monthly inspections for damage or pressure loss.
    • Service extinguishers annually according to BS5306-3.
    • Consider service-free options for reduced maintenance.

    Conclusion

    Protecting your property and the people within it from fire hazards requires a comprehensive approach, including the correct use of fire extinguishers. Understanding fire extinguisher types and uses is essential for creating an effective fire safety strategy that protects both people and property in homes and businesses.

    The right fire extinguisher can make the difference between a minor incident and a devastating fire. Different types of extinguishers, such as water, foam, CO2, powder, and wet chemical, are designed for specific fire classes, including those involving wood, paper, and cooking oils.

    Regular maintenance and proper placement of fire extinguishers are just as important as selecting the correct types. Monthly visual inspections and annual servicing ensure they will function correctly when needed. For businesses, compliance with the Regulatory Reform (Fire Safety) Order 2005 is crucial, requiring not only the appropriate extinguishers but also staff training and a comprehensive fire risk assessment.

    Investing in quality fire extinguishers that meet British Standards provides peace of mind and demonstrates a commitment to fire safety that protects both occupants and buildings.

    FAQ

    What are the different classes of fires and how do I identify them?

    Fires are classified into different categories based on the type of fuel involved. Class A fires involve combustible materials such as paper, wood, and cloth. Class B fires involve flammable liquids like petrol, oil, and paint. Class C fires involve flammable gases, while Class D fires involve combustible metals. Electrical fires are also a distinct category, and Class F fires involve cooking oils and fats. Understanding these classifications is crucial for selecting the right fire extinguisher.

    How do I choose the right fire extinguisher for my home or business?

    To choose the right fire extinguisher, you need to consider the specific fire risks associated with your premises. For homes, a multi-purpose extinguisher rated for Class A and B fires may be sufficient. For businesses, the type of extinguisher required will depend on the specific hazards present, such as electrical equipment, flammable liquids, or cooking oils. Conducting a risk assessment can help you determine the most suitable extinguisher.

    What is the colour coding system for fire extinguishers, and what does it mean?

    The colour coding system for fire extinguishers is a standardised system that indicates the type of extinguishing agent inside. For example, a red label indicates a water extinguisher, while a blue label indicates a dry powder extinguisher. Understanding the colour coding system can help you quickly identify the right extinguisher in an emergency.

    Can I use a CO2 extinguisher on electrical fires?

    Yes, CO2 extinguishers are effective on electrical fires because they displace oxygen and cool the equipment. However, it’s essential to ensure the extinguisher is rated for electrical fires and to follow the manufacturer’s instructions.

    How often should I inspect and maintain my fire extinguishers?

    Fire extinguishers should be visually inspected monthly to ensure they are in good condition and easily accessible. Annual servicing is also required to ensure the extinguishers are functioning correctly. It’s recommended to consult a professional for maintenance and servicing.

    Are wet chemical extinguishers suitable for kitchen fires involving cooking oils?

    Yes, wet chemical extinguishers are specifically designed for Class F fires involving cooking oils and fats. They work by cooling the fuel and preventing re-ignition. Wet chemical extinguishers are a crucial component of kitchen fire safety.

    Can I use a water fire extinguisher on flammable liquids?

    No, water fire extinguishers are not suitable for flammable liquids as they can spread the fuel and make the fire worse. Instead, use a foam or dry powder extinguisher rated for Class B fires.

    What are the advantages of water mist extinguishers over standard water extinguishers?

    Water mist extinguishers have several advantages, including their ability to extinguish fires with minimal water damage and their suitability for use on electrical equipment. They are also effective on Class A fires and can be used in areas where water damage is a concern.
  • Home Security Camera Installation Guide for Your Home

    Home Security Camera Installation Guide for Your Home

    Are you aware of the potential vulnerabilities in your home’s security? With the rise in property crimes, it’s crucial to consider effective measures to safeguard your property and loved ones.

    Installing security cameras can be a significant step towards enhancing your home’s security, but it requires careful planning. To maximise the effectiveness of your security system, it’s essential to strategically position cameras to cover critical areas around your property.

    By thinking like a potential intruder, you can identify the most susceptible spots and place cameras accordingly. This comprehensive guide will walk you through the process of selecting, positioning, and installing security cameras around your home, ensuring you get the most out of your system.

    Key Takeaways

    • Understand the different types of security cameras and their uses.
    • Learn how to identify vulnerable areas around your property.
    • Discover the best locations for camera placement.
    • Gain insights into the tools and step-by-step procedures for installation.
    • Understand how to configure your system for optimal performance.

    Understanding Home Security Camera Systems

    When it comes to securing your home, understanding the different types of home security camera systems is crucial. Modern home security camera systems come in various types, each with specific features designed for different security needs and environments.

    Types of Security Cameras Available

    The market offers a range of security cameras, including dome cameras, bullet cameras, pan-tilt-zoom (PTZ) cameras, and fish-eye cameras. Dome cameras offer a discreet surveillance option with a wide viewing angle, while bullet cameras provide a visible deterrent with longer-range capabilities.

    PTZ cameras allow remote control of camera movement, making them ideal for monitoring large areas. Fish-eye cameras, on the other hand, provide 360-degree coverage without moving parts.

    Wired vs Wireless Security Cameras

    When choosing between wired and wireless security cameras, consider that wired systems offer more reliable connections and don’t require battery changes, but installation is more complex and less flexible. Wireless cameras provide easier installation and more placement options, but may suffer from connectivity issues and require regular battery maintenance or proximity to power outlets.

    Power over Ethernet (PoE) cameras combine the reliability of wired connections with simplified installation, as they receive both power and data through a single Ethernet cable.

    Planning Your Home Security Camera Installation

    To ensure effective surveillance, you need to plan your home security camera installation strategically. This involves several key considerations to ensure your home security system meets your needs.

    Assessing Your Home Security Needs

    Before purchasing any equipment, it’s crucial to assess your specific home security needs. Identify vulnerable entry points and valuable areas that require monitoring. Consider factors such as property size and neighbourhood security concerns.

    You should also determine whether you need indoor coverage, outdoor coverage, or both. This assessment will help you plan a comprehensive security system.

    Determining Camera Quantity and Budget

    When determining the number of cameras needed, balance comprehensive coverage with your budget constraints. Most homes can be adequately secured with 3-8 strategically placed cameras.

    Number of Cameras Typical Coverage Area Estimated Budget
    3 Front door, back door, driveway £500-£1,000
    5 Add coverage of ground floor windows £1,000-£2,000
    8 Comprehensive coverage including common areas inside your home £2,000-£3,500

    Creating a Camera Placement Map

    Creating a detailed camera placement map of your property will help you visualise coverage areas and identify potential blind spots before installation begins. Consider the field of view for each camera and how they can be positioned to maximise coverage.

    Best Locations to Install Security Cameras

    The strategic placement of security cameras can significantly enhance the security of your home. By installing cameras in the right locations, you can deter potential intruders and improve the overall safety of your property.

    Front Door and Main Entrance

    The front door and main entrance are prime locations for security camera installation. Statistics show that approximately 34% of burglars enter through the front door. Installing a camera here can help deter intruders and provide valuable footage. Ensure the camera is positioned to capture clear facial details of anyone approaching.

    Ground Floor Windows and Back Doors

    Ground floor windows and back doors are vulnerable entry points that should be monitored. These areas often provide less visible access points for potential intruders. Installing cameras here can help prevent break-ins and improve home security.

    Driveway and Garage

    Installing cameras to monitor your driveway and garage not only protects valuable vehicles but also provides early detection of anyone approaching your property with suspicious intent. This can be a crucial aspect of home security, helping to prevent theft and vandalism.

    Common Areas Inside Your Home

    Common areas inside your home, such as main hallways, living rooms, and staircases, serve as natural bottlenecks that intruders must pass through. Installing cameras in these areas can help monitor and deter intruders, improving overall home security.

    Location Security Benefit
    Front Door Deters intruders, captures facial details
    Ground Floor Windows and Back Doors Monitors vulnerable entry points
    Driveway and Garage Protects vehicles, detects suspicious activity
    Common Areas Inside Home Monitors intruder pathways

    When positioning outdoor cameras, aim to place them at a height of 8-10 feet to prevent tampering while ensuring they capture clear facial details of anyone approaching. Proper lighting around camera locations also enhances night-time footage quality.

    Places to Avoid Installing Security Cameras

    To maintain both security and privacy, it’s essential to choose the right locations for your security cameras. When deciding where to place cameras, you must consider not only the areas you want to monitor but also the potential impact on others’ privacy and the technical limitations of your equipment.

    Privacy Concerns and Legal Considerations

    When installing security cameras, it’s vital to respect people’s reasonable expectation of privacy. Avoid installing cameras in areas like bedrooms and bathrooms, where individuals expect privacy. Additionally, be mindful of your neighbors; ensure your cameras are not capturing footage of their properties without their consent. Local regulations may also dictate where you can and cannot install surveillance equipment, so it’s crucial to familiarize yourself with these laws to avoid any legal repercussions.

    • Be aware of and comply with local laws regarding surveillance.
    • Avoid pointing cameras at neighbors’ properties.

    Technical Limitations to Consider

    Besides privacy and legal issues, there are technical considerations to keep in mind when installing cameras. Avoid placing cameras in direct sunlight or facing bright lights, as this can cause glare and reduce image quality. Also, be cautious of areas with high moisture or extreme temperatures, as these conditions can damage your cameras if they’re not specifically rated for such environments. Furthermore, avoid installing cameras behind glass or at extreme angles, as these placements can significantly impair their effectiveness.

    • Avoid direct sunlight and extreme temperatures.
    • Do not install cameras behind glass.

    Essential Tools and Materials for Installation

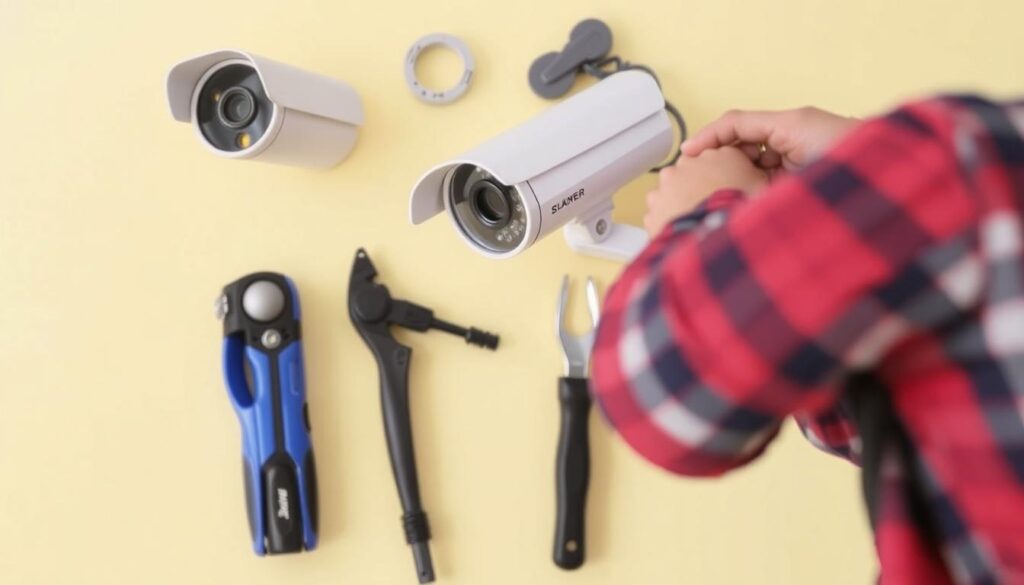
    Security Camera Installation Tools

    Learn More

    The right tools and materials are vital for a hassle-free security camera installation. Proper preparation is essential to ensure a smooth installation process.

    Basic Tools Required

    You’ll need a range of basic tools, including a power drill with various bits, screwdrivers, wire cutters/strippers, a stud finder, measuring tape, and a sturdy ladder for reaching higher installation points.

    Additional Materials You Might Need

    For outdoor camera installation, consider weatherproof sealant, outdoor-rated mounting hardware, and possibly conduit to protect cables from the elements. You may also need Ethernet cables (Cat5e or Cat6) for wired systems, power supplies, and adapters specific to your camera model.

    Home Security Camera Installation Guide: Step-by-Step Process

    Enhancing your home’s security with cameras requires careful planning and installation. To help you through this process, we’ve outlined a step-by-step guide on how to install security cameras effectively.

    Preparing for Installation

    Before you start the camera installation process, it’s essential to test each camera to ensure it powers on and connects properly to your network or recording device. This initial step helps identify any faulty cameras or connectivity issues early on.

    Mounting Cameras Properly

    When mounting cameras, use the provided template to mark drill holes accurately. Ensure you’re attaching the camera to a solid surface, such as a stud for wooden walls, or use appropriate anchors for drywall. For outdoor cameras, apply silicone sealant around the mounting holes and cable entry points to prevent water ingress.

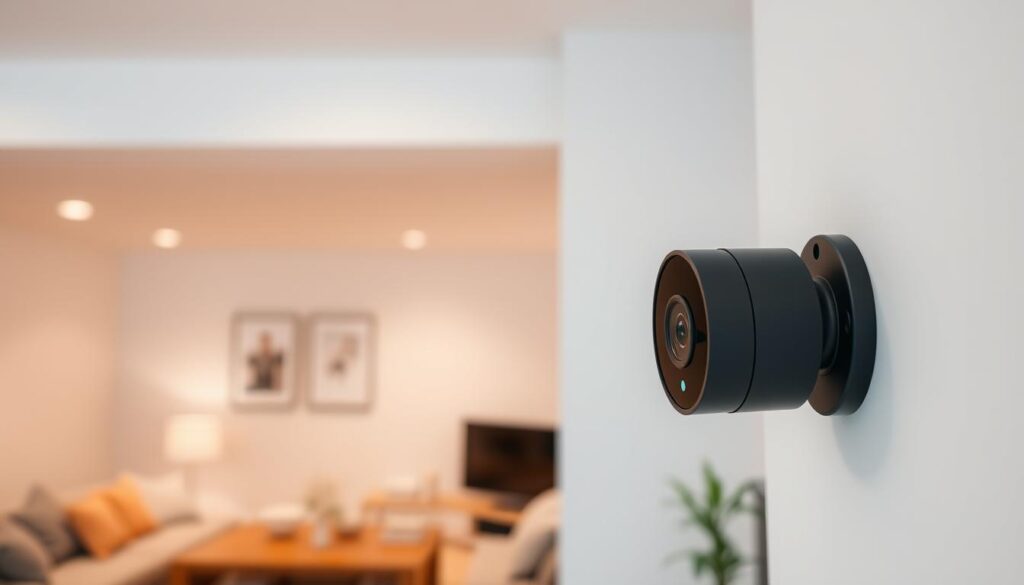
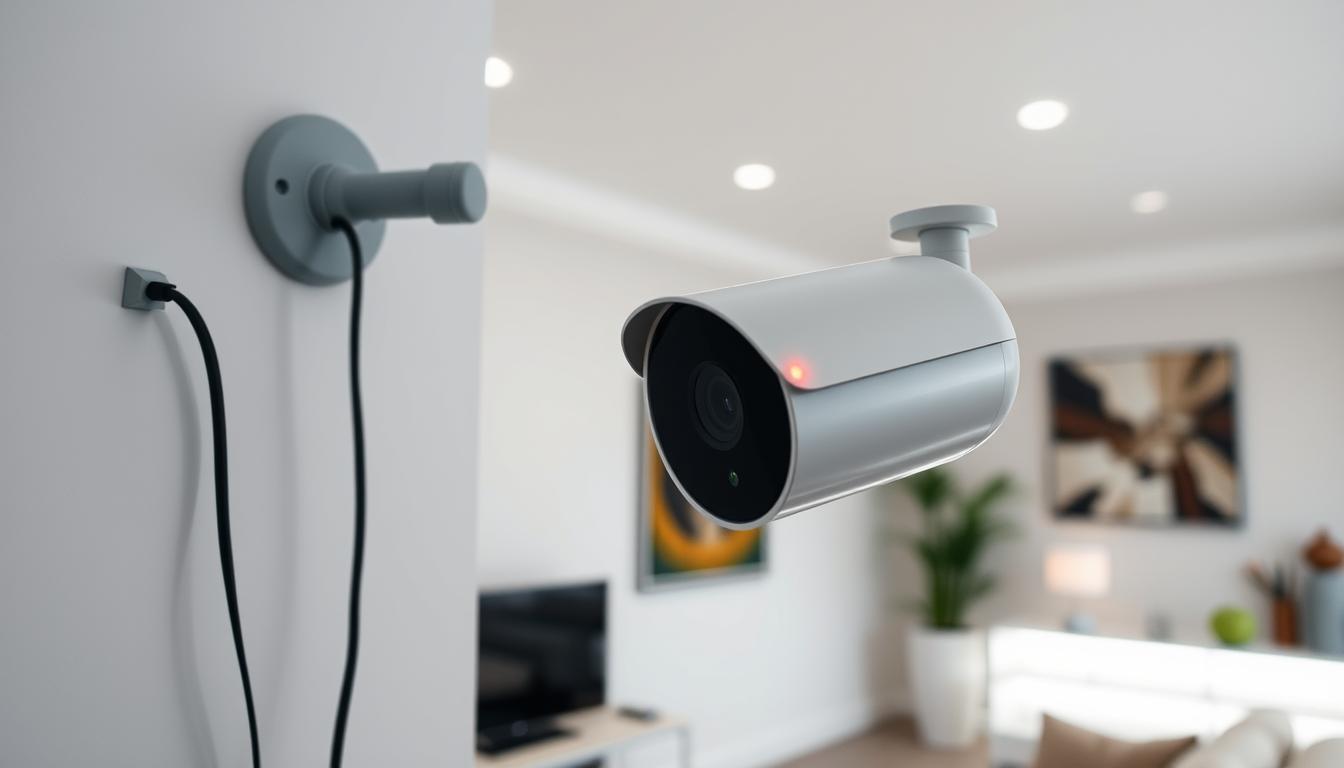
    a crisp, well-lit image of a home security camera installation, featuring a modern, minimalist black camera mounted on a white wall, capturing a wide-angle view of a cozy living room in the background. The camera has a sleek, cylindrical design with a subtle LED indicator light. The scene conveys a sense of security and protection, with the camera's lens and angled positioning suggesting comprehensive surveillance coverage. The lighting is evenly distributed, creating a clean, professional appearance. The overall composition highlights the seamless integration of the security camera into the home's interior design, showcasing its discreet yet effective presence.

    Running and Concealing Cables

    For wired systems, plan routes that minimise exposure and vulnerability when running cables. Use cable conduit or raceways to protect wiring from environmental damage and tampering. For a professional-looking installation, conceal cables within walls where possible, or use cable covers that match your wall colour.

    Connecting Power and Network

    When connecting power, ensure all connections are secure and protected from the elements. Use weatherproof junction boxes for outdoor installations. For network connections, avoid sharp bends in Ethernet cables and keep them away from sources of electrical interference.

    After mounting and connecting each camera, adjust the angle and field of view while watching the live feed on your smartphone or monitor to ensure optimal coverage. For more detailed guidance, you can refer to resources like Reolink’s home surveillance system installation guide.

    Installation Step Description Tips
    Preparing for Installation Test cameras before mounting Identify faulty cameras early
    Mounting Cameras Use provided template for accurate drilling Apply silicone sealant for outdoor cameras
    Running and Concealing Cables Plan routes to minimise exposure Use cable conduit or raceways
    Connecting Power and Network Ensure secure and protected connections Use weatherproof junction boxes outdoors

    Setting Up Your Camera System

    After physically installing your security cameras, setting up your camera system is vital for effective home security. This involves configuring various settings to ensure your cameras work seamlessly and provide the desired level of security.

    Configuring Network Settings

    To start, you need to connect your cameras to your home network. For wired cameras, this involves direct Ethernet connections, while wireless cameras require configuring Wi-Fi settings. Ensuring your cameras are connected to the network is crucial for remote viewing and receiving alerts. You can use a dedicated mobile application provided by the manufacturer to streamline this process.

    Setting Up Remote Viewing

    Setting up remote viewing allows you to monitor your property from anywhere using a smartphone, tablet, or computer. To do this, download the manufacturer’s app, launch it, and enter the unique ID number (UID) of your camera device. This enables you to view live streams over the internet outside your home network, enhancing your ability to monitor your home remotely.

    Configuring Motion Detection and Alerts

    Configuring motion detection settings is crucial to balance between capturing important events and avoiding false alerts. Customise notification preferences to receive alerts via push notifications, email, or text messages when motion is detected. Additionally, set up recording schedules and storage options based on your security needs, choosing between continuous recording, motion-activated recording, or a combination of both.

    By following these steps, you can maximise the effectiveness of your security camera system, ensuring it provides the desired level of security and peace of mind.

    Maintenance and Troubleshooting Tips

    To keep your security cameras functioning optimally, regular maintenance is crucial. A well-maintained system ensures continuous surveillance and extends the lifespan of your equipment.

    Regular Maintenance Schedule

    Creating a quarterly maintenance schedule is essential. This should include cleaning camera lenses with microfibre cloths, checking for loose connections, and clearing debris. For outdoor security cameras, inspect weatherproofing seals annually and reapply silicone sealant as needed to prevent water damage, particularly before winter months.

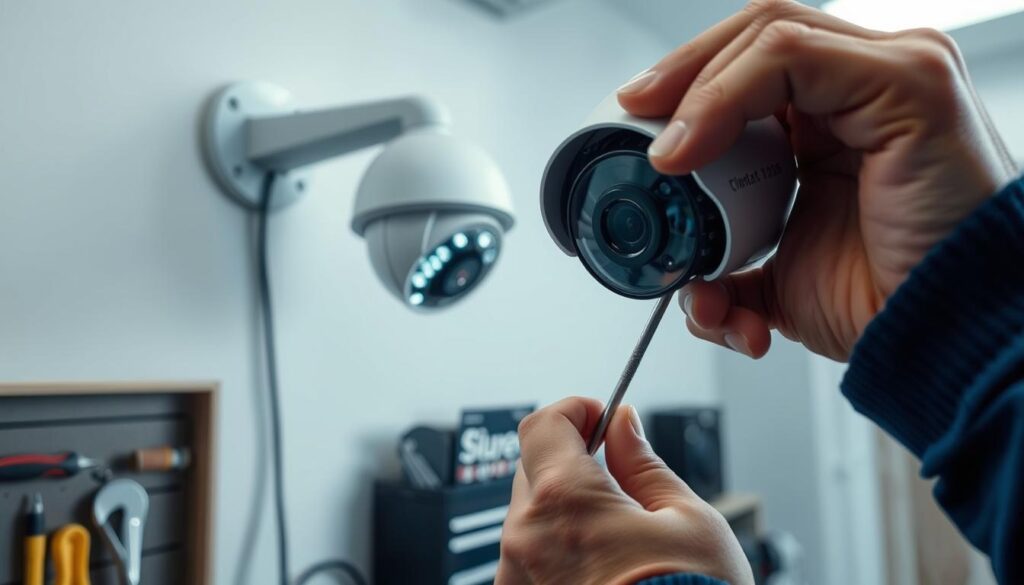
    A security camera mounted on a wall, its lens focused and adjusting to the lighting conditions. In the foreground, a technician's hand holds a screwdriver, meticulously examining the camera's internals. The middle ground shows the technician's face in concentration, while the background depicts a neatly organized toolbox and a clean, well-lit workspace. The scene conveys a sense of precision, attention to detail, and the importance of proper maintenance for reliable home security surveillance.

    Common Issues and Solutions

    Common issues with security cameras include night vision problems, often resolved by cleaning infrared LEDs or adjusting camera positioning. Connectivity problems with wireless cameras can be addressed by relocating the router or adding Wi-Fi extenders. For poor image quality, check focus settings, clean lenses, and ensure adequate lighting. Software issues can often be resolved by updating firmware or restarting the system.

    Conclusion

    Your home is now more secure with the installation of a comprehensive security camera system, providing you with a sense of safety and security. By following this guide, you’ve learned how to select the right cameras and install them effectively. Remember, the effectiveness of your security system depends on both the quality of the equipment and thoughtful placement. Regular maintenance and firmware updates will ensure your system continues to function optimally. Consider your camera system as a living solution that may need adjustments as your security needs evolve.

    The time and effort you’ve invested in installing your security cameras will pay dividends in enhanced home security. If you encounter complex issues, don’t hesitate to consult professionals. We hope this guide has empowered you to take control of your home security through effective camera installation and configuration.

    FAQ

    What type of security camera system is best for my property?

    The best security camera system for your property depends on your specific needs, including the size of your property, the level of surveillance required, and your budget. You can choose between wired and wireless systems, and consider features like motion detection and night vision.

    How many cameras do I need to ensure adequate coverage?

    The number of cameras required depends on the size of your property and the areas you want to monitor. A general rule of thumb is to place cameras at all entrances, including front and back doors, and to cover any vulnerable areas such as ground floor windows.

    Can I install security cameras myself or do I need professional help?

    While it’s possible to install security cameras yourself, it’s recommended to seek professional help if you’re not familiar with the process. A professional installer can ensure that your cameras are placed correctly and that your system is configured to meet your needs.

    What are the benefits of motion detection in a security camera system?

    Motion detection allows your security camera system to alert you to any suspicious activity, reducing the risk of false alarms and ensuring that you can respond quickly to potential threats.

    How do I power my security cameras?

    You can power your security cameras using a wired connection to a power source, or using batteries if you’re using wireless cameras. Make sure to choose a power source that is reliable and suitable for your cameras’ power requirements.

    Can I view my security cameras remotely?

    Yes, most modern security camera systems allow you to view your cameras remotely using a smartphone app or web interface. This allows you to check on your property from anywhere, at any time.

    How do I ensure my security camera system is secure?

    To ensure your security camera system is secure, make sure to use strong passwords, keep your system’s software up to date, and limit access to authorised users only.

  • Carbon monoxide detector placement tips for Your Safety

    Carbon monoxide detector placement tips for Your Safety

    Are you aware of the silent threat lurking in your home? Carbon monoxide poisoning claims around 60 lives annually in the UK, with many more suffering from long-term organ damage.

    Carbon monoxide is a colourless, odourless, and tasteless gas, making it nearly impossible to detect without a carbon monoxide detector. The importance of correctly placing these detectors cannot be overstated, as it is the difference between life and death in the event of a leak.

    This comprehensive guide will walk you through the types of detectors available, guidelines for optimal placement, installation tips, and what to do in case of an emergency.

    Key Takeaways

    • Understand the dangers of carbon monoxide and its impact on health.
    • Learn the importance of correctly placing carbon monoxide detectors.
    • Discover the different types of carbon monoxide detectors available.
    • Gain insights into installation best practices.
    • Know how to respond in case of a carbon monoxide emergency.

    Understanding the Silent Killer: Carbon Monoxide

    Carbon monoxide is a silent threat that can be deadly if not detected early. It’s a colourless, odourless gas that can be produced by faulty fuel-burning appliances, blocked chimneys, or idling cars in enclosed spaces.

    What is Carbon Monoxide and How is it Produced?

    Carbon monoxide is produced when fuel is not burned completely, resulting in the release of this toxic gas. Common sources include malfunctioning boilers, generators, and cars left running in garages. Proper maintenance of appliances and ensuring good ventilation can significantly reduce the risk of carbon monoxide buildup.

    Why Carbon Monoxide Detectors are Essential for Home Safety

    A carbon monoxide detector is your first line of defence against this silent killer. These detectors sound an alarm when carbon monoxide is detected, providing an early warning system that can save lives. For instance, if there’s a fairly low carbon monoxide level, around 50 parts per million (ppm), it could take up to 8 hours for the detector to sound an alarm. Higher levels (over 150 ppm) can trigger it within minutes.

    Some key benefits of having a carbon monoxide detector include:

    • Early detection of carbon monoxide, allowing for timely evacuation and prevention of poisoning.
    • Peace of mind for homeowners and families, knowing they are protected against this invisible threat.
    • Compliance with legal requirements in the UK, particularly for landlords who must ensure their rental properties are equipped with working carbon monoxide detectors.

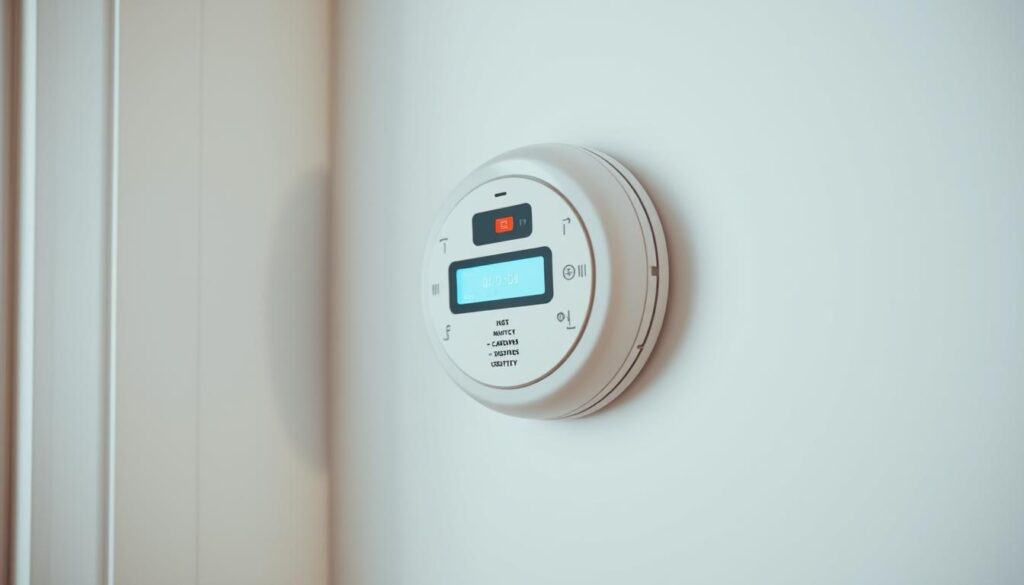
    A high-quality carbon monoxide detector, sleek and modern, mounted on a pristine white wall. The device features a clear LED display, intuitive controls, and a sleek, minimalist design that seamlessly blends into the surroundings. The lighting is soft and diffused, creating a soothing, non-intrusive atmosphere. The angle showcases the detector's profile, emphasizing its compact, unobtrusive nature. The overall scene conveys a sense of safety, security, and the importance of this vital home safety device in protecting against the "silent killer" - carbon monoxide.

    Types of Carbon Monoxide Detectors for Your Home

    To protect your home and loved ones from the dangers of carbon monoxide, it’s essential to understand the different types of carbon monoxide detectors available.

    Sealed Battery Carbon Monoxide Detectors

    Sealed battery carbon monoxide detectors offer a hassle-free solution, as they come with a pre-installed battery that lasts for the detector’s lifetime, typically around 7-10 years. This type of detector is ideal for those who prefer a low-maintenance option.

    Replaceable Battery Carbon Monoxide Detectors

    Replaceable battery carbon monoxide detectors require periodic battery replacements, usually every 6-12 months. While they may need more maintenance, they can be cost-effective and are a viable option for homes where occupants are comfortable with regular checks.

    Smart Carbon Monoxide Detectors

    If you prefer smart devices synced to your phone, a smart carbon monoxide detector is the way to go. Not only does the alarm sound, but you also receive an alert on your mobile device. This feature is particularly useful if there’s a carbon monoxide leak while you’re away from home. These detectors can cost around four times as much as sealed battery detectors and last between 7 and 10 years.

    Carbon Monoxide Detector Placement Tips for Maximum Protection

    Maximizing the effectiveness of your carbon monoxide detectors requires careful consideration of their placement within your home. The right placement can mean the difference between receiving a timely warning and facing the potentially deadly consequences of carbon monoxide poisoning.

    General Placement Guidelines

    When deciding where to place your carbon monoxide detector, it’s essential to follow some general guidelines. Ideally, you should install a detector on every level of your home and near sleeping areas. Ensure that the detector is mounted on a wall or ceiling, at least 30cm away from any wall or light fitting if ceiling-mounted, to avoid false alarms.

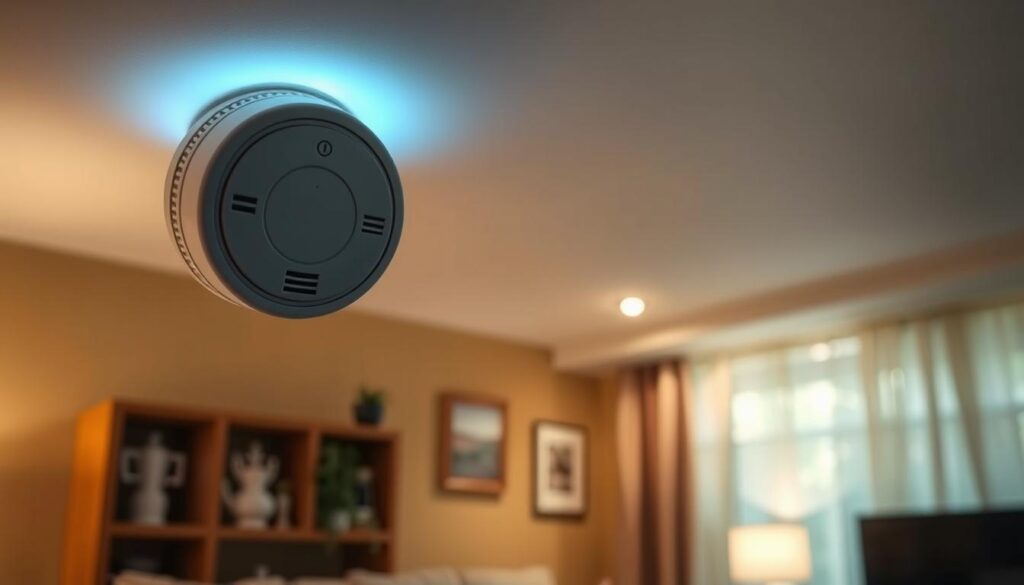
    A well-lit interior space, showcasing the strategic placement of a carbon monoxide detector. The detector is prominently displayed, mounted on a wall near the ceiling, casting a soft glow. The background depicts a cozy living room, with warm wooden tones and subtle ambient lighting, conveying a sense of safety and security. The camera angle is slightly elevated, offering a clear view of the detector's position and its integration within the home environment. The overall tone is one of informed, practical guidance, emphasizing the importance of proper carbon monoxide detector installation for maximum protection.

    Room-Specific Placement Recommendations

    Bedrooms and Sleeping Areas

    Install a carbon monoxide alarm outside each bedroom or in a location that is within 3 metres of the bedroom door. This ensures that you and your family are alerted to any potential danger while sleeping.

    Living Spaces and Common Areas

    Place detectors in living rooms and other common areas where people tend to congregate. This can help ensure that everyone in the household is alerted in case of a leak.

    Near Fuel-Burning Appliances

    It’s also a good idea to install detectors near fuel-burning appliances such as boilers, furnaces, and water heaters, as these are common sources of carbon monoxide leaks.

    Where Not to Place Your Carbon Monoxide Detectors

    Avoid placing monoxide detectors in areas that could lead to false alarms or reduced effectiveness, such as within 3 metres of doors or windows, above radiators, or near sources of steam or fumes like cookers or shower rooms. Additionally, avoid dusty areas like workshops or garages, as dust can interfere with the detector’s operation.

    By carefully selecting the placement of your carbon monoxide detectors, you can significantly enhance your home’s safety and protect your loved ones from the dangers of carbon monoxide poisoning.

    Installation and Maintenance Best Practices

    For a carbon monoxide detector to work effectively, it must be installed and maintained according to the manufacturer’s instructions. This ensures that your detector can alert you to any potential dangers in your home.

    Step-by-Step Installation Guide

    To install your carbon monoxide detector, follow the manufacturer’s instructions carefully. Typically, this involves mounting the device on a wall or placing it on a shelf, ensuring it’s at least 5 feet off the ground. For detailed guidance, you can refer to resources like carbon monoxide detector installation guides.

    Testing Your Carbon Monoxide Detectors

    Regular testing of your carbon monoxide detector is crucial. Press the test button to ensure the device is working correctly. If it fails to respond, check the batteries or consider replacing the detector.

    Maintenance Schedule and Battery Replacement

    Maintaining your carbon monoxide detector involves regular checks and battery replacements. Here’s a summary of key maintenance tasks:

    Task Frequency
    Test Detector Monthly
    Battery Replacement Every 6-12 months
    Detector Replacement Every 5-10 years

    It’s also important to keep the detector clean and dust-free. Use a soft brush or cloth to gently clean the device. For more detailed maintenance instructions, refer to your device’s user manual.

    Conclusion: Responding to Carbon Monoxide Alarms

    In the event of a carbon monoxide alarm, your immediate response can be the difference between safety and serious harm. If your alarm sounds, don’t panic. Instead, follow a simple yet crucial protocol to ensure your safety.

    First, turn off all gas appliances if possible, and gather everyone in your home to evacuate immediately. You can open windows and doors on your way out, but leaving the premises should be your top priority. Once outside, check everyone’s health for any flu-like symptoms that could indicate carbon monoxide poisoning.

    If you or anyone in your household is experiencing symptoms, call 999 straight away. Do not re-enter your home until the alarm stops or emergency responders declare it safe. After the incident, contact a professional to inspect all fossil fuel-burning appliances and potential sources of carbon monoxide to prevent future risks.

    By understanding how to respond to a carbon monoxide alarm and maintaining your detectors, you can significantly reduce the risk of carbon monoxide poisoning and keep your home and family safe.

    FAQ

    How often should I test my CO alarm?

    You should test your CO alarm at least once a month to ensure it’s working correctly. Refer to your device’s manufacturer instructions for specific testing procedures.

    Where is the best location to install a CO detector in my home?

    Install CO detectors on every level of your home and near sleeping areas. They should be placed on a wall or ceiling, at least 1 metre away from any fuel-burning appliance.

    Can I install a CO detector myself?

    Yes, you can install a CO detector yourself, but make sure to follow the manufacturer’s instructions. If you’re unsure, consider consulting a professional for assistance.

    How long do CO detectors typically last?

    CO detectors usually have a lifespan of around 5-7 years, depending on the model and manufacturer. Check your device’s documentation for its specific lifespan.

    What should I do if my CO detector goes off?

    If your CO detector goes off, immediately evacuate your home and call the emergency services. Once it’s safe to do so, check your fuel-burning appliances and ventilation systems for any issues.

    Are smart CO detectors worth the investment?

    Smart CO detectors can provide additional features like alerts to your smartphone and integration with other smart home devices. They can be a worthwhile investment for enhanced safety and convenience.

  • Childproofing Your Home Effectively: A Step-by-Step Guide

    Childproofing Your Home Effectively: A Step-by-Step Guide

    Are you prepared to safeguard your baby’s curious nature and energetic explorations? As a parent, it’s natural to feel concerned about the potential hazards that lurk in every corner of your home.

    Creating a safe environment for your child is crucial, and it’s not just about installing baby gates or securing heavy furniture. It’s about understanding the different stages of child development and adapting your approach as your baby grows into a mobile explorer.

    Key Takeaways

    • Understand the importance of childproofing in preventing accidents and injuries at home.
    • Learn how to adapt your childproofing strategy as your baby grows and becomes more mobile.
    • Discover the most effective childproofing products and techniques used by UK parents.
    • Find out how to strike a balance between creating a safe environment and allowing your child the freedom to explore.
    • Get practical advice on securing every area of your house, from the nursery to the kitchen and living spaces.

    Understanding the Importance of Childproofing

    As a parent, you’re constantly seeking ways to ensure your child’s safety, and one crucial step is understanding the importance of childproofing your home. Research shows that children are more likely to be injured at home than anywhere else, partly because they spend a lot of time there and often have less direct supervision.

    When Accidents Are Most Likely to Happen

    Children are particularly vulnerable during transition periods, such as when they first learn to roll over, crawl, stand, or walk. It’s during these times that their mobility increases, but their awareness of danger doesn’t keep pace. Unsupervised moments present the highest risk, with accidents commonly occurring during brief periods when parents are distracted or attending to other household tasks.

    Common Household Dangers for Children

    Common hazards include falls from furniture, poisoning from household chemicals, choking on small objects, burns from hot surfaces or liquids, and injuries from sharp objects. Babies and young children explore their environment primarily through touch and taste, making seemingly harmless objects potential hazards as they put things in their mouths. The importance of childproofing increases as your baby becomes more mobile, with different safety concerns arising at each developmental stage.

    Creating layers of protection through childproofing can significantly reduce the risk of serious injuries while still allowing for healthy exploration and development. By understanding when and why accidents happen, you can take proactive measures to safeguard your child.

    When to Start Childproofing Your Home Effectively

    The journey to a childproof home begins long before your baby arrives. It’s essential to understand that childproofing is not a one-time task but an ongoing process that adapts to your child’s growth and development.

    Planning During Pregnancy

    It’s advisable to tackle most baby proofing tasks before your baby starts crawling. The second trimester of pregnancy, between 14 and 27 weeks, is an ideal time to start childproofing your house. During this period, many expectant mothers experience an energy boost, making it easier to undertake larger projects without the pressure of caring for a newborn.

    Many parents underestimate how quickly babies develop. Rolling can begin around 4 months, and crawling typically starts between 6-10 months. Therefore, early preparation is crucial. As one expert notes,

    “Baby proofing is an ongoing task, though, so you may need to do several rounds of it and keep a watchful eye out for anything that may be unsafe as your infant becomes bigger and more agile.”

    Adapting as Your Child Grows

    As your child becomes more mobile, you’ll need to adapt your childproofing strategies. This includes moving hazardous items higher, adding more secure locks, and addressing new risks that emerge with their increasing height and capabilities. Creating a childproofing timeline that aligns with developmental milestones helps ensure you’re always one step ahead of your child’s abilities.

    Age Developmental Milestone Childproofing Action
    4 months Rolling Secure furniture and electrical outlets
    6-10 months Crawling Install safety gates and secure cabinets
    12+ months Walking and climbing Move hazardous items higher and add secure locks

    Essential Childproofing Equipment

    Childproofing your home effectively requires a range of essential safety products. These products form the foundation of your home safety strategy, providing reliable protection against common household hazards.

    Safety Gates and Barriers

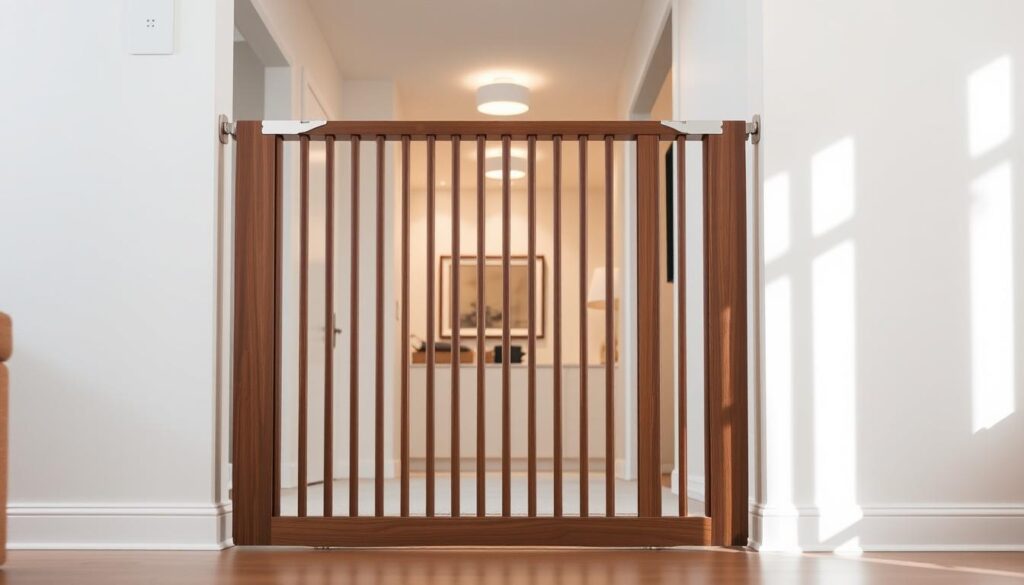
    Safety gates are crucial for blocking access to stairs, kitchens, and other dangerous areas. Pressure-mounted gates are suitable for doorways, while screw-mounted gates are essential for stairways. For instance, the Hauck adjustable safety gate is a trusted product that features a low step-over passage, reducing the risk of trips and falls.

    A sleek, modern baby safety gate standing sturdy in a well-lit, contemporary living room. The gate's frame is made of high-quality wood, with vertical bars spaced closely to prevent small fingers from getting through. The gate is installed at the entrance to a hallway, blending seamlessly with the room's neutral color palette and minimalist decor. Soft, diffused lighting from overhead fixtures casts a warm glow, highlighting the gate's polished finish. The scene conveys a sense of safety, comfort, and attention to detail in childproofing the home.

    Cabinet and Drawer Locks

    Cabinet and drawer locks prevent your baby from accessing potentially harmful items. Magnetic locks offer a sleek solution, while strap locks provide versatile protection for various cabinet types. It’s recommended to fit safety catches to floor-level cabinets or reachable drawers to prevent access to dangerous items like knives or blades.

    Corner Protectors and Edge Guards

    Corner protectors and edge guards cushion sharp furniture edges, reducing the risk of head injuries during falls. Clear options are available for those who prefer a less visible safety solution.

    Product Purpose Key Feature
    Safety Gates Block access to dangerous areas Pressure-mounted or screw-mounted
    Cabinet and Drawer Locks Prevent access to harmful items Magnetic or strap locks
    Corner Protectors and Edge Guards Cushion sharp furniture edges Clear or coloured options

    When selecting childproofing products, look for items that meet British safety standards and consider both effectiveness and ease of use for adults. A comprehensive childproofing kit that includes multiple types of safety devices can provide a cost-effective starting point for securing your home.

    Securing Electrical Hazards

    Electrical hazards are a significant threat to babies and young children, making it crucial to secure your home’s electrical components. As your child grows and becomes more curious, they may be tempted to explore plug sockets and electrical cords, which can lead to serious accidents.

    Outlet Covers and Socket Protection

    One of the most effective ways to prevent electrical shock is by covering plug sockets. Experts recommend using a lockable cover that fits over the housing of the power outlet, rather than the ‘blank plug’ type that you push into the socket holes. A properly fitted plug socket cover can be closed even when a plug is in the outlet, locking it into place and preventing inquisitive little fingers from pulling the plug halfway out and touching the metal pins. To ensure you don’t miss any sockets, get down to your baby’s eye level and inspect your home thoroughly.

    Managing Cords and Cables

    In addition to securing sockets, it’s essential to manage cords and cables effectively. Tie up or cover electrical cables to prevent your baby or toddler from chewing on them, which can cause an electric shock. Cords and cables also pose a strangulation hazard, so it’s crucial to keep them out of your child’s reach. Use cord shorteners, cord covers, or cord-hiding solutions to keep loose cables away from your baby. Consider rearranging furniture to block access to sockets and cords that are difficult to secure otherwise.

    For areas with multiple electrical devices, such as entertainment centres or home offices, consider using a cord management box to contain excess cable length and power strips. By taking these steps, you can significantly reduce the risk of electrical hazards in your home and create a safer environment for your baby to grow and explore.

    Childproofing Windows and Doors

    One of the key steps in childproofing your home involves securing windows and doors. These areas present multiple safety concerns, from fall risks to trapped fingers, making comprehensive childproofing essential.

    Window Locks and Restrictors

    Installing window restrictors is a crucial step in preventing falls from windows. These devices allow you to leave a window slightly ajar for ventilation while preventing it from opening far enough for a child to fall out. Ensure that the restrictor is suitable for your type of windows and limits the opening to no more than 6.5 centimetres.

    Additionally, removing furniture from beneath windows can prevent children from climbing up and accessing the window. Consider installing shatterproof glass or safety film on low-level windows to prevent injury if the glass breaks.

    Door Safety Measures

    Door stoppers can prevent doors from shutting completely, thereby protecting your child’s hands and feet from getting trapped. Using baby gates to close off doorways is another effective measure, especially for doors leading to areas you want to keep off-limits to your child.

    For doors that need to remain accessible, consider using childproof door knob covers or lever locks. These devices prevent your child from opening the door while allowing easy access for adults.

    Safety Measure Purpose
    Window Restrictors Prevent falls from windows
    Door Stoppers Prevent hands and feet from getting trapped
    Baby Gates Restrict access to certain areas
    Childproof Door Knob Covers Prevent children from opening doors

    Furniture and Heavy Object Safety

    As your child grows and becomes more curious, it’s essential to secure furniture and heavy objects to prevent them from tipping over. This is a critical step in childproofing your home, as furniture tipping can lead to serious injuries and fatalities.

    To ensure your home is safe, you need to secure large, heavy items such as bookcases, dressers, chests of drawers, shelving units, and TV stands to the wall or floor. This can be achieved using anti-tip straps or brackets that are either supplied with new furniture or available at most DIY stores for existing furniture.

    Anchoring Furniture to Walls

    All tall or heavy furniture must be securely anchored to the wall to prevent tipping. This includes bookcases, dressers, TV stands, and cabinets that a climbing toddler might be tempted to climb on. Pay particular attention to furniture with drawers that can be pulled out and used as steps, creating a dangerous ladder effect that increases the risk of tipping.

    Using anti-tip straps or brackets is a straightforward process that can significantly reduce the risk of furniture tipping over. It’s a measure that’s necessary not just in the nursery but throughout your home wherever there’s furniture that could be climbed or pulled over by a curious child.

    Protecting Against Sharp Corners and Edges

    Sharp corners and edges on furniture pose a significant risk of injury if your toddler bumps into them. To mitigate this risk, it’s recommended to install corner protectors on all furniture with sharp edges, especially on lower-level furniture like coffee tables, bedside tables, and TV stands.

    When choosing corner protectors, opt for dense foam products that can absorb impact rather than just covering the corner. For glass furniture, verify that it meets British safety standards or consider replacing it with safer alternatives while your child is young.

    Safety Measure Description Benefit
    Anchoring Furniture Secure heavy furniture to walls using anti-tip straps or brackets. Prevents furniture tipping over, reducing injury risk.
    Corner Protectors Install protectors on sharp corners and edges. Cushions impact, reducing injury from bumps.

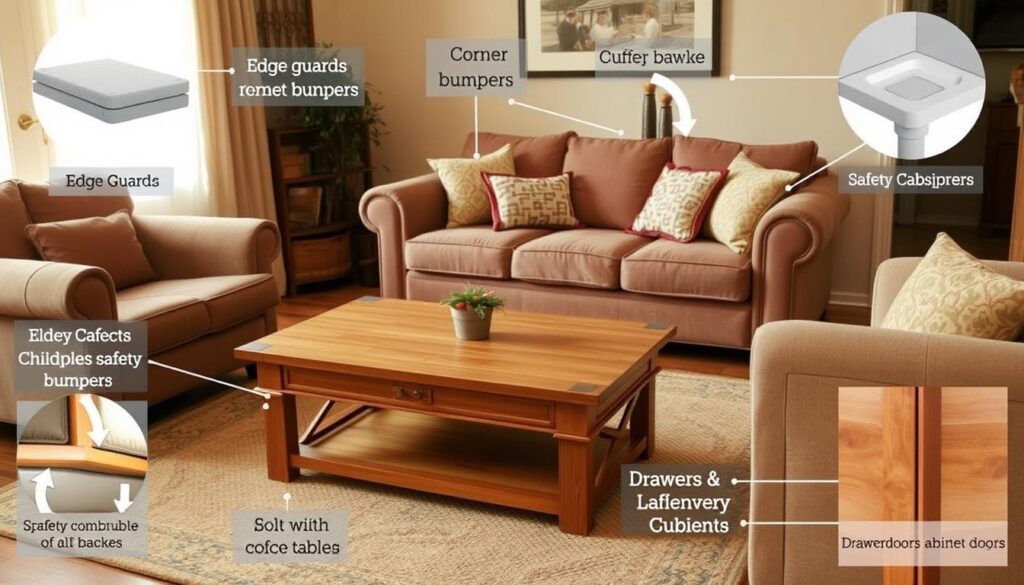
    A cozy living room with a wooden coffee table, plush sofa, and armchair. The furniture is surrounded by various childproofing accessories, such as edge guards, corner bumpers, and safety latches on drawers and cabinet doors. The lighting is warm and inviting, creating a sense of comfort and security. The overall atmosphere conveys the idea of a family-friendly environment, where child safety is a top priority.

    By taking these steps, you can significantly reduce the risk of accidents related to furniture and heavy objects in your home, creating a safer environment for your child to grow and explore.

    Staircase and Floor Safety

    Protecting your child from falls on stairs and trips on floors is a top priority. Staircases represent one of the most significant fall hazards in the home, making it essential to install safety measures.

    Installing Stair Gates

    If you have stairs in the house, you’ll need to baby proof the stairs by placing baby gates at both the top and the bottom. Choose screw-mounted models for the top of stairs, as they are more secure than pressure-mounted gates. Ensure your stair gate meets current safety standards and is tall enough that your child cannot climb over it.

    Securing Rugs and Removing Trip Hazards

    Check your banisters for gaps and cover them if necessary. Remove or secure rugs to prevent tripping hazards as your baby begins walking. Create clear pathways throughout your home by removing unnecessary obstacles and ensuring floors are kept free of small objects.

    By taking these steps, you can significantly reduce the risk of accidents on your home’s staircases and floors, creating a safer environment for your child to grow and explore.

    Kitchen Childproofing Essentials

    Protecting your child from kitchen hazards involves a multi-faceted approach to safety. The kitchen is a high-risk area due to the presence of sharp objects, hot surfaces, and electrical appliances.

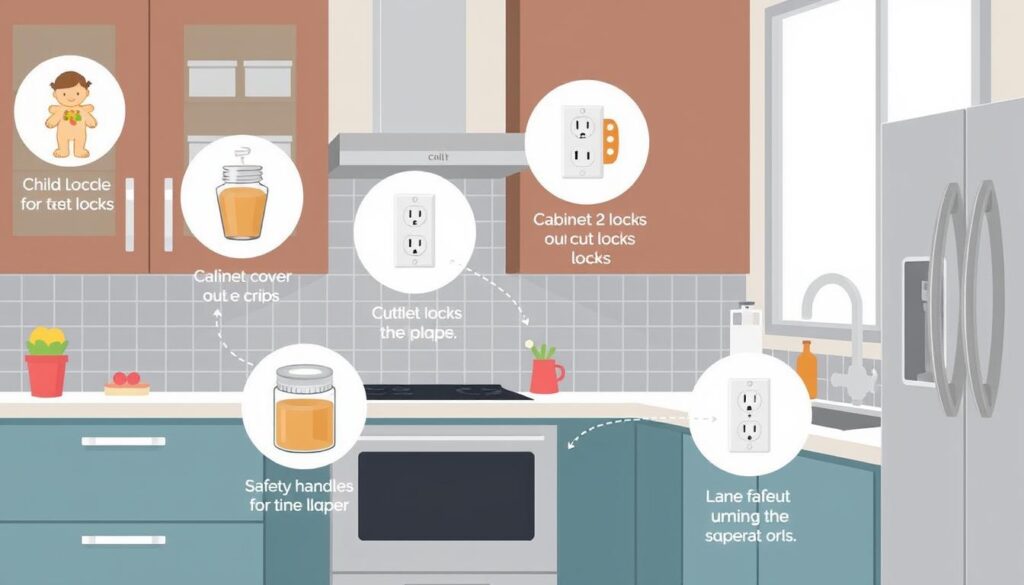
    Image of a kitchen with childproofing devices installed

    Learn More

    Securing Cabinets and Appliances

    To prevent accidents, it’s crucial to secure your kitchen cupboards and drawers. Fit safety catches to floor-level cabinets or reachable drawers to stop your child from accessing dangerous items like knives or cleaning supplies.

    Install childproof locks on all low-level kitchen cupboards and drawers containing sharp objects, breakables, or harmful substances.

    Cooker and Oven Safety

    Prevent your toddler from switching on the oven by fitting oven knob covers. Restrict access to the oven and never use it while your baby or toddler is nearby.

    Turn the handles of pots and pans inwards to prevent your child from reaching for them. This simple action can significantly reduce the risk of scalds and burns.

    Safe Storage of Cleaning Supplies

    Store all cleaning supplies in high cupboards with secure locks. Never transfer chemicals to unmarked containers or food containers that might confuse a child.

    Be vigilant about items that might not seem dangerous but pose risks, such as plastic bags and small fridge magnets that could be choking hazards.

    Bathroom Safety Measures

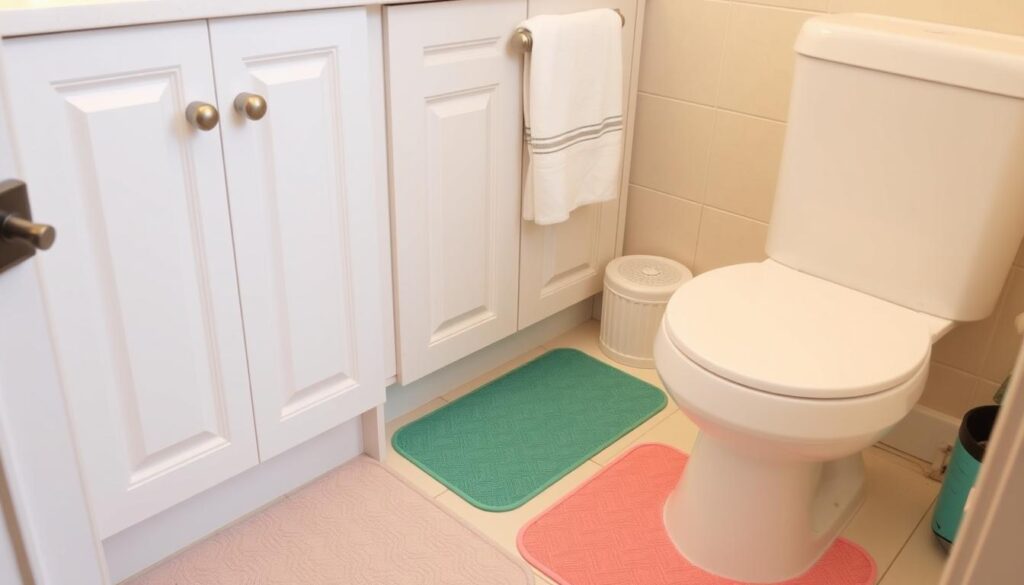
    Image of a childproofed bathroom with safety locks and non-slip mats

    Learn More

    The bathroom poses significant risks to children, necessitating effective safety measures. This room contains multiple serious hazards, including drowning risks, scalding dangers, and access to medications, making it one of the most important rooms to childproof thoroughly.

    Preventing Drowning Hazards

    Never leave your baby unattended in the bathroom, even for a moment, as drowning can occur in as little as 5cm of water and happen silently in seconds. Installing a toilet lock can prevent your child from lifting the toilet lid, reducing both drowning hazards and hygiene concerns for curious toddlers.

    Medicine Cabinet Security

    Install medicine cabinet locks and store all medications, vitamins, cosmetics, and toiletries out of reach, remembering that what seems harmless to adults can be dangerous to children. Securing the bathroom door with a childproof lock or latch high on the door can prevent unsupervised access to this high-risk room when adults aren’t present.

    Additional safety measures include using non-slip mats in the bath and on the bathroom floor to prevent slips and falls, and considering a spout cover to protect against bumps and burns on bath taps. You should also check that bath water is at the correct temperature and watch your baby at all times in the bath.

    Creating a Safe Nursery Environment

    Generate an image of a nursery with a cot, changing table, and secured furniture.

    Learn More

    Creating a safe nursery environment is crucial for your baby’s well-being and your peace of mind. The nursery is a space where your child will spend a significant amount of time, and it’s essential to ensure that it’s free from hazards.

    Cot Safety Standards

    When it comes to cot safety, there are specific standards to adhere to. Check that your baby’s cot meets the current British safety standards (BS EN716-1). Ensure the distance between the bars is between 2.5 and 6 centimetres to prevent entrapment. A sturdy cot with smooth-moving parts and no gaps where fingers or clothing can get trapped is essential.

    Keep the cot empty by removing pillows, blankets, toys, and bumpers for the first 12 months. This reduces the risk of SIDS and ensures a safe sleep environment. Use a firm mattress that fits snugly with no gaps around the edges.

    Changing Table Safety

    Never leave your baby unattended on the changing table, even for a second. Falls from changing tables are a common nursery injury that can be easily prevented by keeping a hand on your baby at all times. Ensure that the changing table is securely anchored to the wall to prevent tip-over accidents.

    Store all baby products, including nappy cream, wipes, and powder, within adult reach but out of your baby’s grasp to prevent accidental ingestion. Consider the room temperature and ventilation in the nursery, using a thermometer to maintain the recommended 16-20°C for safe sleeping conditions.

    Position the cot away from windows, blind cords, wall decorations, and furniture that could be climbed to access the cot. Secure all nursery furniture to the wall, including the changing table, wardrobe, and bookcase, to prevent tip-over accidents as your child becomes more mobile.

    Living Room and Common Areas

    The living room, being a central gathering space, requires careful consideration to ensure it’s safe for your little one. This area often contains a mix of furniture, electronics, and decorative objects that can pose risks to your child.

    Fireplace and Heating Element Protection

    One of the significant hazards in many living rooms is the fireplace or other heating elements. To protect your child from burns, consider using a fireguard that attaches to the wall, ensuring your toddler cannot reach hot surfaces or open flames. You could also add a glass door to your fireplace, allowing your little one to get closer to it without actually being able to access the fire.

    Entertainment Centre Safety

    Entertainment centres, including TVs and electronic equipment, require comprehensive childproofing. Secure your TV to the wall or a sturdy stand to prevent it from tipping over. Manage cords effectively to keep them out of your child’s reach, and lock cabinets containing electronic equipment to prevent your toddler from accessing potentially hazardous items.

    Safety Measure Description Benefit
    Secure Furniture Anchor heavy furniture to walls Prevents tip-overs
    Cord Management Keep cords out of reach Reduces risk of electrical shock
    Cabinet Locks Lock cabinets with hazardous items Prevents access to harmful substances or objects

    Additionally, be mindful of coffee tables and side tables, which can present both corner hazards and tip-over risks. Use corner protectors and consider securing larger tables to the floor to prevent accidents. Remove tablecloths that hang over edges, as your little one can easily pull them, bringing hot drinks, heavy objects, or breakables down onto themselves.

    Conclusion: Maintaining a Child-Safe Home

    As you complete your childproofing journey, it’s essential to remember that maintaining a safe environment is an ongoing task. Childproofing your home effectively requires regular reassessments and adjustments as your little one grows and develops new abilities.

    Make sure to periodically check all childproofing devices to ensure they remain secure and functional. Wear and tear can compromise their effectiveness over time, so it’s crucial to stay vigilant.

    Creating a regular safety audit routine for your house is vital. Get down to your child’s eye level to spot new hazards that may have emerged as your baby becomes more mobile and capable. This proactive approach will help you identify and address potential dangers before they become a threat.

    Remember to share your childproofing tips and strategies with other caregivers who spend time with your child. This includes grandparents, babysitters, and family friends who may not be as familiar with current safety practices. By doing so, you’ll ensure that your little one is protected, regardless of who is caring for them.

    As your child grows, gradually shift from physical barriers to teaching safety rules and boundaries. This will help them understand why certain areas or items require caution, empowering them to make informed decisions and stay safe.

    While comprehensive childproofing significantly reduces risks, supervision remains the most important safety tool. No home can be 100% childproof, and children are remarkably resourceful at finding unexpected hazards. Take pride in creating a safe environment that allows your little one to explore and develop with confidence.

    FAQ

    What is the most critical age range for childproofing a house?

    The most critical age range for childproofing is between six months and three years, as children become more mobile and curious during this period.

    How can I prevent my child from accessing sharp objects in the kitchen?

    You can prevent access to sharp objects by installing cabinet locks on drawers and cupboards that store sharp items, and keeping countertops clear of knives and other hazardous objects.

    What safety measures can be taken to secure windows and prevent falls?

    To secure windows, you can install window locks or restrictors that limit the window’s opening width, and ensure that furniture is placed away from windows to prevent children from climbing up.

    How can I childproof electrical outlets and sockets?

    You can childproof electrical outlets by using outlet covers or socket protectors that fit snugly into the outlet, making it difficult for children to access the electrical components.

    What are some ways to secure heavy furniture and appliances to prevent tip-overs?

    To secure heavy furniture and appliances, you can use anti-tip brackets or straps that anchor them to the wall, preventing them from tipping over if a child pulls on them.

    How can I make my bathroom safer for my child?

    To make your bathroom safer, you can install a non-slip mat in the bath or shower, secure the medicine cabinet with a lock, and ensure that the toilet lid is closed and consider using a toilet lock.

    What are some common hazards in the living room that I should be aware of?

    Common hazards in the living room include electrical cords, sharp corners on furniture, and heavy objects that can tip over, so take steps to secure these hazards.

    How often should I inspect my home for potential hazards?

    You should regularly inspect your home for potential hazards, ideally every few months, or whenever your child reaches a new developmental stage.

  • Installing Smoke Detectors Correctly: Safety Essentials

    Installing Smoke Detectors Correctly: Safety Essentials

    House fires can start so quietly that occupants often remain unaware of the danger until it’s too late. Smoke detectors play a crucial role in home safety by alerting you to potential fires at an early stage, providing vital time to evacuate and call for help.

    To ensure your home is equipped with an effective fire detection system, it’s essential to understand the importance of correctly installing smoke detectors. A well-planned installation can significantly enhance your home’s fire protection.

    This comprehensive guide will walk you through the essential steps for installing smoke detectors correctly, covering the different types available, optimal placement, and step-by-step installation procedures for both battery-operated and hardwired detectors, ensuring your home remains a safe haven for you and your family.

    Key Takeaways

    • Understand the critical role of smoke detectors in home fire safety.
    • Learn about the different types of smoke detectors and their optimal placement.
    • Discover step-by-step installation procedures for battery-operated and hardwired smoke detectors.
    • Gain insights into maintaining your smoke detection system for reliable protection.
    • Ensure compliance with UK fire safety regulations through proper installation.

    Why Proper Smoke Detector Installation Is Critical

    Understanding the importance of proper smoke detector installation can be the difference between life and death in the event of a fire. “Smoke alarms save lives,” as emphasized by fire safety experts, and their correct installation is paramount.

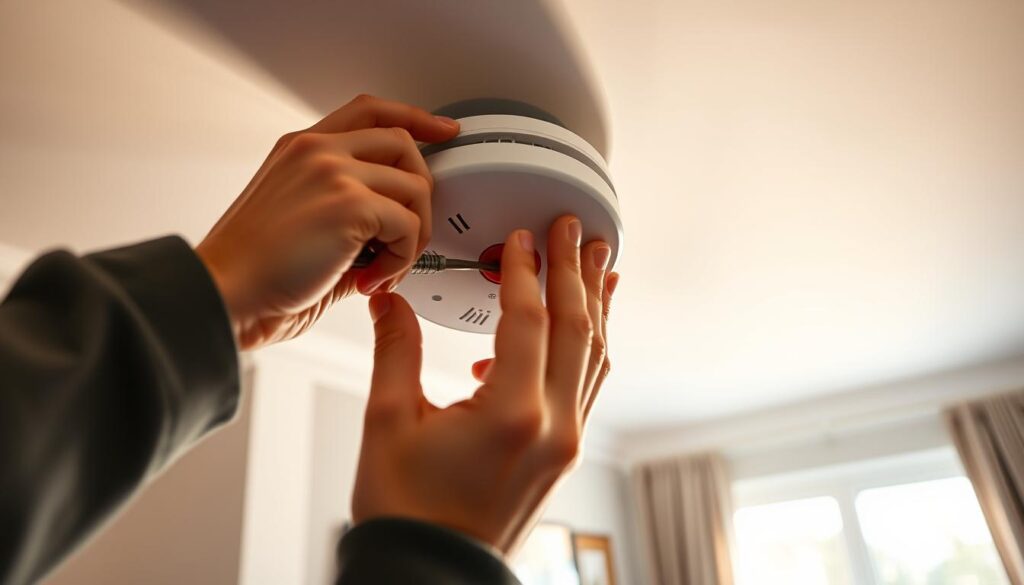
    A well-lit interior scene showing the careful installation of a smoke alarm on a ceiling. In the foreground, a pair of hands carefully mounting the alarm using a screwdriver, with the device's sleek white casing and red test button clearly visible. The middle ground reveals the surrounding wall and ceiling, with a clean, modern aesthetic and warm, natural lighting filtering in through a nearby window. In the background, a subtle sense of domestic comfort, perhaps a hint of furniture or decor, establishing the residential setting. The overall mood is one of precision, safety, and attention to detail, capturing the importance of proper smoke alarm installation.

    Life-Saving Benefits of Smoke Detectors

    Smoke detectors provide an early warning in the event of a fire, allowing occupants to evacuate the premises quickly. This early detection is crucial for reducing the risk of injury or fatality. In fact, having working smoke alarms in your home can halve the risk of dying in a fire.

    UK Fire Safety Regulations and Requirements

    The UK has specific fire safety regulations regarding the installation of smoke alarms in residential properties. For instance, the Building Regulations Approved Document B (Fire Safety) outlines the requirements for domestic smoke alarm installation. Landlords, in particular, have legal responsibilities to ensure that smoke alarms are installed and maintained in rental properties. Compliance with these regulations is not only a legal necessity but also essential for insurance purposes.

    It’s your responsibility to ensure that smoke detector locations comply with any applicable building regulations. This includes understanding the specific requirements for new builds versus existing properties, including the minimum number of alarms required and their mandatory locations within a property.

    Types of Smoke Detectors for Home Safety

    When it comes to home safety, selecting the right type of smoke detector is crucial. Your choice can significantly impact the effectiveness of your home’s safety measures.

    Battery-Operated Smoke Detectors

    Battery-operated smoke detectors are a popular choice due to their ease of installation and cost-effectiveness. They are ideal for homes where hardwiring is not feasible. However, it’s essential to regularly check and replace the batteries to ensure they function correctly.

    Hardwired Smoke Detectors

    Hardwired smoke detectors are directly connected to your home’s electrical system, providing a reliable source of power. They often come with battery backups in case of a power outage, ensuring continuous protection. These detectors are particularly suitable for new constructions or during major renovations.

    Combination Smoke and Carbon Monoxide Detectors

    Combination smoke and carbon monoxide detectors offer dual protection against both smoke and the silent killer, carbon monoxide. These detectors are especially beneficial in homes with gas appliances, boilers, or fireplaces. They detect different threats and produce distinct alarm sounds to indicate whether the danger is smoke or carbon monoxide.

    Installing combination detectors near sleeping areas and in proximity to gas-fuelled appliances is recommended. In the event of a carbon monoxide alarm activation, immediately ventilate the area, evacuate the property, and contact the Gas Emergency service on 0800 111 999.

    Optimal Placement of Smoke Detectors in Your Home

    The effectiveness of smoke detectors largely depends on their strategic placement within your home. Proper installation ensures that smoke detectors can detect fires promptly, providing crucial early warnings to occupants.

    Recommended Locations Throughout the House

    For comprehensive coverage, smoke detectors should be installed on every level of your home and inside or near sleeping areas. It’s advisable to place them in hallways outside bedrooms and on landings. Ensure that detectors are positioned away from kitchens and bathrooms to minimize false alarms caused by steam or cooking fumes.

    Installation on Flat Ceilings

    On flat ceilings, smoke detectors should be mounted as centrally as possible. The ideal location is at least 300mm away from any wall or light fitting. This central positioning helps in capturing smoke more effectively, as it tends to spread out evenly across the ceiling.

    A ceiling-mounted smoke detector in a well-lit, modern living room. The device is centered in the frame, its sleek white casing and circular design standing out against the neutral-toned ceiling. Soft, diffused lighting from recessed fixtures above casts a warm glow, creating a sense of comfort and safety. The room's clean, minimalist aesthetic reinforces the smoke detector's role as a discreet yet essential safety feature. The angle showcases the detector's placement for optimal smoke detection, hinting at the importance of proper installation for home fire protection.

    Installation on Sloped Ceilings

    For homes with sloped or pitched ceilings, the installation rules differ slightly. The detector should be placed within 600mm vertically from the peak of the ceiling when measuring along the slope. It’s also crucial to position the sensor as centrally as possible to the ceiling area. Special brackets or adapters may be required to ensure the detector is mounted correctly on the sloped ceiling, maintaining its effectiveness.

    Understanding these guidelines helps you to install smoke detectors effectively, enhancing your home’s safety against fires.

    Installing Smoke Detectors Correctly: Step-by-Step Guide

    To ensure your home is equipped with a reliable fire safety system, installing smoke detectors correctly is crucial. This guide will walk you through the process, ensuring you can safeguard your home and family effectively.

    Tools and Materials You’ll Need

    Before starting the installation, gather the necessary tools and materials. You’ll need a smoke detector, a screwdriver, and potentially a drill if you’re installing on a wall or ceiling. For hardwired smoke detectors, ensure you have the appropriate electrical knowledge and tools, such as wire strippers and a voltage tester.

    Installing Battery-Operated Smoke Detectors

    Installing battery-operated smoke detectors is relatively straightforward. Begin by mounting the base plate to the wall or ceiling using the provided screws.

    Mounting the Base Plate

    Align the base plate with the mounting holes and screw it into place. Ensure it’s securely fastened to support the weight of the detector.

    Connecting the Battery and Testing

    Insert the battery into the detector, ensuring it’s properly connected. Test the detector by pressing the test button; it should sound an alarm. This confirms the detector is working correctly.

    Installing Hardwired Smoke Detectors

    For hardwired smoke detectors, the process involves working with electrical wiring. It’s essential to follow safety precautions to avoid electrical shock.

    Safety Precautions When Working with Electricity

    Turn off the power to the circuit you’re working on at the circuit breaker or fuse box. Verify the power is off using a voltage tester. This step is crucial for your safety.

    Wiring and Mounting Process

    Wiring the smoke detectors involves installing old-work electrical boxes where the detectors will be placed. Run a 2-wire cable from the power source to the first smoke detector. Then, use 3-wire cables to link multiple detectors together. Secure the cables within wall and ceiling cavities according to building regulations. Mount the detector base plate to the electrical box, make the necessary wire connections, and attach the detector unit. Finally, test the installation to ensure all detectors are properly powered and interconnected.

    Testing and Maintaining Your Smoke Detectors

    To ensure your smoke detectors are functioning correctly, regular testing and maintenance are crucial. This not only guarantees their effectiveness in warning you of potential fires but also prolongs their operational lifespan.

    Regular Testing Procedures

    You should test your smoke detectors monthly. Most models come with a test button that you press to check if the alarm sounds. If it doesn’t, it may indicate a problem with the battery or the detector itself. It’s essential to follow the manufacturer’s instructions for testing. Some detectors may have different testing procedures.

    Battery Replacement Schedule

    Battery-operated smoke detectors require their batteries to be replaced regularly. Typically, this should be done annually, but it’s wise to check the manufacturer’s guidelines. Some batteries may last longer, and using the correct replacement battery is crucial.

    Cleaning and Maintenance Tips

    Cleaning your smoke alarm every few months is recommended. Use a slightly damp cloth or a soft brush attachment on a vacuum cleaner to gently remove dust. Be cautious not to knock the sensor while cleaning, as this may trigger a false alarm. Avoid using solvents, cleaners, or painting the alarm, as these actions can damage the sensor or block smoke entry points.

    Regular maintenance not only ensures your smoke detectors are working correctly but also helps prevent false alarms. Remember, smoke detectors typically need to be replaced every 10 years, regardless of whether they appear to be functioning.

    Conclusion: Ensuring Ongoing Fire Safety in Your Home

    Ensuring your home is equipped with functioning smoke detectors is crucial for the safety of your family and property. Throughout this guide, we’ve covered the critical importance of correctly installed and maintained smoke detectors in preventing fire-related tragedies. By understanding the different types of smoke detectors and their optimal placement, you can significantly enhance your home’s fire safety.

    Regular testing and maintenance of your detectors are vital to ensure they remain operational. Additionally, creating and practising a family evacuation plan can provide comprehensive fire safety. By following the guide and tips provided, you can protect your family and property from the dangers of fire. Take immediate action to implement these measures and enjoy a safer living environment.

    FAQ

    What type of smoke detector is best for my home?

    The best type of smoke detector for your home depends on your specific needs. Battery-operated smoke detectors are easy to install, while hardwired smoke detectors provide a more reliable power source. Combination smoke and carbon monoxide detectors offer additional protection against gas leaks.

    How often should I test my smoke detectors?

    You should test your smoke detectors monthly by pressing the test button. This ensures they are functioning correctly and can alert you in case of a fire.

    Where should I install smoke detectors in my home?

    Install smoke detectors on every level of your home, inside and outside sleeping areas. For optimal protection, place them on ceilings or high on walls, at least 300mm away from any corner or light fitting.

    Can I install smoke detectors on sloped ceilings?

    Yes, you can install smoke detectors on sloped ceilings. However, ensure they are within 900mm of the peak, measured horizontally. This allows for effective detection of smoke.

    How often should I replace the batteries in my smoke detectors?

    Replace the batteries in your smoke detectors at least once a year, or as recommended by the manufacturer. Some smoke detectors have a low-battery warning, which alerts you when the batteries need replacing.

    Do I need to hire an electrician to install hardwired smoke detectors?

    Yes, it is recommended to hire a qualified electrician to install hardwired smoke detectors. They will ensure the detectors are installed correctly and safely, in accordance with UK electrical regulations.

    Can I use tape to fix my smoke detector to the ceiling?

    No, you should not use tape to fix your smoke detector to the ceiling. Instead, use the manufacturer’s recommended fixing method, such as screws or brackets, to ensure a secure and reliable installation.

    Are there any specific fire safety regulations I need to follow when installing smoke detectors?

    Yes, you should comply with UK fire safety regulations, such as those outlined in the Regulatory Reform (Fire Safety) Order 2005. Ensure you install smoke detectors in accordance with the manufacturer’s instructions and relevant British Standards.