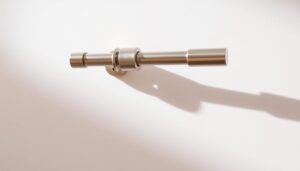
Category: DIY Repairs

  • Unclogging a slow-draining sink: A Step-by-Step Guide

    Unclogging a slow-draining sink: A Step-by-Step Guide

    A clogged sink can be a significant disruption to your daily routine. Did you know that a slow-draining sink is often a precursor to a more severe plumbing problem? The issue typically arises from a gradual buildup of debris, hair, and soap scum within the pipes.

    When water drains slowly from your sink, it’s a sign that the drain is partially blocked. Addressing this issue early can prevent more serious clogs and expensive plumbing repairs down the line. This guide will walk you through diagnosing and fixing your slow-draining sink using both DIY methods and professional techniques, ensuring you can resolve the problem without necessarily calling a plumber.

    Key Takeaways

    • Identify the common causes of slow-draining sinks.
    • Learn DIY methods to clear blockages in your sink’s drain.
    • Understand when to use professional techniques or call a plumber.
    • Discover how to prevent future clogs and maintain your plumbing system.
    • Save time and money by resolving the issue yourself.

    Understanding Why Your Sink Drains Slowly

    Slow-draining sinks are a common household problem that can lead to more severe plumbing issues if left unaddressed. The issue typically arises from a gradual accumulation of materials within the pipes rather than a sudden blockage.

    Causes of Slow Drains

    In bathroom sinks, hair and soap scum are the primary culprits, creating sticky masses that trap other debris, leading to clogs. Kitchen sinks, on the other hand, often suffer from grease, food particles, and mineral buildup from hard water. The design of sink plumbing, particularly the P-trap, can also collect debris over time, contributing to slow drainage.

    The Dangers of Ignoring Slow Drains

    Ignoring slow drains can lead to significant health hazards, including bacterial growth and potential exposure to harmful microorganisms. Stagnant water in slow drains can create unpleasant odours that permeate throughout the home and attract pests like drain flies, creating ideal conditions for mould growth. If left untreated, slow drains inevitably worsen over time, potentially leading to complete blockages and more expensive repairs.

    Signs Your Sink Needs Unclogging

    A slow-draining sink can be a nuisance, but recognising the signs of a potential clog can help you address the issue promptly. Your sink’s drainage behaviour is a good indicator of its overall health.

    Visual and Audible Indicators

    One of the most obvious signs of a slow-draining sink is water pooling in the basin. You may also notice that the water takes longer than usual to drain. Additionally, gurgling sounds often accompany slow drains, indicating a blockage in the pipe. These sounds occur when air is trapped in the pipe and is trying to escape. If you notice any of these signs, it’s essential to investigate further.

    A clogged sink drain, filled with a tangle of hair and gunk, obstructing the flow of water. The basin is partially filled, reflecting the dull, dingy surroundings. Bright, overhead lighting casts sharp shadows, highlighting the built-up debris. The faucet and chrome fixtures gleam, contrasting the murky water and discolored basin. A sense of frustration and inconvenience permeates the scene, signaling the need for immediate attention and unclogging.

    How to Determine the Severity of the Clog

    To assess the severity of the clog, observe how quickly water drains from your sink. You can time how long it takes for the water to drain, which can help you determine the extent of the problem. Check if multiple fixtures are affected, as this could indicate a more significant issue with your plumbing system. Testing the sink stopper mechanism can also help you identify if it’s contributing to the drainage problem. If the issue persists or worsens over time, it may be a sign of an accumulating blockage that requires professional attention.

    Essential Tools for Unclogging a Slow-Draining Sink

    Before you start unclogging your sink, it’s essential to have the necessary tools at hand. You can begin by gathering basic household items that can help resolve the issue.

    Basic Household Items You’ll Need

    You likely have several items in your kitchen that can help unclog your sink. Baking soda and vinegar are a great combination for breaking down clogs. Simply pour 1 cup of baking soda down the drain, followed by 1 cup of vinegar. Let the mixture sit for a few hours or overnight before rinsing with hot water. You can also use dish soap and hot water to help dissolve grease and food residue. Additionally, having a bucket handy can help contain any mess when working under the sink.

    Specialised Tools Worth Investing In

    For more stubborn clogs, you may need to invest in some specialised tools. A plunger is a must-have for any sink, and it’s essential to choose the right type for your sink drain. A drain snake or drain zip tool can be used to remove hair and debris from sink drains. These tools are particularly useful for sinks with pop-up drains. Having a pipe wrench or adjustable wrench can also be beneficial for accessing and cleaning the P-trap.

    The Baking Soda and Vinegar Method

    To tackle a clogged sink, consider the baking soda and vinegar technique, a safe and eco-friendly approach. This method is not only effective but also gentle on your sink and the environment.

    Step-by-Step Instructions

    To use the baking soda and vinegar method, start by pouring 1/2 cup of baking soda down the slow-draining sink. Follow this with 1/2 cup of vinegar. The mixture will fizz and bubble, helping to break down the clog. Let it rest for 10-15 minutes to allow the solution to work effectively. After waiting, rinse the drain with boiling water to clear away the loosened debris.

    For more stubborn clogs, you may need to repeat the process. It’s also a good idea to use this method as part of your regular maintenance to keep your sink draining freely.

    Why This Method Works

    The combination of baking soda and vinegar creates a chemical reaction that helps dissolve common blockages such as soap scum, light grease, and minor hair clogs. The fizzing action of the mixture reaches into the drain and breaks down the clog, making it easier to clear. This natural solution is not only effective but also safe for your pipes and the environment, avoiding the need for harsh chemicals.

    Method Component Function
    Baking Soda Acts as a mild abrasive and helps break down blockages
    Vinegar Creates a chemical reaction with baking soda to dissolve clogs
    Boiling Water Rinses the drain and clears away loosened debris

    Using Hot Water and Dish Detergent

    When dealing with a clogged sink, one effective method to try is using hot water and dish detergent. This approach leverages the degreasing properties of dish soap to break down the clog, making it easier to clear the drain.

    The Process Explained

    To start, pour or squeeze approximately half a cup of dish detergent, such as Dawn®, down the drain. For more stubborn clogs, you can use a full cup. Allow the detergent to work its way down the drain for 30 minutes, giving it time to coat the pipe and penetrate the clog. During the last few minutes of this waiting period, bring a kettle of water to a boil. Carefully carry the kettle to the sink and slowly pour the boiling water down the drain, being cautious not to splash. The hot water helps to dissolve and flush out the clog, while the dish detergent acts as a degreaser, breaking down grease and food residue.

    A dimly lit kitchen countertop, the sink filled with steaming hot water and a few drops of dish detergent swirling about. A person's hands, gloved in yellow rubber, gently agitating the liquid, working to dislodge the stubborn clog. The light casts a warm, amber glow, highlighting the suds and creating a sense of focused, purposeful activity. The scene conveys a practical, problem-solving approach to a common household task, with an air of determination to get the job done efficiently.

    When This Method Works Best

    This method is particularly effective for kitchen sinks clogged with grease and food residue. The dish detergent helps to emulsify these substances, making it easier for the hot water to flush them away. It’s also a relatively safe and non-invasive approach, avoiding the need for harsh chemicals or plumbing tools. However, for more severe clogs or those in bathroom sinks caused by soap scum and hair, you may need to consider alternative methods or additional treatments.

    Mechanical Methods for Unclogging a Slow-Draining Sink

    Mechanical techniques offer a practical solution for unclogging slow-draining sinks without relying on chemicals. These methods are particularly effective for certain types of clogs and can be used in conjunction with other approaches for optimal results.

    Using a Plunger Effectively

    To use a plunger on a sink drain, first ensure you have the right type of plunger. A sink plunger typically has a flat, rubber edge that can create a good seal over the drain. Before plunging, cover the sink overflow with a rag or duct tape to maintain pressure. For more information on fixing slow-draining sinks, you can visit The Spruce.

    Image of a person using a sink plunger

    Learn More

    Drain Zip Tools and Drain Snakes

    Drain zip tools and drain snakes are handy for removing hair and debris from sink drains. A drain snake can be fed into the drain to break up clogs further down the pipe. When using a drain snake, rotate it as you push it further into the pipe to effectively clear the blockage.

    Image of a drain snake tool being used

    Learn More

    Removing and Cleaning the P-Trap

    The P-trap, a curved pipe under the sink, is a common place for debris to accumulate. To clean it, first place a bucket underneath to catch any water or debris. Then, unscrew the slip nuts holding the P-trap in place, and carefully remove it. Clean the P-trap thoroughly before reassembling it.

    By employing these mechanical methods, you can effectively clear clogs in your sink drain without resorting to chemical solutions. Each method has its advantages and is suited to different types of blockages.

    Addressing Specific Types of Clogs

    Understanding the composition of the clog is crucial for selecting the right unclogging method for your sink. Different materials require different approaches to effectively clear the blockage and restore the proper flow of water through your sink’s drain.

    Hair and Soap Scum Blockages

    Hair and soap scum are common culprits behind clogged bathroom sinks. To tackle these blockages, you can use a combination of mechanical and chemical methods. Start by using a zip tool or a wire hook to remove any visible hair and debris from the sink drain. For more stubborn blockages, apply a mixture of baking soda and vinegar to break down the soap scum.

    Grease and Food Residue

    Grease and food residue are typical causes of clogs in kitchen sinks. To dissolve these blockages, use hot water and a degreaser. Pouring a generous amount of degreaser down the drain, followed by hot water, can help break down the grease and food particles. For tougher clogs, consider using a drain snake to physically remove the debris.

    Mineral Buildup and Hard Water Deposits

    Mineral buildup and hard water deposits can affect sinks in areas with hard water, leading to reduced water flow. To address these issues, use a product specifically designed to dissolve mineral deposits. Regularly cleaning your sink with a mixture of vinegar and water can also help prevent such buildup.

    Type of Clog Recommended Method Preventative Measures
    Hair and Soap Scum Zip tool or wire hook, baking soda, and vinegar Regularly clean the sink drain
    Grease and Food Residue Hot water and degreaser, drain snake Avoid pouring grease down the drain
    Mineral Buildup and Hard Water Deposits Product to dissolve mineral deposits, vinegar, and water Regularly clean with vinegar and water

    Preventative Maintenance to Avoid Future Clogs

    A well-maintained sink drain is less likely to experience clogs and backups. By adopting a few simple habits, you can keep your sink draining freely and avoid the hassle of dealing with clogs.

    Weekly and Monthly Maintenance Tips

    To prevent buildup and keep your sink draining smoothly, flush your drains with hot water on a weekly basis. Monthly, remove and clean your sink stopper to prevent hair and debris accumulation. This simple routine can significantly reduce the risk of clogs.

    Sink Strainers and Stoppers

    Installing a sink strainer can catch hair and other debris before they go down the drain, preventing clogs. For bathroom sinks, consider a fine mesh drain hair catch. Regularly cleaning your stopper and strainer is also crucial. Make it a habit to check and clean these devices monthly to ensure they remain effective.

    Conclusion

    Clearing a clogged sink is a manageable task when you have the right information and are prepared to take the necessary steps. Throughout this guide, we’ve covered various methods to unclog a slow-draining sink, from simple DIY solutions like baking soda and vinegar to more involved mechanical approaches.

    It’s crucial to address slow drain issues promptly to prevent more serious plumbing problems. Regular preventative maintenance, including cleaning your sink and being mindful of what goes down the drain, can keep your sink draining freely. By assembling a basic drain cleaning kit and following the tips outlined, you can resolve most slow drain issues without needing a professional plumber.

    By taking control of your home’s plumbing system, you can save time and money. Proper disposal practices and regular checks will keep your entire plumbing system functioning optimally.

    FAQ

    What is the most effective way to clear a clogged bathroom sink?

    Using the baking soda and vinegar method is a highly effective way to clear a clogged bathroom sink. Pour 1 cup of baking soda down the drain, followed by 1 cup of vinegar. Let the mixture sit for a few hours or overnight before rinsing with hot water.

    How do I prevent hair and soap scum from clogging my sink drain?

    To prevent hair and soap scum from clogging your sink drain, use a sink strainer or stopper to catch debris before it goes down the drain. Regularly cleaning your sink drain with baking soda and vinegar can also help.

    Can I use drain cleaners to unclog my sink?

    While drain cleaners can be effective, they can also damage your pipes and harm the environment. It’s recommended to try alternative methods like the baking soda and vinegar method or using a plunger before resorting to chemical drain cleaners.

    How do I remove grease and food residue from my sink drain?

    To remove grease and food residue from your sink drain, pour boiling water down the drain to help dissolve the grease. You can also use a mixture of baking soda and vinegar to help break down the debris.

    What should I do if my sink is still clogged after trying the baking soda and vinegar method?

    If your sink is still clogged after trying the baking soda and vinegar method, you may need to use a plunger or a drain snake to remove the blockage. If the clog persists, it may be best to call a professional plumber.

    How can I maintain my sink drain to prevent future clogs?

    To maintain your sink drain and prevent future clogs, regularly clean your sink drain with baking soda and vinegar, and use a sink strainer or stopper to catch debris. You should also avoid pouring grease and food residue down the drain.

  • Replacing a Broken Tile: A Step-by-Step Guide

    Replacing a Broken Tile: A Step-by-Step Guide

    Did you know that a damaged tile can be more than just an eyesore? It can pose a significant safety hazard in your home, potentially causing trips or cuts. Whether it’s a large floor tile that’s been smashed or a small wall tile that’s been chipped, addressing the issue promptly is crucial.

    Prompt replacement is essential for both aesthetic and practical reasons. This comprehensive guide will walk you through the process, from identifying the damage to achieving a professional-looking finish. You’ll learn how to assess the extent of the damage, gather the necessary tools and materials, and follow a methodical approach to ensure successful tile replacement.

    Key Takeaways

    • Understand the importance of replacing damaged tiles for safety and aesthetic reasons.
    • Learn how to assess the extent of the damage and prepare for replacement.
    • Gather the necessary tools and materials for the replacement process.
    • Follow a step-by-step guide to replace the broken tile successfully.
    • Discover how to apply grout for a seamless finish.
    • Save costs by completing the project as a DIY task.

    Essential Tools and Materials for Tile Replacement

    A successful tile replacement project begins with the right tools and materials, ensuring a professional finish. To achieve this, you need to be well-prepared with the necessary equipment.

    Image of a toolbox with tiling tools

    Buy Now

    Safety Equipment You’ll Need

    Proper safety equipment is essential when replacing a broken tile. This includes safety goggles to protect your eyes from flying debris and heavy-duty gloves to prevent cuts from sharp tile edges.

    Tools for Removing the Old Tile

    The tile removal process requires specific tools, including a grout remover or grout saw for clearing the surrounding grout, a hammer and chisel for breaking up the damaged tile, and a drill with a ceramic bit to create holes that make removal easier.

    Materials for Installing the New Tile

    When installing a new tile, you’ll need materials such as adhesive suitable for your tile type, spacers to maintain consistent grout lines, and a notched trowel for applying adhesive evenly. Ensuring you have the correct tools and materials will result in a professional-looking finish.

    Removing the Broken Tile Safely

    Safely removing a broken tile is crucial to a successful replacement. Before you start, make sure you are wearing safety goggles and heavy-duty gloves to protect yourself from sharp edges and flying debris.

    Preparing the Area

    To prevent damage to surrounding tiles, apply painter’s tape around their edges. This will protect them from accidental damage during the removal process. You should also cover nearby surfaces to catch any dust and debris.

    Removing the Surrounding Grout

    Use a grout saw or grout remover to carefully remove the grout from around the damaged tile. Work methodically to ensure complete removal without affecting adjacent tiles.

    A well-lit workshop setting, with a tiled floor in the foreground. A worker, wearing safety gloves and goggles, carefully pries up a cracked and damaged tile using a sturdy pry bar. Dust motes float in the air, and the worker's movements are precise and focused. The background is a neutral, clean workspace, with shelves and tools visible, conveying a sense of order and professionalism. The lighting is warm and natural, casting subtle shadows that add depth and dimension to the scene. The overall mood is one of diligence and care, with the worker's actions reflecting the importance of safely removing the broken tile before beginning the replacement process.

    Breaking and Removing the Damaged Tile

    Place a chisel in the centre of the tile and gently tap it with a hammer to create a crack. You can then drill evenly-spaced holes into the broken sections to make removal easier. Working from the centre outwards, use a hammer and chisel to remove the broken pieces.

    Cleaning the Exposed Surface

    Once the broken tile is removed, use a wider chisel to clean all the old thinset off the substrate. Thoroughly clean the exposed surface by vacuuming all dust and debris, then wipe with a damp cloth to remove any fine particles.

    Step Action Tools Required
    1 Prepare the area around the damaged tile Painter’s tape, coverings for nearby surfaces
    2 Remove the surrounding grout Grout saw or grout remover
    3 Break and remove the damaged tile Hammer, chisel, drill
    4 Clean the exposed surface Wider chisel, vacuum, damp cloth

    Replacing a Broken Tile: Installation Process

    The next step in replacing a broken tile is to apply the adhesive and set the new tile in place. This process requires attention to detail to ensure a strong bond between the tile and the floor.

    Applying the Adhesive Correctly

    To begin, you’ll need to apply a liberal amount of pre-mixed thin-set adhesive to the bare floor using the flat edge of a notched trowel. The notches in the trowel help to create evenly spaced ridges in the adhesive, allowing air to escape when the new tile is laid down. For maximum adhesion, it’s also recommended to spread a layer of thin-set on the back of the new tile, a process known as “back-buttering.” This ensures complete coverage and a stronger bond between the tile and the floor.

    A well-lit, high-resolution image of a person applying tile adhesive to a surface, shown in a close-up view. The person is wearing protective gloves and kneeling on the floor, using a notched trowel to spread the adhesive evenly across the surface. The adhesive has a smooth, creamy texture and the person is working with focus and precision. The background is clean and uncluttered, allowing the viewer to concentrate on the tiling process. The image conveys a sense of technical expertise and attention to detail, suitable for illustrating the installation process in a step-by-step guide on replacing a broken tile.

    Setting the New Tile in Place

    While holding the edges of the new tile, position it flat above the notched adhesive and gently drop it into place. Once the tile is set, apply even pressure over its surface and lightly wiggle it to ensure proper adhesive contact. Make sure the tile is level and aligned with the surrounding tiles. You can check the alignment by using a level tool. For more detailed guidance, you can refer to This Old House’s guide on replacing a cracked floor.

    Grouting and Finishing Touches

    After allowing the adhesive to set according to the manufacturer’s recommended time, typically 24 hours, you can proceed with grouting. Using a rubber float, scoop a good amount of pre-mixed grout and work it into the joints at a 45° angle, using a sweeping arc motion. Clean off the excess grout with a damp grout sponge. Let the grout sit for about 15 minutes before final inspection.

    Step Description Tools/Materials Needed
    1 Apply adhesive to the floor Notched trowel, pre-mixed thin-set
    2 Set the new tile in place New tile, level
    3 Apply grout to the joints Rubber float, pre-mixed grout, grout sponge

    Conclusion

    By following this guide, you’ll be able to replace a broken tile efficiently and effectively. DIY tile replacement can be a cost-effective option, especially if you only need to replace a few tiles. Contractors typically charge between £7-£30 per square foot for tile work, plus additional costs for regrouting shower or floor areas.

    To ensure a professional-looking finish, it’s crucial to follow each step in this guide carefully, from preparing the area and removing the damaged tile to installing the new tile and applying grout. Regular maintenance of your tiles is also essential for preventing future damage. This includes cleaning tiles and grout regularly, using mats in high-traffic areas, and placing felt pads under furniture to prevent scratches.

    For wall tiles in wet areas like showers, make sure to periodically check and reseal the grout to prevent water damage to the substrate. The key to successful tile replacement lies in patience and attention to detail. By taking your time with each step, you’ll achieve a more durable and aesthetically pleasing repair. Keeping spare tiles from your original installation can also ensure perfect matches for future replacements.

    In conclusion, replacing a broken tile is a manageable DIY project that can save you significant money compared to hiring professional services. With the right tools and a bit of patience, you can achieve a professional-looking finish that blends seamlessly with your existing tiling.

    FAQ

    What safety equipment should I use when removing a damaged tile?

    You should wear safety goggles, a dust mask, and gloves to protect yourself from debris and dust when removing a damaged tile.

    How do I remove the grout around the damaged tile?

    Use a grout remover and a chisel or a grout removal tool to carefully remove the grout around the damaged tile, taking care not to damage the surrounding tiles.

    What is the best way to break and remove a damaged tile?

    Use a hammer and chisel to carefully break the damaged tile into smaller pieces, then remove the pieces, taking care not to damage the surrounding tiles or the surface beneath.

    How do I clean the exposed surface after removing the damaged tile?

    Use a sponge and water to clean the exposed surface, removing any remaining adhesive or debris, and ensure the surface is dry and free of dust before applying new adhesive.

    What type of adhesive should I use to set the new tile in place?

    Use a suitable tile adhesive, such as a cement-based adhesive, and follow the manufacturer’s instructions for application and drying times.

    How do I ensure the new tile is level and secure?

    Use a spirit level to ensure the new tile is level, and apply even pressure to secure it in place, using a rubber float to remove any excess adhesive.

    How long should I wait before grouting the new tile?

    Wait until the adhesive has set, usually several hours or overnight, before grouting the new tile, following the manufacturer’s instructions for grouting.

  • Patching Small Drywall Holes: A Quick Guide

    Patching Small Drywall Holes: A Quick Guide

    Did you know that nearly 70% of homeowners in the UK face the issue of drywall damage at some point? It’s a common problem that can arise from various factors, including accidental impacts or settling foundations. When you notice holes in your wall, it can be both unsightly and concerning.

    Fortunately, repairing these imperfections is a straightforward DIY project that can save you money on professional repairs. By mastering the right techniques and using the appropriate materials, you can maintain the integrity and appearance of your wall in your home.

    Key Takeaways

    • Understand the common causes of drywall damage and how to prevent them.
    • Learn the essential tools and materials needed for drywall repair.
    • Discover the step-by-step process for patching drywall holes effectively.
    • Gain confidence in achieving professional-looking results with DIY repairs.
    • Recognise the importance of prompt repairs to prevent further deterioration.

    Understanding Different Types of Drywall Damage

    Understanding the nature of drywall damage is essential for effective repairs. Drywall can suffer from various types of damage, ranging from minor cosmetic issues to significant structural problems.

    Nail and Screw Holes

    Nail and screw holes are among the most common types of drywall damage, often resulting from hanging pictures or installing fixtures. These small holes can usually be repaired with a simple spackling compound. It’s a straightforward DIY task that requires minimal tools.

    Doorknob Dents and Small Punctures

    Doorknob dents and small punctures are another frequent issue, typically caused by accidental impacts. These can be fixed using a drywall repair kit or by applying a joint compound to smooth out the area. The key is to feather the edges so that the repair blends with the surrounding wall.

    Larger Holes and Wall Damage

    Larger holes and more extensive wall damage present a greater challenge. These can result from door handles, furniture impacts, or other significant incidents. Assessing the extent of the damage is crucial to determine whether a patch kit, mesh repair, or complete drywall replacement is needed. Structural damage behind the drywall can complicate repairs, and in such cases, professional assistance may be necessary.

    Essential Tools and Materials for Drywall Repair

    Repairing drywall effectively begins with having the right tools and materials at your disposal. To achieve a seamless finish, you’ll need to understand the basics of drywall repair.

    Image of a drywall repair kit

    Learn More

    Basic Tools You’ll Need

    For most drywall repairs, you’ll require a few basic tools. These include a putty knife, a utility knife, and sandpaper. A drywall repair kit can be particularly useful as it usually contains the necessary materials, including joint compound and a patch.

    Materials for Different Sized Repairs

    The size of the hole will determine the materials you’ll need. For small holes, spackle or joint compound can be used directly. Larger holes may require a piece of drywall to be cut and fitted over the damaged area, secured with a patch. Understanding when to use spackle versus joint compound is crucial for a successful repair.

    Preparing the Area Before Patching

    Before you start patching, it’s essential to prepare the damaged area on your drywall. This step is crucial for ensuring a smooth and durable repair.

    Cleaning the Damaged Area

    Start by cleaning the damaged area around the hole or crack in your wall. Use a soft brush or a vacuum cleaner to remove any loose debris or dust. This will help you assess the extent of the damage and ensure a clean surface for the repair.

    Removing Loose Debris and Anchors

    When dealing with holes or cracks caused by screws or nails, it’s vital to remove any loose debris and anchors. Use a screwdriver or pliers to carefully extract the screws or nails. If the screws are broken, you may need to use a drill to remove the remaining parts. Ensure the area is clear of any debris to achieve a solid repair.

    Tools Needed Purpose
    Soft Brush or Vacuum Cleaner Remove loose debris and dust
    Screwdriver or Pliers Extract screws or nails
    Drill Remove broken screw parts

    Patching Small Drywall Holes: The Simple Method

    You can easily repair small drywall holes using a simple method that involves basic materials. This approach is effective for maintaining the integrity and appearance of your drywall surface.

    Filling Nail and Screw Holes

    Filling nail and screw holes is a straightforward process. First, apply a small amount of spackle or joint compound to the hole using a putty knife. Smooth the area, ensuring the compound is evenly spread and not protruding beyond the wall surface. Allow it to dry completely before sanding it down to a smooth finish.

    Repairing Minor Dents and Dings

    For minor dents and dings, assess whether the surface paper is damaged. If not, you can fill the dent with joint compound, applying it with a putty knife. Feather the compound outwards to blend it with the surrounding area, ensuring a seamless repair. It may be necessary to apply multiple thin layers, allowing each to dry before applying the next, to achieve a smooth finish.

    To achieve a professional-looking result, it’s crucial to feather the compound around the repair area so that it blends with the surrounding wall. Proper drying time between applications is also vital for the best results. By following these steps, you can effectively repair minor damage to your drywall, maintaining its integrity and appearance.

    Using Patch Kits for Medium-Sized Holes

    Image of a drywall patch kit

    Learn More

    Medium-sized drywall holes require a more robust repair method, such as using a patch kit. These kits usually include a self-adhesive mesh patch and joint compound.

    Selecting the Right Patch Kit

    When choosing a patch kit, consider the size of the hole and the type of drywall you’re dealing with. Ensure the kit includes a suitable amount of joint compound and a patch that’s large enough to cover the damaged area.

    Applying Self-Adhesive Mesh Patches

    To apply a self-adhesive mesh patch, peel off the backing and press it firmly over the hole, ensuring it’s centred. Smooth out any air bubbles or wrinkles.

    Covering the Patch with Joint Compound

    Apply a thin layer of joint compound over the mesh patch using a putty knife. Feather the edges to blend the repair with the surrounding drywall. Allow the compound to dry before sanding.

    • Identify the proper technique for applying joint compound over mesh patches.
    • Learn how to build up layers of compound for a smooth finish.
    • Understand the importance of feathering edges.
    • Discover how to avoid common mistakes.
    • Recognise when multiple coats are necessary.
    • Learn professional techniques for applying compound with different knives.

    The California Patch Method for Larger Holes

    Larger holes in drywall require a more robust repair method, and the California Patch Method is a tried-and-tested approach. This technique involves creating a custom drywall patch to cover the damaged area, ensuring a strong and durable repair.

    Creating a Custom Drywall Patch

    To start, you’ll need to create a drywall patch that matches the size and shape of the hole. Use a drywall piece slightly larger than the damaged area, and cut it to fit precisely. Proper alignment of the patch is crucial for both structural integrity and appearance.

    A detailed, well-lit drywall patch with a smooth, seamless surface. The patch is set against a neutral, soft-textured wall, blending naturally with the surrounding drywall. The edges are precisely cut and the joint compound is evenly applied, creating a professional-looking repair. Soft, directional lighting casts subtle shadows, highlighting the patch's texture and blending it into the wall. The overall scene conveys a sense of craftsmanship and attention to detail, showcasing the California Patch method for larger drywall holes.

    Installing and Securing the Patch

    Once your patch is ready, apply a layer of joint compound around the edges and press it firmly into place. Use screws to secure the patch, making sure to recess them properly to avoid visible bumps. For added support, consider using furring strips or a support board behind the patch, especially for larger repairs.

    Backing Method Description Best Use
    Furring Strips Narrow strips of wood used to provide additional support Larger holes or weakened areas
    Support Board A larger piece of material (e.g., plywood) for extensive backing Very large holes or damaged sections

    By following these steps and using the right materials, you can achieve a professional-looking repair that will last. Remember to apply a compound to finish and blend the repair with the surrounding wall area, ensuring a seamless finish.

    Working with Joint Compound and Spackle

    Image of a person applying joint compound to a drywall

    Learn More

    To achieve a seamless finish on your drywall, you need to know how to work with joint compound and Spackle effectively. Both are used for drywall repairs, but they have different properties and uses.

    Choosing Between Joint Compound and Spackle

    Joint compound is ideal for larger repairs and finishing joints, while Spackle is better suited for small holes and dents. Your choice depends on the size and nature of the repair.

    Mixing and Applying Techniques

    When applying joint compound or Spackle, use a knife to spread it evenly. Adjust the knife angle and pressure to achieve the desired thickness. Ensure the edges are smooth and blend well with the surrounding wall.

    Feathering Edges for a Seamless Finish

    Feathering the edges of your repair is crucial for a seamless finish. Use a wide knife to spread the compound thinly towards the edges. This technique helps avoid visible transitions.

    • Identify proper feathering techniques that blend repair edges invisibly with existing walls
    • Learn how to adjust knife angle and pressure to create gradually thinning compound edges
    • Understand the importance of wide feathering for larger repairs to avoid visible transitions
    • Discover how different knife sizes contribute to effective feathering at various repair stages
    • Recognise common feathering mistakes that lead to visible repair lines after painting
    • Learn how to assess your feathering work while the compound is still wet and make adjustments

    Sanding Techniques for a Smooth Finish

    To ensure a seamless blend with the surrounding wall, proper sanding techniques are essential. Sanding is a critical step that can make or break the quality of your drywall repair.

    Selecting the Right Sandpaper Grit

    Choosing the correct sandpaper grit is vital for achieving a smooth finish. Start with a medium-grit sandpaper (120-150) to remove excess joint compound, then progress to a finer grit (220-240) for final smoothing.

    Proper Sanding Methods

    When sanding, use a gentle, even motion to avoid creating scratches or depressions. Work in a well-lit area to inspect your progress. Use a sanding block to keep the sandpaper flat and prevent unevenness.

    Common Sanding Mistakes to Avoid

    Be cautious of over-sanding, which can damage the drywall paper or expose the patch. Insufficient sanding can leave bumps or ridges. Regularly clean your sandpaper and work area to prevent dust buildup. As one expert notes, “Sanding is not just about removing excess compound; it’s about creating a surface that’s ready for painting.”

    Priming and Painting Repaired Areas

    Once you’ve completed the drywall repair, the next crucial step is to prime and paint the area to achieve a seamless finish. This process not only enhances the appearance but also protects the repair.

    Why Priming Is Essential

    Priming is a vital step as it creates a uniform base for painting, ensuring that the repair blends in with the surrounding area. A good primer can help hide the repair and create a smooth surface for painting.

    Matching Existing Paint Colours

    To achieve a seamless finish, it’s crucial to match the existing paint colour as closely as possible. Take a sample of the original paint to a hardware store to find a matching colour, or use a colour-matching app.

    Techniques for Blending Repairs

    To blend the repair with the surrounding wall area, use techniques such as feathering the edges of the paintA well-lit interior scene showcasing the process of priming and painting drywall repairs. In the foreground, a person carefully applies a high-quality primer to a freshly patched drywall surface, using a roller and tray. The primer has an even, consistent coverage, creating a smooth, seamless base for the topcoat. In the middle ground, the same person transitions to painting the primed area with a high-quality latex paint, using long, even strokes to ensure uniform coverage. The background features a clean, organized workspace with tools and materials neatly arranged, conveying a sense of professionalism and attention to detail. Soft, warm lighting from overhead fixtures casts a gentle glow, accentuating the texture of the drywall and the sheen of the freshly applied paint. The overall scene exudes a sense of care, precision, and the satisfying process of repairing and revitalizing a drywall surface.

    “Feathering involves applying thin layers of paint, gradually increasing the coverage towards the edges,”

    says a painting expert. You can also use different application tools to achieve the desired texture and appearance, and consider applying multiple thincoats for a more even finish.

    • Apply multiple thin coats of paint for a more even finish.
    • Use the right sheen to make the repair less noticeable.
    • Evaluate the repair under different lighting conditions to ensure it remains invisible.

    Repairing Textured Drywall Surfaces

    Generate an image of a person repairing a textured drywall surface

    Learn More

    Textured drywall surfaces add complexity to the repair process, but with the right techniques, you can achieve a seamless finish. To start, it’s essential to understand the type of texture you’re dealing with.

    Identifying Common Textures

    Common textures include orange peel, knockdown, and popcorn ceilings. Identifying the texture type is crucial for selecting the right repair approach. You can often determine the texture by visual inspection or by gently feeling the surface.

    Recreating Texture Patterns

    Recreating the texture pattern involves using the appropriate tools and techniques. For instance, an orange peel texture can be recreated using a specialized brush or a texture spray product. Practice on a small, inconspicuous area first to ensure a match.

    Using Texture Spray Products

    Texture spray products are ideal for achieving consistent results, especially for complex textures. To use these products effectively, you should:

    • Identify when aerosol texture products are appropriate for drywall repairs
    • Learn proper techniques for applying spray textures to achieve consistent results
    • Understand how to control spray pattern, density, and coverage with these products
    • Discover the importance of practice applications before spraying actual wall repairs
    • Recognise when to apply second coats or layers to build up texture appropriately
    • Learn how to protect surrounding areas from overspray when using texture products

    By mastering these techniques and understanding when to apply second coats, you can ensure a successful repair that blends with the surrounding wall surface, maintaining the original texture.

    Conclusion

    Armed with the right techniques and materials, you’ll find that patching small drywall holes is a breeze. To achieve professional-looking results, remember to prepare the area properly, apply the repair compound carefully, and finish with a smooth sanding.

    By mastering these simple drywall repair skills, you can save money and maintain your home’s appearance. With practice, you’ll become more confident in tackling small repairs, and your walls will benefit from prompt attention to holes and other damage.

    FAQ

    What is the best way to repair a nail hole in the wall?

    To repair a nail hole, you can use a putty knife to fill the hole with joint compound or spackle. Allow it to dry, then sand the area to a smooth finish.

    How do I patch a hole in a plasterboard wall?

    For a larger hole, you’ll need to use a drywall repair kit or create a custom drywall patch. Apply joint compound around the edges of the patch and press it firmly into place. Use a putty knife to smooth out the edges.

    What is the difference between joint compound and spackle?

    Joint compound is used for larger repairs and is applied in multiple coats, while spackle is used for smaller repairs and dries quickly. Both can be sanded to a smooth finish.

    How do I match the texture of my wall after making a repair?

    To match the texture, you can use a texture spray product or recreate the pattern manually with a brush or sponge. Practice on a test area first to achieve the desired effect.

    Do I need to prime the wall before painting over a repair?

    Yes, priming is essential to ensure a uniform paint colour and to cover any remaining imperfections. Use a good-quality primer and allow it to dry according to the manufacturer’s instructions.

    What sanding techniques should I use to achieve a smooth finish?

    Use a sanding block or sandpaper with a fine grit (120-150) to sand the repair area. Work in a circular motion, feathering the edges to blend with the surrounding surface.

    Can I use a utility knife to cut a drywall patch?

    Yes, a utility knife is ideal for cutting a drywall patch to size. Score the drywall carefully and snap it along the scored line to achieve a clean edge.

  • DIY Guide: Repairing a Leaky Kitchen Faucet

    DIY Guide: Repairing a Leaky Kitchen Faucet

    A single drip per second from your kitchen faucet can waste over 3,000 gallons of water per year, resulting in unnecessary costs on your water bill.

    This leaky faucet not only wastes precious water but also indicates a potential issue that could lead to more significant problems if left unaddressed.

    Fortunately, repairing the issue yourself is a feasible task. This guide will walk you through identifying and fixing the leak in your faucet, helping you save on your water bill and avoid costly plumbing services.

    Key Takeaways

    • Identify the source of the leak in your kitchen faucet.
    • Gather the necessary tools and materials for the repair.
    • Follow step-by-step procedures to fix different faucet mechanisms.
    • Complete the repair in under an hour with minimal cost.
    • Learn maintenance tips to prevent future leaks.

    Why You Should Fix That Dripping Faucet

    A leaky faucet, though seemingly minor, can have a substantial environmental impact and affect your wallet. The issue goes beyond the mere annoyance of the constant dripping sound.

    The Environmental Impact of Leaks

    A leaky kitchen faucet can waste over 3,000 gallons of water each year. This not only strains your household’s water resources but also contributes to overall water wastage.

    Cost Savings on Your Water Bill

    Fixing a leaky faucet is a cost-effective home repair. By doing so, you can save on your water bill by preventing the waste of thousands of gallons of water annually.

    Issue Annual Water Waste Impact
    1 drip per second Over 3,000 gallons Increased water bill
    Leaky faucet Over 3,000 gallons Environmental strain

    By addressing the issue promptly, you not only reduce your environmental footprint but also lower your utility bills. It’s a simple yet effective way to make your home more sustainable.

    Tools and Materials You’ll Need

    Image of a toolkit with plumbing tools

    Learn More

    Before you start repairing your leaky kitchen faucet, it’s essential to gather the necessary tools and materials. Having the right equipment at hand will make the process smoother and more efficient.

    Essential Tools for Faucet Repair

    For a successful faucet repair, you’ll need to gather several basic tools, including an adjustable wrench, slip joint pliers, and a 4-in-1 screwdriver that can handle different screw types. Specialized tools like Allen wrenches may also be necessary, depending on your specific faucet model.

    Materials and Replacement Parts

    A faucet repair kit appropriate for your faucet type is essential and typically includes replacement washers, O-rings, and seals that commonly wear out. You’ll also need plumber’s tape (PTFE tape) to create watertight seals when reassembling components.

    Additional items to consider include a small basin or container to organize and prevent losing small parts during disassembly, a flashlight or headlamp to illuminate under the sink, and towels or rags for cleaning up water spills.

    Safety First: Preparing for the Repair

    To avoid any accidents or water damage, turning off the water supply is the first step in repairing your kitchen faucet. This ensures a safe and dry work environment, allowing you to focus on the repair without any unnecessary risks.

    Turning Off the Water Supply

    Locate the water shut-off valves beneath your sink, typically found for both hot and cold water lines. Turn these valves clockwise until they are fully closed to shut off the water supply. After shutting off the supply, open the faucet to release any remaining water pressure and confirm that the water flow has stopped completely.

    Protecting Your Sink and Workspace

    To prevent any damage or mess during the repair, place towels around the sink area to catch any residual water. Additionally, consider placing a stopper or rag in the drain to prevent small parts from falling into the drain. Wearing protective gloves can also shield your hands from sharp edges and any cleaning chemicals that may be present on faucet components.

    A dimly lit kitchen interior, with a skilled hand reaching down to turn off a metal water supply valve under the sink. The valve is highlighted in the foreground, its chrome surface gleaming in the soft, warm lighting. The background is blurred, but suggests the familiar surroundings of a kitchen cabinet. The atmosphere is one of focused attention, as the person prepares to address the repair at hand, prioritizing safety and caution. The image conveys a sense of care and control, capturing the essential step of shutting off the water supply before beginning a faucet repair.

    Ensuring you have adequate lighting under the sink and clearing the area of any cleaning supplies or other items will give you ample workspace for the repair. This preparation is key to a successful and stress-free faucet repair.

    Safety Precautions Description
    Turn off Water Supply Locate and turn the shut-off valves clockwise to stop water flow.
    Protect Workspace Use towels to catch residual water and clear the area under the sink.
    Wear Protective Gear Consider wearing gloves to protect hands from sharp edges and chemicals.

    Identifying Your Faucet Type

    The first step in fixing a dripping faucet is to identify its type, as different faucets require unique repair approaches. You can determine the type by examining the handle and the faucet’s overall design.

    Compression Faucets

    Compression faucets are the oldest type and have two handles that must be turned several times to control water flow. They use rubber washers that compress against a valve seat.

    Ball Faucets

    Ball faucets typically feature a single handle that moves over a ball-shaped cap. Inside, a ball assembly with slots controls water flow and temperature.

    Cartridge Faucets

    Cartridge faucets contain a cartridge insert that controls water flow. They can have one or two handles and are identified by their up-down movement for water volume and side-to-side movement for temperature.

    Ceramic Disk Faucets

    Ceramic disk faucets are the most modern and durable type, featuring a single handle that moves over a cylindrical body containing two ceramic disks that control water flow.

    Identifying your faucet type before purchasing repair parts will save you time and prevent unnecessary trips to the hardware store.

    Diagnosing the Source of Your Leak

    Accurate diagnosis of the leak is essential for effective kitchen faucet repair. To start, you need to identify where the water is coming from. Begin by inspecting the faucet’s visible parts for any signs of leakage.

    A detailed close-up view of a leaky kitchen faucet, showing the internal components and the source of the water leak. The faucet is presented in a neutral, well-lit setting, with a clean, minimalist background, allowing the viewer to focus on the key diagnostic elements. The image showcases the dripping water, the worn washers, and the damaged seals, providing a clear visual reference for the "Diagnosing the Source of Your Leak" section of the DIY guide. The lighting is soft and even, highlighting the intricate details of the faucet mechanism, and the camera angle is angled to provide a clear, accessible view for the reader.

    Look for drips or water stains near the base and spout of your faucet. These are common areas where leaks occur. Checking these areas carefully will help you pinpoint the source of the problem.

    Common Leak Locations

    Leaks can manifest in various parts of your kitchen faucet. Common locations include the spout, the base of the faucet, around the handles, and underneath the sink where the supply lines connect. A leak from the spout when the faucet is turned off often indicates worn internal components such as washers, O-rings, or cartridges that need replacement.

    The Paper Towel Test

    The paper towel test is a simple yet effective method for detecting hidden leaks. Wrap dry paper towels around suspected leak areas and check for wetness after a few minutes. For intermittent leaks, consider leaving the paper towels in place overnight to catch any slow leaks that might not be immediately apparent.

    By accurately diagnosing the source of your faucet leak, you can determine the appropriate repair method and replacement parts needed, ensuring a more efficient and effective fix.

    Repairing a Leaky Kitchen Faucet: Basic Steps

    Repairing a leaky kitchen faucet can be a straightforward DIY task if you follow the right steps. The process involves understanding your faucet type and following a general repair procedure.

    Disassembling the Faucet

    To start, you’ll need to disassemble the faucet to access its internal components. Begin by removing any decorative caps or buttons on the handle, which typically conceal the handle attachment screw. Use the appropriate screwdriver to remove the screw, then gently lift off the handle. Be careful not to force it if it’s stuck.

    Once the handle is removed, you’ll need to access the cartridge, ball assembly, or valve stem depending on your faucet type. Lay out parts in the order they were removed to make reassembly easier.

    Inspecting Internal Components

    Carefully inspect all internal parts for signs of wear, mineral buildup, cracks, or damage that could be causing the leak. Pay particular attention to rubber washers, O-rings, and seals as these are the most common failure points in most faucets.

    Clean all parts thoroughly before reassembly, removing any mineral deposits or corrosion with white vinegar or a suitable cleaner. When purchasing replacement parts, bring the old components with you to ensure an exact match or refer to your faucet‘s model number.

    Step Action Tools Needed
    1 Remove decorative caps and unscrew handles Screwdriver
    2 Remove exposed nut with a wrench Wrench
    3 Inspect and replace worn-out parts Replacement parts

    By following these steps, you should be able to repair your leaky kitchen faucet effectively.

    Fixing Compression Faucet Leaks

    Generate an image of a compression faucet repair kit

    Learn More

    Repairing a compression faucet leak is a DIY-friendly task that requires some basic plumbing knowledge. Compression faucets are the oldest and simplest type of faucet, making them relatively straightforward to repair when they develop leaks.

    Replacing Washers and O-rings

    The most common cause of leaks in compression faucets is worn rubber washers that no longer create a watertight seal when compressed against the valve seat. To fix the leaky faucet, you’ll need to remove the handle by unscrewing the decorative cap and removing the handle screw. Inspect the rubber washer at the bottom of the stem and replace it if it shows signs of wear. Check the O-rings around the stem as well, as these can also deteriorate and cause leaks around the handle area.

    Reassembling the Compression Faucet

    Apply plumber’s grease to new washers and O-rings before install new components to ensure smooth operation. When reassembling, ensure all parts are properly aligned and avoid overtightening, which can damage new components. Reassemble the handle and stem assembly, and your compression faucet should be leak-free.

    Repairing Ball-Type Faucet Leaks

    Image of a ball faucet repair kit

    Learn More

    Leaky ball faucets can be a nuisance, but with the right tools and a bit of know-how, you can fix them yourself. Ball-type faucets are common in kitchens and feature a complex internal mechanism with a ball assembly that controls both water flow and temperature.

    To start the repair, you’ll need to disassemble the faucet. Begin by removing the decorative cover and unscrewing the handle. Then, remove the cap, cam, and seal with pliers. This will give you access to the internal components.

    Replacing the Ball Assembly

    The ball assembly may need replacement if it shows signs of corrosion, pitting, or damage to the water ports. To replace it, carefully remove the old assembly and install new parts from a ball faucet repair kit.

    Installing New Seals and Springs

    Beneath the ball, you’ll find small rubber seats and springs that control water flow. Remove these with needle-nose pliers and replace them with new components from the repair kit. Ensure the new parts are properly seated and the ball faucet operates smoothly.

    By following these steps and using a ball faucet repair kit, you should be able to fix the leak and get your faucet working properly again.

    Fixing Cartridge Faucet Leaks

    Fixing a leaky cartridge faucet is a relatively straightforward process that can save you money on your water bill. Most cartridge faucets are one-handled, adjusting water pressure by pulling the handle up and down, while temperature is adjusted from left to right.

    Image of a cartridge faucet handle being removed

    Learn More

    Removing and Replacing the Cartridge

    To disassemble the faucet, first unscrew the handle. If you see a clip holding the cartridge in place, remove it with pliers. Then, take out the faucet spout and the O-rings underneath.

    Dealing with Stuck Cartridges

    Cartridges can become stuck due to mineral buildup or corrosion. Applying penetrating oil and gently wiggling the cartridge can help loosen it. For stubborn cases, consider using a special cartridge puller.

    By following these steps, you should be able to fix leaky issues with your cartridge faucet. Remember to clean the faucet body before installing a new cartridge, ensuring it’s properly aligned and secured.

    Repairing Ceramic Disk Faucet Leaks

    Image of a ceramic disk faucet being repaired

    Learn More

    If you’re dealing with a leaky ceramic disk faucet, understanding its internal mechanism is crucial for repair. Ceramic disk faucets are known for their modern design and durability, featuring two ceramic disks that control water flow by sliding against each other.

    Cleaning and Replacing Seals

    The ceramic disks themselves rarely need replacement; however, the neoprene seals around them can deteriorate, causing leaks. To address this, begin by removing the handle and unscrewing the disk cylinder housing to expose the seals. If the seals are damaged, they should be replaced. Soaking them in white vinegar can help remove mineral deposits if they’re salvageable.

    When replacing seals, ensure they are properly seated in their grooves. Applying a thin layer of silicone grease can enhance their sealing capability. For detailed instructions on disassembling your faucet, you can refer to guides on faucet disassembly.

    Proper Reassembly Techniques

    During reassembly, it’s critical to align the disk cylinder correctly and tighten it according to the manufacturer’s specifications. Overtightening can lead to cracked ceramic components, so caution is advised. After completing the repairs, turn on the water supply slowly to avoid water hammer that could damage the ceramic disks.

    It’s also worth noting that ceramic disk faucets typically come with longer warranties. Before starting your repair, check if your faucet is still under warranty. By following these steps and taking the necessary precautions, you should be able to fix the leaky faucet effectively.

    Fixing Pull-Down Sprayer Issues

    Image of a kitchen faucet with a pull-down sprayer

    Learn More

    Kitchen faucets with pull-down sprayers offer enhanced versatility, but users often face challenges with their operation, particularly with retraction and spray functions.

    Addressing Retraction Problems

    One common issue with pull-down sprayers is their failure to retract properly. This can be due to a tangled or blocked hose under the sink. To resolve this, check under your sink for any obstructions and clear the way. Sometimes, adjusting the counterweight on the hose can also help.

    Resolving Spray Function Issues

    Problems with the spray function can often be traced back to mineral buildup in the spray head or diverter mechanism. To fix this, remove the spray head and soak it in white vinegar for several hours. Regular cleaning can prevent such issues and ensure a smooth flow.

    For persistent problems, inspecting the hose connections for worn O-rings or loose fittings is advisable. Some pull-down sprayers have flow restrictors that can become clogged; cleaning these can improve water flow.

    Preventing Future Faucet Leaks

    By performing a few simple tasks, you can significantly reduce the likelihood of faucet leaks. Regular maintenance is essential to extend the lifespan of your kitchen faucet and prevent issues that could lead to costly repairs.

    Regular Maintenance Tips

    Inspect your faucets every three to six months for early signs of wear, corrosion, or minor leaks. Regularly clean your faucet with a gentle cleaner and soft cloth to avoid mineral and grime buildup. It’s also important to clean the aerator periodically to prevent clogging and ensure steady water flow. Avoid using harsh chemical cleaners as they can damage the finish and components of the faucet.

    • Regularly inspect your faucets for signs of wear and tear.
    • Clean the aerator to prevent clogging.
    • Avoid harsh chemicals that can damage faucet finishes.

    Managing Water Pressure

    High water pressure can strain your plumbing system, leading to leaks and other issues. Ideally, your pressure should be between 40 and 60 psi. If your water pressure is consistently high, consider installing a pressure regulator to protect your plumbing system.

    When to Call a Professional Plumber

    Image of a professional plumber fixing a leaky faucet

    Contact Us

    Knowing when to call a professional plumber can save you from further water damage. While many faucet repairs are suitable for DIY, certain situations call for professional expertise to prevent further damage or complications.

    Signs the Repair Is Beyond DIY

    If your repair attempts haven’t resolved the leak, or if the leak worsens after your efforts, it’s time to consider calling a plumber. Extensive corrosion or damage to the faucet body or water supply lines typically requires professional attention.

    Finding a Qualified Plumber

    When selecting a plumber, look for proper licensing, insurance, and positive reviews from previous customers. Ask potential plumbers about their experience with your specific faucet brand and type before hiring them. A qualified plumber can often spot potential issues that might not be immediately apparent, preventing future problems.

    Professional repairs may cost more upfront than DIY solutions, but they often provide longer-lasting results and may come with service guarantees. If you’re facing a leaky faucet or any other plumbing issue, don’t hesitate to seek professional help to avoid extensive water damage.

    Conclusion

    By completing this DIY guide, you’ve taken a significant step towards saving water and reducing your utility bills. You’ve learned how to diagnose and repair common issues with your kitchen faucet, a skill that can be applied to other faucets in your home, including those in the bathroom.

    Regular maintenance and gentle use of your faucets will extend their lifespan. Keep basic plumbing tools handy for quick repairs. If difficulties arise, consult manufacturer instructions or seek professional help to avoid further damage.

    FAQ

    What are the most common causes of a leaky kitchen faucet?

    The most common causes include worn-out O-rings, damaged valve seats, loose or corroded parts, and mineral buildup due to hard water. Identifying the root cause is crucial for effective repair.

    How do I turn off the water supply to my kitchen faucet?

    To turn off the water supply, locate the shut-off valves under the sink and turn them clockwise. You may need to use an adjustable wrench to tighten the valves securely.

    What type of faucet do I have, and how does it affect the repair?

    Common faucet types include compression, ball, cartridge, and ceramic disk faucets. Each type requires different repair approaches, so identifying your faucet type is essential for a successful fix.

    Can I use a universal replacement cartridge for my faucet?

    While universal cartridges are available, it’s recommended to use a replacement cartridge specifically designed for your faucet model to ensure compatibility and optimal performance.

    How can I prevent mineral buildup in my faucet?

    Regularly cleaning your faucet with a mixture of vinegar and water can help remove mineral deposits. Additionally, installing a water filter can reduce mineral buildup over time.

    What are the signs that indicate I need to call a professional plumber?

    If you’re unsure about the repair, encounter complex issues, or notice signs of water damage, it’s best to consult a qualified plumber to avoid further complications.

    How often should I inspect and maintain my kitchen faucet?

    Regular inspections every 6-12 months can help identify potential issues before they become major problems. Simple maintenance tasks, such as cleaning the aerator, can also prolong the lifespan of your faucet.

  • Quiet Your Squeaky Door Hinge in 3 Simple Steps

    Quiet Your Squeaky Door Hinge in 3 Simple Steps

    A squeaky door hinge can be more than just a minor irritation; it’s a sound that can grate on your nerves every time someone enters or leaves a room in your home.

    Fortunately, silencing that annoying creak doesn’t require professional help. In fact, with just a few simple steps, you can fix the problem for good. Understanding why your door squeaks in the first place is key to preventing the issue from recurring.

    By the end of this article, you’ll know how to transform your squeaky doors into silently operating fixtures, enhancing the comfort of your house.

    Key Takeaways

    • Identify the causes of squeaky door hinges
    • Learn simple steps to fix squeaky door hinges
    • Discover effective lubricants for long-term results
    • Understand how to prevent the problem from recurring
    • Transform squeaky doors into silently operating fixtures

    Why Do Doors Squeak? Understanding the Annoying Noise

    A squeaky door hinge can be more than just a minor annoyance; it’s often a sign of wear and tear. Understanding the reasons behind this irritating sound is crucial to fixing the problem.

    Common Causes of Squeaky Door Hinges

    Squeaky door hinges are typically caused by a lack of lubrication, allowing metal parts to rub against each other. Other factors include dirt and grime accumulation, rust, and misalignment of the door or hinges.

    • Dirt and grime can cause the hinge pins to stick, leading to squeaks.
    • Rust on the hinges can also contribute to the annoying noise.
    • Misaligned doors can put extra stress on the hinges, causing them to squeak.

    How Friction Creates That Irritating Sound

    The science behind the squeak involves friction between moving parts. When metal surfaces with high friction coefficients slide against each other, they create vibrations that travel through the hinge and door, amplifying the sound.

    Cause Effect
    Friction between metal parts Squeaking noise
    Dirt and grime accumulation Increased friction, leading to squeaks
    Rust on hinges Additional friction and noise

    By understanding the causes of squeaky door hinges, you can take the first step towards fixing the issue. Whether it’s lubricating the hinges or addressing the underlying causes, you can enjoy a squeak-free home.

    What You’ll Need: Tools and Materials

    The key to fixing a squeaky door hinge lies in having the right tools and materials at your disposal. To effectively silence that annoying squeak, you’ll need to prepare a few basic supplies and choose the right lubricant for the job.

    Basic Cleaning Supplies

    Before applying any lubricant, you’ll need to clean the door hinges. Basic cleaning supplies include a cloth or brush to remove dust and grime, and possibly a screwdriver to remove the hinge pins.

    Lubrication Options

    When it comes to lubricating door hinges, you have several options. Some of the most effective lubricants include:

    • Silicone spray: widely considered the best lubricant for door hinges due to its long-lasting results and lack of attraction to dust or dirt.
    • Household oils like olive oil, which can serve as temporary lubricants in a pinch.
    • Petroleum jelly (Vaseline): offers excellent lubrication properties and stays in place well, though it can be messy to apply.
    • Lithium grease: provides heavy-duty lubrication, ideal for frequently used doors.
    • Specialized hinge lubricants available at hardware stores, formulated for metal-on-metal friction and often including rust inhibitors.

    Step 1: Prepare and Clean the Door Hinges

    To effectively quiet a squeaky door, start by giving the hinges a good clean. This initial step is crucial for ensuring that your lubrication efforts are effective and long-lasting.

    Removing Dust and Grime

    Dust and grime accumulation on door hinges is a common cause of squeaks. You should start by wiping down the hinges with a damp cloth to remove any surface dirt. For more thorough cleaning, use a small brush to sweep away debris from the hinge pin and surrounding areas.

    Dealing with Rust and Old Paint

    Rust on door hinges not only contributes to squeaking but can eventually cause structural damage if left untreated. For light surface rust, use fine steel wool or a metal brush to gently scrub affected areas until the clean metal is visible. More severe rust may require a specialized rust remover solution. Apply the solution according to the product instructions and allow adequate time for it to work before wiping clean.

    Old paint that has seeped into the hinge mechanism can be particularly troublesome as it creates uneven surfaces that increase friction. Carefully scrape away paint from moving parts using a small flathead screwdriver or utility knife, taking care not to damage the metal underneath.

    Issue Solution
    Dust and Grime Wipe with a damp cloth and brush away debris
    Light Surface Rust Use fine steel wool or a metal brush
    Severe Rust Apply a specialized rust remover solution
    Old Paint Scrape away with a small flathead screwdriver or utility knife

    This cleaning job may seem tedious, but it’s essential for restoring smooth operation and ensuring your lubrication efforts will be effective and long-lasting. By thoroughly cleaning your door hinges, you’re setting the stage for a successful squeak-elimination process.

    Step 2: Apply the Right Lubricant to Fix a Squeaky Door Hinge

    After cleaning, the next crucial step is to lubricate your door hinges effectively. The right lubricant can make all the difference in eliminating that annoying squeak and ensuring your door operates smoothly.

    Household Lubricants You Already Have

    You might be surprised to find that you already have several lubricant options in your home. These can be particularly handy for a quick fix or when you’re waiting to get a more specialized product.

    Olive Oil and Cooking Sprays

    Olive oil is a readily available lubricant that can be used on squeaky door hinges. Simply apply a small amount to the hinge pins. Cooking sprays can also be effective, as they often contain lubricating properties.

    Petroleum Jelly (Vaseline)

    Petroleum jelly, commonly known as Vaseline, is another household item that can be used to lubricate door hinges. It not only reduces friction but also helps protect the metal from rust.

    Bar Soap and Other Surprising Options

    Believe it or not, bar soap can be used to lubricate squeaky hinges. Rub the soap onto the hinge pins, and you’ll notice a reduction in the squeaking noise. Other surprising options include lip balm and certain types of wax.

    Specialized Lubricants for Longer-Lasting Results

    While household items can provide a temporary solution, specialized lubricants are designed to offer longer-lasting results. These products are typically more effective at reducing friction and protecting against wear and tear.

    Silicone Spray: The Top Choice

    Silicone spray is often considered the top choice for lubricating door hinges. It provides a durable barrier against friction and is resistant to dust and dirt, making it an excellent long-term solution. As Tom Silva, a renowned carpenter, once said,

    “Silicone spray is one of the best lubricants you can use on door hinges; it’s long-lasting and doesn’t attract dirt.”

    A bottle of clear, viscous lubricant sits on a wooden surface, its label prominently displaying the words "Door Hinge Lubricant". The bottle is illuminated by warm, natural lighting, casting a soft glow on the surrounding area. The background is blurred, creating a focus on the bottle and its contents. The image conveys a sense of practicality and functionality, capturing the essence of the product's intended use for maintaining and quieting squeaky door hinges.

    WD-40 is a popular product that is often used to silence squeaky door hinges. However, it’s primarily designed as a water displacer and cleaner rather than a long-term lubricant. While it can provide temporary relief, it tends to evaporate quickly and attract dust, potentially creating new friction issues. For a more permanent fix, consider using a dedicated lubricant like silicone spray.

    Step 3: Work the Lubricant and Test the Door

    After applying the lubricant, you need to test the door to ensure the hinge is properly lubricated. This step is crucial in confirming that the squeak is eliminated and the door operates smoothly.

    Opening and Closing Technique

    To effectively work the lubricant into the hinge, open and close the door several times. This action helps distribute the lubricant evenly across the hinge pin and barrel. As you do this, you may notice the squeak diminishing or disappearing altogether.

    When to Reapply Lubricant

    Even the best lubricants will eventually wear out or dissipate over time, requiring reapplication to maintain squeak-free operation. The frequency of reapplication depends on the type of lubricant used and environmental factors. For instance, household lubricants like cooking oils may need refreshing every 2-3 months, while specialized products can last 6-12 months or longer.

    Lubricant Type Reapplication Frequency
    Household Lubricants (e.g., cooking oils) Every 2-3 months
    Specialized Lubricants Every 6-12 months or longer

    It’s also important to consider environmental factors such as humidity and temperature fluctuations, which can affect how quickly the lubricant breaks down. Doors in bathrooms or exterior locations may require more frequent attention. Establishing a regular maintenance schedule for high-traffic doors can prevent squeaks from developing in the first place.

    Beyond the Hinges: Other Causes of Squeaky Doors

    The source of a squeaky door isn’t always the hinge; sometimes, it’s other parts of the door that need attention. When you’ve lubricated the hinges but the squeak persists, it’s time to investigate further.

    Misaligned or Warped Doors

    A door that is not properly aligned with its frame can cause the hinges to work under stress, leading to squeaks. A warped door can also put uneven pressure on the hinges and other hardware, resulting in unwanted noise.

    Loose Screws and Hardware Issues

    Loose screws in the hinge plates can allow unwanted movement, creating squeaks. You should check all visible screws on both the door and frame sides of each hinge, tightening any that show signs of loosening. Moreover, door handles, locks, and latches can also develop squeaks as their internal mechanisms wear or become dirty.

    Cause Solution
    Misaligned or Warped Doors Check door alignment, adjust or replace if necessary
    Loose Screws Tighten screws, use wood toothpicks and glue for a tighter fit
    Dirty or Worn Hardware Clean or replace door handles, locks, and latches

    By addressing these potential causes, you can enjoy a squeak-free door. Applying the right lubricant to these additional hardware components can resolve squeaking issues that persist after hinge treatment.

    A dimly lit workshop interior, with a worn wooden workbench in the foreground, various tools and hardware scattered across its surface. In the middle ground, a partially disassembled door frame stands, revealing the complex mechanisms of the hinges and latch. The background is hazy, with shelves of spare parts and supplies lining the walls, casting long shadows from a single overhead light fixture. The overall atmosphere is one of investigation and problem-solving, with a focus on uncovering the underlying causes of a persistent squeaky door.

    Conclusion: Enjoying Your Squeak-Free Home

    With the squeak gone, you can now enjoy a more serene living environment, thanks to your DIY prowess. You’ve mastered how to fix squeaky door hinges in three simple steps. Regular maintenance will prevent the problem from recurring and extend the life of your door hardware. Different doors may require different solutions based on their location and usage. Consider creating a maintenance schedule to address door hinges preventatively. By doing so, you’ll not only enjoy a squeak-free home but also gain confidence in tackling other minor home repairs.

    FAQ

    What is the best lubricant for squeaky door hinges?

    You can use petroleum jelly, olive oil, or specialised lubricants like silicone spray or WD-40 to silence squeaky door hinges. These lubricants reduce friction between moving parts, eliminating the squeak.

    Why do my door hinges squeak after lubrication?

    If your door hinges squeak after lubrication, it may be due to using the wrong type of lubricant or not applying enough lubricant. Additionally, if the hinges are rusty or dirty, the lubricant may not be able to penetrate effectively.

    Can I use cooking oil to lubricate my door hinges?

    While cooking oil can provide temporary relief, it is not the best option for lubricating door hinges. Cooking oil can attract dust and dirt, causing the hinges to become dirty and squeaky again. Instead, opt for a lubricant specifically designed for door hinges.

    How often should I lubricate my door hinges?

    You should lubricate your door hinges every 6-12 months, depending on usage and environmental conditions. Regular lubrication will help prevent squeaks and keep your doors operating smoothly.

    Are squeaky door hinges a sign of a bigger problem?

    Squeaky door hinges can be a sign of a bigger issue, such as misaligned or warped doors, loose screws, or worn-out hardware. If you’ve lubricated your door hinges and the squeak persists, it may be worth investigating these potential underlying causes.

    Can I prevent my door hinges from squeaking in the first place?

    Yes, you can prevent door hinges from squeaking by regularly cleaning and lubricating them. Additionally, ensuring that your doors are properly aligned and that the hardware is secure can help prevent squeaks from developing.

  • Carbon Monoxide Detector: Safety & Security Tips for UK Homes

    Carbon Monoxide Detector: Safety & Security Tips for UK Homes

    Every year, hundreds of people in the UK are hospitalised due to carbon monoxide poisoning, a silent killer that can strike without warning.

    This colourless, odourless gas is produced when fossil fuels are burned inefficiently, often due to poorly maintained appliances or inadequate ventilation.

    Having a reliable alarm in your home is crucial for safety. In this comprehensive guide, we’ll explore the dangers of monoxide poisoning and the importance of installing a suitable carbon monoxide alarm to protect your family.

    Key Takeaways

    • Understand the risks associated with carbon monoxide poisoning.
    • Learn about the latest technology in monoxide alarm systems.
    • Discover the best practices for installing and maintaining a carbon monoxide detector.
    • Find out about the current UK regulations regarding carbon monoxide safety in homes.
    • Make an informed decision when selecting a carbon monoxide alarm for your home.

    Understanding the Silent Killer: Carbon Monoxide Dangers

    Carbon monoxide is a colourless, odourless gas that poses significant health risks. You need to understand how it affects your body and the warning signs to look out for.

    What is Carbon Monoxide and How is it Produced?

    Carbon monoxide is produced through incomplete combustion of fuels like gas, oil, and wood. It can emanate from faulty boilers, blocked chimneys, or poorly maintained generators. When inhaled, it interferes with the oxygen-carrying capacity of your red blood cells, leading to tissue hypoxia.

    Symptoms of Carbon Monoxide Poisoning

    The initial symptoms of carbon monoxide poisoning are often mistaken for flu, including headaches, dizziness, and nausea. As exposure continues, more severe symptoms develop, such as confusion, unconsciousness, and potentially death. Certain groups, like children and the elderly, are at higher risk due to their vulnerability.

    Why Every UK Home Needs a Carbon Monoxide Detector

    Carbon monoxide detectors are a crucial addition to any UK home, providing a vital layer of protection against this silent killer. You can’t taste, see, or smell carbon monoxide, making it a particularly insidious threat.

    The Limitations of Human Senses

    Human senses are unable to detect carbon monoxide, which makes it imperative to have a detector. This colourless, odourless gas can be present in your home without you even realising it.

    UK Statistics on Carbon Monoxide Incidents

    UK statistics reveal the alarming reality of carbon monoxide incidents. According to recent data, there are numerous cases of carbon monoxide poisoning reported annually, resulting in significant health impacts and, tragically, fatalities. The most common sources of carbon monoxide leaks in UK homes include faulty boilers and poorly maintained appliances.

    A sleek, modern carbon monoxide detector placed prominently on a pristine white wall. The device features a minimalist, rectangular design with a glossy black surface and silver trim, emitting a soft, ambient glow. Subtle shadows cast by the device create depth and dimension. The background is a crisp, clean white, allowing the detector to stand out boldly. Overhead lighting casts a warm, gentle illumination, creating a sense of security and reassurance. The overall composition conveys the importance of this safety device in a stylish, visually appealing manner.

    How Carbon Monoxide Detectors Work

    A carbon monoxide detector’s primary function is to identify potentially lethal concentrations of CO in your home and trigger an appropriate response. These devices are equipped with sensors that detect CO levels, and their effectiveness is crucial for preventing carbon monoxide poisoning.

    Sensor Technologies Explained

    CO detectors typically employ one of several sensor technologies, each with its own characteristics and lifespan. Advances in sensor technology have led to the development of 10-year alarms that are becoming increasingly common. The lifespan of a CO detector can range from 5 to 10 years, depending on the sensor type and manufacturer design.

    Sensor Technology Lifespan Characteristics
    Biomimetic Sensor 5-7 years Mimics the way haemoglobin reacts to CO
    Metal Oxide Semiconductor 5-10 years Highly sensitive, but may be prone to false alarms
    Electrochemical Sensor 5-10 years High accuracy, low power consumption

    Alarm Response Mechanisms

    When a carbon monoxide detector identifies dangerous CO levels, it triggers an alarm to alert occupants. The nature of the alarm can vary depending on the device and the level of CO detected. Some detectors feature pre-alarm warnings for low-level detections, while others sound a full emergency alarm for dangerous concentrations. Smart carbon monoxide alarms can also send notifications to your mobile phone when you’re away from home.

    Interconnected alarm systems ensure that when one carbon monoxide alarm triggers, all alarms in the property sound simultaneously, enhancing safety.

    Key Features to Look for in Carbon Monoxide Detectors

    To protect your home and family from carbon monoxide poisoning, it’s crucial to understand the essential features of CO detectors. When choosing a carbon monoxide detector, several factors can impact its effectiveness and reliability.

    British Standards and Certification (BS50291)

    Ensure that your CO detector meets British Standards by looking for BS50291 certification. This standard guarantees that the device has been tested and proven to detect carbon monoxide accurately. Compliance with this standard is crucial for your safety.

    Power Supply Options

    Carbon monoxide detectors come with various power supply options, including battery-powered, mains-powered, or a combination of both. Consider a detector with a battery backup in case of power outages to ensure continuous protection.

    Sensor Lifespan and Warranty

    CO detectors typically have a lifespan ranging from 5 to 10 years. Advances in sensor technology have made 10-year alarms more common. Manufacturers often provide warranties that match the sensor’s lifespan, typically ranging from 5 to 10 years. Understanding the sensor lifespan and warranty can help you make an informed decision.

    Feature Description Importance
    BS50291 Certification Ensures compliance with British Standards for CO detection High
    Power Supply Battery-powered, mains-powered, or combination Medium
    Sensor Lifespan Ranging from 5 to 10 years High
    Warranty Matching the sensor’s lifespan Medium

    As CO detectors have a limited lifespan, it’s essential to check the end-of-life warning features that alert you when it’s time to replace the device. Maintaining documentation of purchase dates and warranty information is also crucial for ensuring your detector remains effective throughout its lifespan.

    A sleek, modern carbon monoxide detector hovering against a pristine white backdrop, its LED indicators and digital display clearly visible. The device is illuminated by soft, diffused lighting, casting subtle shadows that accentuate its clean, minimalist design. The detector's sensors and vents are prominently featured, showcasing the key technical components that allow it to accurately monitor air quality. The overall composition emphasizes the detector's key safety features, conveying a sense of reliability and reassurance for the viewer.

    By considering these key features, you can select a reliable carbon monoxide detector that provides optimal protection for your home and family.

    Top Carbon Monoxide Detectors for UK Homes

    With numerous options available, choosing the best carbon monoxide detector for your UK home can be overwhelming. To help you make an informed decision, we’ve reviewed some of the top-rated carbon monoxide detectors available in the UK market.

    FireAngel Pro Connected Smart Carbon Monoxide Alarm

    The FireAngel Pro Connected Smart Carbon Monoxide Alarm offers advanced features such as smart connectivity and real-time alerts. Displays CO levels and peak readings, ensuring you’re always informed about the safety of your home.

    Generate an image of the FireAngel Pro Connected Smart Carbon Monoxide Alarm device

    Buy Now

    Kidde K5CO 10-Year Life Carbon Monoxide Alarm

    The Kidde K5CO is a reliable and long-lasting carbon monoxide alarm with a 10-year battery life. It’s designed to provide continuous protection without the need for frequent battery replacements.

    Generate an image of the Kidde K5CO 10-Year Life Carbon Monoxide Alarm

    Buy Now

    Aico Ei208 Standalone Carbon Monoxide Alarm

    The Aico Ei208 is a standalone carbon monoxide alarm that offers reliable detection and alarm functionality. It’s a straightforward and effective solution for home safety.

    Generate an image of the Aico Ei208 Standalone Carbon Monoxide Alarm

    Buy Now

    FireAngel FA3820-EUX10 Wireless Carbon Monoxide Alarm

    The FireAngel FA3820-EUX10 Wireless Carbon Monoxide Alarm features a 10-year sealed battery and wireless connectivity, making it a convenient and low-maintenance option. It also displays CO levels from 10ppm and has a peak level memory function.

    Generate an image of the FireAngel FA3820-EUX10 Wireless Carbon Monoxide Alarm

    Buy Now

    These top-rated carbon monoxide detectors are designed to provide you with peace of mind and protection for your family. When choosing a detector, consider factors such as sensor lifespan, power supply options, and certification to British Standards.

    Installation Guidelines for Carbon Monoxide Detectors

    To effectively protect your home from carbon monoxide poisoning, it’s essential to follow the correct installation guidelines for your carbon monoxide detectors. Proper placement and installation height are critical for the detectors to function correctly.

    Optimal Placement in Your Home

    When deciding where to install your detectors, consider the layout of your home. It’s recommended to install them on every level of your home and near sleeping areas. For wall-mounted installations, the optimal height is typically at eye level. You should refer to the manufacturer’s guide for specific instructions, such as the Nest Protect User Guide for detailed installation instructions.

    Installation Height and Distance Requirements

    According to British Standards, the installation height for wall-mounted carbon monoxide detectors should be between 1-3 meters from the floor. It’s also crucial to maintain a certain distance from potential sources of carbon monoxide, such as boilers or chimneys. Here are some key considerations:

    • Install detectors at least 1 meter away from potential carbon monoxide sources.
    • Ensure detectors are not near corners or obstructions that could affect their performance.
    • For rooms with high ceilings or unusual airflow patterns, consider the specific guidance provided by the manufacturer.

    Maintenance and Testing of Your Carbon Monoxide Detector

    To keep your carbon monoxide detector functioning properly, regular maintenance is essential. This involves testing the device and ensuring its power source is reliable.

    Regular Testing Procedures

    You should test your carbon monoxide detector regularly to ensure it’s working correctly. Most detectors have a test button that you press to verify the alarm sounds. It’s recommended to test your detector at least once a week. If your detector is interconnected with other safety devices, testing one device should trigger all connected alarms.

    Battery Replacement Guidelines

    For detectors that use replaceable batteries, it’s crucial to identify when they need replacing. Many detectors emit a distinct signal, such as a beep, to indicate low battery. The type of battery and its life vary by detector model. Always replace batteries with the type recommended by the manufacturer. Some detectors come with sealed 10-year batteries, eliminating the need for frequent replacements. If your detector continues to signal low battery after replacement, it may be nearing the end of its life.

    UK Regulations and Legal Requirements

    As a homeowner or landlord in the UK, it’s essential to be aware of the legal requirements for carbon monoxide safety. The regulations surrounding carbon monoxide detectors are crucial for ensuring the safety of occupants in rental properties.

    2022 Welsh and Scottish Legislation

    In 2022, Wales and Scotland introduced new legislation regarding carbon monoxide alarms in homes. These regulations mandate the installation of carbon monoxide detectors in rooms with solid fuel appliances. Landlords are required to ensure these detectors are functioning correctly at the start of each tenancy.

    Landlord Responsibilities

    Landlords across the UK have specific responsibilities regarding carbon monoxide safety. They must install carbon monoxide alarms where necessary and maintain them throughout the tenancy. Failure to comply can result in significant penalties. Landlords should also keep records of carbon monoxide detector maintenance and testing to demonstrate compliance.

    Conclusion: Protecting Your Family from Carbon Monoxide

    Protecting your family from the dangers of carbon monoxide requires a reliable detection system. Throughout this article, we’ve highlighted the critical importance of carbon monoxide detectors in UK homes. To recap, a quality carbon monoxide alarm is a vital investment for your family’s safety. For a comprehensive guide on smoke alarms and carbon monoxide detectors, you can visit this resource. Ensuring you have the right detector, placing it correctly, and maintaining it regularly are crucial steps. By taking these measures, you’re not only safeguarding your home but also the people you care about.

    FAQ

    What is the average lifespan of a CO alarm?

    Typically, a CO alarm lasts for around 5-7 years, depending on the manufacturer and model. It’s essential to check the device’s certification and manufacturer’s guidelines for specific information.

    How often should I test my CO alarm?

    You should test your CO alarm at least once a week to ensure it’s functioning correctly. Refer to your device’s user manual for specific testing procedures.

    Can I install a CO alarm myself?

    Yes, you can install a CO alarm yourself, but it’s recommended to follow the manufacturer’s installation guidelines and consider consulting a professional if you’re unsure.

    Are there any specific UK regulations regarding CO alarms?

    Yes, there are regulations in place, particularly in Wales and Scotland, which require CO alarms to be installed in certain dwellings. Familiarise yourself with the 2022 Welsh and Scottish legislation.

    What are the benefits of interlinked CO alarms?

    Interlinked CO alarms provide enhanced safety by ensuring that when one alarm detects CO, all connected alarms sound, alerting you to potential danger throughout your home.

    How do I know if my CO alarm is functioning correctly?

    Check your CO alarm regularly for any error messages or warning signs. Ensure it’s within its lifespan and has a valid certification, such as BS50291.

    Can I use a CO alarm with a smoke alarm?

    Yes, many CO alarms can be used in conjunction with smoke alarms. Some devices even combine both functions. Check the manufacturer’s guidelines for compatibility.