Are you tired of working on DIY projects in a cluttered and disorganised space? Do you dream of having a dedicated workshop where you can let your creativity shine? A well-designed workbench is the cornerstone of any productive workshop.
Having a proper bench can transform your project capabilities and make your DIY endeavours more efficient. Whether you’re a seasoned DIY enthusiast or just starting out, a sturdy workbench is essential for completing tasks with precision and ease.
In this article, you’ll discover how to create a functional and affordable workbench that suits your specific needs and space constraints. You’ll learn about different types of workbenches, budget-friendly approaches to building one, and the materials and tools needed to construct a sturdy bench that will last for years.
Key Takeaways
- Discover how to create a functional and affordable workbench.
- Learn why a proper workbench is essential for any serious DIY enthusiast.
- Understand the different types of workbenches available.
- Explore budget-friendly approaches to building a workbench.
- Get an overview of the materials, tools, and techniques needed.
Why Every DIYer Needs a Proper Workbench
The foundation of a well-organised workshop starts with a sturdy workbench that meets your specific needs. A proper workbench serves as the literal foundation of your workshop, providing a stable platform for all your DIY projects.
The Foundation of Your Workshop
A dedicated workbench improves safety by keeping tools organised and providing proper working heights. It also enhances the ergonomic benefits by being tailored to your height and specific woodworking needs.
Benefits of a Custom-Built Workbench
A well-designed workbench with appropriate work-holding capabilities can dramatically improve your precision and efficiency. By having a proper bench, you can extend the life of your tools by providing appropriate surfaces for cutting, drilling, and assembly.
| Benefits | Description |
|---|---|
| Improved Safety | Keeping tools organised and providing proper working heights |
| Increased Efficiency | Enhancing precision with appropriate work-holding capabilities |
| Extended Tool Life | Providing appropriate surfaces for cutting, drilling, and assembly |
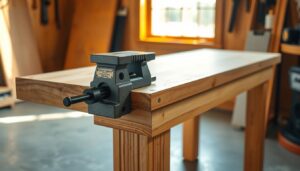
A quality bench vise may cost as much as the workbench itself, but it will really complete your bench, and you’ll be amazed at how much use you get out of it.
Planning Your Budget-Friendly Workbench

A well-planned workbench is crucial for any DIY enthusiast, and it starts with understanding your needs and budget. To create an effective workbench, you must consider several factors.
Determining Your Workshop Needs
Assessing your specific workshop needs is the first step in building a budget-friendly workbench. Consider the types of DIY projects you undertake most frequently and the space available in your workshop.
Setting a Realistic Budget
Setting a realistic budget for your workbench project involves researching material costs and identifying areas where you can save money. This will help you stay within your budget.
Choosing the Right Dimensions
The ideal dimensions for your workbench depend on your height and the nature of your typical projects. Consider the trade-offs between size, stability, and cost when planning your bench.
- Learn how to assess your specific workshop needs before beginning your workbench project, considering the types of DIY work you’ll be doing most frequently.
- Understand the importance of measuring your available space accurately to ensure your bench fits comfortably in your workshop.
- Discover how to set a realistic budget for your workbench project by researching material costs and identifying where you can save money.
- Explore the ideal dimensions for different types of workbenches based on your height and the nature of your typical projects.
- Learn about the trade-offs between size, stability, and cost when planning your bench.
- Understand how to plan for future expansion or modifications to your workbench as your skills and needs evolve over time.
- Discover how to create a detailed materials list and cutting plan to minimise waste and keep your project on budget.
- Learn how to choose between different construction methods based on your available tools, skills, and budget constraints.
Essential Tools for Building Your Workbench

The right tools are crucial for building a workbench that meets your needs and withstands regular use. To get started, you’ll need a combination of power tools, hand tools, and safety equipment.
Must-Have Power Tools
Power tools make the construction process easier and more efficient. Essential power tools include a circular saw for making straight cuts, a cordless drill for drilling holes, and a miter saw for precise angled cuts. If you have access to a table saw, it can be useful for making precise rip cuts.
Hand Tools You’ll Need
In addition to power tools, you’ll need various hand tools, such as a straightedge and tape measure, to ensure accurate measurements and markings. Other essential hand tools include clamps and a square.
Safety Equipment
Safety should be a top priority when working with power tools. Make sure you have safety glasses and hearing protection to protect yourself from debris and loud noises. Wearing appropriate work gloves can also help prevent injuries.
Budget-Friendly Materials Selection
When building a workbench on a budget, choosing the right materials can make all the difference. The materials you select will impact the durability, functionality, and overall cost of your project.
Best Woods for Workbenches on a Budget
For a budget-friendly workbench, consider using common construction lumber such as pine, spruce, or fir. These woods offer good strength at reasonable prices. For the legs, you can use 6×6 timber in lengths sufficient to create four 32″ legs. For the top and stretchers, 2×10 timber in 8-foot lengths can be used.

| Material | Use | Benefits |
|---|---|---|
| Pine, Spruce, or Fir | Legs, Top, and Stretchers | Cost-effective, good strength |
| Reclaimed Wood | Top or Shelves | Unique appearance, eco-friendly |
| Plywood | Shelves or Storage | Affordable, versatile |
Hardware and Fasteners
In addition to the wood, you’ll need screws, bolts, and other fasteners to assemble your workbench. Choose fasteners that provide the right balance of strength and value.
Where to Source Affordable Materials
You can find affordable materials at local builder’s merchants, online marketplaces, and salvage yards. Consider repurposing or reclaimed wood to save money and add character to your workbench.
Simple Workbench Design for Beginners
You don’t need to be an experienced woodworker to build a functional workbench. With a simple design and basic materials, you can create a sturdy bench that will serve as a solid foundation for your DIY projects.
The Basic £50 Workbench
This workbench design is perfect for beginners or those on a tight budget. The materials required are easily available at any builder’s merchant, and the total cost is around £50.
Materials List
The materials needed for this project include:
- 2x4s for the legs and frame
- 4 x 8 x 1/2-in. plywood for the top
- 1-5/8-in. and 3-in. drywall screws
| Material | Quantity | Cost |
|---|---|---|
| 2x4s | 4 pieces | £10 |
| 4 x 8 x 1/2-in. plywood | 1 sheet | £20 |
| 1-5/8-in. drywall screws | 1 pack | £5 |
| 3-in. drywall screws | 1 pack | £10 |
| Total | £45 |
Assembly Overview
Assembling the workbench involves constructing the legs and frame using the 2x4s, and then attaching the plywood top using screws. The process is straightforward and can be completed in a single weekend, even with limited DIY experience.
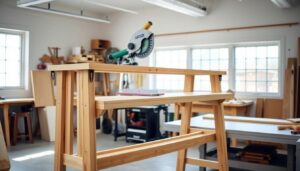
Building the Workbench Base
The foundation of a reliable workbench lies in its base, which you can build using affordable materials like pine or spruce timber. For the legs, you’ll need one or several 6×6 timber lengths long enough to make four 32″ legs.
Cutting the Legs to Size
To ensure your workbench is level, accurately measure and cut the legs to the same length. Use a dowelling jig with expandable dowel pins for precise joinery.
Creating Sturdy Stretchers
Stretchers connect the legs and provide essential stability. Position them effectively to maximise rigidity and prevent wobbling.
Joinery Methods for Stability
Use dowel joinery for strong joints without needing advanced woodworking skills. Apply lots of glue and use clamps to ensure tight-fitting joints.

By focusing on these elements, you’ll create a sturdy workbench base that supports your DIY projects.
Crafting the Perfect Workbench Top
A well-made workbench top is essential for any serious woodworker or DIY enthusiast. It provides a stable surface for your projects, ensuring accuracy and precision in your work.
Gluing Up the Slab
To create a solid workbench top, start by ripping 2x10s down to 4½ inches wide on your table saw. Then, flip all the lengths on their edges and glue them together in sections. This method allows you to create a wide top from narrower boards.
After gluing the sections together, use a thickness planer to flatten out one side of each section. Now, glue these sections together, aligning them carefully to achieve a flat top.
Flattening Techniques
Once the slab is glued up, it needs to be flattened. One effective method is to use a router on a router sled. The sled is a flat bridge that traverses the span between two runners without losing its shape due to the weight of the router. It has a channel down the centre so that the bit can pass through and trim the very top off the slab, ensuring it’s perfectly flat.
Attaching the Top to the Base
After flattening the top, it’s time to attach it to the workbench base. This step requires careful consideration to allow for wood movement while maintaining stability. Using screws or bolts that are not too tight can help achieve this balance.
| Method | Description | Advantages |
|---|---|---|
| Gluing Up Sections | Rip boards to width, glue edge-to-edge in sections | Creates a wide top from narrower boards, allows for stable surface creation |
| Router Sled Flattening | Use a router on a sled to flatten the top | Ensures a perfectly flat surface, especially useful without a large planer |
| Screwed Attachment | Attach the top to the base using screws | Allows for some wood movement, maintains stability |
Adding Essential Workbench Features

To create a truly effective workbench, you need to add certain essential features. These features will enhance the functionality and usability of your workbench, making your woodworking tasks more efficient.
Installing a Bench Vise
Installing a bench vise is a critical step in creating a functional workbench. You need to select the right type of vise for your needs, whether it’s a front vise, end vise, or quick-release model. Proper positioning of the vise is crucial to maximise its effectiveness for holding different types of workpieces.
Creating Dog Holes
Creating a system of dog holes in your workbench top is another essential feature. These holes work in conjunction with your vise to provide versatile work-holding options. You can use a router and jig to create precise dog holes that align with your vise.
Adding End Caps
Adding protective end caps to your workbench is vital to prevent damage and splitting at the vulnerable end grain. To do this, cut a length of hardwood to size, glue and screw it into the end grain. Once the glue is dry, remove a couple of screws, drill out the holes, and insert hardwood dowel in place.
Workbench Finishing Touches
The final touches on your workbench can make all the difference in its functionality and aesthetic appeal. As you’ve nearly completed the construction, it’s time to focus on the details that will enhance its performance and durability.
Sanding Techniques
To achieve a smooth workbench surface, it’s essential to follow a proper sanding progression. Start with a coarse grit sandpaper and gradually move to finer grits, ensuring that the surface is comfortable to work on without being unnecessarily refined. For instance, you can begin with 80-grit sandpaper, followed by 120-grit, and finish with 220-grit for a silky smooth finish.
Applying Protective Finishes
Applying a protective finish is crucial for maintaining your workbench top. You can choose from various options such as oils, varnishes, and wax. For example, Minwax Antique Oil Finish can give your workbench a light orange tinge with dark contrasting sections, as seen when applying two generous coats. It’s vital to test the finish on some offcuts before applying it to the entire surface.
Personalising Your Workbench
Personalising your workbench can be achieved through decorative elements like inlays or carved details. Using a router with a template, you can cut precise inlays to hide any mistakes or add aesthetic value. For example, cutting a roughly 160mm by 10mm inlay over the centre of each joint and then gluing some hardwood into those areas can enhance the overall look.
By following these steps, you can create a workbench that not only meets your functional needs but also reflects your personal style. A well-finished workbench will provide a durable working surface that will last for years to come.
Enhancing Your Workbench with Accessories

The right accessories can transform your workbench into a highly efficient workspace. By incorporating the right tools and features, you can significantly enhance your woodworking experience.
Lighting Solutions
Good lighting is crucial for any workbench. Consider installing under-shelf LED strips or adjustable task lighting to illuminate your workspace. This will not only improve visibility but also reduce eye strain.
Power Strip Installation
Mounting a power strip to one of the legs of your workbench can provide you with easy access to power for your portable tools. This can help improve workflow efficiency and reduce clutter caused by extension cords.
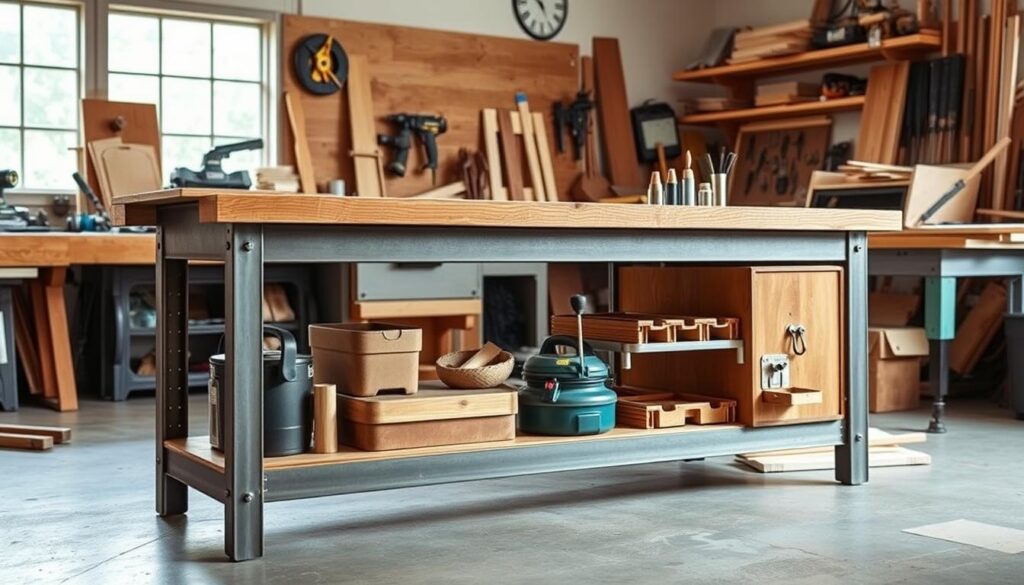
Storage Options
Explore various storage solutions that can be added to your workbench, such as simple shelves or more elaborate drawer systems. You can also consider adding a pegboard or tool wall above your workbench to maximise vertical storage space.
By incorporating these accessories, you can create a more functional and efficient workspace that meets your specific woodworking needs.
Common Mistakes to Avoid When Building a Workbench
When building a workbench, it’s easy to make mistakes that can lead to a less-than-ideal working experience. A well-planned workbench is essential for any serious DIYer, and avoiding common pitfalls is crucial.
Planning Errors
One of the most significant mistakes DIYers make is underestimating the weight and size requirements for a stable workbench. Building a workbench that’s too small or too light can lead to a wobbly and unreliable working surface.
Construction Pitfalls
Using too much downward force when cutting through the centre of the slab with a router sled can cause the sled to flex or the bit to bind. Ensuring the sled is strong enough and properly braced is vital to prevent flexing and achieve a flat surface.
Finishing Missteps
Finishing mistakes can make your workbench surface too slippery or not durable enough for workshop use. Applying the right finish and ensuring it’s properly cured can help prevent these issues and create a long-lasting workbench top.
By being aware of these common mistakes, you can take steps to avoid them and build a workbench that meets your needs and provides years of reliable service. Using the right tools and method will ensure your workbench is sturdy and functional.
Conclusion
A sturdy workbench is the cornerstone of any productive workshop. By building a budget-friendly workbench tailored to your needs, you can significantly enhance your DIY capabilities and project outcomes. Start with a basic design and incrementally add features like a vise as your skills evolve. A well-built workbench is a long-term investment that will serve you for decades. It’s not just about the functionality; the satisfaction of working on a bench you’ve built yourself adds to the enjoyment of future DIY projects. Share your workbench builds and experiences with the community to inspire others.