Author: admin

  • Top Screwdrivers: Buyer’s Guides Tips for UK Homes

    Top Screwdrivers: Buyer’s Guides Tips for UK Homes

    A screwdriver is an indispensable tool in every homeowner’s arsenal, playing a vital role in various DIY projects, electrical work, and plumbing tasks.

    With numerous options available, selecting the best screwdriver for your needs can be a daunting task. The right screwdriver can significantly impact your efficiency and results, making it essential to understand what makes a quality tool.

    Whether you’re a DIY enthusiast or a professional tradesperson, having the right screwdriver in your toolkit is crucial for completing projects successfully in your home.

    Key Takeaways

    • Understanding the different types of screwdrivers and their specific uses is vital.
    • Choosing a quality screwdriver can significantly impact your work efficiency.
    • The right screwdriver can make a difference in completing home projects successfully.
    • Consider the specific needs of your project when selecting a screwdriver.
    • A good screwdriver is an investment for any homeowner or tradesperson.

    Understanding the Importance of Quality Screwdrivers

    Quality screwdrivers are a cornerstone of effective home maintenance. Whether you’re hanging a picture or repairing furniture, the right screwdriver can make all the difference in the outcome of your task.

    Investing in a quality screwdriver pays dividends in several ways. Not only do they offer improved performance, but they also provide greater comfort during use and a significantly longer lifespan compared to their cheaper counterparts.

    The Role of Screwdrivers in Home Maintenance

    Screwdrivers are among the most frequently used tools in any homeowner’s arsenal. They are essential for a wide range of tasks, from simple repairs to complex projects. A quality screwdriver ensures that these tasks are completed efficiently and effectively.

    Task Importance of Quality Screwdriver
    Simple Repairs Prevents damage to screws and surrounding material
    Complex Projects Ensures precision and reliability

    Why Investing in Quality Tools Matters

    Premium screwdrivers feature hardened steel tips that maintain their shape even after extensive use. This prevents slippage, which can lead to damaged screws and potentially injured hands. Moreover, quality tools typically offer ergonomic handles that reduce hand fatigue during extended use.

    “A good tool is like a good friend; it makes the job easier and gets the job done right.”

    – Anonymous

    The initial higher cost of professional-grade screwdrivers is offset by their durability, often lasting decades rather than requiring frequent replacement. This makes them a valuable investment for any home. Superior screwdrivers also provide better torque transfer, making difficult tasks easier and reducing the likelihood of damaging valuable home fixtures or furniture.

    Types of Screwdrivers Every UK Homeowner Should Know

    For UK homeowners, knowing the different types of screwdrivers can make a significant difference in home maintenance. Having the right tool for the job not only makes tasks easier but also ensures that projects are completed efficiently and safely.

    Standard Screwdrivers: Slotted and Phillips

    Standard screwdrivers are the most commonly used tools in any homeowner’s toolkit. The two primary types are slotted (flathead) and Phillips. Slotted screwdrivers are used for screws with a single slot, while Phillips screwdrivers are designed for screws with a cross-shaped slot, providing better torque and reducing the likelihood of slippage.

    A collection of various screwdrivers in different sizes, shapes, and head types, neatly arranged on a clean, neutral-colored surface. The screwdrivers are well-lit, casting subtle shadows, showcasing their intricate designs and textures. The scene has a professional, informative tone, suitable for illustrating a comprehensive guide on the types of screwdrivers every UK homeowner should have in their toolkit. The image captures the diversity and functionality of these essential tools, inviting the viewer to explore and understand their practical applications.

    Precision Screwdrivers for Detailed Work

    Precision screwdrivers are essential for detailed work, such as electronics repair or working with small appliances. These screwdrivers typically have finer tips and are designed to handle smaller screws, reducing the risk of damage to delicate components.

    Speciality Screwdrivers: Torx, Hex and Square Drive

    Speciality screwdrivers, including Torx, Hex (or Allen), and Square Drive, are designed for specific tasks. Torx screwdrivers are used in electronics and appliances, offering superior grip and torque transfer. Hex screwdrivers are essential for assembling flat-pack furniture and bicycles. Square Drive screwdrivers prevent slippage and cam-out, making them ideal for power tool use.

    Screwdriver Type Common Use Key Feature
    Torx Electronics, Appliances Six-pointed star-shaped head
    Hex (Allen) Flat-pack furniture, Bicycles Hexagonal head
    Square Drive (Robertson) Power tool use, Heavy-duty projects Square-shaped recess

    Having a set of these speciality screwdrivers can greatly enhance your ability to tackle various projects around the home. Many of these are available as individual screwdrivers or as bits for multi-bit systems, offering flexibility for different project needs.

    Key Features to Consider When Buying Screwdrivers

    A well-chosen screwdriver can be a valuable addition to your toolkit, provided you know what features to look for. When you’re in the market for a new screwdriver, several factors can enhance your experience and productivity.

    Handle Design and Ergonomics

    The handle design and ergonomics of a screwdriver play a crucial role in comfort and control. A well-designed handle provides a secure grip, reducing the likelihood of slippage during use. Look for handles with ergonomic contours that fit comfortably in your hand, allowing for precise control and reduced fatigue during prolonged tasks.

    Blade Quality and Durability

    The quality of the blade or shaft is paramount for the longevity and effectiveness of the screwdriver. High-quality materials and manufacturing processes ensure that the screwdriver tip remains durable and resistant to wear. A robust shaft can withstand the rigors of frequent use, maintaining its integrity over time.

    Magnetised Tips and Other Useful Features

    Some screwdrivers come with magnetised tips, which are invaluable for retrieving dropped screws and holding fasteners in place when working in awkward positions. Other useful features include built-in storage compartments in the handle for spare bits, transparent handles for easy identification, impact-resistant end caps, and colour-coded handles for quick identification of different types and sizes.

    • Magnetised tips help in managing small parts.
    • Some handles feature storage for spare bits.
    • Transparent handles aid in quick identification.
    • Impact-resistant end caps protect the handle.
    • Colour-coded handles save time during complex projects.

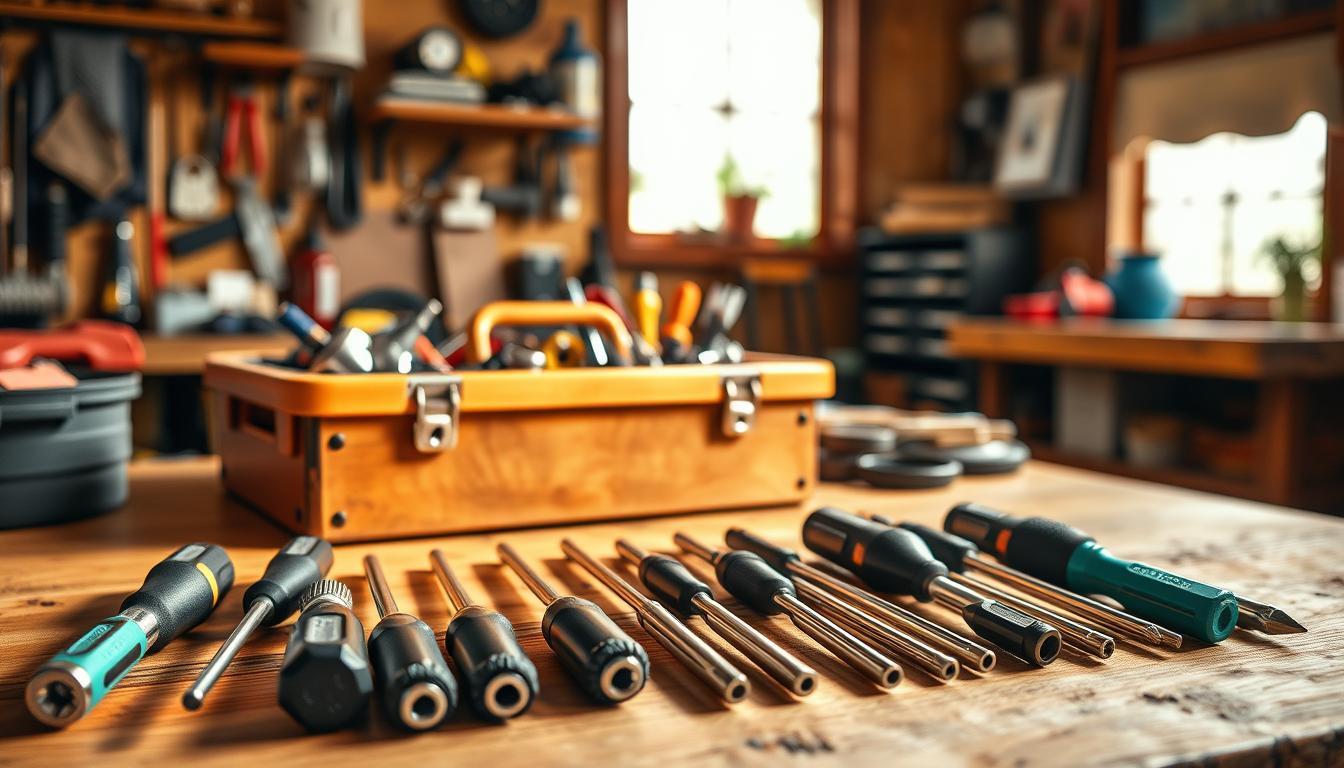
    Top Screwdrivers for General Home Use

    When it comes to home maintenance, having the right screwdrivers is crucial. A good screwdriver set can help you tackle various tasks around the house, from hanging pictures to repairing furniture.

    Wurth Zebra Screwdrivers Set

    The Wurth Zebra Screwdrivers Set is a high-quality option for homeowners. This set offers excellent durability and versatility, making it suitable for a wide range of tasks. With its ergonomic design, you can work comfortably for extended periods.

    Generate an image of the Wurth Zebra Screwdrivers Set on a wooden workbench.

    Buy Now

    Craftsman 12-piece Screwdriver Set

    The Craftsman 12-piece Screwdriver Set is another excellent choice for general home use. This set includes a variety of drivers, such as slotted, Phillips, and Torx, ensuring you’re prepared for most tasks. The set’s organisation case keeps your tools tidy and within reach.

    Generate an image of the Craftsman 12-piece Screwdriver Set in its organisation case.

    Buy Now

    Gearwrench 20-pc Screwdriver Set

    The Gearwrench 20-pc Screwdriver Set is a comprehensive solution for homeowners. This set features dual-material handles that provide a comfortable grip and allow for smooth operation. It includes standard, precision, and specialty drivers, making it an excellent value.

    Generate an image of the Gearwrench 20-pc Screwdriver Set being used to repair a piece of equipment.

    Buy Now

    Best Insulated Screwdrivers for Electrical Work

    For UK homeowners who frequently work with electrical systems, insulated screwdrivers are a must-have. These specialised tools are designed to protect you from electrical shocks, ensuring your safety while working on electrical equipment.

    Klein Tools 6pc 1000V Insulated Screwdriver Set

    The Klein Tools 6pc 1000V Insulated Screwdriver Set is a reliable choice for electrical work. This set includes a range of insulated drivers, providing you with the right tool for the job. The tether-ready design and colour-coded visual identifying labels on the handle make it easy to use and store the screwdrivers safely.

    Generate an image of the Klein Tools 6pc 1000V Insulated Screwdriver Set, highlighting its features such as the colour-coded labels and tether hole.

    Buy Now

    Safety Features to Look for in Insulated Screwdrivers

    When selecting insulated screwdrivers, there are several key safety features to look for. Genuine insulated screwdrivers must comply with international safety standards, such as IEC60900, which requires testing to withstand 10,000 volts. Look for dual-layer insulation with a contrasting inner layer, flame-retardant handles, and insulation that extends to the tip of the handle. Additionally, VDE certification provides assurance that the screwdrivers meet rigorous European safety standards for electrical work.

    Precision Screwdriver Sets for Electronics and Small Repairs

    For electronics enthusiasts and professionals, precision screwdriver sets are indispensable tools. These sets provide the necessary precision and control for delicate operations on small electronics and precision mechanisms.

    Klein Tools 32717 Precision Electronics Screwdriver Set

    The Klein Tools 32717 Precision Electronics Screwdriver Set is a high-quality tool designed for professionals and serious hobbyists. This set includes a range of precision bits and a durable handle, making it ideal for electronics work.

    Generate an image of the Klein Tools 32717 Precision Electronics Screwdriver Set.

    Buy Now

    Wiha Precision Screwdriver Sets

    Wiha precision screwdriver sets embody German engineering excellence, manufactured to strict ISO standards. Founded in 1939, Wiha is renowned for its innovative hand tools, particularly among electronics technicians and watchmakers.

    • Wiha precision screwdriver sets feature optimally sized and shaped handles for excellent control and torque.
    • Each bit is made from high-quality chrome vanadium molybdenum steel, hardened throughout for durability.
    • While slightly more expensive, Wiha sets offer superior performance and durability, favoured by UK professionals and serious hobbyists.

    Generate an image of a Wiha precision screwdriver set.

    Buy Now

    Multi-Bit and Ratcheting Screwdrivers for Versatility

    Multi-bit and ratcheting screwdrivers are game-changers for anyone looking to expand their toolkit. These versatile tools offer a range of benefits, from increased efficiency to improved precision.

    Wiha 77791 26-in-1 Ultra Driver

    The Wiha 77791 26-in-1 Ultra Driver is a powerhouse of versatility, offering 26 different bits in one convenient tool. This multi-bit screwdriver is perfect for UK homeowners who need a reliable tool for various tasks.

    Generate an image of the Wiha 77791 26-in-1 Ultra Driver with its various bits and ergonomic handle.

    Buy Now

    Gearwrench 33pc Ratcheting T-Handle Hex Key Set

    The Gearwrench 33pc Ratcheting T-Handle Hex Key Set combines the leverage of a T-handle design with the efficiency of a ratcheting mechanism, making it ideal for tasks such as furniture assembly or bicycle maintenance. Constructed from powder-coated alloy steel, these hex keys resist twisting under significant torque.

    • Key Features: Ratcheting mechanism for reduced effort, dual-material handles for excellent grip, and chamfered edges for smooth bit insertion.
    • The Gearwrench 33pc set allows for bits to be placed in either the long or short end of the handle, providing flexibility for different applications.

    Generate an image of the Gearwrench 33pc Ratcheting T-Handle Hex Key Set in use, highlighting its ratcheting mechanism and ergonomic handle.

    Buy Now

    Top Screwdriver Brands in the UK Market

    The best screwdriver brands in the UK market are known for their exceptional quality, catering to both professionals and DIY enthusiasts. These brands have established a reputation for producing high-quality screwdrivers that meet the diverse needs of their customers.

    German Engineering: Wera and Wiha

    German engineering is renowned for its precision and durability, and screwdriver brands like Wera and Wiha are no exception. Wera, in particular, is known for its innovative designs and high-quality materials, making its screwdrivers a favourite among professionals. Wiha also offers a range of screwdrivers that are praised for their ergonomic design and precision tips.

    • Wera’s Kraftform screwdrivers are designed for comfort and efficiency.
    • Wiha’s precision screwdrivers are ideal for delicate work.

    American Reliability: Klein Tools and Craftsman

    American brands like Klein Tools and Craftsman have built a reputation for reliability and quality. Klein Tools is particularly known for its insulated screwdrivers, which are a must-have for electricians. Craftsman, on the other hand, offers a wide range of screwdrivers that are appreciated for their durability and affordability.

    A brightly lit display of top screwdriver brands prominently featured in the UK market. In the foreground, a diverse array of screwdrivers from leading manufacturers like Stanley, Makita, Bosch, and DeWalt, each showcasing their distinct design and functionality. The middle ground highlights the ergonomic handles, precision tips, and durable construction of these tools. In the background, a clean, minimalist setting with a crisp white backdrop, allowing the screwdrivers to take center stage. The overall composition conveys a sense of quality, professionalism, and the wide range of options available to discerning UK consumers.

    Japanese Precision: Vessel and ANEX

    Japanese brands Vessel and ANEX are celebrated for their precision and attention to detail. Vessel screwdrivers are known for their unique handle designs that optimise grip and torque transfer. ANEX specialises in precision-engineered screwdrivers that are popular among electronics technicians and watchmakers.

    • Vessel’s “Impacta” series offers impact-resistant tips.
    • ANEX screwdrivers are designed for exact fit and finish.

    These top screwdriver brands in the UK market offer a range of quality tools that cater to different needs and preferences, ensuring that customers can find the best screwdriver for their specific tasks.

    Budget-Friendly Screwdriver Sets That Don’t Compromise Quality

    You don’t have to break the bank to get a quality screwdriver set. Many affordable options are available that offer excellent performance without the hefty price tag. When looking for budget-friendly screwdriver sets, it’s essential to consider the quality of the tools, the variety included in the set, and the overall value for money.

    Amartisan 10-Piece Magnetic Screwdrivers Set

    The Amartisan 10-Piece Magnetic Screwdrivers Set is a great option for those looking for a reliable and affordable screwdriver set. This set includes a variety of magnetic screwdrivers that are perfect for most household tasks. The magnetic tips help prevent screws from falling, making it easier to work on projects.

    Generate an image of the Amartisan 10-Piece Magnetic Screwdrivers Set on a wooden workbench.

    Buy Now

    WORKPRO 10-Piece Precision Screwdriver Set

    The WORKPRO 10-Piece Precision Screwdriver Set offers exceptional value at around £12, providing UK homeowners with a comprehensive selection of precision tools. This set includes various Phillips, slotted, and Torx sizes, making it suitable for electronics repair, eyeglasses, and other small mechanisms. Each screwdriver features a rotating cap for one-handed operation and precise control.

    Generate an image of the WORKPRO 10-Piece Precision Screwdriver Set next to a smartphone.

    Buy Now

    Both of these sets demonstrate that you can achieve high-quality results without overspending. When shopping for a screwdriver set, consider the types of projects you’ll be working on and choose a set that meets your needs. Whether you’re a DIY enthusiast or a professional, having the right tools can make all the difference in the quality of your work.

    Screwdriver Storage and Organisation Solutions

    Effective screwdriver storage is crucial for maintaining a clutter-free workspace. You need a system that keeps your tools organised and within easy reach.

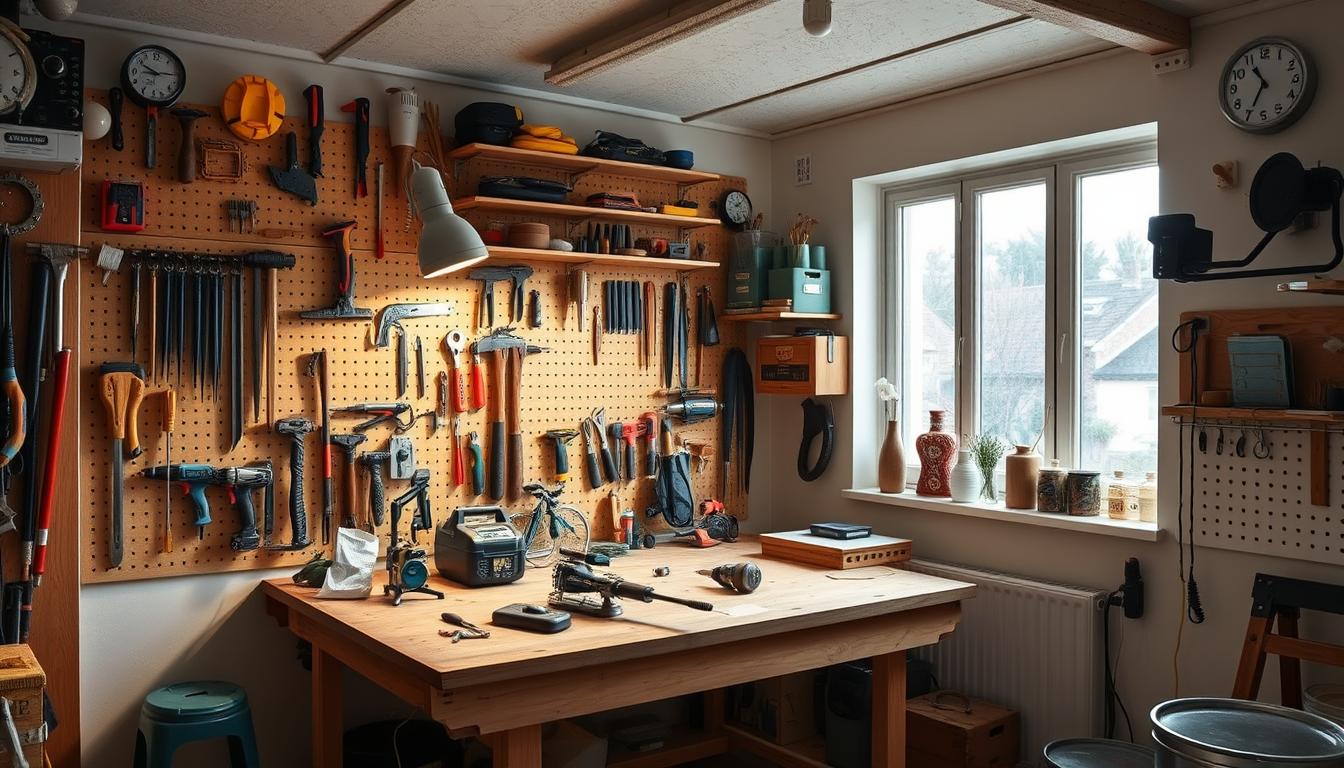
    Wall-Mounted Options for Workshop Organisation

    Wall-mounted storage solutions are ideal for workshop organisation. They help maximise space and keep frequently used screwdrivers accessible. Consider installing a pegboard or a slatwall with hooks and bins to store your screwdrivers. This will help keep your workbench clear and make it easier to find the tool you need.

    • Use hooks to hang screwdrivers, keeping them visible and easily accessible.
    • Install bins or baskets to store small parts and accessories.

    Portable Storage for On-the-Go Repairs

    For on-the-go repairs, portable storage solutions are essential. You need a compact and organised way to carry your screwdrivers. Consider using a roll-up pouch or a hard-shell case to store your screwdrivers. These options provide excellent protection and keep your tools organised.

    • Roll-up pouches offer space efficiency and protection, with individual pockets to keep screwdrivers separated.
    • Hard-shell cases provide superior protection for precision screwdrivers and delicate bits.

    By implementing these storage and organisation solutions, you can ensure that your screwdrivers are always within easy reach, saving you time and enhancing your productivity.

    Conclusion: Choosing the Right Screwdrivers for Your UK Home

    Finding the ideal screwdriver for your UK home requires balancing your needs, usage, and budget constraints. For occasional DIY enthusiasts, a quality mid-range set like the Craftsman 12-piece offers excellent value while providing sufficient durability for most household tasks.

    Professional tradespeople or serious hobbyists should consider investing in premium brands like Wera or Wiha, where the superior performance and longevity justify the higher initial cost. If storage space is limited, consider starting with a versatile multi-bit screwdriver like the Wiha 26-in-1 Ultra Driver, then gradually adding specialised tools as specific needs arise.

    Remember that even the best screwdriver is only effective when properly maintained. Keep tips clean, handles free of grease, and store tools appropriately to ensure they remain ready for use whenever needed. By choosing the right screwdriver for your home and maintaining it well, you’ll be well-equipped to tackle various DIY tasks with confidence.

    FAQ

    What type of screwdriver is best suited for general home use?

    For general home use, a versatile screwdriver set that includes a variety of bits such as slotted, Phillips, and Torx is ideal. Brands like Wurth and Craftsman offer comprehensive sets that cater to different needs.

    What are the benefits of using insulated screwdrivers for electrical work?

    Insulated screwdrivers provide protection against electrical shock, making them essential for electrical work. Look for screwdrivers with 1000V insulation, such as those offered by Klein Tools, to ensure safety while working with electrical systems.

    How do I choose the right precision screwdriver for electronics and small repairs?

    For electronics and small repairs, precision screwdrivers with fine tips and a range of bits are necessary. Consider sets from brands like Wiha and Klein Tools, which offer high-quality precision screwdrivers designed for delicate work.

    What features should I look for in a multi-bit screwdriver?

    When selecting a multi-bit screwdriver, consider the variety of bits included, the quality of the handle, and the ratcheting mechanism. Wiha’s 26-in-1 Ultra Driver is a great example of a versatile multi-bit screwdriver.

    How can I store my screwdrivers effectively?

    Effective storage solutions include wall-mounted options for workshop organisation and portable storage cases for on-the-go repairs. Consider investing in a storage system that keeps your screwdrivers organised and within easy reach.

    Are budget-friendly screwdriver sets a good value?

    Yes, budget-friendly screwdriver sets from brands like Amartisan and WORKPRO can offer good quality at an affordable price. However, be sure to check the materials and construction to ensure they meet your needs.

    What are the advantages of ratcheting screwdrivers?

    Ratcheting screwdrivers provide increased versatility and ease of use, allowing for efficient driving of screws in tight spaces. Gearwrench’s ratcheting T-handle hex key set is a great example of a high-quality ratcheting screwdriver.

  • Microwave Not Working: Appliance Fixes Tips for UK Homes

    Microwave Not Working: Appliance Fixes Tips for UK Homes

    A faulty microwave can be a significant inconvenience in any UK home. With over 75% of households relying on these appliances daily, a malfunction can disrupt meal routines and cause frustration. If your microwave has stopped working, you’re likely wondering whether you can fix it yourself or need to call a professional.

    This comprehensive guide is designed to help you diagnose and potentially fix common issues with your microwave appliance. From simple power problems to more complex internal component failures, we’ll walk you through the steps to identify and possibly repair your microwave, ensuring your safety throughout the process.

    Key Takeaways

    • Diagnose common microwave issues using our step-by-step guide.
    • Understand when to attempt a DIY fix and when to call a professional.
    • Learn safety precautions to avoid electrocution risks when handling microwave repairs.
    • Discover how to troubleshoot your microwave effectively.
    • Make an informed decision about repairing or replacing your appliance.

    Common Microwave Problems in UK Households

    A malfunctioning microwave can disrupt your daily schedule and leave you wondering what went wrong. Your microwave is an essential appliance, used daily for reheating and cooking. When it stops working, it can cause inconvenience.

    Understanding the Importance of Your Microwave

    Your microwave plays a vital role in your kitchen, providing a quick and efficient way to heat food. Recognising its importance can help you identify potential issues before they become major problems. Regular maintenance and prompt repairs can extend its lifespan.

    Signs Your Microwave Needs Attention

    Several signs indicate your microwave needs attention. These include unusual noises, sparking inside the cavity, inconsistent heating, and the door not closing properly. Other signs are burning smells, visible damage to the power cord, and longer microwave heating times. Addressing these issues promptly can prevent further damage and ensure your safety.

    Issue Description Possible Cause
    Unusual Noises Buzzing, grinding, or clicking sounds Mechanical problems
    Sparking Inside Sparks not caused by metal objects Waveguide or magnetron damage
    Inconsistent Heating Food partially hot and partially cold Magnetron or turntable issues

    Safety First: Precautions Before Attempting Repairs

    Microwave repair can be hazardous if you don’t take the necessary safety measures beforehand. When dealing with electrical appliances like microwaves, it’s essential to be aware of the potential electrical hazards.

    Electrical Hazards of Microwave Repair

    Microwaves, like other electrical appliances, can pose significant electrical hazards if not handled properly. Always unplug your microwave before starting any repair work to avoid electrical shocks or injuries. Be cautious of capacitors, as they can retain electrical charge even after the microwave is unplugged.

    Tools You’ll Need for Safe Troubleshooting

    To safely troubleshoot your microwave, you’ll need the right tools. Here’s a summary of the essential tools in a tabular format:

    Tool Purpose
    Multimeter Test electrical components safely
    Insulated screwdrivers (flathead and Phillips) Protect against potential electrical shocks
    Electrical tape Insulate exposed wires during inspection
    Rubber gloves rated for electrical work Provide additional protection when handling internal components

    A well-lit, closeup view of a set of essential microwave repair tools arranged on a clean, organized workbench. In the foreground, a pair of sturdy protective gloves, safety goggles, and a multimeter. In the middle ground, a soldering iron, wire cutters, and a screwdriver set. In the background, a microwave oven component and a technical manual open to a relevant page. The lighting is bright and directional, casting shadows that emphasize the tools' forms and textures. The overall mood is one of careful preparation and attention to safety before attempting any microwave repair work.

    By making sure you have these tools and following safety guidelines, you can minimize risks when repairing your microwave. Always verify that the power is disconnected before beginning any work, and consider using a voltage tester for added safety.

    Is Your Microwave Not Working? Check These Power Issues

    If your microwave isn’t working, checking the power supply and connections is a good place to start. A faulty power supply can often be the culprit behind a non-functional microwave.

    Verifying Power Supply and Connections

    First, ensure that your microwave is properly plugged in and that the outlet is working. You can test the outlet by plugging in another appliance to see if it functions correctly. Additionally, inspect the microwave’s power cord for any signs of damage or wear.

    Checking for Blown Fuses and Tripped Circuit Breakers

    A blown fuse is a common reason for microwave failure. The main fuse can blow due to a power fluctuation or a defective door switch. To diagnose, check your microwave’s fuse, typically located near the power cord entry point. If you find a blown fuse, replace it with one of identical specifications. Also, check your circuit breaker to ensure it hasn’t tripped.

    Cause Symptoms Solution
    Blown Fuse Microwave not turning on Replace fuse with identical specs
    Tripped Circuit Breaker Microwave and other appliances not working Reset circuit breaker

    Some microwaves have thermal fuses that blow when the unit overheats, indicating potential ventilation problems. If a new fuse blows immediately after replacement, it suggests a more serious electrical fault requiring professional attention.

    Door Switch and Latch Problems

    Microwave door switches play a crucial role in the safe operation of your appliance. When functioning correctly, they ensure that the microwave only operates when the door is properly closed. However, when these switches fail, it can lead to issues with your microwave’s performance and safety.

    How Door Switches Affect Microwave Operation

    The door switch is a critical safety feature in your microwave. It is designed to interrupt the circuit when the door is open, preventing the microwave from emitting radiation. A faulty door switch can cause your microwave to malfunction or not start at all. Understanding how these switches work is essential for diagnosing and fixing problems.

    Testing and Replacing Faulty Door Switches

    To check and replace a door switch, you will need to follow a series of steps. First, unplug the microwave from the power source to ensure your safety. Then, you may need to unscrew the grille and/or control panel to access the switch assembly. Remove the switch assembly mounting screws, depress the release tab, and disconnect the wire connector to remove the switch.

    Testing the door switch with a multimeter set to continuity or resistance mode will help determine if it’s functioning properly. The switch should show continuity when pressed and no continuity when released. If it’s faulty, replacing it with a new switch that matches the original specifications is crucial. After replacement, thoroughly test the microwave’s safety features before returning it to regular use.

    Control Panel and Display Issues

    Issues with the control panel and display can render your microwave unusable, leaving you wondering what went wrong. The control panel is the interface through which you interact with your microwave, setting the time and power levels for cooking.

    Diagnosing Keypad and Control Board Problems

    If your microwave’s keypad is unresponsive or the control board is malfunctioning, it may be due to a software glitch or a hardware failure. Check if the issue persists after a simple reset.

    Resetting Your Microwave’s Control System

    Resetting your microwave’s control system can resolve many electronic glitches. To do this, unplug the microwave for at least 1-2 minutes to allow the internal electronics to discharge fully. Some models have a dedicated reset button or key combination; check your owner’s manual for specific instructions.

    • After resetting, you’ll need to reprogram the clock and any custom settings.
    • If your microwave is in “Demo” or “Showroom” mode, the reset procedure should return it to normal operating mode.
    • Persistent control issues may indicate a hardware problem requiring repair or replacement.

    A close-up view of a microwave oven's control panel, showcasing its various buttons, dials, and digital display. The panel is well-lit, with a clean and modern design, allowing for easy navigation and operation. The buttons are clearly labeled with common cooking functions, such as time, power, and preset settings. The digital display is crisp and bright, providing real-time feedback on the microwave's status. The overall mood is one of practicality and efficiency, reflecting the appliance's purpose in a typical UK household kitchen.

    For microwaves with smart features, app-based resets or firmware updates may be available to resolve software-related issues. Always refer to your owner’s manual for guidance on troubleshooting and resetting your specific microwave model.

    Microwave Turns On But Doesn’t Heat Food

    When your microwave turns on but fails to heat food, it’s often a sign of an underlying issue that needs to be addressed. Understanding how microwaves generate heat is crucial to diagnosing the problem.

    Understanding How Microwaves Generate Heat

    Microwaves generate heat through a component called the magnetron, which converts electrical energy into microwave energy. This energy is then directed into the cooking compartment, where it’s absorbed by the food, causing it to heat up.

    Common Causes of Heating Failures

    Several factors can lead to a microwave’s failure to heat food properly. Some of the most common causes include:

    • A faulty magnetron, which is the most common component to fail.
    • A malfunctioning diode, which rectifies AC power to DC for the magnetron.
    • Burned out high-voltage capacitors and transformers.
    • Overheated thermoprotector.

    For a more detailed diagnosis, it’s helpful to consult your manufacturer’s instructions or visit ifixit for community-driven solutions.

    Cause Description Potential Fix
    Faulty Magnetron The magnetron is responsible for generating microwave energy. Replace the magnetron.
    Malfunctioning Diode The diode rectifies AC to DC for the magnetron. Replace the diode.
    High-Voltage Capacitor Failure The capacitor stores electrical charge for the magnetron. Replace the capacitor.

    Turntable and Carousel Malfunctions

    A non-rotating turntable in your microwave can be caused by various factors, ranging from food residue to mechanical faults. The turntable is an essential part of your microwave oven, ensuring even cooking by rotating the food. When it stops working, it can be inconvenient.

    Why the Turntable Stops Rotating

    Often, the issue is due to something as simple as food or residue jamming the turntable or its rollers being stuck. Checking under the turntable for any obstructions is a good first step. Additionally, the drive coupling, which connects to the turntable motor, might be damaged or misaligned.

    Simple Fixes for Turntable Issues

    To resolve the issue, start by removing the glass turntable and support ring to clean underneath with warm, soapy water. Ensure the support rollers move freely and clean any sticky residue. Verify that the turntable motor shaft turns freely when rotated by hand with the microwave unplugged. If your microwave has a turntable on/off function, check your manual for instructions. For persistent issues, consider replacing the turntable assembly, as replacement parts are relatively inexpensive and easy to install.

    Internal Fuse Problems and Replacements

    If your microwave isn’t working, checking the internal fuse is a good place to start. Microwaves contain various types of fuses, including thermal fuses, cavity fuses, and thermoprotectors, designed to cut off power in case of overheating.

    Locating and Testing Microwave Fuses

    To diagnose a fuse issue, you first need to locate the fuse. This usually involves accessing the microwave’s internal components. Once found, you can test the fuse for continuity using a multimeter.

    Safely Replacing Blown Fuses

    If a fuse is blown, it needs to be replaced with an exact match in terms of voltage, amperage, and physical specifications. When handling new fuses, avoid touching the metal end caps to prevent damage. Ensure the fuse holder is clean and free of corrosion before installing the new fuse.

    Some key tips for replacing fuses include:
    – Always use exact replacement fuses.
    – Purchase from reputable suppliers.
    – Handle fuses by their ceramic body.
    – Ensure fuse holders are clean.
    – Secure the fuse firmly in its holder.

    For more detailed guidance on microwave repair, you can visit our page on microwave repair.

    When to Call a Professional Repair Service

    If you’re unsure about how to fix your microwave, seeking help from a qualified technician is the best course of action. Certain issues, such as problems with the control board, require professional expertise.

    Signs of Serious Microwave Damage

    Be aware of signs that indicate serious damage, such as sparks, burning smells, or the microwave not turning off. These issues signify that you need to call a professional.

    Finding Qualified Microwave Repair Services in the UK

    To find a reliable service, look for technicians registered with the UK’s Electrical Safety First organisation. Manufacturer-authorised service centres are also a good option. Check online reviews on platforms like Trustpilot or Checkatrade to ensure you’re hiring a reputable service.

    Conclusion: Extending Your Microwave’s Lifespan

    By following some straightforward tips, you can significantly prolong your microwave oven‘s operational life. Regular maintenance is crucial to prevent common issues that can lead to premature failure.

    To keep your microwave in good condition, it’s essential to clean the interior regularly, avoiding food buildup that can absorb microwave energy and cause damage. You should also avoid slamming the door, as this can damage the critical door switches and latching mechanism.

    Using microwave-safe containers only can prevent damage to the interior and waveguide cover. Additionally, always run the microwave with food or water to absorb the energy, as running it empty can damage the magnetron. Ensuring proper ventilation around the unit and wiping spills immediately can also help.

    For optimal performance, consider having your microwave oven professionally serviced every few years. If you’re due for an upgrade, look for models with advanced features like Sensor Cooking, Air Fry Mode, and Steam Cooking, which can enhance your cooking experience. By following this guide, you can enjoy efficient and safe cooking with your microwave for years to come.

    FAQ

    Why is my microwave oven’s turntable not rotating?

    The turntable may not be rotating due to a faulty turntable motor, a broken turntable coupler, or a misaligned turntable. Check the turntable and its supporting parts for any signs of damage or wear.

    How do I check if my microwave’s door switch is functioning correctly?

    To test the door switch, you’ll need a multimeter. Check the switch for continuity when the door is closed and open. If there’s no continuity when the door is closed, the switch may be faulty.

    What should I do if my microwave’s control panel is unresponsive?

    Try resetting the microwave by unplugging it, waiting for a few minutes, and plugging it back in. If the issue persists, check for any debris or moisture on the control panel or keypad, and clean it gently.

    Why is my microwave not heating food evenly?

    Uneven heating can be caused by a faulty magnetron, a worn-out turntable, or incorrect cooking times. Check the turntable for any damage and ensure it’s properly aligned. If the issue persists, consider consulting a professional.

    Can I replace a blown fuse in my microwave oven?

    Yes, you can replace a blown fuse, but ensure you follow proper safety precautions. Unplug the microwave, locate the fuse, and replace it with a new one of the same rating. Be cautious when handling electrical components.

    How do I diagnose a faulty diode in my microwave?

    Diagnosing a faulty diode requires a multimeter. Check the diode for continuity; if it’s not functioning correctly, it may need to be replaced. Consult your microwave’s user manual or a professional for guidance.

    What are the signs that my microwave needs professional repair?

    If you notice unusual noises, sparks, or a burning smell, it’s best to consult a professional. Additionally, if your microwave is not heating or is displaying error codes, a qualified repair service can help diagnose and fix the issue.

    How can I extend the lifespan of my microwave oven?

    Regularly cleaning the microwave, checking for worn-out parts, and avoiding overheating can help extend its lifespan. Also, ensure proper installation and follow the manufacturer’s guidelines for usage.

  • Budget Workbench Setup: Workshop Setup Tips for UK Homes

    Budget Workbench Setup: Workshop Setup Tips for UK Homes

    Creating a functional workshop at home can be a daunting task, especially when space is limited. In the UK, many homeowners are opting for DIY projects to enhance their living spaces, with a significant number turning their attention to setting up a home workshop.

    You don’t need a large garage or an expansive backyard to create an efficient workbench area. Even in compact homes, a well-planned project area can significantly enhance your DIY capabilities. This guide will walk you through the process of setting up a practical and affordable workbench in your UK home.

    Key Takeaways

    • Discover how to create a functional workbench on a budget.
    • Learn tips for optimising your home workshop space.
    • Understand the importance of selecting the right materials for your workbench.
    • Explore various DIY techniques for building a sturdy workbench.
    • Find out how to tailor your workshop setup to your specific DIY needs.

    Why Every DIY Enthusiast Needs a Proper Workbench

    DIY enthusiasts require a proper workbench to efficiently complete projects, ensuring accuracy and safety. A well-designed workspace provides a stable surface for tasks.

    Having a dedicated workspace improves safety and saves time. It allows you to keep tools organised, making it easier to focus on the task at hand.

    • A stable surface for tasks.
    • Improved safety through organisation.
    • Increased efficiency.

    A quality bench vise can enhance your workspace, making it more versatile. As the central hub of your workshop, a proper workbench enables you to tackle complex projects.

    Understanding UK Workshop Constraints

    The UK’s climate and home structures present distinct challenges for workshop setups. When creating a DIY workspace in your UK home, it’s essential to consider these factors to ensure a functional and durable environment.

    Space Limitations in British Homes

    Many UK homes, especially in urban areas, have limited space available for a workbench. You need to optimise the area you have, considering the size and layout of your workshop. Careful planning is required to accommodate your tools, materials, and projects.

    Weather Considerations for Garage Workshops

    The UK’s damp climate and variable temperatures can significantly impact your woodwork and overall workshop conditions. Uninsulated garages, in particular, experience significant fluctuations in temperature and humidity, affecting both your workbench and projects.

    To mitigate these effects, consider the following key points:

    • The UK’s damp climate affects wood selection and treatment, requiring careful material choices.
    • Uninsulated garages face significant temperature and humidity fluctuations, impacting your workbench and projects.
    • Seasonal changes can affect workbench materials, especially if using untreated wood in an unheated space.
    • Proper ventilation is crucial in UK garage workshops to prevent moisture buildup that can damage tools and materials.
    • Weather-resistant finishes and materials may cost more initially but will extend the life of your workbench in typical British conditions.

    Planning Your Budget Workbench Setup

    Before you start building your workbench, it’s crucial to plan it properly. A well-planned workbench is the foundation of an efficient DIY workspace.

    budget workbench setup

    Learn More

    Determining the Right Size and Height

    To determine the ideal height, stand with your arms at your sides and measure the distance between your palm, held parallel to the floor, and the floor itself. This will help you find a comfortable working height, reducing strain.

    Selecting a Location in Your Home

    When choosing a place for your workbench, consider several factors. You don’t want to lot of space, but enough to work comfortably.

    • Choose a location with adequate natural light if possible, as this will reduce eye strain during detailed work.
    • Consider proximity to power outlets for your electric tools and potential lighting needs.
    • Ensure there’s enough clearance around the workbench for comfortable movement and handling of larger materials.
    • Assess floor stability and levelness, as an uneven surface can cause significant problems with precision work.
    • If placing your workbench in a multi-purpose space, consider how it will affect other activities and whether noise or dust will be problematic.
    • Basements and garages are popular locations, but each presents unique challenges regarding moisture, temperature, and accessibility.

    Essential Tools for Building Your Workbench

    Image of a well-organised workshop with various tools

    Learn More

    To construct a sturdy workbench, you’ll need to have the essential tools at hand. Building a workbench is a significant step in setting up your home workshop.

    Power Tools vs Hand Tools

    When it comes to building your workbench, you’ll need to decide between power tools and hand tools. Power tools can speed up the process, while hand tools offer more control and precision. A combination of both is often the best approach for the task at hand.

    Safety Equipment You’ll Need

    Safety should be your top priority when building your workbench. You’ll need:

    • Safety glasses or goggles for eye protection
    • Hearing protection for safe power tool usage
    • Dust masks or respirators for protection against fine particles
    • Work gloves to prevent splinters and minor cuts
    • A first aid kit nearby as a precaution
    • Proper ventilation, especially when applying finishes or working with treated woods

    By having the right tools and safety equipment, you’ll be well-prepared to complete your workbench project efficiently and safely.

    Budget-Friendly Materials Options

    Image of various budget-friendly materials like plywood, lumber, and reclaimed wood

    Learn More

    Selecting budget-friendly materials is a key step in creating an effective workbench. You can achieve this by considering both new and reclaimed timber options.

    New vs Reclaimed Timber

    When deciding between new and reclaimed timber, consider the cost and the project’s requirements. Reclaimed timber, such as old doors or wooden beams, can be sourced cheaply and adds character to your workbench. New lumber, like 2x4s, is readily available and suitable for the frame, while plywood is a cost-effective option for the worktop.

    Where to Source Affordable Materials in the UK

    You can find affordable materials at UK builders’ merchants like Travis Perkins, Jewson, and Wickes, which often have deals on lumber and sheet materials. Online marketplaces such as Facebook Marketplace, Gumtree, and Freecycle are also excellent for reclaimed wood and discounted materials. Consider visiting architectural salvage yards and community wood recycling projects for unique and affordable options.

    Three Budget Workbench Designs

    When setting up your workshop, having the right workbench design is crucial. A good workbench should be sturdy, with strong legs to support your projects. Here are three budget-friendly workbench designs to consider.

    Simple 2×4 and Plywood Bench

    A simple and cost-effective option is to build a workbench using 2×4 lumber and a plywood top. This bench is easy to construct and can be customized to fit your space. You can add additional features like storage bins or a vice.

    A well-crafted, functional workbench with a sturdy, weathered wood top and a clean, minimalist metal frame. The workbench stands in a bright, airy workshop space with natural light streaming in through large windows. The background features simple, uncluttered shelving units and storage cabinets, creating a sense of organized efficiency. The workbench is positioned at a slight angle, inviting the viewer to imagine themselves working on a variety of projects, from woodworking to electronics repair. The overall scene conveys a sense of productivity, practicality, and a dedication to craftsmanship.

    Repurposed Door Workbench

    Consider repurposing an old door as your workbench top. This can be a cost-effective and environmentally friendly option. Simply attach the door to a sturdy frame, and you have a solid working surface.

    Knockdown Portable Design

    A knockdown design is ideal for UK homes where workshop space might need to be temporarily converted for other uses. This portable workbench uses clever joinery that allows for complete disassembly without compromising stability when assembled. The design features bolted connections rather than permanent glued joints, making it adaptable to changing needs and spaces.

    Step-by-Step: Building a Basic 2×4 Workbench

    Establishing a solid workbench is a fundamental step in setting up your workshop. This guide will walk you through the process of building a basic 2×4 workbench.

    Cutting the Lumber to Size

    Begin by cutting the 2×4 lumber to the required size for your workbench frame. Ensure accurate measurements to avoid any discrepancies during assembly.

    Assembling the Frame

    Assemble the frame using the cut lumber. Use appropriate screws to secure the joints, ensuring the frame is sturdy.

    Attaching the Worktop

    To attach the worktop to the frame, lay the top on the floor and place the frame on it upside down. Centre the frame and ensure a 2-inch overhang on all sides. Use six angle brackets and 1 1/4 inch #6 drywall screws to secure the top to the frame.

    Component Material Quantity
    Frame 2×4 Lumber 4 pieces
    Worktop Plywood or Solid-core Door 1 piece
    Angle Brackets Metal 6 pieces

    By following these steps, you can create a functional workbench that meets your needs.

    Alternative: Door-Based Workbench Construction

    If you’re looking for a sturdy workbench top, consider repurposing a solid-core door. This approach not only reduces waste but also provides a robust surface for your workbench.

    Finding and Preparing a Solid-Core Door

    To start, you’ll need to find a suitable solid-core door. Look for one that is in good condition and made of solid material. Prepare the door by cleaning it thoroughly and removing any hardware that may be attached.

    Building the Supporting Frame

    Construct a frame to support the door top. Ensure it is sturdy and level to provide a stable base for your workbench. The frame should be slightly smaller than the door to allow for overhang on all sides.

    Securing the Door Top

    To attach the door top to the frame, lay the door on the floor with the desired top side facing down. Place the frame on top, centred and with a 2-inch overhang around the perimeter. Use six angle brackets and 1 1/4 inch #6 drywall screws to secure the door to the frame.

    Step Description
    1 Position the door on the floor with the top side down.
    2 Centre the frame on the door, ensuring a 2-inch overhang.
    3 Use angle brackets to attach the door to the frame.

    When assembling the workbench, ensure the door is centred on the frame and the screws are countersunk to create a flush surface. For added stability, consider adding supporting cleats underneath the door.

    Creating a Knockdown Bench for Limited Space

    When working with limited space, a knockdown bench is an ideal solution for DIY enthusiasts in the UK. This type of bench is designed to be easily assembled and disassembled, making it perfect for small workshops or homes with restricted storage.

    Designing Disassemblable Joints

    The key to a successful knockdown bench lies in its disassemblable joints. Using a tusk or wedge drives the joint together without the need for glue, allowing for easy disassembly. When designing the joints, consider the type of materials you will be working with and the weight the bench will need to support.

    Assembly and Disassembly Process

    The assembly process involves laminating the top with multiple pieces of timber, such as hard maple, and attaching it to the base using bench dowels. To disassemble, simply remove the tusks and separate the components. This step can be repeated as needed, making it easy to store the bench when not in use.

    Component Material Assembly Method
    Top Hard Maple Dowels
    Base Oak Tusk and Wedge

    A sturdy, compact knockdown workbench with a sleek, minimalist design, featuring a solid wooden top, metal legs, and a simple folding mechanism that allows for easy storage and transportation. The workbench is positioned in a well-lit, airy home workshop, with natural lighting filtering in through large windows, casting a warm, inviting glow. The overall atmosphere is one of functionality and efficiency, with the workbench serving as a versatile, space-saving solution for the discerning DIY enthusiast.

    Essential Workbench Features to Include

    When setting up your budget workbench, it’s crucial to incorporate features that enhance functionality and efficiency. A well-designed workbench is the foundation of a productive workshop.

    Work Surface Considerations

    Your workbench’s surface is where you’ll spend most of your time, so it’s essential to get it right. Consider the material and size of your worktop carefully. A sturdy, durable surface that can withstand your tools and projects is vital. For more ideas on maximizing your workbench, visit Instructables.

    Storage Solutions

    Incorporating storage into your workbench design is vital for maintaining a clutter-free workspace. A simple shelf beneath the worktop can provide substantial storage while adding structural rigidity to the bench. You can also consider adding drawers for smaller tools and consumables. Additionally, tool wells integrated into the bench top and pegboard or tool panels mounted to the back of your bench can create vertical storage that keeps tools visible and accessible.

    Adding a Woodworking Vice

    Image of a woodworking vice mounted on a sturdy workbench

    Learn More

    A woodworking vice is an indispensable tool that can significantly improve your workbench’s functionality. It effectively becomes an extra pair of hands, holding your workpieces firmly in place.

    There are primarily two types of vices: front (face) vices and end vices. Front vices are ideal for edge planing, while end vices work with bench dogs to hold work flat on the bench top.

    When selecting a vice, consider your budget and the type of work you’ll be doing. Cast iron vices offer durability, whereas wooden vices provide gentler holding power. Quality vices are available from manufacturers like Record, Irwin, and Axminster.

    Incorporating Power and Lighting

    An image of a well-lit workshop with a workbench and appropriate lighting.

    Learn More

    To ensure your workbench is both functional and safe, incorporating the right lighting and power solutions is vital. Adequate lighting is essential for safe and accurate work, making it a critical consideration for your workbench setup.

    Mounting a shop light directly to the underside of a shelf above your bench provides shadow-free illumination of your work area. Installing a power strip on your workbench eliminates the need for extension cords and provides convenient access to electricity for power tools.

    Consider routing power cables through the bench structure to keep them organised and prevent them from becoming trip hazards. In UK workshops, ensure all electrical installations comply with relevant safety standards and consider using RCD protection for added safety.

    Storage Solutions for Your Tools

    Image of a well-organised workshop with tool storage

    Learn More

    Tool storage solutions are essential for maintaining a safe and efficient working environment in your UK home workshop. Effective tool storage around your workbench enhances efficiency and protects your investment in quality tools.

    A simple shelf beneath the workbench provides substantial storage space for larger tools and materials. Consider incorporating drawers for smaller tools and consumables that benefit from being protected from dust.

    In space-constrained UK workshops, look for storage solutions that maximise vertical space rather than valuable floor area. Tool walls and French cleats offer flexible storage systems that can evolve with your changing tool collection and workshop needs.

    Finishing and Protecting Your Workbench

    To ensure your workbench remains in good condition over time, proper finishing and protection are crucial. A well-finished workbench can withstand the rigors of frequent use and last for many years.

    Surface Treatments

    Applying a suitable surface treatment can significantly enhance the durability of your workbench. Options include varnish, oil, or wax, each offering different levels of protection and aesthetic appeal.

    Ongoing Maintenance

    Regular maintenance is key to extending the life of your workbench. This includes regular cleaning, periodically checking and tightening fasteners, and reapplying your chosen finish as needed. By doing so, you’ll be able to enjoy your workbench for a long time.

    Maintenance Task Frequency
    Cleaning Regularly
    Tightening Fasteners Periodically
    Reapplying Finish Once or twice a year

    By following these maintenance tips, you can ensure your workbench remains in excellent condition.

    Common Mistakes to Avoid

    To ensure your workbench serves you well, it’s vital to be aware of and avoid several key mistakes that can affect its usability. When building your bench, consider the height carefully, as a poorly chosen height can lead to discomfort and potential injury over time.

    • Building at the wrong height leads to discomfort and potential injury.
    • Underestimating stability results in a frustrating work experience.
    • Overcomplicating the design often leads to unfinished projects.
    • Neglecting tool storage planning limits functionality.
    • Using unsuitable materials can lead to premature failure.
    • Rushing construction typically results in difficult-to-correct alignment issues.

    Conclusion

    A well-crafted budget workbench is essential for any DIY enthusiast looking to enhance their workshop. By carefully planning your bench to suit your specific needs and available space, you’ll create a valuable asset for all your future projects. The time invested in building a proper workbench will pay dividends in improved efficiency and project quality. Your completed workbench represents the beginning of countless successful projects in your home workshop.

    FAQ

    What is the ideal height for a workbench?

    The ideal height for a workbench is typically between 34 and 36 inches, allowing you to work comfortably without straining your back. However, this can vary depending on your height and the type of projects you undertake.

    What type of wood is best for building a workbench?

    You can use various types of wood for building a workbench, but plywood and solid timber like oak or pine are popular choices due to their durability and affordability. Reclaimed or recycled wood can also be a cost-effective and environmentally friendly option.

    How do I ensure my workbench is stable and sturdy?

    To ensure your workbench is stable, use a solid frame made from 2x4s or thicker lumber, and attach the worktop securely using screws. You can also add legs or a supporting frame to prevent the bench from tipping or wobbling.

    Can I build a workbench without power tools?

    While power tools can make the process easier, you can build a basic workbench using hand tools like a saw, drill, and hammer. However, using power tools like a circular saw or drill press can save time and improve accuracy.

    How can I add storage to my workbench?

    You can add storage to your workbench by incorporating shelves, drawers, or cabinets underneath or alongside the work surface. This will help keep your tools and materials organised and within easy reach.

    What safety equipment should I use when building a workbench?

    When building a workbench, it’s essential to wear safety glasses, a dust mask, and ear protection to prevent injury from sawdust, debris, or loud noises. You should also follow proper lifting techniques to avoid straining your back.

  • Appliance Repair Leeds: City Guides Tips for UK Homes

    Appliance Repair Leeds: City Guides Tips for UK Homes

    Did you know that a malfunctioning household appliance can disrupt your daily routine and lead to significant inconvenience? In the UK, thousands of homeowners face such issues every day. At Appliance Care Leeds, we understand the importance of timely and efficient repair services.

    Our comprehensive guide is designed to provide you with essential information about professional appliance repair services available throughout Leeds and its surrounding areas. You’ll discover how our quick and reliable services can save you time and money while extending the life of your valuable home equipment.

    Key Takeaways

    • Learn about the most common household appliance problems and their professional solutions.
    • Understand the environmental and financial benefits of repairing rather than replacing your appliances.
    • Discover our transparent pricing structure with no hidden charges.
    • Find out how our professional repair process works from booking to completion.
    • Explore the areas of Leeds we cover with our comprehensive appliance repair services.

    Fast and Reliable Appliance Repair Services in Leeds

    appliance repair Leeds

    Book Now

    Experience the best in appliance repair with our Leeds-based team, dedicated to providing top-notch service. Our fast-response appliance repair service aims to attend to your needs within 24-48 hours, offering same-day or next-day appointments throughout Leeds and surrounding areas.

    We understand the disruption that broken appliances cause to your daily routine, which is why we prioritise quick, efficient repairs to minimise inconvenience. Our transparent pricing policy means you’ll never face unexpected costs – we provide clear quotes before beginning work and maintain our no-hidden-charges commitment.

    Our No-Hidden-Charges Policy

    At our appliance repair service, we believe in transparency. You’ll receive a clear quote for the repair work before we begin, ensuring there are no surprise costs. Our commitment to no hidden charges means you can trust us to provide a fair price for our service.

    Professional Engineers at Your Service

    Our team of fully qualified and experienced engineers are dedicated to providing expert appliance repair services. With regular training on the latest models, they have the experience and knowledge to diagnose and fix problems efficiently, ensuring your appliance is back in working order in no time.

    Common Household Appliance Problems We Fix

    At our appliance repair service in Leeds, we specialise in fixing a wide range of common household appliance problems. Our team of expert technicians is equipped to diagnose and repair various faults, ensuring your appliances are running efficiently.

    Image of a technician repairing a washing machine

    Book Now

    Washing Machine and Tumble Dryer Issues

    We diagnose and repair common washing machine problems, including leaking issues, drum or spin cycle faults, and blocked drainage systems. For tumble dryers, we address heating issues, drum rotation failures, and thermostat malfunctions.

    • Leaking issues and drum faults
    • Blocked drainage and excessive noise
    • Heating element failures

    Dishwasher and Refrigeration Faults

    Our technicians fix dishwasher faults, including cleaning and drainage issues, faulty seals, and pump failures. For fridge freezers, we repair cooling failures, compressor issues, and door seal problems.

    • Cleaning and drainage issues
    • Faulty seals and pump failures
    • Cooling failures and compressor issues

    Cooker, Oven and Hob Repairs

    We repair cooker, oven, and hob issues, including heating element failures, temperature control problems, and faulty ignition systems. Our Gas Safe registered engineers ensure all gas appliance work meets safety regulations.

    • Heating element failures
    • Temperature control issues
    • Faulty ignition systems

    Why Choose Professional Appliance Repair in Leeds

    Image of a person using a smartphone to book an appliance repair service

    Book Now

    The benefits of professional appliance repair in Leeds extend beyond just fixing the issue at hand. By choosing a professional service, you can enjoy a multitude of advantages that make the process smoother and more cost-effective.

    Cost-Effective Repairs vs Replacement

    Replacing an appliance can be expensive, considering not just the cost of the new product, but also installation and disposal fees. A professional appliance repair can restore full function at a fraction of the price, saving you hundreds of pounds.

    Environmental Benefits of Repairing Appliances

    Repairing your appliance rather than replacing it helps reduce electronic waste and minimises your carbon footprint. This eco-friendly approach is a win for both your wallet and the environment, aligning with the growing need for sustainability.

    Same or Next Day Service Guarantee

    We understand how disruptive a faulty appliance can be. Our engineers aim to attend on the same or next day, ensuring minimal disruption to your household routine, particularly for essential appliances like refrigerators where food spoilage is a concern.

    Our Appliance Repair Process

    Image of a person booking an appliance repair online or by phone

    Book Now

    At our company, we have streamlined the appliance repair process for your convenience. Our goal is to provide a seamless experience from booking to completion.

    Booking Your Repair Online or by Phone

    Booking your appliance repair is simple and convenient. You can use our online booking system, available 24/7, or call our friendly customer service team during business hours. When booking, you’ll be asked to provide details about your appliance and the fault, helping our engineers prepare for your appointment.

    Diagnostic and Repair Procedures

    Upon arrival, our engineers conduct a thorough diagnostic assessment to identify the root cause of the problem. You’ll receive a clear explanation of the issue and a no-obligation quote for the repair, including parts and labour with no hidden charges. Most repairs are completed on the same day, minimising waiting time.

    Our 3-Month Repair Guarantee

    All our repair work comes with a comprehensive 3-month guarantee covering both parts and labour. If you experience the same issue within the guarantee period, our engineers will return to resolve it at no additional cost. This guarantee gives you confidence in the quality of our service.

    Leeds and Surrounding Areas We Cover

    Our team is dedicated to serving the Leeds region, including its city centre and outlying districts. We understand the importance of convenient and reliable appliance repair services, which is why we cover a broad geographic area.

    Image of a map highlighting Leeds and its surrounding areas

    Learn More

    North and East Leeds Coverage

    We serve the northern suburbs of Leeds, including Chapel Allerton, Moortown, Alwoodley, Roundhay, and Headingley. In East Leeds, our coverage includes Seacroft, Cross Gates, Whitkirk, Halton, and Garforth, with same-day service available in most locations.

    South and West Leeds Coverage

    Our service extends to the southern parts of Leeds, covering Beeston, Middleton, Belle Isle, Hunslet, and Morley. In West Leeds, we serve Armley, Bramley, Pudsey, Farsley, and Horsforth, ensuring prompt and professional appliance repair.

    Wider West Yorkshire Service Areas

    Beyond Leeds, we cover surrounding towns and villages such as Wetherby, Otley, Ilkley, Guiseley, and Rothwell, providing the same high-quality service throughout West Yorkshire. Our extensive coverage ensures that you are never far from our expert appliance repair technicians.

    Conclusion: Why Trust Our Leeds Appliance Repair Service

    Our Leeds appliance repair service is designed to provide fast, dependable, and environmentally friendly solutions for your household appliance needs. With highly trained engineers specialising in all major brands and models, including washing machines, dishwashers, fridges, and ovens, we ensure that your appliances are in good hands.

    We understand the importance of cost-effective repairs and the environmental benefits of choosing to repair rather than replace. Our comprehensive parts inventory enables us to complete most repairs in a single visit, minimizing disruption to your home. Whether you’re dealing with a faulty dishwasher seal or a malfunctioning oven hob, our experienced engineers have the knowledge and parts to provide lasting repairs. For residents in surrounding areas like Todmorden, we offer reliable appliance repairs, ensuring that our service is accessible to a wider community.

    By choosing our service, you’re not only getting a quick fix but also contributing to reducing electronic waste. Our transparent pricing policy means you receive clear quotes before work begins, with no hidden charges. Customer satisfaction is at the heart of our business, reflected in our high rate of repeat customers and referrals. Book your appliance repair online or by phone today and experience the difference that professional, local service makes.

    FAQ

    What domestic appliances do you repair?

    We specialise in repairing a wide range of domestic appliances, including washing machines, tumble dryers, dishwashers, fridge freezers, ovens, hobs, and cookers from various brands.

    How quickly can you fix my faulty appliance?

    We offer a same or next day service guarantee, ensuring your appliance is back up and running as soon as possible. Our engineers work efficiently to diagnose and repair faults, minimising downtime.

    Are your engineers qualified and experienced?

    Yes, our engineers are fully qualified, trained, and experienced in repairing a variety of appliances. They are equipped with the latest tools and technology to diagnose and fix complex issues.

    Do you provide a guarantee for your repairs?

    We stand behind our work, offering a 3-month guarantee on all repairs. If the same fault recurs within this period, we’ll return to fix it free of charge.

    How do I book a repair, and what information do I need to provide?

    You can book a repair online or by phone. We’ll need to know your location, the type of appliance, and a brief description of the issue. This information helps us dispatch the right engineer with the necessary parts.

    Are your charges transparent, or are there any hidden costs?

    We pride ourselves on our transparent pricing policy. You’ll receive a clear quote for the repair, including any parts and labour costs, before we begin work. There are no hidden charges or surprise fees.

    Do you cover areas outside of Leeds?

    Yes, we serve not only Leeds but also surrounding areas in West Yorkshire. Our service area includes North, East, South, and West Leeds, as well as other nearby locations.

    Can I get a fixed price for the repair before you start?

    In many cases, we can provide a fixed price for the repair after diagnosing the issue. For more complex faults, we may need to provide a quote after assessing the appliance on-site.

  • Carbon Monoxide Detector: Safety & Security Tips for UK Homes

    Carbon Monoxide Detector: Safety & Security Tips for UK Homes

    Every year, hundreds of people in the UK are hospitalised due to carbon monoxide poisoning, a silent killer that can strike without warning.

    This colourless, odourless gas is produced when fossil fuels are burned inefficiently, often due to poorly maintained appliances or inadequate ventilation.

    Having a reliable alarm in your home is crucial for safety. In this comprehensive guide, we’ll explore the dangers of monoxide poisoning and the importance of installing a suitable carbon monoxide alarm to protect your family.

    Key Takeaways

    • Understand the risks associated with carbon monoxide poisoning.
    • Learn about the latest technology in monoxide alarm systems.
    • Discover the best practices for installing and maintaining a carbon monoxide detector.
    • Find out about the current UK regulations regarding carbon monoxide safety in homes.
    • Make an informed decision when selecting a carbon monoxide alarm for your home.

    Understanding the Silent Killer: Carbon Monoxide Dangers

    Carbon monoxide is a colourless, odourless gas that poses significant health risks. You need to understand how it affects your body and the warning signs to look out for.

    What is Carbon Monoxide and How is it Produced?

    Carbon monoxide is produced through incomplete combustion of fuels like gas, oil, and wood. It can emanate from faulty boilers, blocked chimneys, or poorly maintained generators. When inhaled, it interferes with the oxygen-carrying capacity of your red blood cells, leading to tissue hypoxia.

    Symptoms of Carbon Monoxide Poisoning

    The initial symptoms of carbon monoxide poisoning are often mistaken for flu, including headaches, dizziness, and nausea. As exposure continues, more severe symptoms develop, such as confusion, unconsciousness, and potentially death. Certain groups, like children and the elderly, are at higher risk due to their vulnerability.

    Why Every UK Home Needs a Carbon Monoxide Detector

    Carbon monoxide detectors are a crucial addition to any UK home, providing a vital layer of protection against this silent killer. You can’t taste, see, or smell carbon monoxide, making it a particularly insidious threat.

    The Limitations of Human Senses

    Human senses are unable to detect carbon monoxide, which makes it imperative to have a detector. This colourless, odourless gas can be present in your home without you even realising it.

    UK Statistics on Carbon Monoxide Incidents

    UK statistics reveal the alarming reality of carbon monoxide incidents. According to recent data, there are numerous cases of carbon monoxide poisoning reported annually, resulting in significant health impacts and, tragically, fatalities. The most common sources of carbon monoxide leaks in UK homes include faulty boilers and poorly maintained appliances.

    A sleek, modern carbon monoxide detector placed prominently on a pristine white wall. The device features a minimalist, rectangular design with a glossy black surface and silver trim, emitting a soft, ambient glow. Subtle shadows cast by the device create depth and dimension. The background is a crisp, clean white, allowing the detector to stand out boldly. Overhead lighting casts a warm, gentle illumination, creating a sense of security and reassurance. The overall composition conveys the importance of this safety device in a stylish, visually appealing manner.

    How Carbon Monoxide Detectors Work

    A carbon monoxide detector’s primary function is to identify potentially lethal concentrations of CO in your home and trigger an appropriate response. These devices are equipped with sensors that detect CO levels, and their effectiveness is crucial for preventing carbon monoxide poisoning.

    Sensor Technologies Explained

    CO detectors typically employ one of several sensor technologies, each with its own characteristics and lifespan. Advances in sensor technology have led to the development of 10-year alarms that are becoming increasingly common. The lifespan of a CO detector can range from 5 to 10 years, depending on the sensor type and manufacturer design.

    Sensor Technology Lifespan Characteristics
    Biomimetic Sensor 5-7 years Mimics the way haemoglobin reacts to CO
    Metal Oxide Semiconductor 5-10 years Highly sensitive, but may be prone to false alarms
    Electrochemical Sensor 5-10 years High accuracy, low power consumption

    Alarm Response Mechanisms

    When a carbon monoxide detector identifies dangerous CO levels, it triggers an alarm to alert occupants. The nature of the alarm can vary depending on the device and the level of CO detected. Some detectors feature pre-alarm warnings for low-level detections, while others sound a full emergency alarm for dangerous concentrations. Smart carbon monoxide alarms can also send notifications to your mobile phone when you’re away from home.

    Interconnected alarm systems ensure that when one carbon monoxide alarm triggers, all alarms in the property sound simultaneously, enhancing safety.

    Key Features to Look for in Carbon Monoxide Detectors

    To protect your home and family from carbon monoxide poisoning, it’s crucial to understand the essential features of CO detectors. When choosing a carbon monoxide detector, several factors can impact its effectiveness and reliability.

    British Standards and Certification (BS50291)

    Ensure that your CO detector meets British Standards by looking for BS50291 certification. This standard guarantees that the device has been tested and proven to detect carbon monoxide accurately. Compliance with this standard is crucial for your safety.

    Power Supply Options

    Carbon monoxide detectors come with various power supply options, including battery-powered, mains-powered, or a combination of both. Consider a detector with a battery backup in case of power outages to ensure continuous protection.

    Sensor Lifespan and Warranty

    CO detectors typically have a lifespan ranging from 5 to 10 years. Advances in sensor technology have made 10-year alarms more common. Manufacturers often provide warranties that match the sensor’s lifespan, typically ranging from 5 to 10 years. Understanding the sensor lifespan and warranty can help you make an informed decision.

    Feature Description Importance
    BS50291 Certification Ensures compliance with British Standards for CO detection High
    Power Supply Battery-powered, mains-powered, or combination Medium
    Sensor Lifespan Ranging from 5 to 10 years High
    Warranty Matching the sensor’s lifespan Medium

    As CO detectors have a limited lifespan, it’s essential to check the end-of-life warning features that alert you when it’s time to replace the device. Maintaining documentation of purchase dates and warranty information is also crucial for ensuring your detector remains effective throughout its lifespan.

    A sleek, modern carbon monoxide detector hovering against a pristine white backdrop, its LED indicators and digital display clearly visible. The device is illuminated by soft, diffused lighting, casting subtle shadows that accentuate its clean, minimalist design. The detector's sensors and vents are prominently featured, showcasing the key technical components that allow it to accurately monitor air quality. The overall composition emphasizes the detector's key safety features, conveying a sense of reliability and reassurance for the viewer.

    By considering these key features, you can select a reliable carbon monoxide detector that provides optimal protection for your home and family.

    Top Carbon Monoxide Detectors for UK Homes

    With numerous options available, choosing the best carbon monoxide detector for your UK home can be overwhelming. To help you make an informed decision, we’ve reviewed some of the top-rated carbon monoxide detectors available in the UK market.

    FireAngel Pro Connected Smart Carbon Monoxide Alarm

    The FireAngel Pro Connected Smart Carbon Monoxide Alarm offers advanced features such as smart connectivity and real-time alerts. Displays CO levels and peak readings, ensuring you’re always informed about the safety of your home.

    Generate an image of the FireAngel Pro Connected Smart Carbon Monoxide Alarm device

    Buy Now

    Kidde K5CO 10-Year Life Carbon Monoxide Alarm

    The Kidde K5CO is a reliable and long-lasting carbon monoxide alarm with a 10-year battery life. It’s designed to provide continuous protection without the need for frequent battery replacements.

    Generate an image of the Kidde K5CO 10-Year Life Carbon Monoxide Alarm

    Buy Now

    Aico Ei208 Standalone Carbon Monoxide Alarm

    The Aico Ei208 is a standalone carbon monoxide alarm that offers reliable detection and alarm functionality. It’s a straightforward and effective solution for home safety.

    Generate an image of the Aico Ei208 Standalone Carbon Monoxide Alarm

    Buy Now

    FireAngel FA3820-EUX10 Wireless Carbon Monoxide Alarm

    The FireAngel FA3820-EUX10 Wireless Carbon Monoxide Alarm features a 10-year sealed battery and wireless connectivity, making it a convenient and low-maintenance option. It also displays CO levels from 10ppm and has a peak level memory function.

    Generate an image of the FireAngel FA3820-EUX10 Wireless Carbon Monoxide Alarm

    Buy Now

    These top-rated carbon monoxide detectors are designed to provide you with peace of mind and protection for your family. When choosing a detector, consider factors such as sensor lifespan, power supply options, and certification to British Standards.

    Installation Guidelines for Carbon Monoxide Detectors

    To effectively protect your home from carbon monoxide poisoning, it’s essential to follow the correct installation guidelines for your carbon monoxide detectors. Proper placement and installation height are critical for the detectors to function correctly.

    Optimal Placement in Your Home

    When deciding where to install your detectors, consider the layout of your home. It’s recommended to install them on every level of your home and near sleeping areas. For wall-mounted installations, the optimal height is typically at eye level. You should refer to the manufacturer’s guide for specific instructions, such as the Nest Protect User Guide for detailed installation instructions.

    Installation Height and Distance Requirements

    According to British Standards, the installation height for wall-mounted carbon monoxide detectors should be between 1-3 meters from the floor. It’s also crucial to maintain a certain distance from potential sources of carbon monoxide, such as boilers or chimneys. Here are some key considerations:

    • Install detectors at least 1 meter away from potential carbon monoxide sources.
    • Ensure detectors are not near corners or obstructions that could affect their performance.
    • For rooms with high ceilings or unusual airflow patterns, consider the specific guidance provided by the manufacturer.

    Maintenance and Testing of Your Carbon Monoxide Detector

    To keep your carbon monoxide detector functioning properly, regular maintenance is essential. This involves testing the device and ensuring its power source is reliable.

    Regular Testing Procedures

    You should test your carbon monoxide detector regularly to ensure it’s working correctly. Most detectors have a test button that you press to verify the alarm sounds. It’s recommended to test your detector at least once a week. If your detector is interconnected with other safety devices, testing one device should trigger all connected alarms.

    Battery Replacement Guidelines

    For detectors that use replaceable batteries, it’s crucial to identify when they need replacing. Many detectors emit a distinct signal, such as a beep, to indicate low battery. The type of battery and its life vary by detector model. Always replace batteries with the type recommended by the manufacturer. Some detectors come with sealed 10-year batteries, eliminating the need for frequent replacements. If your detector continues to signal low battery after replacement, it may be nearing the end of its life.

    UK Regulations and Legal Requirements

    As a homeowner or landlord in the UK, it’s essential to be aware of the legal requirements for carbon monoxide safety. The regulations surrounding carbon monoxide detectors are crucial for ensuring the safety of occupants in rental properties.

    2022 Welsh and Scottish Legislation

    In 2022, Wales and Scotland introduced new legislation regarding carbon monoxide alarms in homes. These regulations mandate the installation of carbon monoxide detectors in rooms with solid fuel appliances. Landlords are required to ensure these detectors are functioning correctly at the start of each tenancy.

    Landlord Responsibilities

    Landlords across the UK have specific responsibilities regarding carbon monoxide safety. They must install carbon monoxide alarms where necessary and maintain them throughout the tenancy. Failure to comply can result in significant penalties. Landlords should also keep records of carbon monoxide detector maintenance and testing to demonstrate compliance.

    Conclusion: Protecting Your Family from Carbon Monoxide

    Protecting your family from the dangers of carbon monoxide requires a reliable detection system. Throughout this article, we’ve highlighted the critical importance of carbon monoxide detectors in UK homes. To recap, a quality carbon monoxide alarm is a vital investment for your family’s safety. For a comprehensive guide on smoke alarms and carbon monoxide detectors, you can visit this resource. Ensuring you have the right detector, placing it correctly, and maintaining it regularly are crucial steps. By taking these measures, you’re not only safeguarding your home but also the people you care about.

    FAQ

    What is the average lifespan of a CO alarm?

    Typically, a CO alarm lasts for around 5-7 years, depending on the manufacturer and model. It’s essential to check the device’s certification and manufacturer’s guidelines for specific information.

    How often should I test my CO alarm?

    You should test your CO alarm at least once a week to ensure it’s functioning correctly. Refer to your device’s user manual for specific testing procedures.

    Can I install a CO alarm myself?

    Yes, you can install a CO alarm yourself, but it’s recommended to follow the manufacturer’s installation guidelines and consider consulting a professional if you’re unsure.

    Are there any specific UK regulations regarding CO alarms?

    Yes, there are regulations in place, particularly in Wales and Scotland, which require CO alarms to be installed in certain dwellings. Familiarise yourself with the 2022 Welsh and Scottish legislation.

    What are the benefits of interlinked CO alarms?

    Interlinked CO alarms provide enhanced safety by ensuring that when one alarm detects CO, all connected alarms sound, alerting you to potential danger throughout your home.

    How do I know if my CO alarm is functioning correctly?

    Check your CO alarm regularly for any error messages or warning signs. Ensure it’s within its lifespan and has a valid certification, such as BS50291.

    Can I use a CO alarm with a smoke alarm?

    Yes, many CO alarms can be used in conjunction with smoke alarms. Some devices even combine both functions. Check the manufacturer’s guidelines for compatibility.