Author: admin

  • Replacing a Broken Tile: A Step-by-Step Guide

    Replacing a Broken Tile: A Step-by-Step Guide

    Did you know that a damaged tile can be more than just an eyesore? It can pose a significant safety hazard in your home, potentially causing trips or cuts. Whether it’s a large floor tile that’s been smashed or a small wall tile that’s been chipped, addressing the issue promptly is crucial.

    Prompt replacement is essential for both aesthetic and practical reasons. This comprehensive guide will walk you through the process, from identifying the damage to achieving a professional-looking finish. You’ll learn how to assess the extent of the damage, gather the necessary tools and materials, and follow a methodical approach to ensure successful tile replacement.

    Key Takeaways

    • Understand the importance of replacing damaged tiles for safety and aesthetic reasons.
    • Learn how to assess the extent of the damage and prepare for replacement.
    • Gather the necessary tools and materials for the replacement process.
    • Follow a step-by-step guide to replace the broken tile successfully.
    • Discover how to apply grout for a seamless finish.
    • Save costs by completing the project as a DIY task.

    Essential Tools and Materials for Tile Replacement

    A successful tile replacement project begins with the right tools and materials, ensuring a professional finish. To achieve this, you need to be well-prepared with the necessary equipment.

    Image of a toolbox with tiling tools

    Buy Now

    Safety Equipment You’ll Need

    Proper safety equipment is essential when replacing a broken tile. This includes safety goggles to protect your eyes from flying debris and heavy-duty gloves to prevent cuts from sharp tile edges.

    Tools for Removing the Old Tile

    The tile removal process requires specific tools, including a grout remover or grout saw for clearing the surrounding grout, a hammer and chisel for breaking up the damaged tile, and a drill with a ceramic bit to create holes that make removal easier.

    Materials for Installing the New Tile

    When installing a new tile, you’ll need materials such as adhesive suitable for your tile type, spacers to maintain consistent grout lines, and a notched trowel for applying adhesive evenly. Ensuring you have the correct tools and materials will result in a professional-looking finish.

    Removing the Broken Tile Safely

    Safely removing a broken tile is crucial to a successful replacement. Before you start, make sure you are wearing safety goggles and heavy-duty gloves to protect yourself from sharp edges and flying debris.

    Preparing the Area

    To prevent damage to surrounding tiles, apply painter’s tape around their edges. This will protect them from accidental damage during the removal process. You should also cover nearby surfaces to catch any dust and debris.

    Removing the Surrounding Grout

    Use a grout saw or grout remover to carefully remove the grout from around the damaged tile. Work methodically to ensure complete removal without affecting adjacent tiles.

    A well-lit workshop setting, with a tiled floor in the foreground. A worker, wearing safety gloves and goggles, carefully pries up a cracked and damaged tile using a sturdy pry bar. Dust motes float in the air, and the worker's movements are precise and focused. The background is a neutral, clean workspace, with shelves and tools visible, conveying a sense of order and professionalism. The lighting is warm and natural, casting subtle shadows that add depth and dimension to the scene. The overall mood is one of diligence and care, with the worker's actions reflecting the importance of safely removing the broken tile before beginning the replacement process.

    Breaking and Removing the Damaged Tile

    Place a chisel in the centre of the tile and gently tap it with a hammer to create a crack. You can then drill evenly-spaced holes into the broken sections to make removal easier. Working from the centre outwards, use a hammer and chisel to remove the broken pieces.

    Cleaning the Exposed Surface

    Once the broken tile is removed, use a wider chisel to clean all the old thinset off the substrate. Thoroughly clean the exposed surface by vacuuming all dust and debris, then wipe with a damp cloth to remove any fine particles.

    Step Action Tools Required
    1 Prepare the area around the damaged tile Painter’s tape, coverings for nearby surfaces
    2 Remove the surrounding grout Grout saw or grout remover
    3 Break and remove the damaged tile Hammer, chisel, drill
    4 Clean the exposed surface Wider chisel, vacuum, damp cloth

    Replacing a Broken Tile: Installation Process

    The next step in replacing a broken tile is to apply the adhesive and set the new tile in place. This process requires attention to detail to ensure a strong bond between the tile and the floor.

    Applying the Adhesive Correctly

    To begin, you’ll need to apply a liberal amount of pre-mixed thin-set adhesive to the bare floor using the flat edge of a notched trowel. The notches in the trowel help to create evenly spaced ridges in the adhesive, allowing air to escape when the new tile is laid down. For maximum adhesion, it’s also recommended to spread a layer of thin-set on the back of the new tile, a process known as “back-buttering.” This ensures complete coverage and a stronger bond between the tile and the floor.

    A well-lit, high-resolution image of a person applying tile adhesive to a surface, shown in a close-up view. The person is wearing protective gloves and kneeling on the floor, using a notched trowel to spread the adhesive evenly across the surface. The adhesive has a smooth, creamy texture and the person is working with focus and precision. The background is clean and uncluttered, allowing the viewer to concentrate on the tiling process. The image conveys a sense of technical expertise and attention to detail, suitable for illustrating the installation process in a step-by-step guide on replacing a broken tile.

    Setting the New Tile in Place

    While holding the edges of the new tile, position it flat above the notched adhesive and gently drop it into place. Once the tile is set, apply even pressure over its surface and lightly wiggle it to ensure proper adhesive contact. Make sure the tile is level and aligned with the surrounding tiles. You can check the alignment by using a level tool. For more detailed guidance, you can refer to This Old House’s guide on replacing a cracked floor.

    Grouting and Finishing Touches

    After allowing the adhesive to set according to the manufacturer’s recommended time, typically 24 hours, you can proceed with grouting. Using a rubber float, scoop a good amount of pre-mixed grout and work it into the joints at a 45° angle, using a sweeping arc motion. Clean off the excess grout with a damp grout sponge. Let the grout sit for about 15 minutes before final inspection.

    Step Description Tools/Materials Needed
    1 Apply adhesive to the floor Notched trowel, pre-mixed thin-set
    2 Set the new tile in place New tile, level
    3 Apply grout to the joints Rubber float, pre-mixed grout, grout sponge

    Conclusion

    By following this guide, you’ll be able to replace a broken tile efficiently and effectively. DIY tile replacement can be a cost-effective option, especially if you only need to replace a few tiles. Contractors typically charge between £7-£30 per square foot for tile work, plus additional costs for regrouting shower or floor areas.

    To ensure a professional-looking finish, it’s crucial to follow each step in this guide carefully, from preparing the area and removing the damaged tile to installing the new tile and applying grout. Regular maintenance of your tiles is also essential for preventing future damage. This includes cleaning tiles and grout regularly, using mats in high-traffic areas, and placing felt pads under furniture to prevent scratches.

    For wall tiles in wet areas like showers, make sure to periodically check and reseal the grout to prevent water damage to the substrate. The key to successful tile replacement lies in patience and attention to detail. By taking your time with each step, you’ll achieve a more durable and aesthetically pleasing repair. Keeping spare tiles from your original installation can also ensure perfect matches for future replacements.

    In conclusion, replacing a broken tile is a manageable DIY project that can save you significant money compared to hiring professional services. With the right tools and a bit of patience, you can achieve a professional-looking finish that blends seamlessly with your existing tiling.

    FAQ

    What safety equipment should I use when removing a damaged tile?

    You should wear safety goggles, a dust mask, and gloves to protect yourself from debris and dust when removing a damaged tile.

    How do I remove the grout around the damaged tile?

    Use a grout remover and a chisel or a grout removal tool to carefully remove the grout around the damaged tile, taking care not to damage the surrounding tiles.

    What is the best way to break and remove a damaged tile?

    Use a hammer and chisel to carefully break the damaged tile into smaller pieces, then remove the pieces, taking care not to damage the surrounding tiles or the surface beneath.

    How do I clean the exposed surface after removing the damaged tile?

    Use a sponge and water to clean the exposed surface, removing any remaining adhesive or debris, and ensure the surface is dry and free of dust before applying new adhesive.

    What type of adhesive should I use to set the new tile in place?

    Use a suitable tile adhesive, such as a cement-based adhesive, and follow the manufacturer’s instructions for application and drying times.

    How do I ensure the new tile is level and secure?

    Use a spirit level to ensure the new tile is level, and apply even pressure to secure it in place, using a rubber float to remove any excess adhesive.

    How long should I wait before grouting the new tile?

    Wait until the adhesive has set, usually several hours or overnight, before grouting the new tile, following the manufacturer’s instructions for grouting.

  • Patching Small Drywall Holes: A Quick Guide

    Patching Small Drywall Holes: A Quick Guide

    Did you know that nearly 70% of homeowners in the UK face the issue of drywall damage at some point? It’s a common problem that can arise from various factors, including accidental impacts or settling foundations. When you notice holes in your wall, it can be both unsightly and concerning.

    Fortunately, repairing these imperfections is a straightforward DIY project that can save you money on professional repairs. By mastering the right techniques and using the appropriate materials, you can maintain the integrity and appearance of your wall in your home.

    Key Takeaways

    • Understand the common causes of drywall damage and how to prevent them.
    • Learn the essential tools and materials needed for drywall repair.
    • Discover the step-by-step process for patching drywall holes effectively.
    • Gain confidence in achieving professional-looking results with DIY repairs.
    • Recognise the importance of prompt repairs to prevent further deterioration.

    Understanding Different Types of Drywall Damage

    Understanding the nature of drywall damage is essential for effective repairs. Drywall can suffer from various types of damage, ranging from minor cosmetic issues to significant structural problems.

    Nail and Screw Holes

    Nail and screw holes are among the most common types of drywall damage, often resulting from hanging pictures or installing fixtures. These small holes can usually be repaired with a simple spackling compound. It’s a straightforward DIY task that requires minimal tools.

    Doorknob Dents and Small Punctures

    Doorknob dents and small punctures are another frequent issue, typically caused by accidental impacts. These can be fixed using a drywall repair kit or by applying a joint compound to smooth out the area. The key is to feather the edges so that the repair blends with the surrounding wall.

    Larger Holes and Wall Damage

    Larger holes and more extensive wall damage present a greater challenge. These can result from door handles, furniture impacts, or other significant incidents. Assessing the extent of the damage is crucial to determine whether a patch kit, mesh repair, or complete drywall replacement is needed. Structural damage behind the drywall can complicate repairs, and in such cases, professional assistance may be necessary.

    Essential Tools and Materials for Drywall Repair

    Repairing drywall effectively begins with having the right tools and materials at your disposal. To achieve a seamless finish, you’ll need to understand the basics of drywall repair.

    Image of a drywall repair kit

    Learn More

    Basic Tools You’ll Need

    For most drywall repairs, you’ll require a few basic tools. These include a putty knife, a utility knife, and sandpaper. A drywall repair kit can be particularly useful as it usually contains the necessary materials, including joint compound and a patch.

    Materials for Different Sized Repairs

    The size of the hole will determine the materials you’ll need. For small holes, spackle or joint compound can be used directly. Larger holes may require a piece of drywall to be cut and fitted over the damaged area, secured with a patch. Understanding when to use spackle versus joint compound is crucial for a successful repair.

    Preparing the Area Before Patching

    Before you start patching, it’s essential to prepare the damaged area on your drywall. This step is crucial for ensuring a smooth and durable repair.

    Cleaning the Damaged Area

    Start by cleaning the damaged area around the hole or crack in your wall. Use a soft brush or a vacuum cleaner to remove any loose debris or dust. This will help you assess the extent of the damage and ensure a clean surface for the repair.

    Removing Loose Debris and Anchors

    When dealing with holes or cracks caused by screws or nails, it’s vital to remove any loose debris and anchors. Use a screwdriver or pliers to carefully extract the screws or nails. If the screws are broken, you may need to use a drill to remove the remaining parts. Ensure the area is clear of any debris to achieve a solid repair.

    Tools Needed Purpose
    Soft Brush or Vacuum Cleaner Remove loose debris and dust
    Screwdriver or Pliers Extract screws or nails
    Drill Remove broken screw parts

    Patching Small Drywall Holes: The Simple Method

    You can easily repair small drywall holes using a simple method that involves basic materials. This approach is effective for maintaining the integrity and appearance of your drywall surface.

    Filling Nail and Screw Holes

    Filling nail and screw holes is a straightforward process. First, apply a small amount of spackle or joint compound to the hole using a putty knife. Smooth the area, ensuring the compound is evenly spread and not protruding beyond the wall surface. Allow it to dry completely before sanding it down to a smooth finish.

    Repairing Minor Dents and Dings

    For minor dents and dings, assess whether the surface paper is damaged. If not, you can fill the dent with joint compound, applying it with a putty knife. Feather the compound outwards to blend it with the surrounding area, ensuring a seamless repair. It may be necessary to apply multiple thin layers, allowing each to dry before applying the next, to achieve a smooth finish.

    To achieve a professional-looking result, it’s crucial to feather the compound around the repair area so that it blends with the surrounding wall. Proper drying time between applications is also vital for the best results. By following these steps, you can effectively repair minor damage to your drywall, maintaining its integrity and appearance.

    Using Patch Kits for Medium-Sized Holes

    Image of a drywall patch kit

    Learn More

    Medium-sized drywall holes require a more robust repair method, such as using a patch kit. These kits usually include a self-adhesive mesh patch and joint compound.

    Selecting the Right Patch Kit

    When choosing a patch kit, consider the size of the hole and the type of drywall you’re dealing with. Ensure the kit includes a suitable amount of joint compound and a patch that’s large enough to cover the damaged area.

    Applying Self-Adhesive Mesh Patches

    To apply a self-adhesive mesh patch, peel off the backing and press it firmly over the hole, ensuring it’s centred. Smooth out any air bubbles or wrinkles.

    Covering the Patch with Joint Compound

    Apply a thin layer of joint compound over the mesh patch using a putty knife. Feather the edges to blend the repair with the surrounding drywall. Allow the compound to dry before sanding.

    • Identify the proper technique for applying joint compound over mesh patches.
    • Learn how to build up layers of compound for a smooth finish.
    • Understand the importance of feathering edges.
    • Discover how to avoid common mistakes.
    • Recognise when multiple coats are necessary.
    • Learn professional techniques for applying compound with different knives.

    The California Patch Method for Larger Holes

    Larger holes in drywall require a more robust repair method, and the California Patch Method is a tried-and-tested approach. This technique involves creating a custom drywall patch to cover the damaged area, ensuring a strong and durable repair.

    Creating a Custom Drywall Patch

    To start, you’ll need to create a drywall patch that matches the size and shape of the hole. Use a drywall piece slightly larger than the damaged area, and cut it to fit precisely. Proper alignment of the patch is crucial for both structural integrity and appearance.

    A detailed, well-lit drywall patch with a smooth, seamless surface. The patch is set against a neutral, soft-textured wall, blending naturally with the surrounding drywall. The edges are precisely cut and the joint compound is evenly applied, creating a professional-looking repair. Soft, directional lighting casts subtle shadows, highlighting the patch's texture and blending it into the wall. The overall scene conveys a sense of craftsmanship and attention to detail, showcasing the California Patch method for larger drywall holes.

    Installing and Securing the Patch

    Once your patch is ready, apply a layer of joint compound around the edges and press it firmly into place. Use screws to secure the patch, making sure to recess them properly to avoid visible bumps. For added support, consider using furring strips or a support board behind the patch, especially for larger repairs.

    Backing Method Description Best Use
    Furring Strips Narrow strips of wood used to provide additional support Larger holes or weakened areas
    Support Board A larger piece of material (e.g., plywood) for extensive backing Very large holes or damaged sections

    By following these steps and using the right materials, you can achieve a professional-looking repair that will last. Remember to apply a compound to finish and blend the repair with the surrounding wall area, ensuring a seamless finish.

    Working with Joint Compound and Spackle

    Image of a person applying joint compound to a drywall

    Learn More

    To achieve a seamless finish on your drywall, you need to know how to work with joint compound and Spackle effectively. Both are used for drywall repairs, but they have different properties and uses.

    Choosing Between Joint Compound and Spackle

    Joint compound is ideal for larger repairs and finishing joints, while Spackle is better suited for small holes and dents. Your choice depends on the size and nature of the repair.

    Mixing and Applying Techniques

    When applying joint compound or Spackle, use a knife to spread it evenly. Adjust the knife angle and pressure to achieve the desired thickness. Ensure the edges are smooth and blend well with the surrounding wall.

    Feathering Edges for a Seamless Finish

    Feathering the edges of your repair is crucial for a seamless finish. Use a wide knife to spread the compound thinly towards the edges. This technique helps avoid visible transitions.

    • Identify proper feathering techniques that blend repair edges invisibly with existing walls
    • Learn how to adjust knife angle and pressure to create gradually thinning compound edges
    • Understand the importance of wide feathering for larger repairs to avoid visible transitions
    • Discover how different knife sizes contribute to effective feathering at various repair stages
    • Recognise common feathering mistakes that lead to visible repair lines after painting
    • Learn how to assess your feathering work while the compound is still wet and make adjustments

    Sanding Techniques for a Smooth Finish

    To ensure a seamless blend with the surrounding wall, proper sanding techniques are essential. Sanding is a critical step that can make or break the quality of your drywall repair.

    Selecting the Right Sandpaper Grit

    Choosing the correct sandpaper grit is vital for achieving a smooth finish. Start with a medium-grit sandpaper (120-150) to remove excess joint compound, then progress to a finer grit (220-240) for final smoothing.

    Proper Sanding Methods

    When sanding, use a gentle, even motion to avoid creating scratches or depressions. Work in a well-lit area to inspect your progress. Use a sanding block to keep the sandpaper flat and prevent unevenness.

    Common Sanding Mistakes to Avoid

    Be cautious of over-sanding, which can damage the drywall paper or expose the patch. Insufficient sanding can leave bumps or ridges. Regularly clean your sandpaper and work area to prevent dust buildup. As one expert notes, “Sanding is not just about removing excess compound; it’s about creating a surface that’s ready for painting.”

    Priming and Painting Repaired Areas

    Once you’ve completed the drywall repair, the next crucial step is to prime and paint the area to achieve a seamless finish. This process not only enhances the appearance but also protects the repair.

    Why Priming Is Essential

    Priming is a vital step as it creates a uniform base for painting, ensuring that the repair blends in with the surrounding area. A good primer can help hide the repair and create a smooth surface for painting.

    Matching Existing Paint Colours

    To achieve a seamless finish, it’s crucial to match the existing paint colour as closely as possible. Take a sample of the original paint to a hardware store to find a matching colour, or use a colour-matching app.

    Techniques for Blending Repairs

    To blend the repair with the surrounding wall area, use techniques such as feathering the edges of the paintA well-lit interior scene showcasing the process of priming and painting drywall repairs. In the foreground, a person carefully applies a high-quality primer to a freshly patched drywall surface, using a roller and tray. The primer has an even, consistent coverage, creating a smooth, seamless base for the topcoat. In the middle ground, the same person transitions to painting the primed area with a high-quality latex paint, using long, even strokes to ensure uniform coverage. The background features a clean, organized workspace with tools and materials neatly arranged, conveying a sense of professionalism and attention to detail. Soft, warm lighting from overhead fixtures casts a gentle glow, accentuating the texture of the drywall and the sheen of the freshly applied paint. The overall scene exudes a sense of care, precision, and the satisfying process of repairing and revitalizing a drywall surface.

    “Feathering involves applying thin layers of paint, gradually increasing the coverage towards the edges,”

    says a painting expert. You can also use different application tools to achieve the desired texture and appearance, and consider applying multiple thincoats for a more even finish.

    • Apply multiple thin coats of paint for a more even finish.
    • Use the right sheen to make the repair less noticeable.
    • Evaluate the repair under different lighting conditions to ensure it remains invisible.

    Repairing Textured Drywall Surfaces

    Generate an image of a person repairing a textured drywall surface

    Learn More

    Textured drywall surfaces add complexity to the repair process, but with the right techniques, you can achieve a seamless finish. To start, it’s essential to understand the type of texture you’re dealing with.

    Identifying Common Textures

    Common textures include orange peel, knockdown, and popcorn ceilings. Identifying the texture type is crucial for selecting the right repair approach. You can often determine the texture by visual inspection or by gently feeling the surface.

    Recreating Texture Patterns

    Recreating the texture pattern involves using the appropriate tools and techniques. For instance, an orange peel texture can be recreated using a specialized brush or a texture spray product. Practice on a small, inconspicuous area first to ensure a match.

    Using Texture Spray Products

    Texture spray products are ideal for achieving consistent results, especially for complex textures. To use these products effectively, you should:

    • Identify when aerosol texture products are appropriate for drywall repairs
    • Learn proper techniques for applying spray textures to achieve consistent results
    • Understand how to control spray pattern, density, and coverage with these products
    • Discover the importance of practice applications before spraying actual wall repairs
    • Recognise when to apply second coats or layers to build up texture appropriately
    • Learn how to protect surrounding areas from overspray when using texture products

    By mastering these techniques and understanding when to apply second coats, you can ensure a successful repair that blends with the surrounding wall surface, maintaining the original texture.

    Conclusion

    Armed with the right techniques and materials, you’ll find that patching small drywall holes is a breeze. To achieve professional-looking results, remember to prepare the area properly, apply the repair compound carefully, and finish with a smooth sanding.

    By mastering these simple drywall repair skills, you can save money and maintain your home’s appearance. With practice, you’ll become more confident in tackling small repairs, and your walls will benefit from prompt attention to holes and other damage.

    FAQ

    What is the best way to repair a nail hole in the wall?

    To repair a nail hole, you can use a putty knife to fill the hole with joint compound or spackle. Allow it to dry, then sand the area to a smooth finish.

    How do I patch a hole in a plasterboard wall?

    For a larger hole, you’ll need to use a drywall repair kit or create a custom drywall patch. Apply joint compound around the edges of the patch and press it firmly into place. Use a putty knife to smooth out the edges.

    What is the difference between joint compound and spackle?

    Joint compound is used for larger repairs and is applied in multiple coats, while spackle is used for smaller repairs and dries quickly. Both can be sanded to a smooth finish.

    How do I match the texture of my wall after making a repair?

    To match the texture, you can use a texture spray product or recreate the pattern manually with a brush or sponge. Practice on a test area first to achieve the desired effect.

    Do I need to prime the wall before painting over a repair?

    Yes, priming is essential to ensure a uniform paint colour and to cover any remaining imperfections. Use a good-quality primer and allow it to dry according to the manufacturer’s instructions.

    What sanding techniques should I use to achieve a smooth finish?

    Use a sanding block or sandpaper with a fine grit (120-150) to sand the repair area. Work in a circular motion, feathering the edges to blend with the surrounding surface.

    Can I use a utility knife to cut a drywall patch?

    Yes, a utility knife is ideal for cutting a drywall patch to size. Score the drywall carefully and snap it along the scored line to achieve a clean edge.

  • DIY Guide: Repairing a Leaky Kitchen Faucet

    DIY Guide: Repairing a Leaky Kitchen Faucet

    A single drip per second from your kitchen faucet can waste over 3,000 gallons of water per year, resulting in unnecessary costs on your water bill.

    This leaky faucet not only wastes precious water but also indicates a potential issue that could lead to more significant problems if left unaddressed.

    Fortunately, repairing the issue yourself is a feasible task. This guide will walk you through identifying and fixing the leak in your faucet, helping you save on your water bill and avoid costly plumbing services.

    Key Takeaways

    • Identify the source of the leak in your kitchen faucet.
    • Gather the necessary tools and materials for the repair.
    • Follow step-by-step procedures to fix different faucet mechanisms.
    • Complete the repair in under an hour with minimal cost.
    • Learn maintenance tips to prevent future leaks.

    Why You Should Fix That Dripping Faucet

    A leaky faucet, though seemingly minor, can have a substantial environmental impact and affect your wallet. The issue goes beyond the mere annoyance of the constant dripping sound.

    The Environmental Impact of Leaks

    A leaky kitchen faucet can waste over 3,000 gallons of water each year. This not only strains your household’s water resources but also contributes to overall water wastage.

    Cost Savings on Your Water Bill

    Fixing a leaky faucet is a cost-effective home repair. By doing so, you can save on your water bill by preventing the waste of thousands of gallons of water annually.

    Issue Annual Water Waste Impact
    1 drip per second Over 3,000 gallons Increased water bill
    Leaky faucet Over 3,000 gallons Environmental strain

    By addressing the issue promptly, you not only reduce your environmental footprint but also lower your utility bills. It’s a simple yet effective way to make your home more sustainable.

    Tools and Materials You’ll Need

    Image of a toolkit with plumbing tools

    Learn More

    Before you start repairing your leaky kitchen faucet, it’s essential to gather the necessary tools and materials. Having the right equipment at hand will make the process smoother and more efficient.

    Essential Tools for Faucet Repair

    For a successful faucet repair, you’ll need to gather several basic tools, including an adjustable wrench, slip joint pliers, and a 4-in-1 screwdriver that can handle different screw types. Specialized tools like Allen wrenches may also be necessary, depending on your specific faucet model.

    Materials and Replacement Parts

    A faucet repair kit appropriate for your faucet type is essential and typically includes replacement washers, O-rings, and seals that commonly wear out. You’ll also need plumber’s tape (PTFE tape) to create watertight seals when reassembling components.

    Additional items to consider include a small basin or container to organize and prevent losing small parts during disassembly, a flashlight or headlamp to illuminate under the sink, and towels or rags for cleaning up water spills.

    Safety First: Preparing for the Repair

    To avoid any accidents or water damage, turning off the water supply is the first step in repairing your kitchen faucet. This ensures a safe and dry work environment, allowing you to focus on the repair without any unnecessary risks.

    Turning Off the Water Supply

    Locate the water shut-off valves beneath your sink, typically found for both hot and cold water lines. Turn these valves clockwise until they are fully closed to shut off the water supply. After shutting off the supply, open the faucet to release any remaining water pressure and confirm that the water flow has stopped completely.

    Protecting Your Sink and Workspace

    To prevent any damage or mess during the repair, place towels around the sink area to catch any residual water. Additionally, consider placing a stopper or rag in the drain to prevent small parts from falling into the drain. Wearing protective gloves can also shield your hands from sharp edges and any cleaning chemicals that may be present on faucet components.

    A dimly lit kitchen interior, with a skilled hand reaching down to turn off a metal water supply valve under the sink. The valve is highlighted in the foreground, its chrome surface gleaming in the soft, warm lighting. The background is blurred, but suggests the familiar surroundings of a kitchen cabinet. The atmosphere is one of focused attention, as the person prepares to address the repair at hand, prioritizing safety and caution. The image conveys a sense of care and control, capturing the essential step of shutting off the water supply before beginning a faucet repair.

    Ensuring you have adequate lighting under the sink and clearing the area of any cleaning supplies or other items will give you ample workspace for the repair. This preparation is key to a successful and stress-free faucet repair.

    Safety Precautions Description
    Turn off Water Supply Locate and turn the shut-off valves clockwise to stop water flow.
    Protect Workspace Use towels to catch residual water and clear the area under the sink.
    Wear Protective Gear Consider wearing gloves to protect hands from sharp edges and chemicals.

    Identifying Your Faucet Type

    The first step in fixing a dripping faucet is to identify its type, as different faucets require unique repair approaches. You can determine the type by examining the handle and the faucet’s overall design.

    Compression Faucets

    Compression faucets are the oldest type and have two handles that must be turned several times to control water flow. They use rubber washers that compress against a valve seat.

    Ball Faucets

    Ball faucets typically feature a single handle that moves over a ball-shaped cap. Inside, a ball assembly with slots controls water flow and temperature.

    Cartridge Faucets

    Cartridge faucets contain a cartridge insert that controls water flow. They can have one or two handles and are identified by their up-down movement for water volume and side-to-side movement for temperature.

    Ceramic Disk Faucets

    Ceramic disk faucets are the most modern and durable type, featuring a single handle that moves over a cylindrical body containing two ceramic disks that control water flow.

    Identifying your faucet type before purchasing repair parts will save you time and prevent unnecessary trips to the hardware store.

    Diagnosing the Source of Your Leak

    Accurate diagnosis of the leak is essential for effective kitchen faucet repair. To start, you need to identify where the water is coming from. Begin by inspecting the faucet’s visible parts for any signs of leakage.

    A detailed close-up view of a leaky kitchen faucet, showing the internal components and the source of the water leak. The faucet is presented in a neutral, well-lit setting, with a clean, minimalist background, allowing the viewer to focus on the key diagnostic elements. The image showcases the dripping water, the worn washers, and the damaged seals, providing a clear visual reference for the "Diagnosing the Source of Your Leak" section of the DIY guide. The lighting is soft and even, highlighting the intricate details of the faucet mechanism, and the camera angle is angled to provide a clear, accessible view for the reader.

    Look for drips or water stains near the base and spout of your faucet. These are common areas where leaks occur. Checking these areas carefully will help you pinpoint the source of the problem.

    Common Leak Locations

    Leaks can manifest in various parts of your kitchen faucet. Common locations include the spout, the base of the faucet, around the handles, and underneath the sink where the supply lines connect. A leak from the spout when the faucet is turned off often indicates worn internal components such as washers, O-rings, or cartridges that need replacement.

    The Paper Towel Test

    The paper towel test is a simple yet effective method for detecting hidden leaks. Wrap dry paper towels around suspected leak areas and check for wetness after a few minutes. For intermittent leaks, consider leaving the paper towels in place overnight to catch any slow leaks that might not be immediately apparent.

    By accurately diagnosing the source of your faucet leak, you can determine the appropriate repair method and replacement parts needed, ensuring a more efficient and effective fix.

    Repairing a Leaky Kitchen Faucet: Basic Steps

    Repairing a leaky kitchen faucet can be a straightforward DIY task if you follow the right steps. The process involves understanding your faucet type and following a general repair procedure.

    Disassembling the Faucet

    To start, you’ll need to disassemble the faucet to access its internal components. Begin by removing any decorative caps or buttons on the handle, which typically conceal the handle attachment screw. Use the appropriate screwdriver to remove the screw, then gently lift off the handle. Be careful not to force it if it’s stuck.

    Once the handle is removed, you’ll need to access the cartridge, ball assembly, or valve stem depending on your faucet type. Lay out parts in the order they were removed to make reassembly easier.

    Inspecting Internal Components

    Carefully inspect all internal parts for signs of wear, mineral buildup, cracks, or damage that could be causing the leak. Pay particular attention to rubber washers, O-rings, and seals as these are the most common failure points in most faucets.

    Clean all parts thoroughly before reassembly, removing any mineral deposits or corrosion with white vinegar or a suitable cleaner. When purchasing replacement parts, bring the old components with you to ensure an exact match or refer to your faucet‘s model number.

    Step Action Tools Needed
    1 Remove decorative caps and unscrew handles Screwdriver
    2 Remove exposed nut with a wrench Wrench
    3 Inspect and replace worn-out parts Replacement parts

    By following these steps, you should be able to repair your leaky kitchen faucet effectively.

    Fixing Compression Faucet Leaks

    Generate an image of a compression faucet repair kit

    Learn More

    Repairing a compression faucet leak is a DIY-friendly task that requires some basic plumbing knowledge. Compression faucets are the oldest and simplest type of faucet, making them relatively straightforward to repair when they develop leaks.

    Replacing Washers and O-rings

    The most common cause of leaks in compression faucets is worn rubber washers that no longer create a watertight seal when compressed against the valve seat. To fix the leaky faucet, you’ll need to remove the handle by unscrewing the decorative cap and removing the handle screw. Inspect the rubber washer at the bottom of the stem and replace it if it shows signs of wear. Check the O-rings around the stem as well, as these can also deteriorate and cause leaks around the handle area.

    Reassembling the Compression Faucet

    Apply plumber’s grease to new washers and O-rings before install new components to ensure smooth operation. When reassembling, ensure all parts are properly aligned and avoid overtightening, which can damage new components. Reassemble the handle and stem assembly, and your compression faucet should be leak-free.

    Repairing Ball-Type Faucet Leaks

    Image of a ball faucet repair kit

    Learn More

    Leaky ball faucets can be a nuisance, but with the right tools and a bit of know-how, you can fix them yourself. Ball-type faucets are common in kitchens and feature a complex internal mechanism with a ball assembly that controls both water flow and temperature.

    To start the repair, you’ll need to disassemble the faucet. Begin by removing the decorative cover and unscrewing the handle. Then, remove the cap, cam, and seal with pliers. This will give you access to the internal components.

    Replacing the Ball Assembly

    The ball assembly may need replacement if it shows signs of corrosion, pitting, or damage to the water ports. To replace it, carefully remove the old assembly and install new parts from a ball faucet repair kit.

    Installing New Seals and Springs

    Beneath the ball, you’ll find small rubber seats and springs that control water flow. Remove these with needle-nose pliers and replace them with new components from the repair kit. Ensure the new parts are properly seated and the ball faucet operates smoothly.

    By following these steps and using a ball faucet repair kit, you should be able to fix the leak and get your faucet working properly again.

    Fixing Cartridge Faucet Leaks

    Fixing a leaky cartridge faucet is a relatively straightforward process that can save you money on your water bill. Most cartridge faucets are one-handled, adjusting water pressure by pulling the handle up and down, while temperature is adjusted from left to right.

    Image of a cartridge faucet handle being removed

    Learn More

    Removing and Replacing the Cartridge

    To disassemble the faucet, first unscrew the handle. If you see a clip holding the cartridge in place, remove it with pliers. Then, take out the faucet spout and the O-rings underneath.

    Dealing with Stuck Cartridges

    Cartridges can become stuck due to mineral buildup or corrosion. Applying penetrating oil and gently wiggling the cartridge can help loosen it. For stubborn cases, consider using a special cartridge puller.

    By following these steps, you should be able to fix leaky issues with your cartridge faucet. Remember to clean the faucet body before installing a new cartridge, ensuring it’s properly aligned and secured.

    Repairing Ceramic Disk Faucet Leaks

    Image of a ceramic disk faucet being repaired

    Learn More

    If you’re dealing with a leaky ceramic disk faucet, understanding its internal mechanism is crucial for repair. Ceramic disk faucets are known for their modern design and durability, featuring two ceramic disks that control water flow by sliding against each other.

    Cleaning and Replacing Seals

    The ceramic disks themselves rarely need replacement; however, the neoprene seals around them can deteriorate, causing leaks. To address this, begin by removing the handle and unscrewing the disk cylinder housing to expose the seals. If the seals are damaged, they should be replaced. Soaking them in white vinegar can help remove mineral deposits if they’re salvageable.

    When replacing seals, ensure they are properly seated in their grooves. Applying a thin layer of silicone grease can enhance their sealing capability. For detailed instructions on disassembling your faucet, you can refer to guides on faucet disassembly.

    Proper Reassembly Techniques

    During reassembly, it’s critical to align the disk cylinder correctly and tighten it according to the manufacturer’s specifications. Overtightening can lead to cracked ceramic components, so caution is advised. After completing the repairs, turn on the water supply slowly to avoid water hammer that could damage the ceramic disks.

    It’s also worth noting that ceramic disk faucets typically come with longer warranties. Before starting your repair, check if your faucet is still under warranty. By following these steps and taking the necessary precautions, you should be able to fix the leaky faucet effectively.

    Fixing Pull-Down Sprayer Issues

    Image of a kitchen faucet with a pull-down sprayer

    Learn More

    Kitchen faucets with pull-down sprayers offer enhanced versatility, but users often face challenges with their operation, particularly with retraction and spray functions.

    Addressing Retraction Problems

    One common issue with pull-down sprayers is their failure to retract properly. This can be due to a tangled or blocked hose under the sink. To resolve this, check under your sink for any obstructions and clear the way. Sometimes, adjusting the counterweight on the hose can also help.

    Resolving Spray Function Issues

    Problems with the spray function can often be traced back to mineral buildup in the spray head or diverter mechanism. To fix this, remove the spray head and soak it in white vinegar for several hours. Regular cleaning can prevent such issues and ensure a smooth flow.

    For persistent problems, inspecting the hose connections for worn O-rings or loose fittings is advisable. Some pull-down sprayers have flow restrictors that can become clogged; cleaning these can improve water flow.

    Preventing Future Faucet Leaks

    By performing a few simple tasks, you can significantly reduce the likelihood of faucet leaks. Regular maintenance is essential to extend the lifespan of your kitchen faucet and prevent issues that could lead to costly repairs.

    Regular Maintenance Tips

    Inspect your faucets every three to six months for early signs of wear, corrosion, or minor leaks. Regularly clean your faucet with a gentle cleaner and soft cloth to avoid mineral and grime buildup. It’s also important to clean the aerator periodically to prevent clogging and ensure steady water flow. Avoid using harsh chemical cleaners as they can damage the finish and components of the faucet.

    • Regularly inspect your faucets for signs of wear and tear.
    • Clean the aerator to prevent clogging.
    • Avoid harsh chemicals that can damage faucet finishes.

    Managing Water Pressure

    High water pressure can strain your plumbing system, leading to leaks and other issues. Ideally, your pressure should be between 40 and 60 psi. If your water pressure is consistently high, consider installing a pressure regulator to protect your plumbing system.

    When to Call a Professional Plumber

    Image of a professional plumber fixing a leaky faucet

    Contact Us

    Knowing when to call a professional plumber can save you from further water damage. While many faucet repairs are suitable for DIY, certain situations call for professional expertise to prevent further damage or complications.

    Signs the Repair Is Beyond DIY

    If your repair attempts haven’t resolved the leak, or if the leak worsens after your efforts, it’s time to consider calling a plumber. Extensive corrosion or damage to the faucet body or water supply lines typically requires professional attention.

    Finding a Qualified Plumber

    When selecting a plumber, look for proper licensing, insurance, and positive reviews from previous customers. Ask potential plumbers about their experience with your specific faucet brand and type before hiring them. A qualified plumber can often spot potential issues that might not be immediately apparent, preventing future problems.

    Professional repairs may cost more upfront than DIY solutions, but they often provide longer-lasting results and may come with service guarantees. If you’re facing a leaky faucet or any other plumbing issue, don’t hesitate to seek professional help to avoid extensive water damage.

    Conclusion

    By completing this DIY guide, you’ve taken a significant step towards saving water and reducing your utility bills. You’ve learned how to diagnose and repair common issues with your kitchen faucet, a skill that can be applied to other faucets in your home, including those in the bathroom.

    Regular maintenance and gentle use of your faucets will extend their lifespan. Keep basic plumbing tools handy for quick repairs. If difficulties arise, consult manufacturer instructions or seek professional help to avoid further damage.

    FAQ

    What are the most common causes of a leaky kitchen faucet?

    The most common causes include worn-out O-rings, damaged valve seats, loose or corroded parts, and mineral buildup due to hard water. Identifying the root cause is crucial for effective repair.

    How do I turn off the water supply to my kitchen faucet?

    To turn off the water supply, locate the shut-off valves under the sink and turn them clockwise. You may need to use an adjustable wrench to tighten the valves securely.

    What type of faucet do I have, and how does it affect the repair?

    Common faucet types include compression, ball, cartridge, and ceramic disk faucets. Each type requires different repair approaches, so identifying your faucet type is essential for a successful fix.

    Can I use a universal replacement cartridge for my faucet?

    While universal cartridges are available, it’s recommended to use a replacement cartridge specifically designed for your faucet model to ensure compatibility and optimal performance.

    How can I prevent mineral buildup in my faucet?

    Regularly cleaning your faucet with a mixture of vinegar and water can help remove mineral deposits. Additionally, installing a water filter can reduce mineral buildup over time.

    What are the signs that indicate I need to call a professional plumber?

    If you’re unsure about the repair, encounter complex issues, or notice signs of water damage, it’s best to consult a qualified plumber to avoid further complications.

    How often should I inspect and maintain my kitchen faucet?

    Regular inspections every 6-12 months can help identify potential issues before they become major problems. Simple maintenance tasks, such as cleaning the aerator, can also prolong the lifespan of your faucet.

  • Quiet Your Squeaky Door Hinge in 3 Simple Steps

    Quiet Your Squeaky Door Hinge in 3 Simple Steps

    A squeaky door hinge can be more than just a minor irritation; it’s a sound that can grate on your nerves every time someone enters or leaves a room in your home.

    Fortunately, silencing that annoying creak doesn’t require professional help. In fact, with just a few simple steps, you can fix the problem for good. Understanding why your door squeaks in the first place is key to preventing the issue from recurring.

    By the end of this article, you’ll know how to transform your squeaky doors into silently operating fixtures, enhancing the comfort of your house.

    Key Takeaways

    • Identify the causes of squeaky door hinges
    • Learn simple steps to fix squeaky door hinges
    • Discover effective lubricants for long-term results
    • Understand how to prevent the problem from recurring
    • Transform squeaky doors into silently operating fixtures

    Why Do Doors Squeak? Understanding the Annoying Noise

    A squeaky door hinge can be more than just a minor annoyance; it’s often a sign of wear and tear. Understanding the reasons behind this irritating sound is crucial to fixing the problem.

    Common Causes of Squeaky Door Hinges

    Squeaky door hinges are typically caused by a lack of lubrication, allowing metal parts to rub against each other. Other factors include dirt and grime accumulation, rust, and misalignment of the door or hinges.

    • Dirt and grime can cause the hinge pins to stick, leading to squeaks.
    • Rust on the hinges can also contribute to the annoying noise.
    • Misaligned doors can put extra stress on the hinges, causing them to squeak.

    How Friction Creates That Irritating Sound

    The science behind the squeak involves friction between moving parts. When metal surfaces with high friction coefficients slide against each other, they create vibrations that travel through the hinge and door, amplifying the sound.

    Cause Effect
    Friction between metal parts Squeaking noise
    Dirt and grime accumulation Increased friction, leading to squeaks
    Rust on hinges Additional friction and noise

    By understanding the causes of squeaky door hinges, you can take the first step towards fixing the issue. Whether it’s lubricating the hinges or addressing the underlying causes, you can enjoy a squeak-free home.

    What You’ll Need: Tools and Materials

    The key to fixing a squeaky door hinge lies in having the right tools and materials at your disposal. To effectively silence that annoying squeak, you’ll need to prepare a few basic supplies and choose the right lubricant for the job.

    Basic Cleaning Supplies

    Before applying any lubricant, you’ll need to clean the door hinges. Basic cleaning supplies include a cloth or brush to remove dust and grime, and possibly a screwdriver to remove the hinge pins.

    Lubrication Options

    When it comes to lubricating door hinges, you have several options. Some of the most effective lubricants include:

    • Silicone spray: widely considered the best lubricant for door hinges due to its long-lasting results and lack of attraction to dust or dirt.
    • Household oils like olive oil, which can serve as temporary lubricants in a pinch.
    • Petroleum jelly (Vaseline): offers excellent lubrication properties and stays in place well, though it can be messy to apply.
    • Lithium grease: provides heavy-duty lubrication, ideal for frequently used doors.
    • Specialized hinge lubricants available at hardware stores, formulated for metal-on-metal friction and often including rust inhibitors.

    Step 1: Prepare and Clean the Door Hinges

    To effectively quiet a squeaky door, start by giving the hinges a good clean. This initial step is crucial for ensuring that your lubrication efforts are effective and long-lasting.

    Removing Dust and Grime

    Dust and grime accumulation on door hinges is a common cause of squeaks. You should start by wiping down the hinges with a damp cloth to remove any surface dirt. For more thorough cleaning, use a small brush to sweep away debris from the hinge pin and surrounding areas.

    Dealing with Rust and Old Paint

    Rust on door hinges not only contributes to squeaking but can eventually cause structural damage if left untreated. For light surface rust, use fine steel wool or a metal brush to gently scrub affected areas until the clean metal is visible. More severe rust may require a specialized rust remover solution. Apply the solution according to the product instructions and allow adequate time for it to work before wiping clean.

    Old paint that has seeped into the hinge mechanism can be particularly troublesome as it creates uneven surfaces that increase friction. Carefully scrape away paint from moving parts using a small flathead screwdriver or utility knife, taking care not to damage the metal underneath.

    Issue Solution
    Dust and Grime Wipe with a damp cloth and brush away debris
    Light Surface Rust Use fine steel wool or a metal brush
    Severe Rust Apply a specialized rust remover solution
    Old Paint Scrape away with a small flathead screwdriver or utility knife

    This cleaning job may seem tedious, but it’s essential for restoring smooth operation and ensuring your lubrication efforts will be effective and long-lasting. By thoroughly cleaning your door hinges, you’re setting the stage for a successful squeak-elimination process.

    Step 2: Apply the Right Lubricant to Fix a Squeaky Door Hinge

    After cleaning, the next crucial step is to lubricate your door hinges effectively. The right lubricant can make all the difference in eliminating that annoying squeak and ensuring your door operates smoothly.

    Household Lubricants You Already Have

    You might be surprised to find that you already have several lubricant options in your home. These can be particularly handy for a quick fix or when you’re waiting to get a more specialized product.

    Olive Oil and Cooking Sprays

    Olive oil is a readily available lubricant that can be used on squeaky door hinges. Simply apply a small amount to the hinge pins. Cooking sprays can also be effective, as they often contain lubricating properties.

    Petroleum Jelly (Vaseline)

    Petroleum jelly, commonly known as Vaseline, is another household item that can be used to lubricate door hinges. It not only reduces friction but also helps protect the metal from rust.

    Bar Soap and Other Surprising Options

    Believe it or not, bar soap can be used to lubricate squeaky hinges. Rub the soap onto the hinge pins, and you’ll notice a reduction in the squeaking noise. Other surprising options include lip balm and certain types of wax.

    Specialized Lubricants for Longer-Lasting Results

    While household items can provide a temporary solution, specialized lubricants are designed to offer longer-lasting results. These products are typically more effective at reducing friction and protecting against wear and tear.

    Silicone Spray: The Top Choice

    Silicone spray is often considered the top choice for lubricating door hinges. It provides a durable barrier against friction and is resistant to dust and dirt, making it an excellent long-term solution. As Tom Silva, a renowned carpenter, once said,

    “Silicone spray is one of the best lubricants you can use on door hinges; it’s long-lasting and doesn’t attract dirt.”

    A bottle of clear, viscous lubricant sits on a wooden surface, its label prominently displaying the words "Door Hinge Lubricant". The bottle is illuminated by warm, natural lighting, casting a soft glow on the surrounding area. The background is blurred, creating a focus on the bottle and its contents. The image conveys a sense of practicality and functionality, capturing the essence of the product's intended use for maintaining and quieting squeaky door hinges.

    WD-40 is a popular product that is often used to silence squeaky door hinges. However, it’s primarily designed as a water displacer and cleaner rather than a long-term lubricant. While it can provide temporary relief, it tends to evaporate quickly and attract dust, potentially creating new friction issues. For a more permanent fix, consider using a dedicated lubricant like silicone spray.

    Step 3: Work the Lubricant and Test the Door

    After applying the lubricant, you need to test the door to ensure the hinge is properly lubricated. This step is crucial in confirming that the squeak is eliminated and the door operates smoothly.

    Opening and Closing Technique

    To effectively work the lubricant into the hinge, open and close the door several times. This action helps distribute the lubricant evenly across the hinge pin and barrel. As you do this, you may notice the squeak diminishing or disappearing altogether.

    When to Reapply Lubricant

    Even the best lubricants will eventually wear out or dissipate over time, requiring reapplication to maintain squeak-free operation. The frequency of reapplication depends on the type of lubricant used and environmental factors. For instance, household lubricants like cooking oils may need refreshing every 2-3 months, while specialized products can last 6-12 months or longer.

    Lubricant Type Reapplication Frequency
    Household Lubricants (e.g., cooking oils) Every 2-3 months
    Specialized Lubricants Every 6-12 months or longer

    It’s also important to consider environmental factors such as humidity and temperature fluctuations, which can affect how quickly the lubricant breaks down. Doors in bathrooms or exterior locations may require more frequent attention. Establishing a regular maintenance schedule for high-traffic doors can prevent squeaks from developing in the first place.

    Beyond the Hinges: Other Causes of Squeaky Doors

    The source of a squeaky door isn’t always the hinge; sometimes, it’s other parts of the door that need attention. When you’ve lubricated the hinges but the squeak persists, it’s time to investigate further.

    Misaligned or Warped Doors

    A door that is not properly aligned with its frame can cause the hinges to work under stress, leading to squeaks. A warped door can also put uneven pressure on the hinges and other hardware, resulting in unwanted noise.

    Loose Screws and Hardware Issues

    Loose screws in the hinge plates can allow unwanted movement, creating squeaks. You should check all visible screws on both the door and frame sides of each hinge, tightening any that show signs of loosening. Moreover, door handles, locks, and latches can also develop squeaks as their internal mechanisms wear or become dirty.

    Cause Solution
    Misaligned or Warped Doors Check door alignment, adjust or replace if necessary
    Loose Screws Tighten screws, use wood toothpicks and glue for a tighter fit
    Dirty or Worn Hardware Clean or replace door handles, locks, and latches

    By addressing these potential causes, you can enjoy a squeak-free door. Applying the right lubricant to these additional hardware components can resolve squeaking issues that persist after hinge treatment.

    A dimly lit workshop interior, with a worn wooden workbench in the foreground, various tools and hardware scattered across its surface. In the middle ground, a partially disassembled door frame stands, revealing the complex mechanisms of the hinges and latch. The background is hazy, with shelves of spare parts and supplies lining the walls, casting long shadows from a single overhead light fixture. The overall atmosphere is one of investigation and problem-solving, with a focus on uncovering the underlying causes of a persistent squeaky door.

    Conclusion: Enjoying Your Squeak-Free Home

    With the squeak gone, you can now enjoy a more serene living environment, thanks to your DIY prowess. You’ve mastered how to fix squeaky door hinges in three simple steps. Regular maintenance will prevent the problem from recurring and extend the life of your door hardware. Different doors may require different solutions based on their location and usage. Consider creating a maintenance schedule to address door hinges preventatively. By doing so, you’ll not only enjoy a squeak-free home but also gain confidence in tackling other minor home repairs.

    FAQ

    What is the best lubricant for squeaky door hinges?

    You can use petroleum jelly, olive oil, or specialised lubricants like silicone spray or WD-40 to silence squeaky door hinges. These lubricants reduce friction between moving parts, eliminating the squeak.

    Why do my door hinges squeak after lubrication?

    If your door hinges squeak after lubrication, it may be due to using the wrong type of lubricant or not applying enough lubricant. Additionally, if the hinges are rusty or dirty, the lubricant may not be able to penetrate effectively.

    Can I use cooking oil to lubricate my door hinges?

    While cooking oil can provide temporary relief, it is not the best option for lubricating door hinges. Cooking oil can attract dust and dirt, causing the hinges to become dirty and squeaky again. Instead, opt for a lubricant specifically designed for door hinges.

    How often should I lubricate my door hinges?

    You should lubricate your door hinges every 6-12 months, depending on usage and environmental conditions. Regular lubrication will help prevent squeaks and keep your doors operating smoothly.

    Are squeaky door hinges a sign of a bigger problem?

    Squeaky door hinges can be a sign of a bigger issue, such as misaligned or warped doors, loose screws, or worn-out hardware. If you’ve lubricated your door hinges and the squeak persists, it may be worth investigating these potential underlying causes.

    Can I prevent my door hinges from squeaking in the first place?

    Yes, you can prevent door hinges from squeaking by regularly cleaning and lubricating them. Additionally, ensuring that your doors are properly aligned and that the hardware is secure can help prevent squeaks from developing.

  • Bosch Drill Review: Tool Reviews Tips for UK Homes

    Bosch Drill Review: Tool Reviews Tips for UK Homes

    Did you know that a reliable cordless drill is an indispensable tool for most home improvement projects? With numerous options available in the market, selecting the right one can be daunting. Bosch, a renowned brand for its quality and performance, offers a range of drill drivers that cater to various needs.

    Whether you’re a seasoned DIY enthusiast or a homeowner looking to tackle minor repairs, Bosch’s cordless drills are designed to deliver exceptional performance. Their products are engineered to provide reliability and versatility, making them a popular choice among UK homeowners.

    Key Takeaways

    • Assessing the performance of Bosch drills for home improvement tasks.
    • Understanding the design and features that make Bosch drills stand out.
    • Evaluating the value for money of different Bosch drill models.
    • Comparing various Bosch drill models to determine the best fit for your needs.
    • Practical tips for maximising the use of your Bosch drill.

    Bosch Cordless Drill Design and Build Quality

    Image of a Bosch cordless drill being held by a user, highlighting its compact design

    Learn More

    A key aspect of Bosch’s cordless drill lineup is its attention to design and build quality, making it a favourite among DIY enthusiasts and professionals alike. The Bosch cordless drill is engineered to be both functional and ergonomic.

    Compact Form Factor and Ergonomics

    The Bosch cordless drill boasts a compact form factor that makes it easy to manoeuvre in tight spaces, a common challenge in many UK homes. Its ergonomic design ensures a comfortable grip, reducing strain during extended use.

    Chuck Design and Durability

    The chuck of the Bosch cordless drill is designed for durability and ease of use. It securely holds drill bits in place, ensuring precise drilling operations. The robust construction of the chuck contributes to the overall durability of the drill.

    Weight and Balance

    The Bosch drill is notably lighter, weighing just 2.8 pounds with the battery included, compared to the 3.5 pounds or more of other cordless drills in the same tier. This lightweight design, combined with its compact size, makes it exceptionally nimble. Key benefits include:
    – Carefully engineered weight distribution for optimal balance, reducing wrist strain.
    – Significantly lighter than competitor drills, making it suitable for users who struggle with heavier tools.
    – Less arm fatigue during overhead work, allowing for longer working sessions.
    – Balanced design ensures the drill doesn’t feel front-heavy even with larger bits installed.

    Core Specifications and Features

    Image of Bosch Cordless Drill with highlighted features

    Learn More

    When selecting a cordless drill, understanding its core specifications and features is crucial for making an informed decision. The Bosch cordless drill is renowned for its robust build quality and advanced features that enhance its performance and usability.

    Motor Type and Power Output

    The Bosch cordless drill is equipped with a high-performance motor that provides a significant power output, making it suitable for demanding tasks. The motor type varies across models, with some featuring brushless technology for improved efficiency and longevity.

    Battery Platform and Runtime

    Bosch cordless drills are part of a broader battery platform, allowing users to share batteries across multiple tools. The runtime of these drills depends on the battery capacity and the task at hand. Bosch offers a range of battery options to suit different needs.

    Speed Settings and Torque Control

    These drills come with adjustable speed settings and torque control, enabling users to tailor the tool’s performance to specific tasks. This feature is particularly useful for preventing damage to materials and ensuring precise control.

    Additional Features

    Bosch cordless drills incorporate several practical features, including kickback control, which reduces the risk of sudden torque reactions. They also feature integrated LED work lights that improve visibility in dark work areas. Other features include belt clips for convenient carrying and electronic motor protection to prevent overheating.

    • Bosch cordless drills incorporate practical safety features like kickback control.
    • Integrated LED work lights improve visibility in dark work areas.
    • Many Bosch models include belt clips for convenient carrying.
    • The electronic motor protection system prevents overheating.
    • Some premium models feature Bluetooth connectivity for customising settings.

    Bosch Drill Review: Performance Testing

    Bosch cordless drills are designed to deliver high performance, and our testing reveals just how well they fare. In this section, we will delve into the performance aspects of Bosch cordless drills, examining their drilling capabilities, driving performance, and battery life during heavy use.

    Drilling Performance in Different Materials

    The Bosch cordless drills demonstrated impressive drilling performance across various materials. Drilling into wood was effortless, with the drill bits gliding through without significant resistance.

    Wood Drilling Capabilities

    When drilling into wood, the Bosch cordless drill showed remarkable speed and accuracy. The drill’s powerful motor and efficient battery combination enabled it to handle large-diameter holes with ease.

    Metal Drilling Performance

    Drilling into metal was also a strong suit for the Bosch cordless drill. The drill’s robust motor and precise control allowed for smooth drilling through various metal types, including steel and aluminum.

    A well-lit, high-angle studio shot of a Bosch cordless drill being tested for performance. The drill is held securely in a test rig, with various sensors and instruments surrounding it. The scene has a clean, professional atmosphere, with a plain white background that allows the drill to be the focal point. Bright, directional lighting casts dramatic shadows, highlighting the tool's sleek design and engineering details. The camera is positioned to capture a three-quarter view, showcasing the drill's key features and mechanisms in action during the testing process.

    Driving Performance

    In addition to drilling, the Bosch cordless drill excelled in driving performance. The drill’s advanced motor control and ergonomic design made it easy to drive screws with precision.

    Screw Driving Precision

    The Bosch cordless drill offered excellent screw driving precision, allowing users to drive screws accurately and efficiently. The drill’s adjustable torque settings and comfortable grip made it ideal for a variety of driving tasks.

    Handling Larger Fasteners

    The drill also handled larger fasteners with ease, demonstrating its capability to tackle demanding tasks. The combination of powerful torque and precise control made it suitable for heavy-duty applications.

    Battery Life During Heavy Use

    The battery life of the Bosch 18V Compact Brushless drill is quite good, allowing users to complete tasks without frequent recharging. Our testing showed that the 2.0Ah battery provided sufficient power for extended drilling and driving sessions.

    During heavy-use testing, Bosch cordless drills demonstrated impressive battery endurance. The efficient brushless motors maximised battery life, enabling users to complete more tasks per charge. Even under demanding conditions, the battery performance remained consistent, and the quick charging time of approximately 63 minutes for a 2.0Ah battery minimised downtime between work sessions.

    Value for Money and Target Users

    The value for money that Bosch drills offer is a critical consideration for both DIY enthusiasts and professionals. When evaluating a Bosch drill, it’s essential to consider not just the initial price point, but also its long-term benefits and overall performance.

    Price Point Analysis

    Bosch drills, particularly the GSR18V-90 C, may seem expensive at first glance. However, their compatibility with the 18V battery platform is a significant advantage, especially for those already invested in the Bosch ecosystem. This cross-compatibility means you don’t need to invest in a separate battery system, potentially saving you money in the long run. As noted by a satisfied customer, “Investing in a Bosch drill is like making a smart investment; it pays off over time.”

    A Bosch cordless drill, its metallic body gleaming under a soft, warm light. The drill is nestled on a clean, wooden workbench, surrounded by a well-organized array of drill bits, screwdriver heads, and other accessories. The background is a minimalist, modern workshop space, with clean lines and a neutral color palette that complements the tool's sleek design. The overall scene conveys a sense of quality, precision, and value, reflecting the reliable performance and versatility of the Bosch drill.

    Ideal Users: DIY Enthusiasts vs Professionals

    Bosch drills cater to a wide range of users, from DIY enthusiasts to professionals. Their versatility and reliability make them an excellent choice for anyone needing a dependable cordless drill driver. Whether you’re working on home improvement projects or tackling construction jobs, Bosch drills are equipped to handle the task with precision and power.

    Long-term Value Considerations

    When considering long-term value, Bosch drills consistently demonstrate excellent durability, with many users reporting operational lifespans exceeding 5-7 years. The availability of spare parts and Bosch’s robust warranty service in the UK provides peace of mind and extends the functional lifetime of their drills. As a result, the higher initial price is often offset by their longer service life and consistent performance, making them a valuable option for those who need a reliable tool over time.

    In conclusion, while the initial cost of a Bosch drill may be higher than some budget alternatives, its long-term durability and performance features make it a solid investment. For UK homeowners planning multiple projects, investing in a quality Bosch drill represents better value than purchasing multiple lower-quality tools that may fail prematurely.

    Top Bosch Drill Models Compared

    If you’re in the market for a reliable Bosch drill in the UK, understanding the differences between top models is crucial.

    bosch drill review

    Learn More

    Bosch GSR18V-90 C Professional

    The Bosch GSR18V-90 C Professional is a high-performance cordless drill driver designed for heavy-duty applications. With its powerful 18V motor, it offers high torque and speed settings, making it suitable for professionals and serious DIY enthusiasts. This model is part of Bosch’s Professional range, known for its durability and reliability.

    Bosch 18V Compact Brushless

    The Bosch 18V Compact Brushless drill is designed for convenience and efficiency. Its compact design and brushless motor make it an ideal choice for those who need a reliable tool for lighter tasks. This model is perfect for DIY enthusiasts and homeowners who require a versatile drill for occasional use.

    Bosch GSB Series (Hammer Function)

    The Bosch GSB Series stands out for its hammer function, making it suitable for drilling into masonry and concrete. Models like the GSB18V-55 offer a balance between performance and versatility, with the added benefit of being able to handle tough materials. This series is ideal for UK homeowners who need to drill into brick or concrete walls.

    When choosing a Bosch drill, consider the specific needs of your projects. Whether you require a high-torque drill driver or a model with a hammer function, Bosch has a range of options to suit different applications and user preferences.

    Conclusion: Is a Bosch Drill Right for Your UK Home?

    In the realm of DIY and professional projects, a reliable drill is indispensable, and Bosch’s GSR18V-90 C fits the bill. After putting this cordless drill through its paces in our comprehensive review, it’s clear that it’s a top-tier option for both professionals and serious DIY enthusiasts.

    The Bosch GSR18V-90 C excels in most areas, including power, ergonomics, safety features, and overall reliability, making it a great choice for those who need a dependable tool for various tasks and projects. While it may not be the best fit for those on a tight budget, its durability and consistent performance justify the investment for those planning multiple projects.

    Ultimately, whether you’re a professional or a DIY enthusiast, the Bosch GSR18V-90 C is a cordless drill worth considering for its value and performance. Its versatility makes it adaptable to a wide range of household projects, from delicate furniture assembly to more robust constructions.

    FAQ

    What is the average battery life of an 18V cordless drill?

    The average battery life of an 18V cordless drill can vary depending on the type of tasks you’re performing and the battery capacity. Typically, you can expect around 2-5 hours of runtime with moderate use.

    How do I choose the right drill bits for my cordless drill?

    To choose the right drill bits, consider the material you’re working with and the type of hole you need to create. For example, use cobalt drill bits for drilling through metal, and masonry bits for drilling into concrete or brick.

    Can I use a cordless drill for driving screws?

    Yes, a cordless drill is also a versatile driver. You can use it for driving screws by adjusting the torque settings to avoid stripping the screw head.

    What is the benefit of a brushless motor in a cordless drill?

    A brushless motor provides increased efficiency, longer battery life, and reduced maintenance compared to traditional brushed motors.

    How do I maintain my cordless drill to prolong its lifespan?

    Regularly clean the drill, check and replace worn-out drill bits, and store the battery properly to prolong its lifespan.

    What should I consider when choosing a cordless drill for DIY projects?

    When choosing a cordless drill, consider the power output, battery capacity, and weight to ensure it meets your needs for various DIY tasks.

    Are cordless drills suitable for heavy-duty tasks?

    Yes, many cordless drills are designed for heavy-duty tasks, offering high torque and speed settings to tackle demanding jobs.

  • Must-Have Repair Tools: Repair Basics Tips for UK Homes

    Must-Have Repair Tools: Repair Basics Tips for UK Homes

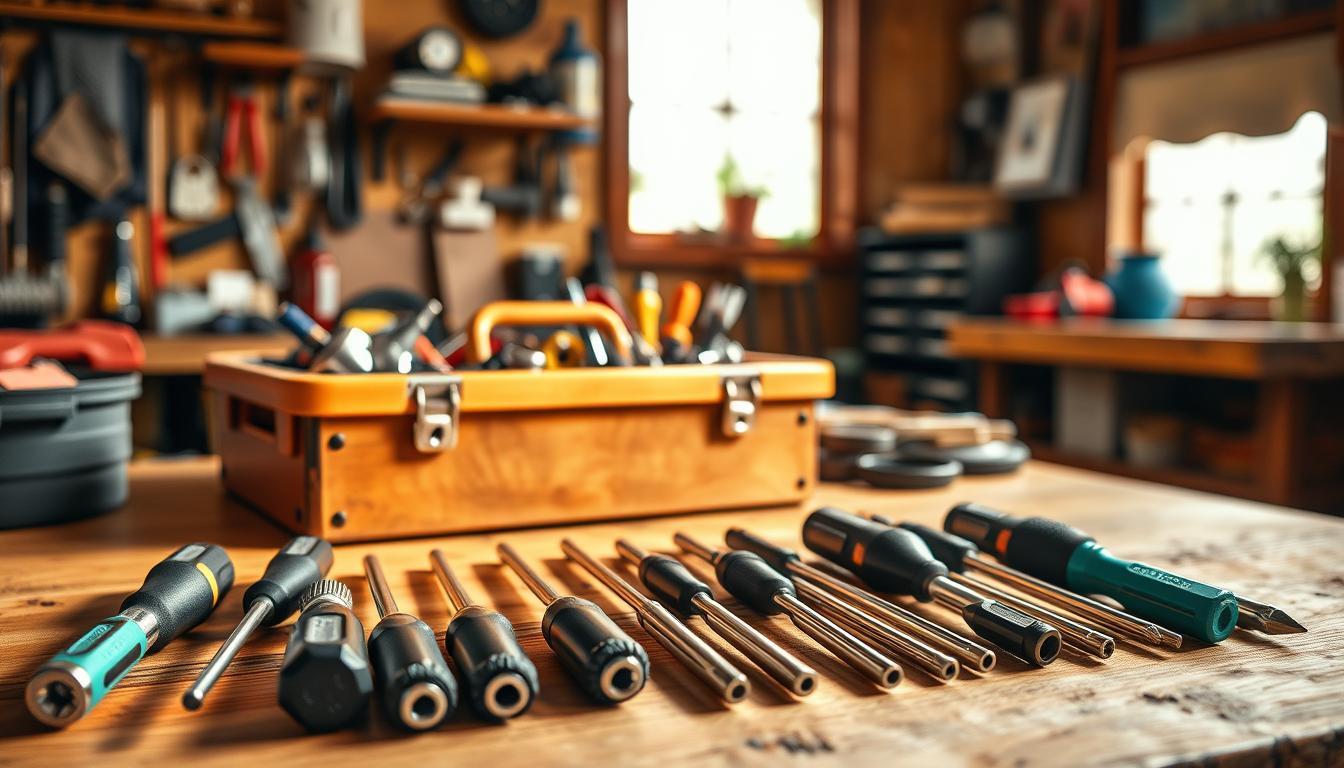
    Did you know that a well-stocked tool kit can save UK homeowners a significant amount of money on maintenance and repair costs? Having the right tools at your disposal enables you to tackle minor household tasks efficiently, reducing the need for professional interventions.

    As a homeowner in the UK, you’re likely to encounter various tasks that require immediate attention, from fixing leaky faucets to tightening loose fixtures. By understanding the basics of home maintenance, you can prevent minor issues from escalating into major problems.

    Key Takeaways

    • Understand the importance of having the right tools for home maintenance.
    • Learn how to select the appropriate tools for various household tasks.
    • Discover how to build your tool collection strategically over time.
    • Gain insights into tool quality considerations for effective repair work.
    • Find out how proper tool usage can save time and frustration.

    Why Every UK Homeowner Needs a Basic Tool Kit

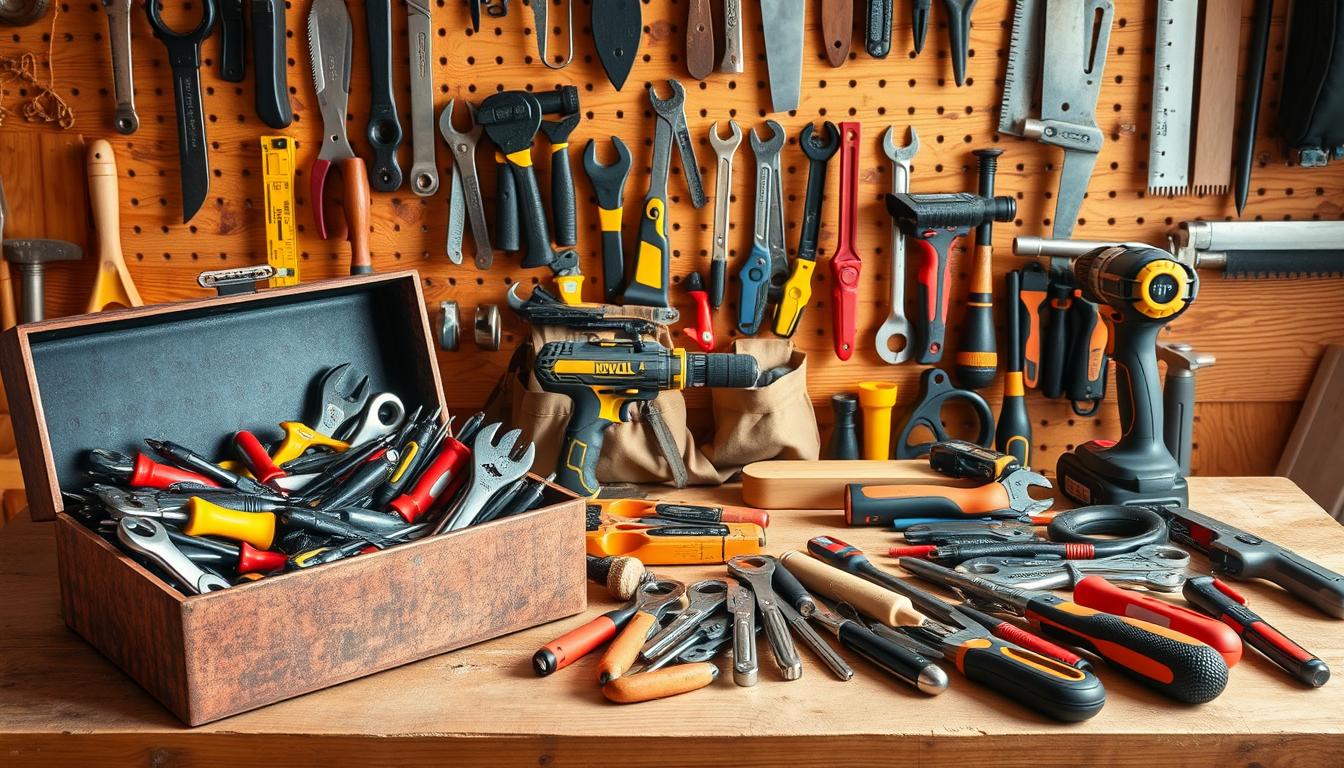
    A basic tool kit is a must-have for every UK homeowner, enabling them to perform routine maintenance and repairs. Having the right tools at your disposal can make a significant difference in how you manage your home. It’s not just about having a collection of tools; it’s about having the right tool for the job.

    A well-lit, high-quality image of a basic home tool kit arranged neatly on a wooden workbench. In the foreground, a sturdy toolbox with an assortment of essential hand tools - screwdrivers, pliers, hammers, and a utility knife - all gleaming with a polished finish. In the middle ground, a selection of power tools including a cordless drill, an oscillating multi-tool, and a circular saw, their sleek modern designs conveying reliability and durability. The background features a wall-mounted pegboard displaying a variety of other useful tools - wrenches, sockets, tape measures, and a level - creating a sense of a comprehensive and organized workshop. The overall scene exudes a feeling of functionality, practicality, and the confidence a well-equipped DIY enthusiast would have when tackling common home repairs.

    Investing in a good tool kit can save you money in the long run by allowing you to tackle minor repairs and maintenance tasks yourself. This is particularly beneficial for UK homeowners who want to be more self-sufficient and less reliant on professional services for every small issue.

    The Cost-Saving Benefits of DIY Home Repairs

    DIY home repairs can significantly reduce your maintenance costs. By having a basic tool kit, you can address common household issues without having to call a professional. This not only saves you money on service fees but also gives you a sense of accomplishment and independence.

    Moreover, being able to perform simple repairs and maintenance tasks can prevent minor issues from becoming major problems, further reducing your overall expenditure on home maintenance.

    Understanding Tool Quality and Investment Value

    When it comes to buying tools, the general rule is to invest in good quality. High-quality tools are not only more durable and long-lasting, but they also enhance safety by reducing the risk of accidents caused by faulty or breaking tools. You can identify a quality tool by its smooth machining, well-balanced design, and comfortable grip.

    While it might be tempting to opt for cheaper tools, the long-term benefits of investing in quality far outweigh the initial cost savings. A good tool can last a lifetime with proper care, making it a valuable addition to your home maintenance arsenal.

    In conclusion, having a basic tool kit is indispensable for UK homeowners. It empowers you to handle home repairs and maintenance tasks efficiently, saving you money and enhancing your sense of self-sufficiency. By understanding the importance of tool quality and safety, you can make informed decisions when it comes to building and maintaining your tool kit.

    Essential Measuring Tools for Precise Home Repairs

    To tackle home repairs with confidence, it’s essential to have the right measuring tools at your disposal. Accurate measurements are vital for ensuring that your DIY projects are completed successfully and safely.

    Image of a tape measure on a wooden workbench

    Learn More

    Tape Measures and Rulers: Getting Accurate Measurements

    A good quality tape measure is indispensable for any homeowner. It allows you to measure rooms, objects, and materials accurately. When choosing a tape measure, consider one that is durable and has both metric and imperial measurements.

    Rulers, on the other hand, are perfect for measuring smaller objects or for tasks that require more precision. A combination square can also be useful for ensuring accurate 90-degree angles.

    Levels and Squares: Ensuring Everything Is Straight

    A spirit level ensures that surfaces are perfectly horizontal or vertical, which is crucial for hanging pictures, installing shelves, or laying tiles. There are various types of levels, including bubble levels and laser levels, each with its own set of advantages.

    A combination square or try square is another essential tool for verifying that corners are square and that edges are straight.

    Stud Finders and Chalk Lines: Locating Wall Supports

    When hanging heavy items or performing more complex repairs, locating the wall studs is essential. A stud finder is a handy tool that detects the wooden studs behind your walls. There are magnetic, electronic, and advanced models available in the UK market.

    A chalk line is used for marking straight lines over long distances, such as when replacing wallpaper or laying flooring tiles. It’s a simple yet effective tool for ensuring alignment.

    Must-Have Repair Tools for Fastening and Securing

    Image of a well-organised toolbox with various fastening tools

    Learn More

    To ensure your home repairs are done correctly, you’ll need the right tools for fastening and securing. This includes a variety of fastening tools that can handle different materials and tasks.

    Hammer Selection: Types and Uses in Home Repairs

    A good hammer is a fundamental tool in any home repair kit. There are several types of hammers, each designed for specific tasks. For instance, a claw hammer is versatile and can be used for both driving nails and pulling them out. A ball-peen hammer, on the other hand, is ideal for shaping metal and closing rivets.

    Screwdrivers: Standard, Phillips, and Speciality Types

    Screwdrivers are another essential tool for fastening and securing. You’ll need a set that includes standard (flathead), Phillips, and possibly speciality types like Torx or hex (Allen) drivers. Having the right screwdriver ensures that you can drive screws efficiently without damaging them or the surrounding material.

    Wall Anchors and Fasteners for Different Materials

    When hanging items on your wall, it’s crucial to use the appropriate wall anchors to ensure they can support the weight. For plasterboard or drywall, plastic or metal E-Z Ancor bolts are effective. For heavier items or for use in masonry, toggle bolts provide extra strength. Understanding the type of wall you’re dealing with and choosing the right fastener is key to a successful repair.

    • We’ll explore the various wall anchors and fasteners available for UK wall types, including plasterboard/drywall, masonry, and lath and plaster.
    • You’ll learn how to match the appropriate anchor type to the weight of the item being hung and the wall material.
    • The subsection will explain weight ratings for different anchors and how to calculate the required support for shelving and wall-mounted items.
    • We’ll discuss specialised anchors for hollow doors, ceiling mounting, and other challenging surfaces.
    • The discussion will include tools needed for proper anchor installation and common installation mistakes to avoid.

    Cutting Tools Every UK Home Should Have

    Image of a well-organised toolkit with various cutting tools

    Learn More

    Cutting tools are a fundamental component of any homeowner’s toolkit in the UK, enabling them to undertake repairs and renovations. Having the right cutting tools can make a significant difference in the quality and efficiency of DIY projects.

    Handsaws: Crosscut, Ripsaw, and Speciality Saws

    Handsaws are a crucial part of any toolkit, providing a manual means of cutting various materials. A crosscut saw is used for cutting across the grain of wood, while a ripsaw is designed for cutting along the grain. Speciality saws, such as dovetail and tenon saws, are used for more precise joinery tasks.

    Utility Knives and Scissors: Precision Cutting Tools

    Utility knives and scissors are versatile cutting tools used for a variety of tasks, from cutting drywall to trimming carpet. Utility knives are particularly useful for making precise cuts in various materials, while scissors are ideal for cutting softer materials like fabric and plastic.

    Power Saws: When to Invest in Electric Cutting Tools

    Power saws are a significant investment for any homeowner, offering increased efficiency and precision when cutting various materials. When choosing a power saw, consider the type of projects you will be undertaking and the materials you will be working with. Circular saws, jigsaws, and reciprocating saws are popular options, each with its own unique benefits and applications.

    For instance, a circular saw is ideal for making straight cuts in wood and other materials, while a jigsaw is better suited for curved cuts. Always follow safety guidelines when operating power saws, including wearing protective eyewear and maintaining a firm grip on the saw.

    When using power saws, it’s essential to select the correct blade for the material being cut. Different blades are designed for cutting wood, metal, or plastic, and using the wrong blade can result in poor cut quality or damage to the saw. Additionally, consider the power source of your saw, whether it’s corded or cordless, and choose a model that suits your needs.

    Essential Pliers and Wrenches for Home Repairs

    Generate an image of a well-organised toolkit with various pliers and wrenches.

    Learn More

    A well-equipped homeowner’s toolkit should include a variety of pliers and wrenches to tackle different repair jobs effectively. These tools are essential for gripping, twisting, and bending various objects, making them indispensable for home repairs.

    Types of Pliers: Slip-Joint, Needle-Nose, and Locking

    Pliers come in several types, each designed for specific tasks. Slip-joint pliers are versatile and can be used for gripping objects of various sizes. Needle-nose pliers are ideal for reaching into tight spaces and gripping small objects. Locking pliers can be locked in place, allowing for secure grip on objects.

    Wrench Selection: Adjustable, Combination, and Socket Sets

    Wrenches are crucial for turning bolts and nuts. An adjustable wrench can be used on various sizes of fasteners, making it a versatile tool. A combination wrench offers both an open-end and a box-end, providing flexibility. Socket sets are comprehensive and can be used for a wide range of tasks, from simple repairs to complex projects.

    Speciality Gripping Tools for Specific Tasks

    For specific tasks, specialised gripping tools are necessary. Pipe wrenches are used for gripping pipes, while strap wrenches are ideal for delicate surfaces. Basin wrenches are used for tightening or loosening faucet mounting nuts in tight spaces.

    By including these essential pliers and wrenches in your toolkit, you’ll be well-prepared to tackle various home repair tasks efficiently.

    Drilling Equipment for UK Home Improvement Projects

    Image of a cordless drill with various drill bits

    Learn More

    UK homeowners undertaking improvement projects need to be equipped with the appropriate drilling tools. Drilling equipment is a fundamental component of any home improvement task, allowing you to complete a variety of projects efficiently.

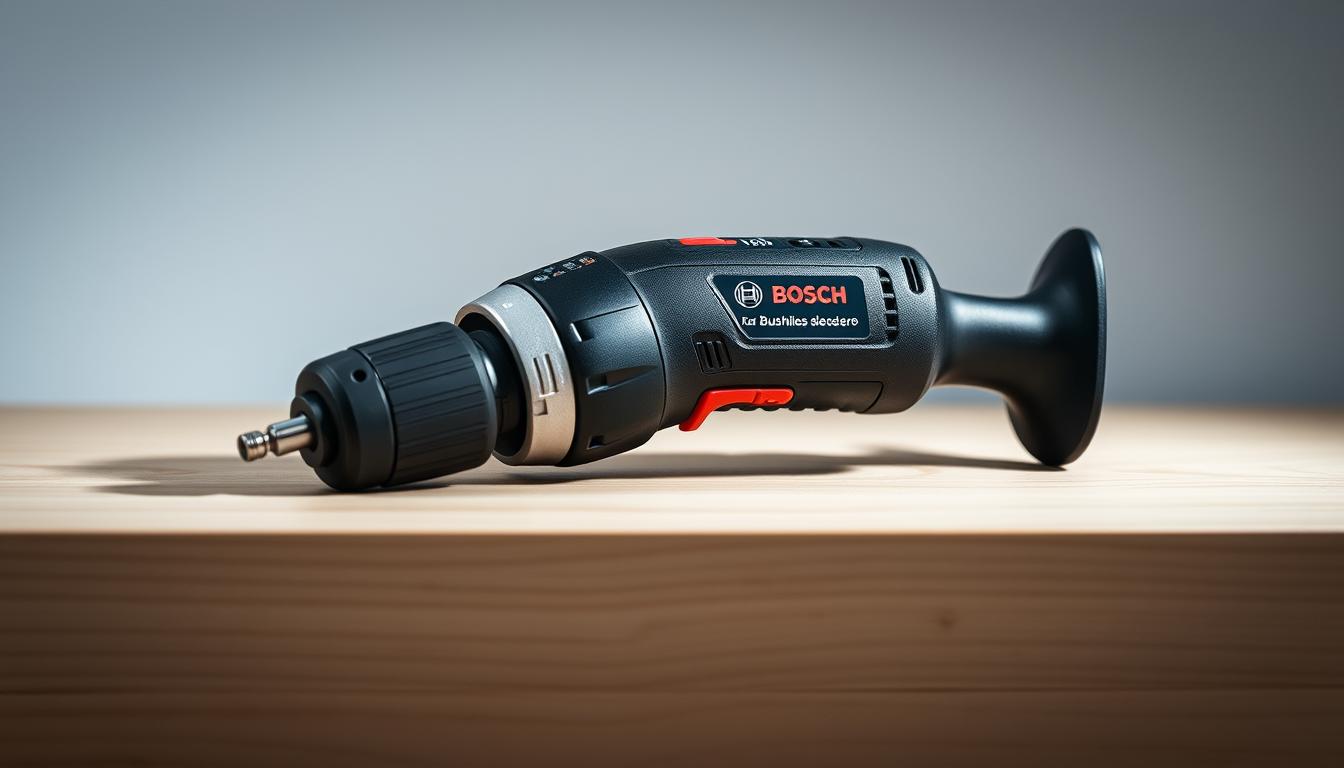
    Power Drills: Corded vs. Cordless Options

    When selecting a power drill, you have two primary options: corded or cordless. Corded drills provide consistent power and are ideal for heavy-duty tasks, while cordless drills offer greater flexibility and convenience. Your choice depends on the specific requirements of your projects and personal preference.

    Essential Drill Bits for Different Materials

    The type of drill bit you need depends on the material you’re working with. For instance, twist drill bits are versatile and suitable for drilling into wood and metal, whereas spade bits are better for making larger holes in wood. Understanding the different types of drill bits and their applications is crucial for achieving professional results.

    Drill Bit Drill Type Use
    Twist Hand, power, or drill press Small-diameter holes in wood and metal
    Spade Power or drill press Holes up to 1 1/2 inches in wood
    Auger Braces Holes up to 1 1/2 inches in wood
    Expansion Brace Holes up to 3 inches in wood
    Fly cutter Drill press Holes up to 6 inches in wood; smaller holes in other materials
    Hole saw Power or drill press Holes up to 3 inches in wood

    Drill Accessories and Attachments

    To enhance the functionality of your drill, consider investing in various accessories and attachments. These include depth stops, dust collection attachments, and drill guides, which improve accuracy and cleanliness. Additionally, versatile attachments can transform your drill into other tools, such as sanders, mixers, and screwdrivers, making it a valuable addition to your tool set for various tasks.

    You’ll also find bit extension accessories useful for reaching difficult areas and right-angle attachments for tight spaces. Furthermore, chuck adapters allow for using different bit shank types with your drill, expanding its capabilities. Proper storage solutions for organising drill bits and accessories are also essential to prevent loss and damage.

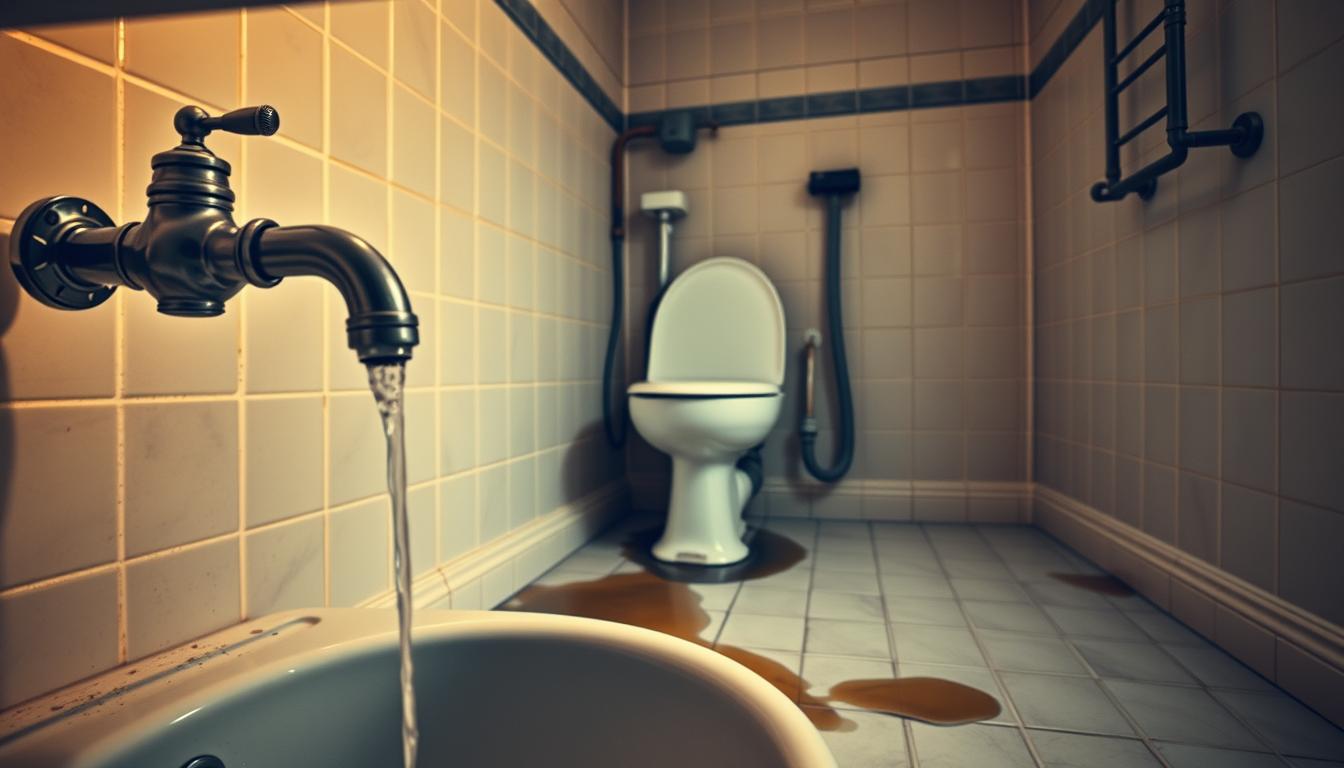
    Plumbing Repair Tools for Common Household Issues

    Image of a well-organised plumbing toolkit

    Learn More

    For UK homeowners, having a well-stocked toolkit for plumbing repairs is essential for maintaining their home’s integrity and avoiding costly professional fees. Plumbing issues can arise unexpectedly, and being prepared with the right tools can make a significant difference in resolving problems efficiently.

    Pipe Wrenches and Adjustable Spanners

    A pipe wrench is a fundamental tool for any homeowner dealing with plumbing repairs. Its robust design and strong grip make it indispensable for handling heavy-duty tasks, such as tightening or loosening stubborn or rusted pipes. An adjustable spanner is another versatile tool that can be used for a variety of tasks, from gripping bolts to adjusting pipe fittings.

    Plungers and Drain Snakes

    Clogged drains are a common issue in many UK homes. A plunger is often the first line of defence, capable of clearing blockages with a bit of effort. For more stubborn clogs, a drain snake (also known as an auger) can be used to navigate deeper into the pipes and remove the obstruction.

    Pipe Cutters and Joining Tools

    When it comes to working with pipes made of different materials such as plastic or metal, having the right cutting and joining tools is crucial. Pipe cutters are designed to make clean, square cuts, which are essential for ensuring proper sealing and preventing leaks. For joining pipes, tools such as soldering equipment, compression fitting tools, and push-fit systems are used, depending on the pipe material and the specific application.

    In conclusion, being equipped with the right plumbing repair tools can significantly simplify the process of maintaining and repairing your home’s plumbing system. Whether you’re dealing with plastic or metal pipes, having a well-stocked toolkit is key to resolving common household issues efficiently.

    Electrical Repair Tools for Safe Home Maintenance

    When it comes to electrical repairs in your UK home, having the right tools is crucial for safety and efficiency. Electrical wiring may not be your primary focus, but you’ll inevitably encounter electrical tasks like installing a new stereo or repairing a window.

    Image of a person using a voltage tester near electrical wiring

    Learn More

    Voltage Testers and Safety Equipment

    Voltage testers are essential for ensuring that electrical circuits are safe to work on. They help you detect the presence of voltage, preventing accidental shocks. When choosing a voltage tester, look for one that is non-contact, making it safer and easier to use.

    For added safety, consider using a voltage tester with a high voltage rating and one that is designed for your specific needs, such as testing outlets or wiring.

    Wire Strippers and Crimping Tools

    The Klein11057 Klein-Kurve Wire Stripper and Cutter is a valuable tool for any electrical task. It serves two critical functions: cutting wires to the desired length and safely stripping the insulation from the wire ends. When working with electrical wiring, wire strippers and crimping tools are indispensable for making secure connections.

    Insulated Screwdrivers and Pliers

    For electrical work, it’s crucial to use screwdrivers and pliers that are properly insulated to prevent electrical shock. Look for tools that are VDE-certified, as they meet UK safety standards. Insulated tools are designed to protect you from electrical shock, making them a must-have for any electrical repair.

    When using insulated tools, ensure they are in good condition and free from damage. Regularly inspect your tools and replace them as needed to maintain your safety while working on electrical projects.

    Painting and Decorating Tools for Home Refreshes

    Generate an image of a well-organised painting station with various decorating tools.

    Learn More

    To achieve a professional finish, you’ll need to equip yourself with the best painting and decorating tools. Whether you’re touching up a single room or giving your entire home a fresh coat of paint, having the right equipment is crucial for a successful project.

    Brushes and Rollers: Selecting the Right Types

    Choosing the correct brushes and rollers is vital for a smooth, even finish. For cutting in and detailed work, use high-quality brushes with synthetic or natural bristles, depending on the type of paint you’re using. Rollers are ideal for covering large areas quickly.

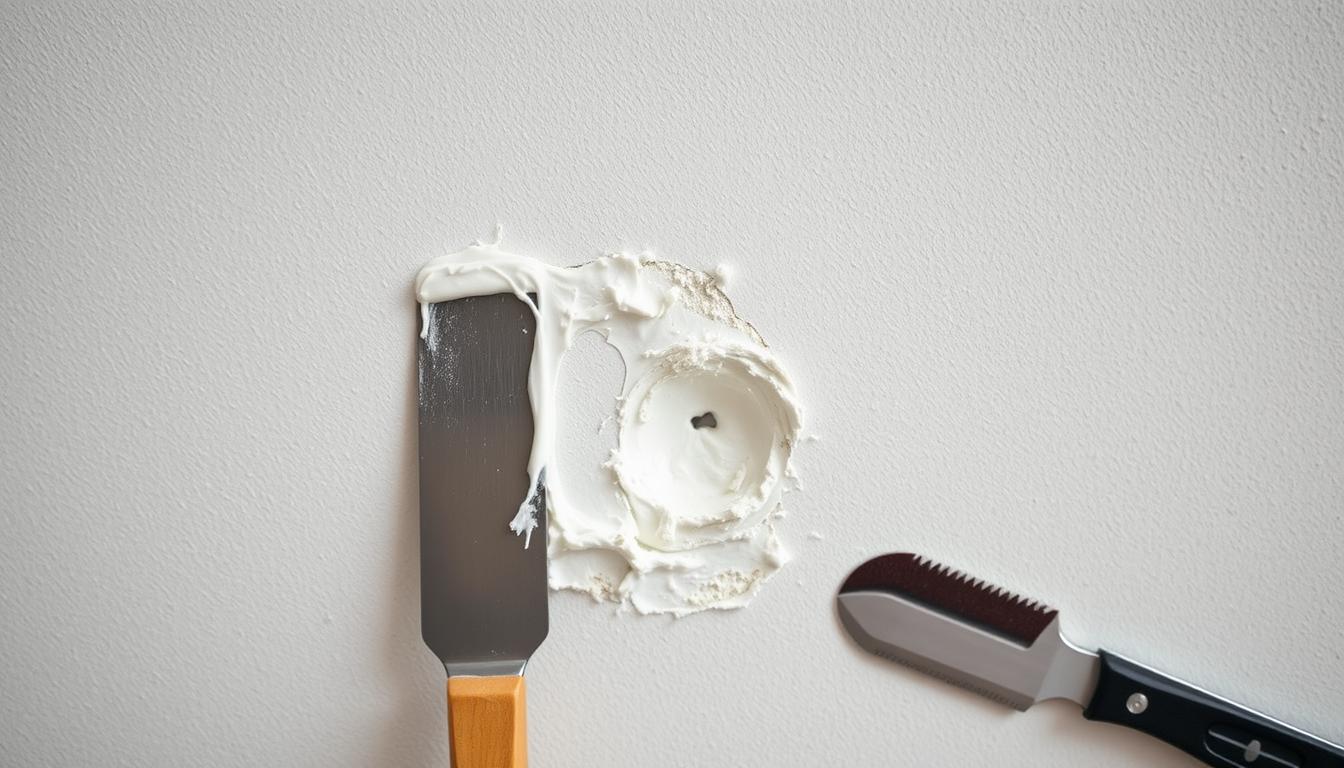
    Preparation Tools: Scrapers, Sandpaper, and Fillers

    Before you start painting, proper preparation is key. Use scrapers to remove old paint and wallpaper, sandpaper to smooth out surfaces, and fillers to repair any cracks or holes. These tools will help ensure a professional-looking finish.

    Paint Trays, Ladders, and Protective Coverings

    To make your painting project efficient and safe, you’ll need the right accessories. Paint trays and scuttles help you manage paint and reduce mess. Ladders provide the necessary height, but always ensure they’re stable and secure to maintain safety. Protective coverings like dust sheets and masking tapes protect your floors and trim from unwanted paint splatters.

    By investing in the right painting and decorating tools, you’ll not only achieve a professional finish but also make the work process more enjoyable and efficient.

    Speciality Tools for Furniture Assembly and Repair

    Image of a person using an Allen key to assemble furniture

    Learn More

    To tackle furniture repairs and assembly with confidence, you’ll need to have the right speciality tools on hand. Furniture assembly and repair require precision and the correct equipment to achieve professional results.

    Allen Keys and Hex Wrenches

    Allen keys and hex wrenches are essential for assembling and repairing furniture that uses hexagonal bolts. These tools come in various sizes and are used to drive bolts and screws with hexagonal heads. Having a set of Allen keys in different sizes will ensure you’re prepared for most furniture assembly tasks.

    Clamps and Wood Glues

    Clamps are vital for holding parts together while glue dries during furniture repair. Spring clamps and C-clamps are particularly useful, with the latter being available in a range of sizes to accommodate different projects. When using clamps, it’s essential to insert buffer blocks of scrap wood between the jaws and the material being clamped to avoid damage.

    Furniture Repair Kits and Touch-Up Materials

    Furniture repair kits are available in the UK market, offering specialised solutions for scratch repair, veneer repair, and upholstery repair. These kits usually include touch-up materials like wax sticks, markers, and fillers to address common furniture damage. Using the right repair kit can help you achieve a professional finish and extend the life of your furniture.

    When repairing visible furniture surfaces, matching colours and finishes is crucial. Techniques for achieving a seamless repair include using colour-matching guides and testing touch-up materials on inconspicuous areas first. Knowing when to attempt a DIY repair versus seeking professional restoration is also important to avoid further damage.

    Safety Equipment to Accompany Your Tool Collection

    Image of a person wearing safety goggles and gloves while working on a DIY project

    Learn More

    As you build your tool collection, it’s equally important to consider the safety equipment that accompanies it. Ensuring your safety while working on DIY projects is paramount, and having the right safety gear can make all the difference.

    Protective Eyewear and Gloves

    Protective eyewear, such as safety goggles, shields your eyes from debris and chemicals. Gloves, on the other hand, provide grip, protection from cuts, and insulation against electrical shock or heat. When selecting gloves, consider the type of work you’ll be doing and choose gloves that are appropriate for the task.

    Dust Masks and Respirators

    Dust masks and respirators are crucial for protecting your respiratory system from dust, fumes, and other airborne contaminants. Disposable dust masks are suitable for occasional use, while respirators offer more comprehensive protection and are often used for more extensive projects or in poorly ventilated areas.

    First Aid Supplies for DIY Accidents

    A well-stocked first aid kit is an essential component of your safety equipment. It should include supplies for treating minor injuries, such as bandages, antiseptic wipes, and pain relievers. Additionally, consider including items specific to common DIY injuries, such as burn cream and eye wash solutions.

    Organising a dedicated first aid kit for your tool storage area and knowing basic first aid procedures can significantly reduce the risk of complications from accidents. Understanding when to seek medical attention is also crucial.

    Tool Storage and Organisation Solutions

    A well-organised tool storage system is essential for UK homeowners who value their time and workspace. Effective storage solutions enable you to work efficiently, reduce clutter, and ensure that your tools are in good condition.

    Image of a well-organised toolbox with various tools

    Learn More

    Toolboxes and Tool Chests: Choosing the Right Size

    When selecting a toolbox or tool chest, consider the size of your tool collection and the space available in your workshop or garage. A larger toolbox may offer more storage, but it may also occupy valuable space.

    Consider a toolbox with dividers or trays to keep your tools organised and easily accessible. Some toolboxes also come with lockable lids for added security.

    Wall-Mounted Storage Systems

    Wall-mounted storage systems are ideal for maximising space in smaller workshops or garages. These systems typically consist of a pegboard or slatwall with hooks and bins to hang and store your tools.

    They keep your tools organised, visible, and within easy reach, making it simpler to find the right tool for the job.

    Tool Belts and Portable Organisers

    For those who need to work on projects away from their workshop, tool belts and portable organisers are invaluable. They allow you to carry your essential tools with you, ensuring you’re always prepared.

    Tool belts come in various designs, with some featuring multiple pockets and compartments to keep your tools organised. Portable organisers, such as tool totes or bucket systems, offer additional storage and can be easily carried to different work sites.

    Budget-Friendly Tool Kits for New Homeowners

    Affordable tool kits for new homeowners in the UK

    Learn More

    Creating a functional tool kit on a budget is a strategic process that requires careful planning. As a new homeowner, you need to balance the quality of tools with the cost, ensuring you have the right equipment for DIY tasks without overspending.

    Starter Tool Kits: What’s Included and What’s Missing

    Starter tool kits are an excellent starting point for new homeowners. They usually include a basic set of tools such as a hammer, screwdrivers, and pliers. However, it’s essential to assess what’s missing from these kits to ensure you have a comprehensive tool collection.

    Typically, starter kits lack specialised tools for specific tasks. You may need to supplement these kits with additional tools tailored to your needs.

    Prioritising Tool Purchases on a Limited Budget

    When funds are limited, prioritising tool purchases is crucial. Focus on acquiring tools that are frequently used and versatile. For instance, a good quality adjustable wrench and a set of screwdrivers can help with a variety of tasks.

    Consider alternative approaches such as borrowing tools from friends or family, or exploring community tool libraries available in some UK areas. Buying second-hand tools can also be cost-effective, but be sure to inspect them for quality before purchasing.

    To spread costs, plan your tool purchases around specific projects. This approach ensures you have the necessary tools when you need them, while managing your budget effectively.

    You can expect to pay an average of 25 percent more for high-quality equipment, but investing in good tools can save you money in the long run by reducing the need for frequent replacements. The initial cost of a tool is just the beginning; consider the long-term value it provides to your DIY endeavours.

    Maintaining and Caring for Your Repair Tools

    must-have repair tools

    Learn More

    Ensuring your tools are well-maintained is vital for successful DIY projects. Proper care not only extends the lifespan of your tools but also ensures they perform optimally when needed.

    Cleaning and Rust Prevention

    Regular cleaning is essential to prevent the buildup of dirt and grime on your tools. Use a soft cloth and mild detergent to wipe down tools after use. For tools prone to rust, such as those made from steel, apply a rust-inhibiting coating or store them in a dry environment.

    Sharpening Cutting Tools

    Sharpening cutting tools, such as saws and knives, maintains their effectiveness. Use a sharpening stone or file appropriate for the tool material. Regular sharpening not only improves cutting performance but also reduces the risk of accidents caused by dull tools.

    When to Replace Worn or Damaged Tools

    Identifying when a tool is beyond repair is crucial for safety and efficiency. Signs that a tool needs replacement include excessive wear, damage to critical parts, or if the tool no longer performs its intended function. Continuing to use worn or damaged tools can lead to accidents and decreased productivity.

    • We’ll identify signs that indicate a tool should be replaced rather than repaired.
    • You’ll learn about safety concerns associated with continued use of damaged or worn tools.
    • The subsection will discuss warranty considerations and manufacturer repair services available in the UK.
    • We’ll explain how to dispose of or recycle old tools responsibly within UK waste management systems.
    • The discussion will include guidance on upgrading versus like-for-like replacement when tools reach end of life.

    Smart and Innovative Tools for Modern UK Homes

    Detailed still life of essential repair tools for UK homes, arranged on a wooden workbench. In the foreground, a toolbox, pliers, screwdrivers, and a hammer in focus. In the middle ground, a cordless power drill, a utility knife, and a tape measure. In the background, a miter saw, a level, and a box of nails. Warm, natural lighting illuminates the scene, creating shadows and highlights that accentuate the textures of the tools. The composition is balanced and visually appealing, emphasizing the practical and functional nature of these everyday household repair essentials.

    Learn More

    The world of DIY tools is rapidly evolving, and UK homeowners can now benefit from innovative solutions that simplify home maintenance. These modern tools not only make tasks easier but also provide more accurate results, saving time and effort.

    Multi-Tools and Space-Saving Designs

    Multi-tools have become essential for many UK homeowners due to their versatility and space-saving design. These tools combine several functions into one device, making them ideal for a variety of tasks around the home.

    Digital Measuring and Detection Tools

    Digital measuring and detection tools have revolutionised the way homeowners approach DIY projects. These tools offer precise measurements and can detect hidden features behind walls, making them invaluable for home repairs.

    Battery Systems and Compatibility Considerations

    Battery technology has advanced significantly, impacting the performance of cordless tools. When selecting cordless tools, it’s crucial to consider the battery system and compatibility to ensure seamless integration across multiple tools.

    Investing in a single battery system can offer several advantages, including reduced costs and increased convenience. Understanding battery maintenance practices, such as proper charging and storage, can maximise lifespan and performance.

    When choosing cordless tools, consider the voltage and capacity required for your specific home repair needs. A higher voltage may offer more power, but it’s essential to balance this with the type of tasks you’ll be performing.

    In conclusion, smart and innovative tools are transforming the way UK homeowners approach DIY projects. By understanding the benefits and considerations of these modern tools, homeowners can make informed decisions to enhance their home repair capabilities.

    Conclusion: Building Your Repair Tool Collection Over Time

    As you start or continue to build your tool collection, focusing on quality, versatility, and maintenance will serve you well. Creating an effective repair tool kit for your home is not a one-time task, but rather an ongoing process of refinement.

    The key to a successful tool collection lies in understanding your needs and gradually acquiring the tools that will help you tackle various tasks. By prioritizing quality and appropriate selection, you’ll be able to efficiently complete repairs and maintenance tasks.

    Proper maintenance of your tools is also crucial. Regular cleaning, rust prevention, and sharpening cutting tools will extend their lifespan and ensure they remain in good working condition. As you develop your tool collection, you’ll also want to develop your repair skills, allowing you to tackle more complex projects with confidence.

    Approaching tool acquisition as a journey rather than a one-time purchase will help you build a well-rounded collection that meets your needs. With the right tools and knowledge, you’ll be empowered to maintain your home effectively, giving you a sense of satisfaction and empowerment.

    By following these principles, you’ll be well on your way to creating a comprehensive tool kit that will serve you well for years to come, making repair tasks more manageable and less daunting.

    FAQ

    What are the essential drill bits to have for various home repairs?

    For different materials, you’ll need a variety of drill bits, including twist bits for metal, spade bits for wood, and masonry bits for drilling into brick or concrete.

    How do I choose the right wrench for a specific task?

    Consider the type of job and the size of the bolts or nuts you’re working with. An adjustable wrench can be useful for various tasks, while a socket wrench provides more leverage for larger fasteners.

    What safety equipment should I use when working with power saws?

    Always wear protective eyewear, such as safety glasses or goggles, and consider using ear protection and a dust mask to prevent injury from debris and noise.

    How do I maintain my cutting tools to ensure they remain effective?

    Regularly sharpen your cutting tools, such as handsaws and utility knives, and store them properly to prevent damage and rust.

    What are the benefits of using a cordless power drill?

    A cordless drill offers greater flexibility and convenience, allowing you to work in various locations without being restricted by a power cord.

    How do I select the right tape measure for my needs?

    Consider the length and width of the tape measure, as well as its durability and resistance to wear. A 25-metre tape measure is a good all-purpose choice for most home repairs.

    What plumbing repair tools are essential for common household issues?

    For common plumbing tasks, you’ll need pipe wrenches, adjustable spanners, and plungers to tackle clogs and leaks.

    How do I ensure accurate measurements when working on a project?

    Use a level and a square to ensure your work is straight and level, and double-check your measurements with a tape measure or ruler.

  • Wallpaper Bubbling Solution: Walls & Surfaces Tips for UK Homes

    Wallpaper Bubbling Solution: Walls & Surfaces Tips for UK Homes

    Did you know that nearly 40% of homeowners in the UK experience wallpaper bubbling at some point? This frustrating issue can mar the beauty of your home’s interior. Bubbles can appear immediately after installation or develop over time due to various factors, including moisture issues or improper application techniques.

    Understanding the causes of these bubbles is crucial for implementing the right wallpaper bubbling solution. In many cases, bubbles dissipate on their own as the adhesive dries. However, some issues require prompt attention to prevent further damage to your home’s walls.

    Key Takeaways

    • Identify the root causes of wallpaper bubbles to apply the correct fix.
    • Timing is crucial; some bubbles resolve themselves over time.
    • Moisture issues can contribute to the formation of bubbles.
    • Proper application techniques can prevent bubbling.
    • Regular inspection can help in early detection of the problem.

    Understanding Wallpaper Bubbles in UK Homes

    The appearance of bubbles under wallpaper is a widespread issue in the UK, typically caused by factors such as improper wall preparation or trapped air pockets. Understanding the root causes of these bubbles is crucial for determining the appropriate wallpaper bubbling solution.

    Detailed close-up of wallpaper bubbles on a textured surface, capturing the intricate patterns and varied shapes of the air pockets. Soft, diffused lighting illuminates the dimensional quality of the bubbles, creating a sense of depth and dimension. The wallpaper has a muted, vintage color palette, evoking a sense of age and character. The overall composition focuses on the bubbles, filling the frame and highlighting their organic, almost sculptural qualities. Subtle shifts in focus draw the eye to the delicate edges and contours of the individual bubbles, emphasizing their fragile, ephemeral nature.

    Common Causes of Wallpaper Bubbling

    Several factors contribute to the formation of wallpaper bubbles in UK homes. These include:

    Excess or Insufficient Adhesive

    If a bubble is still wet, it may indicate that too much paste was applied. Conversely, a dry bubble could signify insufficient adhesive.

    Improper Wall Preparation

    Failure to clean surfaces thoroughly or address underlying issues like damp or uneven walls can lead to persistent bubbling problems.

    Trapped Air Pockets

    Air sealed between the wall surface and the wallpaper during application is a common cause of bubbles. Ensuring smooth application can mitigate this issue.

    When to Address Bubbling Issues

    Timing is critical when dealing with wallpaper bubbles. Some minor air pockets may resolve themselves as the adhesive dries.

    Immediate vs. Delayed Repairs

    Large, numerous, or highly visible bubbles require immediate attention, while smaller, isolated ones might be monitored before intervention.

    Assessing Bubble Severity

    Determining whether the issue is cosmetic or indicates a more serious underlying problem is essential before proceeding with repairs.

    By understanding the causes and assessing the severity of wallpaper bubbles, homeowners can apply the appropriate solution effectively.

    Essential Tools for Fixing Wallpaper Bubbles

    To tackle wallpaper bubbles, you’ll need to assemble a basic repair kit with the necessary tools. Having the right equipment makes the job significantly easier and more professional-looking.

    Basic Repair Kit Components

    The following tools are essential for effectively addressing wallpaper bubbles in your UK home:

    Sharp Snap-Blade Knife

    A sharp snap-blade knife is crucial for making precise incisions in the wallpaper.

    Generate an image of a sharp snap-blade knife used for wallpaper repair.

    Buy Now

    Wallpaper Paste Syringe

    The wallpaper paste syringe allows for precise application of adhesive directly into bubble areas.

    Generate an image of a wallpaper paste syringe.

    Buy Now

    Smoothing Tool

    A proper smoothing tool helps ensure that repaired areas lie completely flat against the wall.

    Generate an image of a smoothing tool used for wallpaper.

    Buy Now

    Wallpaper Adhesive

    Selecting the right wallpaper adhesive is critical; look for products specifically designed for your wallpaper type.

    Generate an image of a recommended wallpaper adhesive product.

    Buy Now

    Additional Helpful Items

    In addition to the basic repair kit, having a few extra items can be beneficial.

    Damp Sponge and Cloth

    A damp sponge is essential for cleaning excess paste from the wallpaper surface.

    Plastic Scraper

    For UK homes, having a plastic scraper can prevent accidental damage to both the wallpaper and underlying plasterwork.

    The Perfect Wallpaper Bubbling Solution: Step-by-Step Guide

    Repairing wallpaper bubbles requires a methodical approach to ensure a seamless finish. By following these steps, you can effectively fix bubbles and maintain the aesthetic appeal of your wallpapered walls.

    Identifying and Locating Bubbles

    The first step in fixing wallpaper bubbles is to identify and locate them. Carefully inspect your walls to determine the extent of the bubbling.

    Wet vs. Dry Bubbles

    It’s essential to differentiate between wet and dry bubbles. Wet bubbles indicate excess paste, while dry bubbles suggest insufficient adhesive.

    Surface Inspection Techniques

    Use both visual inspection in good lighting and tactile techniques to detect bubbles. Run your hand gently across the wall to feel for raised areas.

    Creating Access to the Bubble

    To repair a bubble, you need to create access to it. Use a sharp snap-blade knife to make a precise X-cut, following the wallpaper pattern where possible.

    Making the Perfect X-Cut

    Exercise caution when making the cut to avoid tearing the wallpaper or cutting too deeply into the wall surface.

    Removing Debris and Air

    After creating access, remove any debris or air pockets that may have caused the bubble.

    Applying Adhesive Correctly

    The right adhesive application is crucial for a successful repair. Use a glue syringe to apply the wallpaper adhesive precisely where needed.

    Image of a glue syringe being used to apply adhesive

    Learn More

    Filling the Syringe Properly

    Fill the syringe with the appropriate wallpaper paste or adhesive, ensuring you have the right amount for the repair.

    Injection Techniques

    Work methodically to inject the adhesive, ensuring complete coverage without oversaturating the paper or wall.

    Recommended Adhesive Products

    For UK homes, consider using adhesives specifically formulated for the local climate conditions.

    Smoothing and Finishing the Repair

    Use a smoothing tool with light, even pressure to eliminate air pockets and ensure proper adhesion.

    Using the Smoothing Tool Effectively

    Work from the centre of the repair outward to smooth out the area.

    Cleaning Excess Adhesive

    Use a slightly damp sponge to clean up any excess adhesive, preventing staining and ensuring a professional finish.

    Allowing Proper Drying Time

    Allow sufficient drying time before touching or decorating the repaired area. This typically takes 24-48 hours, depending on room temperature and humidity levels.

    Preventing Future Wallpaper Bubbles

    To keep your wallpaper looking its best, it’s crucial to prevent bubbles from forming in the first place. This involves a combination of proper wall preparation, correct application techniques, and consideration of environmental factors.

    Proper Wall Preparation Techniques

    Thorough wall preparation is essential for preventing wallpaper bubbles. This process begins with comprehensive surface cleaning to remove dust, grease, and loose material. Priming walls is also vital, especially for drywall or newly plastered surfaces, as it creates a uniform surface that promotes even adhesion.

    Surface Cleaning and Priming

    Surface cleaning must be thorough, removing all contaminants that could interfere with the adhesive. Priming helps to create a smooth surface, reducing the risk of bubbles forming due to uneven adhesion.

    Dealing with Textured Surfaces

    For textured surfaces or artexed ceilings, consider using a lining paper first to create a smooth base for your decorative wallpaper. This extra step can significantly reduce the risk of bubbles.

    Correct Wallpaper Application Methods

    When applying wallpaper, work methodically in sections, ensuring each piece is properly aligned and smoothed before moving to the next. Adhesive application best practices are crucial; using the correct amount for your specific wallpaper type is key to preventing bubbles.

    Adhesive Application Best Practices

    Too little adhesive can cause poor adhesion, while too much can create excess moisture leading to bubbling. Always follow the manufacturer’s instructions for the correct adhesive application.

    Smoothing Techniques During Installation

    Smoothing techniques should be consistent, working from the centre outward to push air bubbles toward the edges where they can escape. This helps to ensure a bubble-free finish.

    Environmental Considerations for UK Homes

    UK homes are subject to seasonal humidity changes, which can affect wallpaper performance. Consider using moisture-resistant wallpapers in areas prone to dampness to mitigate this risk.

    Prevention Method Description Benefit
    Surface Cleaning Remove dust, grease, and loose material Reduces risk of air bubbles
    Priming Walls Create a uniform surface Promotes even adhesion
    Lining Paper Use on textured surfaces Creates a smooth base for wallpaper
    Correct Adhesive Application Follow manufacturer’s instructions Prevents excess moisture and poor adhesion

    A pristine white wall, its surface unmarred, serves as the backdrop for a captivating display of wallpaper prevention techniques. In the foreground, a delicate hand carefully applies a thin layer of wallpaper paste, ensuring a seamless and secure bond between the paper and the wall. The lighting, soft and diffused, casts a warm glow, highlighting the intricate patterns and textures of the wallpaper as it is carefully smoothed into place. In the middle ground, a selection of tools, including a wallpaper scraper and a paste brush, stand ready, their precise placement and organization conveying a sense of order and professionalism. The overall mood is one of calm, methodical attention to detail, reflecting the care and expertise required to prevent future wallpaper bubbles and maintain the pristine appearance of the surface.

    Conclusion: Maintaining Flawless Wallpapered Walls

    To maintain flawless wallpapered walls in your UK home, it’s essential to address bubbling issues promptly. Regular inspection of your wallpapered surfaces, particularly after seasonal changes when moisture levels fluctuate, can help identify potential problems before they become serious.

    Prevention remains the best approach for long-term wall beauty. By taking care when applying the wallpaper and using a quality adhesive, you can help prevent bubbles from forming in the first place. Make sure to keep some matching wallpaper scraps and appropriate adhesive stored safely for future repairs.

    Different rooms in your home may experience different conditions; bathrooms and kitchens are particularly prone to moisture-related wallpaper issues and may require more frequent monitoring. With proper installation, quality materials, and the right repair techniques, your wallpapered walls can remain a beautiful feature of your home for many years to come.

    FAQ

    What causes air pockets under my wallpaper?

    Air pockets, also known as bubbles, are typically caused by trapped air or moisture between the adhesive and the wall surface. This can occur when the wallpaper paste is not applied evenly or when the wall is not properly prepared.

    How do I fix a bubble in my wallpaper?

    To fix a bubble, you’ll need to create a small incision in the wallpaper, then use a syringe to inject adhesive into the affected area. Use a damp sponge to smooth out the area, ensuring the adhesive is evenly distributed.

    Can I use a roller to remove bubbles from my wallpaper?

    While a roller can be used to smooth out the wallpaper, it’s not always effective in removing bubbles. For more stubborn bubbles, it’s best to use a syringe and adhesive to reattach the paper to the wall.

    How can I prevent bubbles from forming on my new wallpaper?

    To prevent bubbles, ensure your walls are properly prepared by cleaning and drying them thoroughly. Apply the wallpaper paste evenly, and use a brush or roller to smooth out the paper as you apply it.

    What should I do if the bubble reappears after I’ve fixed it?

    If the bubble reappears, it may be due to moisture or air pockets that were not fully addressed. Check the area for any signs of dampness and ensure the adhesive is fully dry. You may need to reapply adhesive or consult a professional for further assistance.

    Can I paint over a bubble in my wallpaper?

    It’s not recommended to paint over a bubble, as this can cause the paper to lift further or create more air pockets. Instead, address the bubble directly by reattaching the paper to the wall using adhesive.

  • Low Water Pressure: Plumbing Fixes Tips for UK Homes

    Low Water Pressure: Plumbing Fixes Tips for UK Homes

    Are you tired of weak water flow from your taps? It’s a frustrating problem that can disrupt your daily routine. In the UK, many homeowners face issues with plumbing that lead to reduced pressure in their homes.

    Understanding the causes of this issue is the first step towards resolving it. Whether it’s a simple fix or a more complex problem with your home’s plumbing system, this guide will provide you with practical advice and help you restore proper water pressure.

    Key Takeaways

    • Identify common causes of low water pressure in UK homes.
    • Learn DIY troubleshooting methods to resolve the issue.
    • Understand when to call a professional plumber for assistance.
    • Discover how your home’s plumbing system interacts with the wider water network.
    • Get tailored advice for resolving pressure issues in your home.

    Understanding Low Water Pressure in UK Homes

    Understanding the concept of water pressure is crucial for UK homeowners. Water pressure refers to the force that pushes water through your home’s pipework, determining the strength of the flow from your taps and appliances.

    Common Signs of Low Water Pressure

    You may be experiencing low water pressure if you notice weak streams from your taps, longer filling times for baths and appliances, or inconsistent water flow. These signs indicate that the water pressure in your home is not meeting your needs.

    How Water Pressure Works in Residential Plumbing

    Water pressure is measured as the force that pushes water through your home’s pipework. In residential plumbing systems, water pressure typically ranges between 1 and 3 bar, with UK water companies aiming to provide a minimum flow rate of 9 litres per minute at your property boundary.

    Why Water Companies Manage Pressure Levels

    Water companies actively manage pressure levels throughout the day to prevent leaks, save water, ensure constant supply, and reduce bills. They adjust the strength of water flow so there’s enough for everyday needs, but not so much that it causes bursts and leaks.

    Some key reasons why water companies manage pressure levels include:

    • Preventing leaks and bursts in the wider water network
    • Conserving water resources
    • Reducing the risk of supply interruptions
    • Ensuring a minimum flow rate at your property boundary

    By understanding how water pressure works and why it’s managed, you can better diagnose issues with your home’s water supply.

    Common Causes of Low Water Pressure

    Several factors contribute to low water pressure in UK homes, ranging from external influences to internal plumbing issues. Understanding these causes is essential to addressing the problem effectively.

    External Factors Beyond Your Control

    External factors can significantly impact water pressure. For instance, planned works by water companies can temporarily reduce pressure in your area. Burst water mains or emergency repairs in your neighbourhood can also cause sudden drops in pressure or complete loss of water supply.

    Internal Plumbing Issues

    Internal plumbing issues are another common cause. Limescale buildup in pipes, particularly in hard water areas, can narrow the internal diameter of pipes and restrict flow over time. Older properties often have narrower pipes that cannot deliver the same volume of water as modern plumbing systems.

    Seasonal and Time-of-Day Variations

    Seasonal factors and time-of-day variations also play a role. Peak usage times, typically 7-9 am and 6-8 pm, create higher demand across the network, resulting in naturally lower pressure during these periods.

    Cause Description Impact on Pressure
    Planned Works Water company maintenance Temporary reduction
    Burst Water Mains Emergency repairs Sudden drop or loss
    Limescale Buildup Narrowing of pipes Gradual reduction

    A highly detailed and technical cutaway diagram showcasing the common causes of low water pressure in a UK home's plumbing system. The foreground depicts a cross-section of the home's water pipes, faucets, and fixtures, highlighting issues like mineral buildup, leaks, and clogged valves. The middle ground features annotated diagrams explaining the mechanical and hydraulic factors contributing to diminished water flow, with clear labels and callouts. The background provides an atmospheric setting, with a muted color palette and subtle shadows to convey a sense of technical precision and professionalism, as if the image were from an engineering manual or technical journal.

    DIY Troubleshooting for Low Water Pressure

    To tackle low water pressure, start by checking a few key areas around your home to identify the cause. This proactive approach can help you resolve the issue or determine if you need to call a professional plumber.

    Check for Planned Works or Local Incidents

    Before attempting any repairs, it’s essential to check if there are any planned works or reported incidents in your area that might be causing the low water pressure. You can do this by visiting your water company’s website or contacting their customer service. This simple check can save you time and effort.

    Inspect and Adjust Your Stop Tap

    Your internal stop tap controls the main water flow into your property. Ensure it’s fully open to maximize water pressure. To adjust it, turn the stop tap anti-clockwise until it stops, then back it off slightly to prevent seizing. This simple adjustment can improve water flow throughout your home.

    A well-lit, close-up shot of a chrome stop tap, its knob turned clockwise to adjust the water flow. The tap is set against a neutral background, perhaps a tiled wall or a stainless steel sink, allowing the intricate details of the mechanism to be clearly visible. The lighting is soft and even, highlighting the metallic sheen and the subtle grooves on the knob's surface. The composition emphasizes the stop tap's function as a crucial component in a plumbing system, conveying a sense of the importance of proper maintenance and adjustment for achieving optimal water pressure in a household.

    Clear Airlocks in Your Pipes

    Airlocks occur when air becomes trapped in high points of your plumbing system, causing irregular water flow and sometimes vibrating pipes. To clear an airlock, turn on all taps starting with the one closest to the stop tap and let the water flow for 10-15 minutes to push air bubbles through the system.

    Test Your Water Flow Rate

    Testing your flow rate provides objective data about your water pressure. Use a measuring jug to time how quickly it fills from your main kitchen tap. A 1-litre jug should fill in approximately 6-7 seconds for adequate pressure. If the flow rate is less than 9 litres per minute, you have a pressure issue that needs addressing.

    Flow Rate (litres/minute) Time to Fill 1 Litre (seconds) Pressure Status
    9 or more 6.7 or less Adequate
    Less than 9 More than 6.7 Low Pressure

    When to Call a Professional Plumber

    Find an approved plumber for low water pressure issues

    Learn More

    When low water pressure persists despite your best efforts to fix it, seeking professional help is the next logical step. If you’ve tried all DIY troubleshooting steps and still experience issues, especially if both hot and cold water systems are affected, it’s time to call a professional plumber.

    Signs That Indicate Professional Help Is Needed

    Sudden changes in water pressure, unusual noises in your plumbing system, or visible leaks are clear indicators that you need a qualified plumber. Variations in water pressure across different areas of your home or a gradual decline in pressure over time also suggest underlying issues that require expert diagnosis.

    Finding a Qualified Plumber in the UK

    To find a reliable plumber, check if they are registered with approved schemes like WaterSafe, ensuring they have the necessary qualifications and insurance to work on your water supply. Before hiring, verify if your home insurance covers plumbing and drainage, as this might cover certain repairs.

    What to Expect During a Professional Assessment

    During a professional assessment, the plumber will check your stop tap, inspect visible pipework, test flow rates, and possibly use specialized equipment to identify blockages. They will assess both the supply side and your home’s internal pipework to pinpoint where pressure is being lost, offering solutions like booster pumps or replacing narrowed pipework if necessary.

    Conclusion: Maintaining Optimal Water Pressure

    Effective management of water pressure can significantly enhance your home’s overall plumbing performance. To achieve this, regular maintenance is essential, including checking your stop tap every few months to ensure it moves freely.

    You can also make adjustments to your usage patterns, such as running appliances during off-peak times when water pressure is typically higher. For more information on understanding water pressure in your home, you can visit our guide on understanding water pressure.

    By being mindful of these factors and taking proactive steps, you can maintain optimal water pressure and enjoy a more efficient plumbing system.

    FAQ

    What is the first step to take when experiencing issues with the flow of water from my taps?

    Check if there are any planned works or local incidents in your area that could be affecting the water supply. You can do this by contacting your water company or checking their website for updates.

    How do I inspect and adjust my stop tap?

    Locate your stop tap, usually found near the kitchen sink or where the water supply enters your home. Check that it’s fully open and not restricted. If you’re unsure, consult a professional plumber for assistance.

    What is an airlock in my pipes, and how do I clear it?

    An airlock occurs when air becomes trapped in your pipes, preventing water from flowing properly. To clear it, turn off the stop tap, open the affected tap, and let it run until the air is released. You may need to repeat this process several times.

    How can I test my water flow rate?

    To test your water flow rate, turn on a tap to its maximum flow and time how long it takes to fill a container. Compare this to the recommended flow rate for your appliances to ensure they’re functioning correctly.

    When should I consider calling a professional plumber to help with my plumbing issues?

    If you’ve tried troubleshooting and the issue persists, or if you’re unsure about how to proceed, it’s time to call a professional plumber. They can assess the situation and provide a solution to restore optimal water flow to your home.

    How can I find a qualified plumber in the UK?

    Look for plumbers who are registered with a reputable trade organisation, such as the Chartered Institute of Plumbing and Heating Engineering. Check online reviews and ask for recommendations from friends or family to find a reliable professional.

  • Paint Peeling Fix: Walls & Surfaces Tips for UK Homes

    Paint Peeling Fix: Walls & Surfaces Tips for UK Homes

    You’ve invested time and effort into decorating your home, but peeling paint can quickly make your walls look worn and neglected.

    In the UK, where the climate can be quite damp, paint durability is a common concern. The good news is that most peeling paint issues can be addressed with the right techniques and tools.

    This comprehensive guide will walk you through the steps to identify, fix, and prevent peeling paint on various surfaces in your home. You’ll learn how to maintain the aesthetic appeal and structural integrity of your walls.

    Key Takeaways

    • Understand the common causes of peeling paint in UK homes.
    • Learn how to identify peeling paint issues early.
    • Discover the right techniques for fixing peeling paint.
    • Find out how to prevent peeling paint in the future.
    • Get tips on maintaining your home’s surfaces.

    Understanding Why Paint Peels in UK Homes

    Peeling paint is a common issue in UK homes, often caused by a combination of factors related to the home’s environment and maintenance. The integrity of paint on walls is challenged by various conditions, leading to peeling, cracking, or flaking.

    The Impact of British Weather and Humidity

    The UK’s notoriously damp climate creates unique challenges for paint adhesion and longevity. Seasonal humidity fluctuations cause paint to expand and contract, eventually leading to peeling. Condensation in poorly ventilated homes further exacerbates the issue, affecting different wall surfaces in various ways. Excess moisture is a primary culprit, as it prevents paint from bonding properly with the wall surface.

    Common Causes of Paint Peeling in Different Rooms

    Inadequate surface preparation is a common cause of paint peeling, regardless of the room type. Layering different paint types incorrectly, such as applying latex paint over oil-based paint, can lead to chemical incompatibility issues. Specific rooms experience unique challenges: bathrooms suffer from steam, kitchens from cooking moisture, and living areas from external wall penetration. Intermittent heating patterns in UK homes can also exacerbate paint adhesion issues. Understanding these room-specific causes can help in applying targeted solutions to prevent peeling paint.

    Identifying Different Types of Paint Peeling Problems

    Paint peeling can manifest in various forms, each indicating a different underlying issue that needs to be addressed. Recognizing the specific type of peeling is crucial for determining the appropriate repair method.

    Bubbling and Blistering Paint

    Bubbling and blistering paint is characterized by the formation of bubbles or blisters on the paint surface, often indicating trapped moisture or heat beneath the paint. This issue can arise due to poor surface preparation or exposure to high temperatures.

    A close-up view of an aged, weathered wall surface with layers of peeling paint. The foreground showcases the intricate textures and patterns created by the flaking paint, revealing the underlying materials. The middle ground highlights the irregular edges and curled corners of the peeling paint, capturing the sense of deterioration. The background subtly hints at the surrounding environment, providing a sense of context without distracting from the main subject. Warm, directional lighting casts dramatic shadows, emphasizing the depth and dimension of the peeling paint. The overall atmosphere conveys a sense of decay and the passage of time, reflecting the theme of "Identifying Different Types of Paint Peeling Problems".

    Flaking and Cracking Paint

    Flaking paint involves the detachment of small paint pieces, while cracking paint remains attached but develops visible lines. Flaking often results from poor adhesion, whereas cracking can indicate aging paint or settlement issues. Understanding the difference is vital for addressing the root cause.

    Peeling from the Surface vs. Between Layers

    It’s essential to determine whether the paint is peeling from the surface or between layers. Peeling from the surface suggests an adhesion failure to the wall, while peeling between layers indicates a cohesion failure between paint coats. This distinction guides the repair approach.

    To effectively fix peeling paint, you must identify the type of paint and its condition. For instance, latex paint tends to have a rubbery, stretchy consistency when peeling, whereas oil-based paint often results in brittle flakes. By examining the peeling pattern and location, you can diagnose the root cause and choose the appropriate fix.

    • Examine the visual characteristics of the peeling paint to determine its type and condition.
    • Assess the pattern and location of the peeling to identify potential underlying issues.
    • Consider the material of your walls, as different materials exhibit unique peeling patterns.

    Essential Tools for Your Paint Peeling Fix Project

    When tackling paint peeling issues in your UK home, having the right tools is crucial for a successful repair. The task requires a combination of basic and specialized tools to ensure a professional finish.

    Scrapers and Sandpaper Options

    For removing peeling paint, you’ll need a reliable paint scraper. For larger areas, consider the Ultimate Paint Scraper, which gently buffs away peeling paint. For smaller surface areas, use the Ultimate Fine Sandpaper with a Seriously Good Cork Block to rapidly clean up the area. Having multiple sandpaper grits (coarse to fine) is essential for different stages of the repair process.

    Fillers and Primers

    For damaged walls, you’ll need a suitable filler. UK homes can benefit from either ready-mixed or powder fillers, depending on the extent of the damage. A primer is also crucial as it creates a proper foundation for new paint and prevents future peeling issues.

    Painting Tools and Accessories

    An image of various painting tools and accessories

    Beyond basic brushes and rollers, consider painting tools like extension poles, paint pads for edges, and specialized applicators for difficult areas. These tools will help you achieve a professional finish on your paint project.

    Safety Equipment

    An image of safety goggles and a dust mask

    When removing old peeling paint, it’s vital to use proper safety equipment, including dust masks and eye protection, to safeguard against hazardous substances.

    By investing in quality tools and following the right techniques, you’ll be well-equipped to tackle paint peeling issues in your UK home effectively.

    Step-by-Step Guide to Fix Peeling Paint on Walls

    With the right guidance, you can easily fix peeling paint on your walls and achieve a smooth finish. This step-by-step guide will walk you through the process, from preparing your work area to applying primer.

    Preparing Your Work Area

    Before starting your project, it’s essential to prepare your work area. Begin by removing any furniture near the wall you’re working on. Lay a dust sheet to protect your floor and furniture from dust, drips, and spills. Secure the dust sheet with masking tape to prevent it from shifting while you work. Ensure proper ventilation to protect your health.

    Removing Loose and Peeling Paint

    Use a scraper or a paint remover to gently remove loose and peeling paint. Be cautious not to gouge the wall surface. For more stubborn areas, use a more aggressive scraping method, but be careful not to damage the underlying surface. Stop scraping when you reach sound paint.

    A neatly organized workshop interior with natural lighting filtering through a large window. In the foreground, a wall section with peeled and flaking paint, revealing the underlying surface. In the middle ground, a person in work clothes uses a scraper tool to carefully remove the damaged paint, exposing the clean surface. Shelves along the back wall hold an assortment of painting supplies, brushes, and tools. The overall atmosphere is one of focused, methodical repair, conveying a sense of practical problem-solving.

    Sanding and Smoothing the Surface

    Once you’ve removed the loose paint, sand the area to create a smooth transition between the painted and unpainted sections. Use a fine-grit sandpaper to achieve a smooth surface. Wipe away any dust with a damp microfibre cloth.

    Step Action Tools Needed
    1 Remove loose paint Scraper or paint remover
    2 Sand the surface Fine-grit sandpaper
    3 Fill cracks and holes Filler, putty knife

    Filling Cracks and Holes

    Apply filler to cracks and holes in thin layers, allowing each layer to dry before applying the next. Use a putty knife to achieve a flush finish with the surrounding wall. Sand the filled area to ensure it’s smooth.

    Applying Primer to Prepared Areas

    Select a primer suitable for your wall condition and apply it according to the manufacturer’s instructions. Use a roller or brush to apply the primer evenly. Allow the primer to dry completely before proceeding.

    By following these steps and taking your time, you can successfully fix peeling paint on your walls and achieve a professional-looking finish.

    Tackling Peeling Paint in High-Moisture Areas

    Peeling paint in high-moisture areas can be particularly problematic, necessitating tailored solutions for UK homeowners. These areas, such as bathrooms and kitchens, are prone to moisture-related issues that can compromise the integrity of the paint.

    Bathroom-Specific Paint Peeling Solutions

    Fixing peeling paint in bathrooms requires a thorough approach due to the constant exposure to moisture. To effectively address this issue, it’s crucial to start with a clean surface, removing any soap residue and mildew that can prevent proper paint adhesion. Using bathroom-specific paints with anti-mould properties is highly recommended, as these formulations are designed to resist the high humidity conditions typical in UK bathrooms.

    Image of bathroom-specific paint with anti-mould properties

    Learn More

    Kitchen Paint Peeling Fixes

    Kitchens present a unique set of challenges, with the combination of moisture, grease, and temperature fluctuations making kitchen paint particularly prone to peeling. To fix peeling paint in kitchens, it’s essential to thoroughly clean the surface to remove grease and grime. Using a primer before applying paint can also enhance durability.

    Dealing with Condensation Issues

    Condensation is a significant contributor to peeling paint in high-moisture areas. To address this, both immediate fixes for affected paint and longer-term solutions to reduce condensation formation are necessary. Ensuring proper ventilation systems are in place can dramatically reduce paint peeling problems. Regular maintenance, including prompt attention to early signs of peeling, is also crucial.

    By understanding the causes of peeling paint and implementing the right fixes, homeowners can maintain the integrity of their walls in high-moisture areas.

    Ceiling Paint Peeling Fix: Special Considerations

    Fixing peeling paint on ceilings presents unique challenges that require careful consideration and the right techniques. The gravity-defying nature of the work and the often awkward positions needed can make the task daunting. However, with proper preparation and understanding of the causes, you can achieve a flawless finish.

    paint peeling fix

    Learn More

    Working Safely at Height

    When working on ceiling repairs, safety is paramount. Ensure you’re using a sturdy ladder or scaffolding that’s appropriate for the task. Always maintain three points of contact, whether it’s two hands and one foot or two feet and one hand. For extensive repairs, consider hiring a professional to avoid accidents.

    Techniques for Overhead Repairs

    To minimize fatigue and paint drips, adopt specialized techniques for overhead repairs. Use a roller with an extension pole to cover large areas efficiently, and work in sections to maintain even coverage. Keep your work area well-ventilated, and consider using a paint with a slow-drying formula to reduce drips.

    Preventing Future Ceiling Paint Problems

    Preventing future ceiling paint peeling involves addressing the underlying causes, such as moisture issues. Ensure your attic is well-insulated and ventilated to reduce condensation. Regularly inspect your ceiling for signs of dampness or water damage, and address these issues promptly to prevent paint peeling.

    By understanding the challenges and taking the right precautions, you can successfully fix peeling paint on your ceiling and enjoy a durable, attractive finish for years to come.

    Choosing the Right Paint After Repairs

    Choosing the appropriate paint type and finish is essential to prevent future peeling issues after repairs. The right paint can significantly extend the time between necessary redecorating, making it a crucial decision for homeowners.

    Understanding Paint Sheens for Different Surfaces

    Different surfaces and rooms require specific paint sheens. Flat sheens are ideal for ceilings and low-traffic areas, while satin and semi-gloss finishes are better suited for high-traffic areas and surfaces that are exposed to moisture, such as bathrooms and kitchens.

    The durability and moisture resistance of satin and semi-gloss enamels make them perfect for areas that need frequent cleaning. For instance, a satin enamel sheen creates a pearl-like finish that’s durable and dirt-resistant, making it suitable for virtually all exterior surfaces.

    Water-Based vs. Oil-Based Paints

    Water-based paints are easier to clean up and dry faster than oil-based paints, making them a popular choice for many homeowners. However, oil-based paints offer a harder, more durable finish, which can be beneficial for certain applications.

    When deciding between water-based and oil-based paints, consider the surface you’re painting and the desired finish. For example, water-based paints are suitable for most interior surfaces, while oil-based paints are often used for trim work and exterior surfaces.

    Specialist Paints for Problem Areas

    Specialist paints are available for problem areas such as bathrooms, hallways, and radiators. Moisture-resistant formulations are ideal for damp-prone areas, while scuff-resistant options are perfect for high-traffic areas.

    For instance, paints with built-in mould inhibitors can help prevent mould growth in damp areas, ensuring a healthier and more durable finish.

    Preventing Future Paint Peeling Problems

    To keep your walls looking their best, preventing paint peeling is crucial. This involves a combination of proper surface preparation, effective moisture control, and regular maintenance.

    Proper Surface Preparation Techniques

    Preparing your surface correctly is the first step in preventing paint peeling. This includes thoroughly cleaning the wall to remove dirt, grease, or mould. For different wall materials, specific preparation methods are necessary. For instance, plaster walls may require a coat of primer to create a smooth surface for painting. Ensuring the surface is dry and free from defects before applying paint will significantly extend its lifespan.

    Moisture Control in UK Homes

    Moisture is a significant contributor to paint peeling in UK homes. To combat this, it’s essential to implement effective moisture control strategies. This can include improving ventilation, using dehumidifiers, and addressing issues like condensation, rising damp, and penetrating damp. By reducing moisture levels, you can prevent paint failure and maintain the integrity of your walls.

    Maintenance Tips for Lasting Results

    Regular maintenance is key to extending the life of your paintwork. This includes gentle cleaning routines to remove dirt without damaging the paint, prompt attention to minor damage, and regular inspections for early signs of problems. Creating a home maintenance calendar that includes regular paint condition assessments, particularly after extreme weather events, will help you stay on top of potential issues before they become major problems.

    Professional vs DIY: When to Call in the Experts

    Find professional painters for peeling paint in UK homes

    Learn More

    Understanding when to DIY and when to call in the experts is crucial for effectively fixing peeling paint issues in your UK home. While DIY repairs can be cost-effective for minor issues, more complex problems may require professional expertise.

    Signs Your Peeling Paint Indicates Bigger Problems

    If you notice extensive peeling, especially in conjunction with other signs like dampness, mould, or structural cracks, it may indicate underlying issues that need professional assessment. Structural damage or extensive damp can compromise the integrity of your walls and ceilings, making it essential to address these problems promptly.

    Cost Comparison: DIY vs Professional Repair

    When comparing DIY and professional repairs, consider not just the cost of materials but also the value of your time and the quality of the finish. While DIY might seem cheaper upfront, professional services often provide a longer-lasting solution, potentially saving you money in the long run.

    For complex issues or if you’re unsure about the extent of the problem, it’s wise to consult with a professional. They can provide a detailed assessment and quotation, helping you make an informed decision.

    When hiring a professional, look for reputable painting and decorating experts in the UK, checking for relevant certifications and trade associations. Effective communication is key; ensure they understand your specific concerns and requirements.

    Consider a hybrid approach where you handle simpler tasks while bringing in experts for more technical elements. This can be a cost-effective way to manage your project while ensuring complex issues are addressed properly.

    Conclusion

    Tackling peeling paint effectively involves more than just covering up the problem; it requires a thorough understanding of the underlying causes. Throughout this article, we’ve explored the various reasons behind paint peeling in UK homes, from the impact of British weather and humidity to common causes in different rooms. By understanding these factors and following our step-by-step guide, you can achieve a flawless finish on your walls and maintain the overall appearance and value of your home.

    Successful paint peeling fixes require proper diagnosis, preparation, and execution. By addressing the root causes rather than just the symptoms, you can ensure a long-lasting result. The UK’s climate presents unique challenges for paint durability, making it crucial to select the right materials and techniques. By following our guide and taking preventative measures, you can avoid future peeling paint issues and enjoy a beautiful, professional-quality finish.

    We encourage you to assess your own home for early signs of peeling and address them promptly. With the right approach and materials, even persistent peeling paint problems can be resolved. By maintaining your walls and taking on projects like this, you can enjoy the satisfaction of a job well done and the cost savings of DIY projects.

    FAQ

    What are the most common causes of paint peeling in UK homes?

    The most common causes include excessive moisture, poor surface preparation, and the impact of British weather. High humidity and condensation can also contribute to the problem, particularly in areas like bathrooms and kitchens.

    How do I prevent paint from peeling in the future?

    To prevent future peeling issues, ensure proper surface preparation, control moisture levels in your home, and use specialist paints designed for high-moisture areas. Regular maintenance, such as checking for signs of dampness and addressing any issues promptly, is also crucial.

    What tools do I need to fix peeling paint on walls and ceilings?

    Essential tools include a paint scraper or scraper knife, sandpaper, fillers, primers, and safety equipment like gloves and goggles. For ceilings, you’ll also need to consider safety equipment for working at height, such as a sturdy ladder or step stool.

    Can I use any type of paint to repair peeling areas?

    No, it’s essential to choose the right type of paint for the job. Consider factors like the surface you’re painting, the level of moisture in the area, and the desired finish. Water-based or oil-based paints have different properties, and some paints are specifically designed for problem areas or high-moisture environments.

    When should I consider calling a professional to fix peeling paint?

    If you’re dealing with extensive peeling paint, signs of underlying damp or structural issues, or if you’re not comfortable with heights (for ceiling repairs), it’s best to seek the help of a professional. They can diagnose the root cause of the problem and provide a long-lasting solution.

    How do I deal with condensation issues that contribute to paint peeling?

    To address condensation, improve ventilation in your home by using extractor fans, ensuring good airflow, and reducing moisture-producing activities. You can also consider using a dehumidifier to control humidity levels, particularly in areas prone to moisture.

  • Top Screwdrivers: Buyer’s Guides Tips for UK Homes

    Top Screwdrivers: Buyer’s Guides Tips for UK Homes

    A screwdriver is an indispensable tool in every homeowner’s arsenal, playing a vital role in various DIY projects, electrical work, and plumbing tasks.

    With numerous options available, selecting the best screwdriver for your needs can be a daunting task. The right screwdriver can significantly impact your efficiency and results, making it essential to understand what makes a quality tool.

    Whether you’re a DIY enthusiast or a professional tradesperson, having the right screwdriver in your toolkit is crucial for completing projects successfully in your home.

    Key Takeaways

    • Understanding the different types of screwdrivers and their specific uses is vital.
    • Choosing a quality screwdriver can significantly impact your work efficiency.
    • The right screwdriver can make a difference in completing home projects successfully.
    • Consider the specific needs of your project when selecting a screwdriver.
    • A good screwdriver is an investment for any homeowner or tradesperson.

    Understanding the Importance of Quality Screwdrivers

    Quality screwdrivers are a cornerstone of effective home maintenance. Whether you’re hanging a picture or repairing furniture, the right screwdriver can make all the difference in the outcome of your task.

    Investing in a quality screwdriver pays dividends in several ways. Not only do they offer improved performance, but they also provide greater comfort during use and a significantly longer lifespan compared to their cheaper counterparts.

    The Role of Screwdrivers in Home Maintenance

    Screwdrivers are among the most frequently used tools in any homeowner’s arsenal. They are essential for a wide range of tasks, from simple repairs to complex projects. A quality screwdriver ensures that these tasks are completed efficiently and effectively.

    Task Importance of Quality Screwdriver
    Simple Repairs Prevents damage to screws and surrounding material
    Complex Projects Ensures precision and reliability

    Why Investing in Quality Tools Matters

    Premium screwdrivers feature hardened steel tips that maintain their shape even after extensive use. This prevents slippage, which can lead to damaged screws and potentially injured hands. Moreover, quality tools typically offer ergonomic handles that reduce hand fatigue during extended use.

    “A good tool is like a good friend; it makes the job easier and gets the job done right.”

    – Anonymous

    The initial higher cost of professional-grade screwdrivers is offset by their durability, often lasting decades rather than requiring frequent replacement. This makes them a valuable investment for any home. Superior screwdrivers also provide better torque transfer, making difficult tasks easier and reducing the likelihood of damaging valuable home fixtures or furniture.

    Types of Screwdrivers Every UK Homeowner Should Know

    For UK homeowners, knowing the different types of screwdrivers can make a significant difference in home maintenance. Having the right tool for the job not only makes tasks easier but also ensures that projects are completed efficiently and safely.

    Standard Screwdrivers: Slotted and Phillips

    Standard screwdrivers are the most commonly used tools in any homeowner’s toolkit. The two primary types are slotted (flathead) and Phillips. Slotted screwdrivers are used for screws with a single slot, while Phillips screwdrivers are designed for screws with a cross-shaped slot, providing better torque and reducing the likelihood of slippage.

    A collection of various screwdrivers in different sizes, shapes, and head types, neatly arranged on a clean, neutral-colored surface. The screwdrivers are well-lit, casting subtle shadows, showcasing their intricate designs and textures. The scene has a professional, informative tone, suitable for illustrating a comprehensive guide on the types of screwdrivers every UK homeowner should have in their toolkit. The image captures the diversity and functionality of these essential tools, inviting the viewer to explore and understand their practical applications.

    Precision Screwdrivers for Detailed Work

    Precision screwdrivers are essential for detailed work, such as electronics repair or working with small appliances. These screwdrivers typically have finer tips and are designed to handle smaller screws, reducing the risk of damage to delicate components.

    Speciality Screwdrivers: Torx, Hex and Square Drive

    Speciality screwdrivers, including Torx, Hex (or Allen), and Square Drive, are designed for specific tasks. Torx screwdrivers are used in electronics and appliances, offering superior grip and torque transfer. Hex screwdrivers are essential for assembling flat-pack furniture and bicycles. Square Drive screwdrivers prevent slippage and cam-out, making them ideal for power tool use.

    Screwdriver Type Common Use Key Feature
    Torx Electronics, Appliances Six-pointed star-shaped head
    Hex (Allen) Flat-pack furniture, Bicycles Hexagonal head
    Square Drive (Robertson) Power tool use, Heavy-duty projects Square-shaped recess

    Having a set of these speciality screwdrivers can greatly enhance your ability to tackle various projects around the home. Many of these are available as individual screwdrivers or as bits for multi-bit systems, offering flexibility for different project needs.

    Key Features to Consider When Buying Screwdrivers

    A well-chosen screwdriver can be a valuable addition to your toolkit, provided you know what features to look for. When you’re in the market for a new screwdriver, several factors can enhance your experience and productivity.

    Handle Design and Ergonomics

    The handle design and ergonomics of a screwdriver play a crucial role in comfort and control. A well-designed handle provides a secure grip, reducing the likelihood of slippage during use. Look for handles with ergonomic contours that fit comfortably in your hand, allowing for precise control and reduced fatigue during prolonged tasks.

    Blade Quality and Durability

    The quality of the blade or shaft is paramount for the longevity and effectiveness of the screwdriver. High-quality materials and manufacturing processes ensure that the screwdriver tip remains durable and resistant to wear. A robust shaft can withstand the rigors of frequent use, maintaining its integrity over time.

    Magnetised Tips and Other Useful Features

    Some screwdrivers come with magnetised tips, which are invaluable for retrieving dropped screws and holding fasteners in place when working in awkward positions. Other useful features include built-in storage compartments in the handle for spare bits, transparent handles for easy identification, impact-resistant end caps, and colour-coded handles for quick identification of different types and sizes.

    • Magnetised tips help in managing small parts.
    • Some handles feature storage for spare bits.
    • Transparent handles aid in quick identification.
    • Impact-resistant end caps protect the handle.
    • Colour-coded handles save time during complex projects.

    Top Screwdrivers for General Home Use

    When it comes to home maintenance, having the right screwdrivers is crucial. A good screwdriver set can help you tackle various tasks around the house, from hanging pictures to repairing furniture.

    Wurth Zebra Screwdrivers Set

    The Wurth Zebra Screwdrivers Set is a high-quality option for homeowners. This set offers excellent durability and versatility, making it suitable for a wide range of tasks. With its ergonomic design, you can work comfortably for extended periods.

    Generate an image of the Wurth Zebra Screwdrivers Set on a wooden workbench.

    Buy Now

    Craftsman 12-piece Screwdriver Set

    The Craftsman 12-piece Screwdriver Set is another excellent choice for general home use. This set includes a variety of drivers, such as slotted, Phillips, and Torx, ensuring you’re prepared for most tasks. The set’s organisation case keeps your tools tidy and within reach.

    Generate an image of the Craftsman 12-piece Screwdriver Set in its organisation case.

    Buy Now

    Gearwrench 20-pc Screwdriver Set

    The Gearwrench 20-pc Screwdriver Set is a comprehensive solution for homeowners. This set features dual-material handles that provide a comfortable grip and allow for smooth operation. It includes standard, precision, and specialty drivers, making it an excellent value.

    Generate an image of the Gearwrench 20-pc Screwdriver Set being used to repair a piece of equipment.

    Buy Now

    Best Insulated Screwdrivers for Electrical Work

    For UK homeowners who frequently work with electrical systems, insulated screwdrivers are a must-have. These specialised tools are designed to protect you from electrical shocks, ensuring your safety while working on electrical equipment.

    Klein Tools 6pc 1000V Insulated Screwdriver Set

    The Klein Tools 6pc 1000V Insulated Screwdriver Set is a reliable choice for electrical work. This set includes a range of insulated drivers, providing you with the right tool for the job. The tether-ready design and colour-coded visual identifying labels on the handle make it easy to use and store the screwdrivers safely.

    Generate an image of the Klein Tools 6pc 1000V Insulated Screwdriver Set, highlighting its features such as the colour-coded labels and tether hole.

    Buy Now

    Safety Features to Look for in Insulated Screwdrivers

    When selecting insulated screwdrivers, there are several key safety features to look for. Genuine insulated screwdrivers must comply with international safety standards, such as IEC60900, which requires testing to withstand 10,000 volts. Look for dual-layer insulation with a contrasting inner layer, flame-retardant handles, and insulation that extends to the tip of the handle. Additionally, VDE certification provides assurance that the screwdrivers meet rigorous European safety standards for electrical work.

    Precision Screwdriver Sets for Electronics and Small Repairs

    For electronics enthusiasts and professionals, precision screwdriver sets are indispensable tools. These sets provide the necessary precision and control for delicate operations on small electronics and precision mechanisms.

    Klein Tools 32717 Precision Electronics Screwdriver Set

    The Klein Tools 32717 Precision Electronics Screwdriver Set is a high-quality tool designed for professionals and serious hobbyists. This set includes a range of precision bits and a durable handle, making it ideal for electronics work.

    Generate an image of the Klein Tools 32717 Precision Electronics Screwdriver Set.

    Buy Now

    Wiha Precision Screwdriver Sets

    Wiha precision screwdriver sets embody German engineering excellence, manufactured to strict ISO standards. Founded in 1939, Wiha is renowned for its innovative hand tools, particularly among electronics technicians and watchmakers.

    • Wiha precision screwdriver sets feature optimally sized and shaped handles for excellent control and torque.
    • Each bit is made from high-quality chrome vanadium molybdenum steel, hardened throughout for durability.
    • While slightly more expensive, Wiha sets offer superior performance and durability, favoured by UK professionals and serious hobbyists.

    Generate an image of a Wiha precision screwdriver set.

    Buy Now

    Multi-Bit and Ratcheting Screwdrivers for Versatility

    Multi-bit and ratcheting screwdrivers are game-changers for anyone looking to expand their toolkit. These versatile tools offer a range of benefits, from increased efficiency to improved precision.

    Wiha 77791 26-in-1 Ultra Driver

    The Wiha 77791 26-in-1 Ultra Driver is a powerhouse of versatility, offering 26 different bits in one convenient tool. This multi-bit screwdriver is perfect for UK homeowners who need a reliable tool for various tasks.

    Generate an image of the Wiha 77791 26-in-1 Ultra Driver with its various bits and ergonomic handle.

    Buy Now

    Gearwrench 33pc Ratcheting T-Handle Hex Key Set

    The Gearwrench 33pc Ratcheting T-Handle Hex Key Set combines the leverage of a T-handle design with the efficiency of a ratcheting mechanism, making it ideal for tasks such as furniture assembly or bicycle maintenance. Constructed from powder-coated alloy steel, these hex keys resist twisting under significant torque.

    • Key Features: Ratcheting mechanism for reduced effort, dual-material handles for excellent grip, and chamfered edges for smooth bit insertion.
    • The Gearwrench 33pc set allows for bits to be placed in either the long or short end of the handle, providing flexibility for different applications.

    Generate an image of the Gearwrench 33pc Ratcheting T-Handle Hex Key Set in use, highlighting its ratcheting mechanism and ergonomic handle.

    Buy Now

    Top Screwdriver Brands in the UK Market

    The best screwdriver brands in the UK market are known for their exceptional quality, catering to both professionals and DIY enthusiasts. These brands have established a reputation for producing high-quality screwdrivers that meet the diverse needs of their customers.

    German Engineering: Wera and Wiha

    German engineering is renowned for its precision and durability, and screwdriver brands like Wera and Wiha are no exception. Wera, in particular, is known for its innovative designs and high-quality materials, making its screwdrivers a favourite among professionals. Wiha also offers a range of screwdrivers that are praised for their ergonomic design and precision tips.

    • Wera’s Kraftform screwdrivers are designed for comfort and efficiency.
    • Wiha’s precision screwdrivers are ideal for delicate work.

    American Reliability: Klein Tools and Craftsman

    American brands like Klein Tools and Craftsman have built a reputation for reliability and quality. Klein Tools is particularly known for its insulated screwdrivers, which are a must-have for electricians. Craftsman, on the other hand, offers a wide range of screwdrivers that are appreciated for their durability and affordability.

    A brightly lit display of top screwdriver brands prominently featured in the UK market. In the foreground, a diverse array of screwdrivers from leading manufacturers like Stanley, Makita, Bosch, and DeWalt, each showcasing their distinct design and functionality. The middle ground highlights the ergonomic handles, precision tips, and durable construction of these tools. In the background, a clean, minimalist setting with a crisp white backdrop, allowing the screwdrivers to take center stage. The overall composition conveys a sense of quality, professionalism, and the wide range of options available to discerning UK consumers.

    Japanese Precision: Vessel and ANEX

    Japanese brands Vessel and ANEX are celebrated for their precision and attention to detail. Vessel screwdrivers are known for their unique handle designs that optimise grip and torque transfer. ANEX specialises in precision-engineered screwdrivers that are popular among electronics technicians and watchmakers.

    • Vessel’s “Impacta” series offers impact-resistant tips.
    • ANEX screwdrivers are designed for exact fit and finish.

    These top screwdriver brands in the UK market offer a range of quality tools that cater to different needs and preferences, ensuring that customers can find the best screwdriver for their specific tasks.

    Budget-Friendly Screwdriver Sets That Don’t Compromise Quality

    You don’t have to break the bank to get a quality screwdriver set. Many affordable options are available that offer excellent performance without the hefty price tag. When looking for budget-friendly screwdriver sets, it’s essential to consider the quality of the tools, the variety included in the set, and the overall value for money.

    Amartisan 10-Piece Magnetic Screwdrivers Set

    The Amartisan 10-Piece Magnetic Screwdrivers Set is a great option for those looking for a reliable and affordable screwdriver set. This set includes a variety of magnetic screwdrivers that are perfect for most household tasks. The magnetic tips help prevent screws from falling, making it easier to work on projects.

    Generate an image of the Amartisan 10-Piece Magnetic Screwdrivers Set on a wooden workbench.

    Buy Now

    WORKPRO 10-Piece Precision Screwdriver Set

    The WORKPRO 10-Piece Precision Screwdriver Set offers exceptional value at around £12, providing UK homeowners with a comprehensive selection of precision tools. This set includes various Phillips, slotted, and Torx sizes, making it suitable for electronics repair, eyeglasses, and other small mechanisms. Each screwdriver features a rotating cap for one-handed operation and precise control.

    Generate an image of the WORKPRO 10-Piece Precision Screwdriver Set next to a smartphone.

    Buy Now

    Both of these sets demonstrate that you can achieve high-quality results without overspending. When shopping for a screwdriver set, consider the types of projects you’ll be working on and choose a set that meets your needs. Whether you’re a DIY enthusiast or a professional, having the right tools can make all the difference in the quality of your work.

    Screwdriver Storage and Organisation Solutions

    Effective screwdriver storage is crucial for maintaining a clutter-free workspace. You need a system that keeps your tools organised and within easy reach.

    Wall-Mounted Options for Workshop Organisation

    Wall-mounted storage solutions are ideal for workshop organisation. They help maximise space and keep frequently used screwdrivers accessible. Consider installing a pegboard or a slatwall with hooks and bins to store your screwdrivers. This will help keep your workbench clear and make it easier to find the tool you need.

    • Use hooks to hang screwdrivers, keeping them visible and easily accessible.
    • Install bins or baskets to store small parts and accessories.

    Portable Storage for On-the-Go Repairs

    For on-the-go repairs, portable storage solutions are essential. You need a compact and organised way to carry your screwdrivers. Consider using a roll-up pouch or a hard-shell case to store your screwdrivers. These options provide excellent protection and keep your tools organised.

    • Roll-up pouches offer space efficiency and protection, with individual pockets to keep screwdrivers separated.
    • Hard-shell cases provide superior protection for precision screwdrivers and delicate bits.

    By implementing these storage and organisation solutions, you can ensure that your screwdrivers are always within easy reach, saving you time and enhancing your productivity.

    Conclusion: Choosing the Right Screwdrivers for Your UK Home

    Finding the ideal screwdriver for your UK home requires balancing your needs, usage, and budget constraints. For occasional DIY enthusiasts, a quality mid-range set like the Craftsman 12-piece offers excellent value while providing sufficient durability for most household tasks.

    Professional tradespeople or serious hobbyists should consider investing in premium brands like Wera or Wiha, where the superior performance and longevity justify the higher initial cost. If storage space is limited, consider starting with a versatile multi-bit screwdriver like the Wiha 26-in-1 Ultra Driver, then gradually adding specialised tools as specific needs arise.

    Remember that even the best screwdriver is only effective when properly maintained. Keep tips clean, handles free of grease, and store tools appropriately to ensure they remain ready for use whenever needed. By choosing the right screwdriver for your home and maintaining it well, you’ll be well-equipped to tackle various DIY tasks with confidence.

    FAQ

    What type of screwdriver is best suited for general home use?

    For general home use, a versatile screwdriver set that includes a variety of bits such as slotted, Phillips, and Torx is ideal. Brands like Wurth and Craftsman offer comprehensive sets that cater to different needs.

    What are the benefits of using insulated screwdrivers for electrical work?

    Insulated screwdrivers provide protection against electrical shock, making them essential for electrical work. Look for screwdrivers with 1000V insulation, such as those offered by Klein Tools, to ensure safety while working with electrical systems.

    How do I choose the right precision screwdriver for electronics and small repairs?

    For electronics and small repairs, precision screwdrivers with fine tips and a range of bits are necessary. Consider sets from brands like Wiha and Klein Tools, which offer high-quality precision screwdrivers designed for delicate work.

    What features should I look for in a multi-bit screwdriver?

    When selecting a multi-bit screwdriver, consider the variety of bits included, the quality of the handle, and the ratcheting mechanism. Wiha’s 26-in-1 Ultra Driver is a great example of a versatile multi-bit screwdriver.

    How can I store my screwdrivers effectively?

    Effective storage solutions include wall-mounted options for workshop organisation and portable storage cases for on-the-go repairs. Consider investing in a storage system that keeps your screwdrivers organised and within easy reach.

    Are budget-friendly screwdriver sets a good value?

    Yes, budget-friendly screwdriver sets from brands like Amartisan and WORKPRO can offer good quality at an affordable price. However, be sure to check the materials and construction to ensure they meet your needs.

    What are the advantages of ratcheting screwdrivers?

    Ratcheting screwdrivers provide increased versatility and ease of use, allowing for efficient driving of screws in tight spaces. Gearwrench’s ratcheting T-handle hex key set is a great example of a high-quality ratcheting screwdriver.