Author: admin

  • How to Safely Upgrade Old Electrical Outlets in Your UK Home

    How to Safely Upgrade Old Electrical Outlets in Your UK Home

    Are outdated electrical outlets putting your family’s safety at risk?

    If your UK home is older, it’s likely that your power outlets are outdated and may not meet current safety standards. Relying on adapters and power strips to use modern devices can be hazardous. Upgrading your home’s outlets is a manageable DIY project that can significantly improve your home’s electrical safety.

    This comprehensive guide will walk you through the process of safely upgrading your home’s outlets, improving both safety and functionality. By the end of this guide, you’ll understand how electricity flows through your home’s outlets and how modern outlets provide better protection against electrical hazards.

    Key Takeaways

    • Identify which outlets need upgrading to improve safety.
    • Understand the step-by-step installation process for new outlets.
    • Learn how to select the right outlet types for different areas of your living space.
    • Discover how modern outlets provide better protection against electrical hazards.
    • Gain confidence in tackling this important aspect of home maintenance.

    Understanding Why You Should Upgrade Your Electrical Outlets

    Upgrading your electrical outlets is a crucial step in maintaining a safe and efficient electrical system in your UK home. Outdated outlets can pose significant safety risks, including electrical shocks and fires.

    Signs Your Outlets Need Upgrading

    If you notice any of the following signs, it may be time to upgrade your electrical outlets: two-prong outlets instead of three-prong, insufficient power outlets around the house, plugs falling out frequently, or having mobile babies or toddlers in the house. Two-slot power outlets used to be standard but aren’t grounded, missing the third wire that protects from electric shock.

    A well-lit, high-quality photograph of several electrical outlets in a modern UK home interior. The outlets are mounted flush against a clean, white wall. The foreground features a close-up view of the outlets, showcasing their design and safety features. The middle ground depicts the surrounding wall with a natural, soft lighting that illuminates the outlets' details. The background provides a subtle, uncluttered context, allowing the outlets to be the focal point. The overall atmosphere conveys a sense of order, safety, and functionality, suitable for illustrating the importance of upgrading old electrical outlets in a home.

    Safety Benefits of Modern Outlets

    Modern outlets offer substantial safety benefits, including proper grounding, protection against electrical surges, and special features designed to prevent electrical fires and shocks. Grounded outlets are much safer than ungrounded, protecting from shock and lowering the likelihood of short circuits. GFCI outlets are essential safety devices that monitor the flow of electricity and automatically cut power when they detect an imbalance.

    Types of Modern Outlets Available in the UK

    The UK market offers various specialised outlets, including USB-integrated outlets, weather-resistant outlets for outdoor use, and smart outlets that can be controlled remotely as part of a comprehensive smart home system. Other types include AFCI receptacles, tamper-resistant receptacles, LED nightlight outlets, recessed outlets, and pop-up outlets. Understanding the electrical panel that supports your home’s outlets is essential when planning upgrades.

    Essential Tools and Materials for Upgrading Electrical Outlets

    To safely upgrade your electrical outlets, you’ll need a specific set of tools and materials. Upgrading electrical outlets is a task that requires attention to detail and the right equipment to ensure safety and efficiency.

    Required Tools for the Job

    Having the right tools is crucial for the safe and efficient upgrade of electrical outlets. You’ll need a flathead screwdriver and a Phillips screwdriver for removing the old outlet and installing the new one. A voltage tester is essential for verifying that there’s no power supply to the outlet you’re working on. Additionally, needle-nose pliers are useful for handling wires, and electrical tape can be used for additional insulation.

    Image of a voltage tester

    Learn More

    Outlet Types and Materials

    When selecting new outlets, consider the specific needs of each location in your home. For areas near water, such as kitchens and bathrooms, GFCI outlets are recommended due to their ground fault protection. The quality of materials also plays a significant role in safety and longevity. Choose outlets and faceplates from reputable manufacturers that meet British electrical standards.

    Image of GFCI outlets

    Learn More

    Step-by-Step Guide to Upgrading Old Electrical Outlets

    The process of upgrading old electrical outlets involves several key steps that, when followed correctly, can help you achieve a safer and more efficient electrical system in your home. Before you begin, it’s essential to understand the importance of safety and the correct procedures to follow.

    Safety Preparations Before Starting

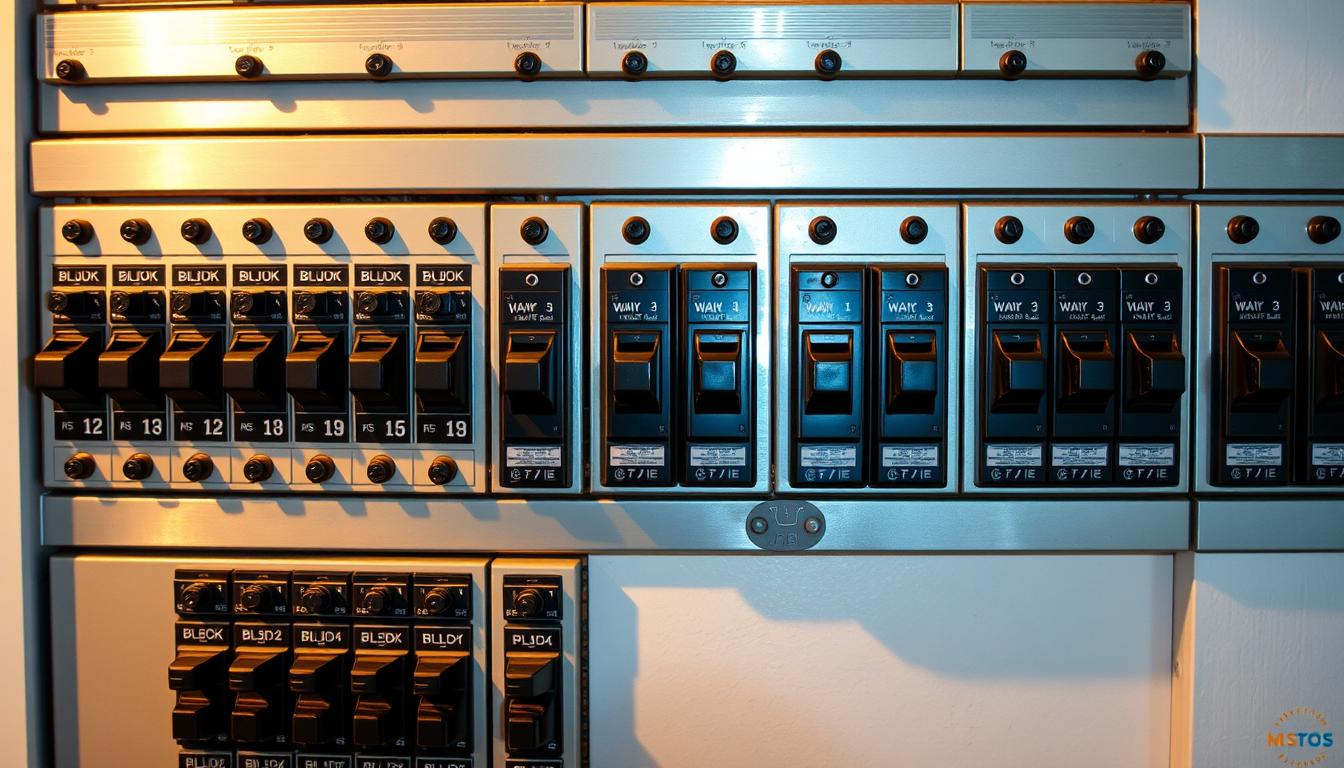
    Before commencing any electrical work, ensure your safety by turning off the appropriate circuit breaker and verifying that the power is off using a voltage tester. This critical first step prevents electrical shock and is non-negotiable when working with wires in your home.

    • Identify the correct circuit breaker controlling the outlet you wish to upgrade.
    • Switch off the breaker and test the outlet to ensure it’s dead.

    Removing the Old Outlet

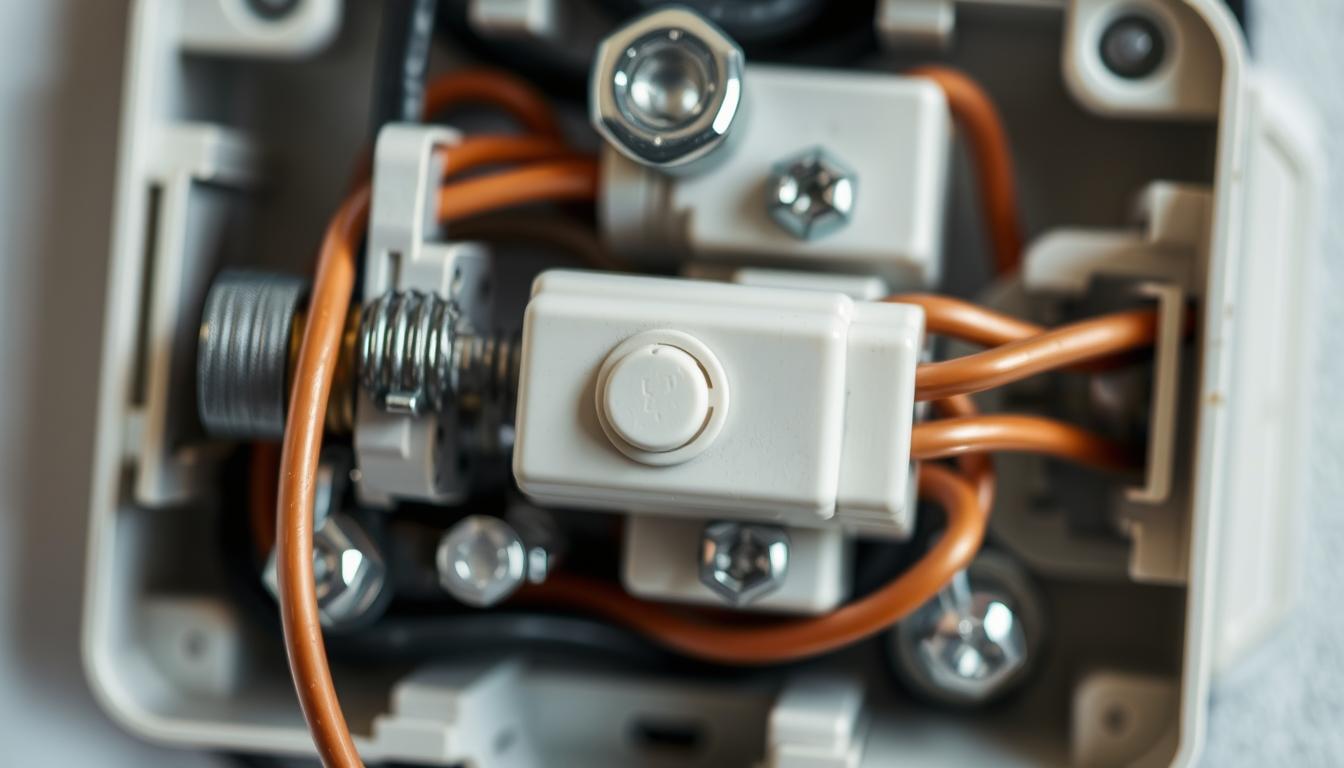
    To remove the old outlet, start by unscrewing the faceplate. Once removed, you’ll see the mounting screws that attach the outlet to the junction box. Carefully unscrew these, and gently pull the outlet forward to expose the wires connected to its terminals.

    A well-lit, close-up view of an electrical outlet being upgraded. The old outlet is partially disassembled, revealing the internal wiring and components. In the foreground, a skilled hand is carefully connecting new, modern wiring to the updated outlet. The background showcases the surrounding wall, painted in a neutral, muted tone that complements the technical nature of the scene. The lighting is bright and clear, casting subtle shadows that highlight the intricate details of the upgrade process. The overall mood is one of precision, focus, and a sense of safety and care in maintaining a crucial household feature.

    Understanding the Wiring

    In UK homes, you’ll typically find three wires: the live wire (usually brown), the neutral wire (usually blue), and the earth/ground wire (green and yellow striped or bare copper). Each serves a specific purpose in the circuit. Understanding the role of each wire is crucial for a safe and correct installation.

    • Live wire: Brown
    • Neutral wire: Blue
    • Earth/Ground wire: Green and yellow striped or bare copper

    Installing the New Outlet

    Connecting the Wires Correctly

    To attach the new outlet correctly, connect the live wire to the brass-coloured terminal, the neutral wire to the silver-coloured terminal, and the ground wire to the green terminal. Ensure each wire is securely fastened with no loose copper strands.

    • Form a clockwise hook in the wire using needle-nose pliers.
    • Tighten the screw to secure the wire.

    Securing the Outlet in Place

    After wiring is complete, carefully fold the wires back into the junction box, taking care not to place excessive strain on any connections. Position the new outlet and secure it to the box with the mounting screws. Ensure it’s straight and flush before tightening.

    Testing Your New Outlet

    Once the new outlet is installed, restore power by switching the breaker back on. Test the outlet with a voltage tester or by plugging in a simple device like a lamp to confirm proper function and complete the installation process.

    Conclusion: Ensuring Safety and Compliance

    Upgrading your home’s electrical outlets is a vital step towards ensuring your family’s safety and bringing your property up to date with current UK electrical standards. This process is not just about modernization; it’s a crucial safety improvement that protects against electrical shocks and fires. Modern outlets, especially those with GFCI and AFCI protection, significantly reduce these risks. For complex electrical projects or whole-house rewiring, it’s advisable to consult certified electricians who understand UK electrical compliance nuances. Regular inspection of your outlets, ideally during summer, can help identify signs of wear or damage. Consider a comprehensive electrical panel assessment alongside outlet upgrades, particularly for older properties. For more information on dealing with old wiring, visit Wave Electrical Solutions. Proper documentation of your electrical work is also important for future reference or when selling your home.

    FAQ

    What are the signs that indicate my home’s outlets need to be replaced?

    If you notice sparks, burning smells, or if your outlets feel warm to the touch, it’s likely time to replace them. Additionally, if your outlets are loose or have broken sockets, consider replacing them to ensure your home’s safety.

    Can I replace my outlets myself, or do I need to hire a professional?

    While it’s possible to replace outlets yourself, it’s recommended that you hire a certified electrician if you’re unsure about any aspect of the process. They can ensure the job is done safely and to the required standards.

    What type of outlet should I install in my kitchen?

    Kitchens require special consideration due to the presence of water and high-power appliances. Consider installing RCD-protected outlets or using a Residual Current Device (RCD) to enhance safety.

    How do I know if my new outlet is installed correctly?

    After installation, test your new outlet using a voltage tester to ensure it’s working correctly. You should also check that the faceplate is securely attached and that there are no signs of damage or wear.

    What is the purpose of the ground wire in my outlet?

    The ground wire provides a safe path for electricity to flow to the ground if there’s a fault, protecting you from electric shock. Ensure it’s properly connected when installing a new outlet.

    Can I use electrical tape to secure wires?

    While electrical tape can be used to insulate wires, it’s not a substitute for proper wiring practices. Use it sparingly and ensure that your wiring is secure and meets the required standards.

  • Fixing a flickering light fixture: A Step-by-Step Guide

    Fixing a flickering light fixture: A Step-by-Step Guide

    Are flickering lights driving you mad? You’re not alone. Many homeowners find themselves puzzled and concerned by this common issue.

    Flickering lights are not just annoying; they can also be a sign of an underlying problem that needs attention. According to certified master electrician Kyle Krueger, there could be various reasons behind this issue, ranging from minor to major electrical issues.

    This comprehensive guide will walk you through identifying the cause of the flickering and provide step-by-step solutions. Whether it’s a simple light fixture issue or a more serious wiring problem, we’ll help you determine the best course of action.

    Key Takeaways

    • Understand the common causes of flickering lights
    • Learn how to identify the source of the problem
    • Discover step-by-step solutions to fix the issue
    • Know when to call a professional electrician
    • Ensure your lighting is safe and functional

    Understanding Why Light Fixtures Flicker

    The annoying flicker of your light fixtures can be more than just a minor irritation; it often signals an underlying issue. Flickering lights can be caused by various factors, ranging from simple problems like loose bulbs to more complex electrical issues.

    Common Causes of Flickering Lights

    Flickering lights are often the result of loose or poor electrical connections, or faulty wiring. According to Krueger, “loose electrical connections, poor connections, or faulty wiring” are the most dangerous situations that could cause lights to flicker. This problem is more common in older homes, where the electrical system may be outdated.

    Some common warning signs that indicate flickering lights are symptoms of serious electrical problems include:

    • Loose connections causing arcing—a type of electrical discharge—in the junction box, which can lead to electrical fires.
    • Continual arcing creating high temperatures in junction boxes that can ignite surrounding materials.
    • Flickering accompanied by buzzing or popping sounds, which requires immediate professional attention.

    When Flickering Lights Indicate Serious Problems

    Certain patterns of flickering across multiple fixtures may indicate problems with the main electrical supply. For instance, if you notice that multiple lights are flickering in sync, it could be a sign of a more significant issue with your electrical system. Statistics show that electrical distribution or lighting equipment is a common cause of home fires, emphasizing the need to address flickering lights promptly.

    Causes of Flickering Lights Potential Risks
    Loose or Poor Electrical Connections Arcing, Electrical Fires
    Faulty Wiring Electrical Discharge, Fire Hazards
    Outdated Electrical Systems Increased Risk of Electrical Issues

    It’s crucial to identify the cause of flickering lights to prevent potential electrical hazards. If you’re unsure about the cause or if the issue persists after checking the obvious causes, it’s recommended to consult a professional electrician.

    Safety First: Before You Begin

    Ensuring your safety is paramount when dealing with electrical issues like flickering lights. Electrical work can be hazardous if not done properly.

    Essential Safety Precautions

    Before starting, turn off the power to the light fixture at your circuit breaker or fuse box. Verify that the fixture is completely dark before beginning work. Use a non-contact voltage tester to ensure there is no electricity flowing to the fixture.

    Tools You’ll Need

    To diagnose and fix flickering light fixtures, you’ll need a variety of tools. These include:

    • Screwdrivers (flathead and Phillips)
    • Voltage tester
    • Wire strippers
    • Pliers (needle-nose and slip-joint)
    • Replacement parts (wire nuts, electrical tape, spare bulbs)
    Tool Purpose
    Screwdrivers Removing fixture covers and switch plates
    Voltage Tester Checking for live wires
    Wire Strippers Stripping insulation from wires

    A well-organized set of light fixture repair tools displayed on a clean, neutral-colored surface. In the foreground, a pair of pliers, a screwdriver, and a utility knife stand out against the background. In the middle ground, a voltage tester and a wire stripper are positioned, showcasing the essential tools for safely diagnosing and repairing electrical issues. The lighting is soft and evenly distributed, creating a calm, professional atmosphere suitable for a safety-focused section of a home repair guide.

    Diagnosing the Source of Flickering

    Diagnosing the source of flickering lights is crucial to applying the correct fix. To start, you need to observe the flickering pattern and identify any accompanying symptoms that could indicate the underlying cause.

    Is It One Light or Multiple Lights?

    First, determine if the flickering is isolated to one light or if it’s affecting multiple lights. If it’s just one light, the issue might be with the bulb or the fixture itself. However, if multiple lights are flickering, it could indicate a more widespread problem with your electrical system, such as a wiring issue or an overloaded circuit.

    Timing Patterns of Flickering

    Next, observe the timing pattern of the flickering. Is it constant or intermittent? Does it flicker at specific times of the day? Flickering that occurs at the same time every day might be related to the usage patterns of other electrical appliances in your home. For instance, if your lights flicker every time you turn on your air conditioner, it could indicate that your electrical circuit is overloaded.

    Accompanying Symptoms

    Pay attention to any accompanying symptoms such as buzzing, popping, or humming sounds. These sounds can be indicative of specific issues. For example, buzzing sounds might suggest a problem with dimmer switches or incompatible bulbs. “It monitors the various circuit wiring for arcing,” says Krueger, highlighting the importance of identifying such symptoms. Popping or crackling sounds, on the other hand, can signal dangerous arcing that requires immediate attention from an electrician.

    Furthermore, certain smells like burning or ozone accompanying flickering lights can indicate serious electrical problems. Similarly, if you notice vibrations or physical movement of fixtures during flickering, it could point to loose connections or other specific issues that need to be addressed.

    If the random flickering continues for no other known cause, and especially if you hear popping sounds, it’s advisable to contact an electrician right away. Meanwhile, you can cut off power to the potentially damaged wire by shutting off the corresponding circuit breaker in your breaker box.

    Quick Fixes for Flickering Light Fixtures

    Before seeking professional help for flickering lights, consider these simple and effective solutions. Flickering light fixtures can be a nuisance, but often, the issue can be resolved with some basic troubleshooting.

    Tightening Loose Bulbs

    One of the simplest fixes is to ensure that the bulb is screwed in tightly. A loose bulb can cause flickering, so checking and tightening it can often resolve the issue. Make sure to turn off the power to the fixture before attempting to tighten the bulb.

    Checking Fixture Connections

    If tightening the bulb doesn’t work, the next step is to check the connections within the fixture. Loose or corroded connections can cause flickering. Turn off the power from the circuit breaker and inspect the wiring and connections. If you’re not comfortable with this, it may be best to consult a professional.

    Replacing Faulty Light Switches

    If the issue isn’t with the bulb or fixture, the problem might lie with the light switch. An old dimmer switch, especially one designed for incandescent bulbs, may not work well with LEDs, leading to flickering. Check if your dimmer switch is compatible with your bulbs. If not, consider replacing it with a compatible dimmer, such as the Lutron Caseta. Before starting, ensure the power is turned off from the circuit breaker.

    To replace a faulty light switch, follow these steps:

    • Turn off the power to the switch from the circuit breaker.
    • Remove the faceplate and switch.
    • Check the wiring connections and take note of how they are connected.
    • Install the new switch, ensuring the wiring connections are secure and correct.
    • Replace the faceplate and turn the power back on.

    It’s crucial to select the right replacement switch for your fixture type. For standard switches, the wiring is typically straightforward. However, dimmer switches may require more attention to ensure compatibility with your lighting setup.

    Switch Type Wiring Requirements Compatibility Considerations
    Standard Switch Simple wiring, typically just live and neutral connections. Generally compatible with most light fixtures.
    Dimmer Switch More complex wiring, may require additional connections for dimming functionality. Must be compatible with the type of bulbs used (e.g., LED, incandescent).

    A well-lit workshop interior with a closeup view of a person's hands replacing a light switch on the wall. The switch is mounted in a recessed electrical box, with exposed wiring visible. The person is wearing work gloves and is concentrating intently on the task. The lighting is bright and even, illuminating the details of the switch and the person's hands. The background is clean and uncluttered, allowing the focus to remain on the core action. The overall mood is one of practical, step-by-step problem-solving.

    After replacing the switch, test it to ensure the flickering issue is resolved. If the problem persists, it may be necessary to investigate further or consult a professional electrician.

    Solving Bulb and Fixture Compatibility Issues

    One common cause of flickering lights is the incompatibility between bulbs and lighting fixtures in your home. Ensuring that your bulbs and fixtures are compatible is crucial for maintaining a stable and flicker-free lighting system.

    LED Bulbs and Dimmer Switch Problems

    LED bulbs can sometimes be incompatible with dimmer switches, leading to flickering. This is because LED bulbs require specific dimming technology to function correctly with dimmer switches. If you’re experiencing flickering with LED bulbs on a dimmer switch, try replacing the bulbs with ones that are specifically designed to be dimmable and compatible with your dimmer switch.

    Choosing the Right Bulb for Your Fixture

    Selecting the right bulb for your fixture is essential. Check the fixture’s specifications to ensure the bulb you choose matches its requirements. For instance, if your fixture is rated for a certain wattage, using a bulb with a higher wattage can cause flickering or other issues.

    Smart Light Troubleshooting

    Smart lights can flicker due to Wi-Fi connectivity issues or software problems. To troubleshoot, first ensure your smart lights are within a strong Wi-Fi signal range. You can also try restarting your router or updating the firmware of your smart lights and their controlling app. If issues persist, resetting your smart bulbs and reconfiguring them may resolve the problem.

    To summarise, some key steps to resolve flickering issues include:

    • Checking the compatibility between bulbs and fixtures
    • Ensuring dimmer switches are compatible with LED bulbs
    • Troubleshooting Wi-Fi connectivity for smart lights
    • Updating firmware and software for smart lighting systems

    Fixing a Flickering Light Fixture: Advanced Solutions

    When basic fixes don’t resolve the flickering issue, it’s time to explore advanced solutions. Flickering lights can be a symptom of more complex electrical problems, requiring a deeper investigation.

    Addressing Circuit Overload Issues

    Circuit overload occurs when too many devices are connected to a single circuit, causing the lights to flicker. To address this, you should identify the overloaded circuit and redistribute some of the devices to other circuits. You can also consider upgrading your electrical panel to increase the overall capacity.

    Dealing with Voltage Fluctuations

    Voltage fluctuations can cause lights to flicker. This issue often requires professional diagnosis. An electrician can assess your home’s wiring and electrical system to determine the cause of the voltage fluctuations and recommend the necessary repairs or upgrades.

    Upgrading Outdated Wiring and Fixtures

    Outdated wiring, such as knob and tube or aluminium wiring, can lead to flickering lights and safety hazards. Upgrading to modern wiring and fixtures can resolve these issues. Consider hiring a professional to assess and upgrade your home’s electrical system.

    Type of Wiring Risks Upgrade Solution
    Knob and Tube Wiring Fire hazard, outdated Replace with modern copper wiring
    Aluminium Wiring Oxidation risk, fire hazard Replace with copper wiring or use COPALUM connectors

    Upgrading your electrical system not only fixes flickering lights but also enhances your home’s safety and efficiency. Consider consulting an electrician to plan and execute the upgrades.

    When to Call a Professional Electrician

    Knowing when to call an electrician can save you from potential electrical hazards. If you notice repeated tripping of arc fault circuit interrupters or flickering lights with no known cause, it’s time to seek help. Flickering accompanied by popping or crackling sounds is another serious indicator. In older homes, unresolved light flickering can signal outdated wiring. Consult a licensed electrician to address these issues. They can diagnose the problem in your home or room and provide a solution, ensuring your safety and compliance with local regulations regarding electrical repairs.

    FAQ

    Why are my LED bulbs flickering on a dimmer switch?

    LED bulbs can flicker on dimmer switches if they’re not compatible. Try replacing the bulb with a dimmable LED or adjusting the dimmer switch settings.

    Can a loose connection cause flickering lights?

    Yes, a loose connection can cause flickering lights. Check your socket and wiring connections to ensure they’re secure.

    How do I diagnose the source of flickering lights in my home?

    To diagnose the issue, check if the problem is isolated to one lighting circuit or multiple circuits. Also, observe the timing patterns of the flickering and look for accompanying symptoms like buzzing or popping sounds.

    What are the safety precautions I should take when dealing with electrical issues?

    Always switch off the power to the circuit at the consumer unit or circuit breaker before starting work. Use insulated tools and avoid working near live electrical components.

    Can I replace a faulty light switch myself?

    Yes, you can replace a faulty light switch yourself if you’re comfortable with DIY electrical work. Ensure you follow proper safety precautions and consult a professional if you’re unsure.

    How do I know if my wiring is outdated or faulty?

    Signs of outdated or faulty wiring include flickering lights, warm or sparking outlets, and frequent circuit breaker tripping. Consider consulting a professional electrician to assess your home’s electrical system.

    What are the risks of ignoring flickering lights?

    Ignoring flickering lights can lead to more serious electrical issues, including fires. It’s essential to investigate and address the cause of flickering lights to ensure your home’s safety.

    Can I use any LED bulb in my fixture?

    No, not all LED bulbs are compatible with every fixture. Check the fixture’s specifications and the bulb’s packaging to ensure compatibility, especially if you’re using a dimmer switch.

  • Installing a new ceiling fan: A Step-by-Step Guide for You

    Installing a new ceiling fan: A Step-by-Step Guide for You

    Are you looking to enhance the aesthetics and functionality of your living space? A ceiling fan can be a great addition to your home, providing better air circulation and potential energy savings.

    With the right tools and careful attention to safety, most homeowners can successfully complete the installation in just a few hours. This comprehensive guide will walk you through each step of the process, whether you’re replacing an existing light fixture or installing a brand-new fan.

    Key Takeaways

    • Enhance your home’s aesthetics and functionality with a ceiling fan.
    • Improve air circulation and potentially save energy.
    • Follow our step-by-step guide for a successful installation.
    • Ensure safety precautions are taken during the installation process.
    • Choose the right ceiling fan for your living space.

    What You Need to Know Before Starting

    To ensure a smooth installation process, you need to be aware of a few key factors. Installing a ceiling fan is not just about replacing an old fan or installing a new one; it’s about understanding the benefits, types, and potential complexities involved.

    Benefits of Installing a Ceiling Fan

    Ceiling fans offer several benefits for your home, including improved air circulation and reduced energy costs. By circulating air, ceiling fans can make your home feel cooler in the summer and warmer in the winter, potentially reducing your reliance on heating and cooling systems. Additionally, ceiling fans can enhance the aesthetics of a room, providing a stylish and functional lighting solution.

    Types of Ceiling Fans Available

    Ceiling fans come in various styles, sizes, and configurations to suit different rooms and preferences. Some common types include standard fans, which typically have blades spanning 29-56 inches, low-profile or “hugger” fans ideal for rooms with low ceilings, outdoor fans designed to withstand moisture and weather conditions, and Energy Star-certified fans that are more energy-efficient. Choosing the right type of ceiling fan depends on your specific needs and the characteristics of the room where it will be installed.

    When to Call a Professional

    While many ceiling fan installations can be DIY projects, there are situations where it’s advisable to call a professional. If you’re dealing with complex electrical systems, very high ceilings, or need to make structural modifications, it’s best to seek the help of a qualified electrician. They can ensure the job is done safely and correctly, avoiding potential risks or hazards.

    Essential Tools and Materials for Installing a New Ceiling Fan

    Image of a person installing a ceiling fan with necessary tools

    Learn More

    Gathering the essential tools and materials is a vital step before you begin installing your new ceiling fan. Having everything you need on hand will make the installation process smoother and more efficient.

    Required Tools Checklist

    To install your ceiling fan successfully, you’ll need a range of tools. These include a sturdy ladder or step stool, wire cutters/strippers, a circuit tester or voltage detector, an adjustable wrench, pliers, and both flathead and Phillips screwdrivers. Ensuring you have these tools readily available will help prevent delays during the installation.

    Materials You’ll Need

    The materials required for installing a ceiling fan include the ceiling fan kit itself (comprising the fan, blades, mounting bracket, and hardware), a fan-rated electrical box (if you’re replacing an existing box), a ceiling medallion (optional for decorative purposes), and electrical tape. If your installation includes a light kit, you’ll also need to have the appropriate light bulbs as specified by the manufacturer.

    By assembling all the necessary tools and materials before starting, you’ll be well-prepared for a successful ceiling fan installation.

    Safety Precautions Before Installation

    To ensure a safe installation process, follow these critical safety guidelines. Installing a ceiling fan involves working with electrical components and at heights, making safety your top priority.

    Turning Off the Power Safely

    Before beginning any work, always turn off the power to the circuit at the main fuse or circuit breaker box, not just at the wall switch. Find the fuse or circuit breaker for the room’s power and switch it off at the breaker box. Use a voltage tester on the wires to confirm that the power is off. If you’re unsure about any aspect of the electrical work, consult a licensed electrician.

    Safety Steps Description
    Turn off Power Switch off the power at the breaker box
    Verify Power Off Use a voltage tester to confirm the power is off
    Consult a Professional If unsure, consult a licensed electrician

    Ladder Safety Tips

    When using a ladder, ensure it’s placed on a stable, level surface. Follow the “three-point contact” rule, maintaining two feet and one hand or two hands and one foot on the ladder at all times. Never stand on the top two steps of a stepladder, and position the ladder so you don’t have to lean or reach too far to access your work area.

    Choosing the Right Location for Your Ceiling Fan

    Selecting the optimal location for your ceiling fan is vital for both safety and efficiency. The placement of your ceiling fan can significantly impact its performance and the overall comfort it provides.

    Optimal Ceiling Height and Clearance

    For optimal performance, it’s crucial to hang the fan at the right height. Ideally, the fan should be at least 7-10 feet from the floor and at least 8 inches from the ceiling. This clearance ensures that the fan operates efficiently and safely.

    Positioning for Maximum Airflow

    To maximize airflow, center the fan in the room. Ensure there are at least 18 inches between the blades and any walls or tall furniture. For rooms with sloped ceilings, consider using a special mounting kit designed for angled installations.

    Installation Consideration Recommended Measurement
    Distance from Wall At least 1 1/2 feet
    Height from Floor 7-10 feet
    Clearance from Ceiling At least 8 inches
    Clearance from Walls/Furniture At least 18 inches

    A bright, well-lit interior space with a high ceiling. In the center, a modern, brushed nickel ceiling fan with five blades is installed, its graceful silhouette commanding attention. The fan is surrounded by a recessed lighting fixture, casting a warm, ambient glow throughout the room. The walls are painted a neutral, calming color, complementing the sleek, minimalist design of the fan. The floor is covered in a plush, neutral-toned carpet, adding a touch of coziness. The overall scene conveys a sense of tranquility and sophistication, perfectly suited for the "Choosing the Right Location for Your Ceiling Fan" section of the article.

    By following these guidelines, you can ensure that your ceiling fan is installed in a way that maximizes its performance and safety. Proper placement is key to enjoying the benefits of your ceiling fan, including improved air circulation and reduced energy costs.

    Removing an Existing Light Fixture or Old Fan

    To make way for your new ceiling fan, you’ll first need to take down the existing fixture or old fan. This involves carefully detaching the old light and inspecting the electrical box to ensure it’s suitable for fan installation.

    Disconnecting the Wiring

    Start by ensuring the power is turned off at the circuit breaker. Verify with a voltage tester that no current is flowing to the fixture. When disconnecting the wiring, carefully unscrew the wire nuts and separate the fixture wires from the ceiling wires, noting which wires were connected together.

    Removing the Fixture Safely

    Remove any glass shades or globes from the fixture. Unscrew the retaining nut or screws holding the fixture to the ceiling. Lower and hold the fixture carefully, as it may be heavy. For heavier fixtures or old fans, consider having a helper support the weight while you disconnect the wiring.

    Step Action Precaution
    1 Turn off power at the circuit breaker Verify with a voltage tester
    2 Remove glass shades or globes Handle with care
    3 Unscrew retaining nut or screws Support heavy fixtures

    After removing the fixture, inspect the electrical box in the ceiling to determine if it’s rated for supporting a ceiling fan, which is heavier and creates more vibration than a standard light fixture. If the existing electrical box isn’t fan-rated, you’ll need to install a new one that can safely support the weight and movement of your new fan.

    Installing a New Ceiling Fan: The Mounting Process

    To install a ceiling fan correctly, you need to focus on the mounting process, which involves several key steps. Ensuring your ceiling fan is securely mounted is crucial for both safety and efficiency.

    Checking and Installing the Electrical Box

    The first step in the mounting process is verifying that you have a suitable electrical box. This box must be fan-rated and securely fastened to a ceiling joist or support beam to handle the weight and vibration of the fan. If your existing box isn’t fan-rated, you’ll need to replace it, potentially involving cutting into the ceiling to secure a new box or using a special fan brace.

    Installing the Mounting Bracket

    The next critical step is installing the mounting bracket, also known as a ceiling plate. This bracket attaches to the electrical box and will support the entire weight of your ceiling fan. Ensure it’s securely fastened using the appropriate screws.

    Preparing the Downrod

    For standard installations, you’ll need to prepare the downrod. Carefully feed the fan wires through the downrod and canopy before securing the downrod to the fan motor housing. The downrod needs to be properly secured with locking pins and set screws to prevent loosening due to the fan’s vibration.

    • The mounting bracket must be securely attached to the electrical box.
    • Ensure the downrod is properly secured to prevent loosening.
    • Verify that all components are correctly installed for safety and efficiency.

    Wiring Your Ceiling Fan Correctly

    To ensure your ceiling fan operates safely and efficiently, proper wiring is essential. Different fans come with different wiring configurations, so it’s crucial to check the wiring included with your fan to ensure it matches your planned switch configuration.

    A detailed close-up view of the wiring inside a ceiling fan, showcasing the various electrical components and their interconnections. The image should have a clear, well-lit, and technical appearance, with a neutral color scheme that emphasizes the intricate details of the wiring. The focus should be on the wiring, with the surrounding ceiling and fan structure blurred or minimized in the background. The perspective should be slightly elevated, providing a comprehensive view of the wiring layout. The lighting should be bright and uniform, casting minimal shadows to ensure optimal visibility of the wiring details.

    Understanding the Wiring Colour Codes (UK Standards)

    In the UK, standard wiring colour codes are used to simplify the wiring process. The brown wire is live (previously red), the blue wire is neutral (previously black), and the green/yellow wire is for earth/ground. Understanding these colour codes is vital for connecting your ceiling fan correctly.

    Connecting the Fan Wires

    Before connecting any wires, ensure the power is off and verified with a voltage tester. When connecting fan wires, you’ll typically need to match the live, neutral, and earth wires from your ceiling to the corresponding wires on your fan using wire connectors. For fans with light kits, there will be additional wiring connections to make, which may include separate live wires for independent control of the fan and light.

    Wiring Options for Light Kits and Controls

    Different wiring configurations are possible depending on your switch setup. You can wire your ceiling fan and light using separate switches, allowing you to control the fan and light independently. Alternatively, you can use a single switch for both the fan and light, or wire the fan to operate using a pull chain while the light is controlled by a wall switch. If you’re unsure about any connections, it’s recommended to consult a licensed electrician to avoid incorrect installation.

    After connecting the wires with wire connectors, secure them with electrical tape to prevent them from vibrating loose during fan operation. Proper wiring is crucial for the safe and effective operation of your ceiling fan, and following these guidelines will help ensure a successful installation.

    Assembling and Attaching the Fan Components

    As you near the completion of your ceiling fan installation, you’ll need to assemble and attach the remaining parts. This involves securing the motor housing, attaching the fan blades, and installing any light kits or other accessories.

    Securing the Motor Housing

    The motor housing is the central component of your ceiling fan, and it needs to be securely attached to the mounting bracket. Typically, this involves lifting the motor housing into place and securing it with the provided screws or locking mechanism. Ensure that it is firmly attached to prevent any movement or vibration.

    Attaching the Fan Blades Properly

    To attach the fan blades, align each blade with the blade iron (the bracket that holds the blade to the fan). Insert and tighten the screws provided to secure the blade to the iron. Repeat this process for all blades, ensuring they are evenly spaced and securely fastened. Then, fasten the blade irons to the motor using the screws provided. Be careful not to over-tighten, as this could damage the blades.

    Installing the Light Kit

    If your ceiling fan includes a light kit, you’ll need to connect its wires to the corresponding wires from the fan motor. Secure the light kit to the fan’s switch housing using the provided screws. Install any shades or glass covers included with the light kit, and add the appropriate light bulbs as specified by the manufacturer. Ensure all connections are secure and the light kit is firmly attached to the fan body.

    Throughout the assembly process, refer to the manufacturer’s instructions for your specific fan model, as component designs and assembly methods can vary significantly between brands and models.

    Testing and Troubleshooting Your New Ceiling Fan

    The final step in installing a ceiling fan is to test its operation and troubleshoot any issues. This ensures that your new ceiling fan is working correctly and safely. It’s essential to verify that all components are functioning as expected.

    Initial Testing Procedure

    Begin by turning on the power at the circuit breaker, then use the wall switch and/or pull chains to test all speeds of the fan. Check that the light functions, if applicable, are working correctly. Observe the fan’s operation at different speeds to identify any potential issues.

    Balancing the Fan Blades

    A properly balanced fan should run smoothly without visible wobble or excessive noise. If you notice wobbling, turn off the fan and check that all blades are tightly secured. Use a balancing kit to add weights to the fan blades if necessary.

    Common Issues and Solutions

    Some common issues you might encounter include a fan that doesn’t turn on, lights that work but the fan doesn’t, or excessive noise. Check the circuit breaker, wall switch, and wiring connections. For a fan that wobbles, ensure all blades are securely attached. If problems persist, consult the manual or contact a professional electrician.

    Conclusion

    Your new ceiling fan is now installed, and you’re ready to enjoy the comfort and efficiency it provides, making your home a more pleasant space.

    By following this comprehensive guide, you’ve learned all the essential steps for a successful installation. You can now appreciate the improved air circulation and aesthetic appeal it brings to your room.

    To ensure your ceiling fan continues to function effectively, remember to perform regular maintenance, including occasional cleaning and checking for loose screws.

    If you encountered any issues during the installation process, don’t hesitate to consult a professional electrician for assistance.

    FAQ

    What is the recommended ceiling height for installing a ceiling fan?

    The ideal ceiling height for a ceiling fan is at least 2.1 metres to ensure safe and efficient operation. For higher ceilings, consider using a longer downrod to maintain optimal airflow.

    How do I turn off the power to the ceiling circuit?

    Switch off the power to the ceiling circuit at your consumer unit or fuse box. Verify that the power is off using a voltage tester to avoid electrical shock.

    What type of electrical box is required for a ceiling fan?

    A sturdy, fan-rated electrical box is necessary to support the weight and motion of your ceiling fan. Ensure the box is securely attached to a joist or other structural element.

    Can I use a standard light fixture electrical box for my ceiling fan?

    No, a standard light fixture electrical box may not be designed to handle the weight and vibration of a ceiling fan. Use a fan-rated electrical box for safe installation.

    How do I balance the fan blades for smooth operation?

    Use a balancing kit or adjust the blades to ensure even spacing and alignment. Check for any damage or warping that may affect balance.

    What are the wiring colour codes for the UK?

    In the UK, the standard wiring colour codes are: brown for live, blue for neutral, and green/yellow for earth. Ensure you follow these codes when wiring your ceiling fan.

    Can I install a ceiling fan myself, or do I need an electrician?

    If you’re comfortable with DIY electrical work and follow safety guidelines, you can install a ceiling fan yourself. However, if you’re unsure, consider hiring a qualified electrician.

  • Replacing a Faulty Light Switch: DIY Instructions for You

    Replacing a Faulty Light Switch: DIY Instructions for You

    Dealing with a faulty light switch can be frustrating and disrupt your daily routine. Understanding when to replace it is crucial for maintaining your home’s electrical system.

    Replacing a faulty light switch is a relatively straightforward DIY task that can save you money on electrician fees. However, it requires careful attention to safety precautions and proper wiring techniques.

    By following our comprehensive guide, you’ll be able to identify the right type of switch for your needs and install it correctly, ensuring your home’s functionality and safety.

    Key Takeaways

    • Identify when your light switch needs replacing.
    • Understand the essential safety precautions for DIY electrical work.
    • Learn how to choose the correct type of switch for your needs.
    • Follow step-by-step instructions for a successful installation.
    • Ensure proper wiring techniques for safe and efficient operation.

    Understanding Light Switch Problems

    Light switch problems can be tricky to diagnose, but there are clear signs to look out for. Before you start investigating the electrical circuit, it’s essential to rule out simple causes.

    Signs of a Faulty Light Switch

    A faulty light switch can manifest in various ways. For instance, if your light switch doesn’t turn on or off, or if the dimmer switch isn’t functioning correctly, it’s likely that the switch is faulty. Sometimes, the issue might be as simple as a blown light bulb. To confirm, try replacing the light bulb with a known working one.

    Determining If You Need a New Switch

    To determine if you need a new switch, inspect the existing one. Check if the issue persists across multiple bulbs. If so, it may indicate a problem with the switch rather than the bulb. You should also inspect the wires for any damage or disconnections by turning off the power and removing the switch plate. Consider the age of your switch and whether it’s been exposed to moisture or excessive dust.

    Other factors to consider include the switch’s amperage rating and whether it’s suitable for the load it’s controlling. Testing for power at the switch location using a voltage tester can also help confirm if the circuit is functioning properly.

    Safety First: Precautions Before You Begin

    Ensuring your safety is paramount when dealing with electrical components like a faulty light switch. Electrical work can be hazardous if not done correctly, so it’s crucial to follow proper safety protocols to avoid electrical shock or other injuries.

    Proper Circuit Isolation Procedures

    To work safely on your lighting circuit, you first need to isolate it from the power source. This involves locating the correct circuit breaker and switching it off. Verify that you’ve identified the right breaker by checking which lights or appliances are affected when you flip the switch.

    After switching off the breaker, use a reliable voltage tester to confirm that there’s no power flowing to the light switch you’re about to replace. This step is crucial for your safety.

    Testing for Dead Circuits

    Using an approved voltage tester, you can now test your lighting circuit. This will tell you for certain that the circuit you intend to work on is dead and safe to touch. It’s a simple yet effective way to ensure your safety before starting work.

    A well-lit workshop interior, with a sturdy wooden workbench in the foreground. On the bench, an array of electrical tools and safety equipment, including wire strippers, insulated gloves, and a circuit tester. In the middle ground, a detailed diagram of electrical wiring, pinned to the wall, providing clear safety guidelines. The background features various electrical components, such as outlet boxes and junction boxes, neatly organized on shelves. The overall atmosphere is one of careful preparation and attention to detail, reflecting the importance of electrical safety.

    Essential Safety Equipment

    When working with electrical components, having the right safety equipment is vital. Some essential items include:

    • Insulated screwdrivers with rubber handles to protect against accidental contact with live wires.
    • Safety glasses to safeguard your eyes from sparks or debris.
    • A reliable voltage tester to confirm the circuit is dead before you begin.
    • Rubber-soled shoes for additional insulation against electrical current.

    By taking these precautions and using the right safety equipment, you significantly reduce the risk of electrical shock or injury when working with electrical systems, ensuring a safe working environment.

    Tools and Materials You’ll Need

    To successfully replace a light switch, you’ll need to have the right tools and materials at hand. This ensures the job is done efficiently and safely.

    Essential Tools for the Job

    When it comes to replacing a faulty light switch, having the correct tools is crucial. You’ll need a screwdriver, typically a flathead or Phillips head, to remove the screws holding the switch in place. It’s also advisable to have a voltage tester to ensure the circuit is dead before you start working on it. Additionally, you’ll need wire strippers if your new switch requires adjusting the wire ends.

    Choosing the Right Replacement Switch

    Selecting the correct replacement switch is vital for a successful DIY project. First, ensure the new switch matches the functionality of the old one—whether it’s a single-pole, three-way, or dimmer switch. Consider the amperage rating of your circuit; most residential lighting circuits use 15-amp switches. Also, check the type of wire connection the new switch requires and ensure it fits with your existing wiring setup. Don’t forget to check that the new switch comes with the appropriate screws for mounting.

    Here’s a summary of what you need to consider when choosing a new switch:

    Switch Type Amperage Rating Wire Connection Type
    Single-pole, three-way, or dimmer 15-amp for most residential circuits Back-wiring or side terminals
    Decorative switches Check compatibility with existing wiring Some require a neutral wire

    When purchasing a new switch, ensure it fits in the same switch box as the old one. Some modern switches may have different dimensions or require a neutral wire, which older installations might not have. Keeping the original mounting screws is advisable, as newer switches might come with metric screws that don’t fit older boxes.

    Types of Light Switches Explained

    When it comes to lighting control, understanding the different types of light switches is crucial. The right switch can enhance the functionality and efficiency of your lighting system.

    Single-Pole vs Two-Way Switches

    Single-pole switches are the most common type, used to control a light fixture from one location. Two-way switches, on the other hand, allow you to control a light fixture from two different locations, making them ideal for hallways, staircases, or large rooms.

    Dimmer Switches and Their Installation

    Dimmer switches offer more than just on/off functionality; they allow you to adjust the brightness of your lights. For guidance on choosing the correct dimmer switch, consider factors like compatibility with your existing lighting and the type of bulbs you’re using.

    Special Considerations for Bathrooms

    Bathrooms require special consideration due to moisture and safety regulations. Ensure that any light switch installed in a bathroom is suitable for the environment and complies with local electrical standards.

    Motion Sensor Switches

    Motion sensor switches automatically turn on lights when they detect movement, making them perfect for utility areas, garages, or anywhere hands-free lighting control is beneficial. These switches can enhance convenience and energy efficiency.

    Type of Switch Functionality Ideal Use
    Single-Pole Control from one location Most rooms
    Two-Way Control from two locations Hallways, staircases
    Dimmer Adjust brightness Living areas, dining rooms
    Motion Sensor Automatic on/off with motion detection Utility areas, garages

    Step-by-Step Guide to Replacing a Faulty Light Switch

    The process of replacing a faulty light switch involves several key steps, from preparing your work area to testing the new switch. Ensuring that you follow these steps carefully will help you complete the task safely and efficiently.

    Preparing Your Work Area

    Before you begin, make sure your work area is clear and safe. Turn off the power to the circuit at the consumer unit and verify that the light switch is dead using a voltage tester. Clear the area around the switch of any clutter or obstructions.

    Removing the Old Switch

    To remove the old switch, start by taking out the screws that hold the switch plate cover in place. Gently pull the cover away from the wall to access the switch. You will then need to remove the mounting screws that secure the switch to the back box.

    Documenting the Wiring

    Before disconnecting any wires, take a moment to document how they are connected to the old switch. This can be done by taking a photo or making a note of the wire colours and their corresponding terminals. This step is crucial for ensuring that the new switch is wired correctly.

    Disconnecting the Wires

    Carefully disconnect the wires from the old switch, taking note of any earth wires that need to be connected to the new switch. Use a screwdriver to loosen the terminal screws, then gently pull the wires free. If the wires are stuck, do not force them as this could damage the wiring.

    Installing the New Switch

    With the old switch removed and the wiring documented, you can now install the new switch. Ensure that the new switch is compatible with your electrical system and wiring.

    Connecting the Wires Correctly

    Connect the cores to the correct terminals of the new switch, and tighten the screws. Then check they’re clamping the cable cores firmly by giving the wires a slight tug. If there isn’t one already, fit a length of brown PVC sleeving over the blue core (or the black core if your wiring is in the old colours) to show it can be live.

    • Carefully fold wires into the back box, ensuring none are pinched or strained when the switch is pushed back.
    • Align the switch with the mounting holes in the back box and insert the mounting screws.
    • Tighten the mounting screws evenly until the switch is firmly secured against the wall without overtightening.
    • Ensure the switch is level and properly aligned before final tightening of the mounting screws.
    • Return to the consumer unit and restore power to the circuit to test the new installation.
    • Test the switch operation several times to ensure it functions smoothly and consistently.
    • Listen for any unusual sounds like buzzing or clicking that might indicate a problem with the installation.
    • If the switch doesn’t work properly, turn off power again and recheck all connections before troubleshooting further.
    • Once satisfied with the operation, attach the switch plate cover and secure it with its screws.
    • Perform a final test of the switch after the cover is installed to ensure everything works correctly.
    Step Description Notes
    1 Prepare your work area Clear the area and turn off power
    2 Remove the old switch Take out screws and gently pull the cover away
    3 Document the wiring Take a photo or note wire colours and terminals
    4 Install the new switch Ensure compatibility and correct wiring
    5 Test the new switch Restore power and test operation

    Understanding Earthing and Why It Matters

    Proper earthing is a fundamental component of a safe electrical system. Earthing provides a safe path for electrical current to flow to the ground, protecting you and your home from electrical shock.

    The Importance of Proper Earthing

    Proper earthing is crucial for safety. It ensures that if there’s a fault in your electrical system, the current is directed harmlessly into the ground, preventing electrical shock. This is particularly important in homes with metal light switches or other metal components.

    How to Earth a Metal Light Switch

    When installing a metal light switch, it’s essential to earth the switch correctly. For a metal mounting box with a plastic faceplate, connect the earth wire directly to the earthing terminal on the box. If you have a metal faceplate, connect the main earth wire to the faceplate and then run a supplementary earth wire to the mounting box.

    Component Earthing Requirement
    Metal Mounting Box with Plastic Faceplate Connect earth wire to the earthing terminal on the box
    Metal Faceplate Connect main earth wire to faceplate, then run supplementary earth wire to mounting box
    Plastic Mounting Box and Faceplate Use green/yellow sleeving on bare earth cores and clamp with a connector

    A dimly lit workshop interior, with a metal light switch mounted on a textured concrete wall. The switch is partially disassembled, revealing its intricate components. A human hand, wearing protective gloves, is carefully connecting the earth wire to the switch's grounding terminal, ensuring proper electrical safety. The image conveys a sense of focused attention and technical precision, highlighting the importance of earthing in electrical installations.

    Always use green and yellow sleeving on bare earth wires to identify them clearly. Ensure that earth wires are securely connected to the earthing terminals by tightening the terminal screws fully. If your home’s wiring doesn’t include earth wires, consult an electrician before installing metal switches or faceplates.

    Conclusion

    Replacing a light switch is a simple yet effective way to improve your home’s functionality. By following the steps outlined in this guide, you can ensure a successful replacement that meets your needs. Always make sure to isolate the circuit and test for dead circuits before beginning work. Choosing the right new switch is crucial for compatibility and safety. Properly documenting the original wiring configuration and ensuring all connections are secure and earthed will help you achieve a professional result. If you’re unsure, don’t hesitate to consult a qualified electrician.

    With the right approach, replacing a faulty light switch can be a cost-effective and satisfying DIY project, enhancing both the functionality and appearance of your home.

    FAQ

    What safety precautions should I take when replacing a light switch?

    Before starting, ensure the circuit is dead by switching off the power at the circuit breaker or fuse box. Use a voltage tester to verify the circuit is safe to work on. Wear protective gear, such as gloves and safety glasses, to prevent injury.

    How do I determine if my light switch is faulty?

    Signs of a faulty light switch include flickering lights, a switch that feels loose or doesn’t click properly, or a switch that doesn’t turn the lights on or off. If you’re experiencing any of these issues, it’s likely your switch needs replacing.

    Can I replace a standard switch with a dimmer switch?

    Yes, but ensure the dimmer switch is compatible with your lighting system and the type of bulbs you’re using. Some dimmer switches are designed for specific bulb types, such as LED or halogen. Always check the manufacturer’s instructions before installation.

    What type of screwdriver do I need to remove the old switch?

    Typically, a flathead screwdriver is required to remove the faceplate and screws holding the switch in place. Check the type of screws used in your switch to ensure you have the correct screwdriver.

    How do I know if my circuit is dead?

    Use a voltage tester to check for any voltage present at the switch. If the tester indicates no voltage, it’s safe to work on the circuit. If you’re still unsure, consult a licensed electrician for assistance.

    Can I replace a two-way switch with a single-pole switch?

    No, a two-way switch is designed for specific applications, such as controlling a light from multiple locations. Replacing it with a single-pole switch may not provide the desired functionality. Consult a licensed electrician if you’re unsure about the type of switch you need.

    What are the benefits of using a motion sensor switch?

    Motion sensor switches can help reduce energy consumption by automatically turning off lights when not in use. They’re particularly useful in areas like corridors, stairwells, or outdoor spaces.

    How do I ensure proper earthing for my new switch?

    Ensure the earthing wire is securely connected to the earthing terminal on the switch and the earthing system in your home. If you’re unsure about the earthing system, consult a licensed electrician for guidance.

  • Resetting a Tripped Circuit Breaker: A Step-by-Step Guide

    Resetting a Tripped Circuit Breaker: A Step-by-Step Guide

    Have you ever experienced a sudden loss of power in your home, only to discover that a circuit breaker has tripped? It’s a frustrating situation, but understanding how to safely reset it can save you time and money.

    A circuit breaker is an essential safety device that protects your home’s electrical system from damage due to overloads and short circuits. When it trips, it automatically cuts off power to prevent potential hazards like electrical fires or equipment damage.

    In this guide, we’ll walk you through the process of identifying, locating, and resetting a tripped breaker in your home. You’ll learn how to prevent future electrical issues and ensure your safety when handling electrical panels.

    Key Takeaways

    • Understand the role of circuit breakers in protecting your home’s electrical system.
    • Learn how to identify and locate a tripped breaker.
    • Discover the steps to safely reset a circuit breaker.
    • Prevent future electrical issues with our expert tips.
    • Ensure your safety when handling electrical panels.

    Understanding Circuit Breakers and Why They Trip

    The primary role of circuit breakers is to safeguard your electrical system by interrupting the flow of electricity when it becomes hazardous. Circuit breakers are safety devices designed to protect your home’s electrical infrastructure from damage caused by excessive current.

    What Is a Circuit Breaker?

    A circuit breaker is an automatic electrical switch that is designed to protect an electrical circuit from damage caused by an overload or short circuit. Standard circuit breakers in UK homes typically handle between 15-100 amps, depending on their purpose and location within your electrical system.

    Common Causes of Tripped Circuit Breakers

    There are several reasons why a circuit breaker might trip. Understanding these causes is crucial for troubleshooting and preventing future trips.

    Overloaded Circuits

    An overloaded circuit occurs when too many devices are operating on the same circuit, attempting to draw more power than the circuit is designed to handle. High-amp devices like microwaves or dryers can cause a breaker to trip when used for sustained periods.

    Short Circuits

    A short circuit happens when a hot wire comes into contact with a neutral wire, creating a surge of current that the breaker detects and interrupts.

    Ground Faults

    Ground faults are similar to short circuits but involve a hot wire touching a grounded element, such as a metal electrical box or appliance frame.

    Signs of a Tripped Breaker

    Signs that a breaker has tripped include partial power loss in specific areas of your home, a switch that’s visibly in the middle position, or a slight burning smell near your electrical panel.

    Cause Description Common Indicators
    Overloaded Circuits Too many devices on one circuit Frequent tripping, multiple devices affected
    Short Circuits Hot wire touches neutral wire Immediate tripping, sometimes accompanied by a spark
    Ground Faults Hot wire touches grounded element Tripping, potential shock hazard

    Safety Precautions Before Resetting a Tripped Circuit Breaker

    Before you attempt to reset a tripped circuit breaker, it’s crucial to take necessary safety precautions to avoid potential electrical hazards. Working around an electrical service panel or circuit breaker board can be dangerous due to the concentrated electrical load and highly powered lugs.

    Essential Safety Equipment

    To ensure your safety while working with electrical systems, it’s vital to have the right equipment. Essential safety equipment includes a reliable flashlight to illuminate the often poorly lit area around the breaker panel, rubber-soled shoes to prevent electrical shock, and optionally, rubber gloves for additional protection.

    Important Safety Rules to Follow

    When dealing with electrical panels, following safety rules is paramount. Here are some critical guidelines to observe:

    Keeping Hands Dry

    Always ensure your hands are completely dry before touching any part of the electrical panel to prevent potential electrical conductivity through moisture.

    Using One Hand Only

    Use only one hand when touching the breaker panel to prevent creating a circuit across your chest if an electrical fault occurs.

    Standing to the Side of the Panel

    Stand to the side of the panel rather than directly in front of it to protect yourself from potential arc flashes or sparks.

    Additional safety tips include never attempting to remove the inner panel cover or touch any exposed wires within the breaker box, and considering turning off power-hungry appliances before resetting the breaker to prevent it from immediately tripping again. If you detect unusual smells, sounds, or see visible damage to the panel, stop immediately and call a qualified electrician.

    Locating Your Circuit Breaker Panel

    Locating the circuit breaker panel in your UK home can be a straightforward task if you know where to look. The electric service panel, sometimes called a circuit breaker board, is a metal box with a door that may be inset in a wall or surface-mounted.

    Common Locations in UK Homes

    In UK homes, circuit breaker panels (also called consumer units) are typically located in utility areas, garages, under stairs, or near the point where electricity enters your property. Modern UK homes usually have the consumer unit installed near the front door or in a hallway cupboard for easy access in emergencies.

    • Garages or utility areas
    • Under stairs or near the front door
    • Hallway cupboards for easy access
    • Older properties might have panels in basements or attics

    Identifying Different Types of Panels

    The main circuit breaker panel in UK homes is typically a metal box with a hinged door, either surface-mounted or recessed into the wall. UK consumer units are generally smaller than their American counterparts and often have a distinctive grey or white plastic cover.

    When searching for your panel, look for the electricity meter which is often installed nearby or sometimes within the same cabinet. Different types of panels exist in UK homes, including older fuse boxes with ceramic fuses and modern RCD (Residual Current Device) protected consumer units.

    A well-lit, detailed circuit breaker panel in a modern residential interior. The panel is mounted flush against the wall, with rows of breakers neatly organized behind a glass or clear plastic cover. The panel is situated in a clean, organized utility room or closet, with soft, warm lighting illuminating the space. The breakers are clearly labeled, allowing for easy identification. The overall scene conveys a sense of order and functionality, reflecting the importance of this electrical component in the home.

    Resetting a Tripped Circuit Breaker: The Complete Process

    Resetting a tripped circuit breaker requires a systematic approach to ensure your safety and the proper functioning of your electrical system. This process involves several steps that you need to follow carefully to restore power to the affected area of your home.

    Identifying Which Breaker Has Tripped

    The first step is to identify which circuit breaker has tripped. You can do this by checking the position of the breaker handles in your circuit breaker panel. A tripped breaker is usually in a middle or “off” position, different from the other switches that are fully on. You can also check by feel; tripped breakers have a soft or springy feeling when you lightly press them leftward or rightward.

    a detailed high-resolution photograph of a circuit breaker panel, shot in a well-lit interior with natural sunlight streaming in from a nearby window. The panel is mounted on a white wall, its metal surface gleaming with a slight industrial sheen. The various circuit breakers, switches, and indicators are clearly visible, their labels and icons crisp and legible. The foreground is in sharp focus, allowing the viewer to examine the panel's components closely, while the background is softly blurred, providing context without distracting from the main subject. The overall mood is one of technical precision and functional elegance, conveying the importance and complexity of a properly functioning electrical system.

    Turning Off Connected Devices

    Before resetting the tripped breaker, turn off or unplug all devices connected to the affected circuit to reduce the electrical load and prevent the breaker from immediately tripping again. This is a crucial safety precaution to avoid any potential electrical shock or damage to your appliances.

    The Reset Procedure

    The proper reset procedure involves two key steps:

    Flipping to “Off” Position

    First, push the tripped breaker fully to the “off” position until you feel a definite click. This ensures that the breaker is completely off.

    Flipping to “On” Position

    After ensuring the breaker is completely off, firmly push it to the “on” position with a single, confident motion. The handle should seat firmly in place and make an audible click. UK circuit breakers typically move from top (on) to bottom (off), which may differ from other countries’ systems.

    Verifying Power Has Been Restored

    After resetting the breaker, verify that power has been restored by checking lights or using a circuit tester on outlets in the affected area. If the breaker trips immediately after resetting, this indicates a persistent problem that requires further investigation.

    Step Description
    1 Identify the tripped breaker by its middle position or soft/springy feel.
    2 Turn off or unplug devices connected to the affected circuit.
    3 Push the tripped breaker to the “off” position until it clicks.
    4 Push the breaker to the “on” position firmly until it clicks.
    5 Verify power has been restored using lights or a circuit tester.

    By following these steps, you can safely reset a tripped circuit breaker and restore power to your home. Remember to document which breaker controls which areas of your home by labelling the panel for future reference.

    Troubleshooting Persistent Circuit Breaker Issues

    When your circuit breaker continues to trip, it indicates a deeper electrical issue that needs to be addressed. Persistent tripping can be caused by various factors, including overloaded circuits, short circuits, or faulty breakers.

    When a Breaker Immediately Trips Again

    If your circuit breaker trips immediately after resetting, this indicates a persistent electrical problem that requires systematic troubleshooting. Common causes include overloaded circuits, short circuits, ground faults, or a faulty breaker itself. To address this, you should first identify the cause.

    Resetting the Main Breaker

    In some cases, resetting the main breaker can resolve issues with subsidiary breakers. The main breaker is usually located at the top of your consumer unit. Resetting it may help if the issue is related to the main electrical supply.

    Identifying Problem Appliances

    To identify if an appliance is causing the problem, unplug all devices from the affected circuit, reset the breaker, and then reconnect devices one by one. High-power appliances like kettles, heaters, and hairdryers are common causes of overloaded circuits.

    When to Call a Professional Electrician

    If you notice signs such as burning smells, discoloured outlets, or buzzing sounds from the panel, it’s time to call a professional electrician. UK regulations require certain electrical work to be performed by a qualified electrician registered with a government-approved scheme.

    A professional electrician can perform a load calculation to determine if your electrical system needs upgrading to handle your household’s power requirements. They can also help identify and fix the root cause of the tripping breaker, ensuring your electrical system’s safety and efficiency.

    Preventing Future Circuit Breaker Trips

    Knowing your electrical system’s capacity is key to preventing circuit breaker trips and ensuring home safety. To achieve this, you should distribute high-power appliances across different circuits rather than concentrating them on a single circuit. This helps in preventing overloads that can lead to tripped breakers.

    You can also prevent future trips by avoiding the simultaneous use of multiple high-wattage appliances, especially in areas like the kitchen. Regular inspections of cords and plugs for signs of wear or damage can help identify potential issues before they cause problems. Consider having an electrician install additional circuits in areas with high electrical demands.

    Furthermore, replacing outdated wiring and upgrading to a modern consumer unit with RCD protection can enhance safety and prevent breaker trips. By taking these steps, you can significantly reduce the occurrence of tripped circuit breakers and ensure the overall safety of your home’s electrical system.

    FAQ

    What should I do if my circuit breaker trips repeatedly?

    If your breaker trips repeatedly, it may indicate an overloaded circuit or a short circuit. You should turn off all devices connected to the affected circuit and try to reset the breaker. If the problem persists, consider consulting a professional electrician to inspect your electrical system.

    How do I identify which breaker has tripped in my breaker panel?

    To identify the tripped breaker, inspect your breaker panel for a switch that is in a different position from the others, typically in the middle or off position. Check the panel labels to determine which circuit is associated with the tripped breaker.

    Can I reset a tripped breaker with wet hands?

    No, it’s not safe to reset a breaker with wet hands. Water is a good conductor of electricity, and attempting to reset a breaker with wet hands can lead to electrical shock. Ensure your hands are dry before handling any electrical switch or panel.

    What are the common causes of ground faults in my home?

    Ground faults occur when there is an unintended path of electricity to the ground, often due to faulty or damaged wiring. Common causes include worn or damaged wires, short circuits, or overloaded circuits. If you suspect a ground fault, it’s recommended to consult a qualified electrician.

    How can I prevent my circuit breaker from tripping in the future?

    To prevent breaker trips, avoid overloading your circuits by distributing your electrical load across multiple circuits. Regularly inspect your wiring and electrical devices for signs of wear or damage, and consider upgrading your electrical panel if it’s old or outdated.

    When should I call a professional electrician to help with my circuit breaker?

    You should call a professional electrician if you’re unsure about how to reset a breaker, if the breaker trips repeatedly, or if you suspect a short circuit or ground fault. An electrician can diagnose and repair any underlying issues with your electrical system.

  • Unblocking a Kitchen Sink Drain: Your Step-by-Step Guide

    Unblocking a Kitchen Sink Drain: Your Step-by-Step Guide

    Are you tired of dealing with a clogged kitchen sink drain that disrupts your daily routine? A blocked drain is one of the most frustrating household plumbing issues you can face. But before you call a professional plumber, have you considered tackling the problem yourself?

    This comprehensive guide will walk you through the process of diagnosing and fixing the blockage in your sink. By understanding the causes and signs of a clogged drain, you’ll be better equipped to address the issue effectively and prevent future occurrences.

    Key Takeaways

    • Diagnose the cause of your kitchen sink’s blockage.
    • Learn multiple DIY methods to clear a clogged drain.
    • Understand how to prevent future blockages in your kitchen sink.
    • Discover when it’s necessary to call a professional plumber.
    • Restore your kitchen sink to proper working order.

    Common Causes of Kitchen Sink Blockages

    Understanding the root causes of kitchen sink blockages can help you prevent and tackle the issue effectively. Kitchen sink blockages are often the result of a combination of factors.

    Food Waste and Scraps

    Food waste and scraps are significant contributors to kitchen sink blockages. When food particles go down the drain, they can accumulate and cause blockages. Avoid disposing of food waste down the sink to prevent this issue.

    Grease and Fat Build-up

    Grease and fat build-up is another common cause. When grease and fat cool down, they solidify and stick to the pipe walls, gradually blocking the flow of water. Being mindful of what you pour down the drain can help mitigate this problem.

    Soap Scum and Other Debris

    Soap scum forms when soap combines with minerals in hard water, creating a sticky residue. This residue can build up over time, especially in areas with hard water, and combine with other debris like food particles, creating a substantial blockage. As noted, “Soap scum and hair are the most likely candidates for blocking your drain.” Regular use of dish soap, particularly when washing greasy items, can contribute to soap scum build-up if not properly flushed.

    Signs Your Kitchen Sink Drain Is Blocked

    A blocked kitchen sink can be a significant inconvenience, and recognising the signs is the first step towards resolving the issue. When your kitchen sink’s drain is clogged, it can lead to unpleasant odours and disrupt your daily activities.

    Slow Draining Water

    One of the primary indicators of a blocked kitchen sink drain is slow draining water. If you notice that water is taking longer than usual to drain, it may be a sign that your drain is partially blocked.

    Unpleasant Odours

    Foul odours emanating from your kitchen sink can be a telltale sign of a blockage. These unpleasant smells often become more noticeable when running water or when the dishwasher drains. Some common characteristics of these odours include:

    • Rotting food smells
    • Sewage-like odours
    • Musty smells

    If left untreated, these smells can permeate your entire kitchen and even adjacent rooms. The presence of persistent unpleasant odours, even after cleaning the visible parts of your sink, strongly indicates a blockage deeper in the drainage system that requires attention. Ensuring your kitchen sink drains properly is crucial for a hygienic environment.

    Essential Tools for Unblocking a Kitchen Sink Drain

    The right tools can make all the difference when it comes to unblocking your kitchen sink drain. Having the correct equipment on hand will make the process more efficient and effective.

    Household Items You’ll Need

    You likely have some of the necessary tools already. A sink plunger is one of the most useful items for creating the suction needed to dislodge blockages. Additionally, a pair of protective gloves can be useful when handling potentially dirty or sharp objects.

    Optional Specialised Tools

    For more stubborn blockages, specialised tools can be invaluable. A drain snake or auger can reach deeper into pipes to break up or retrieve blockages that are beyond the reach of other methods. A pipe wrench may also be necessary if you need to disassemble the sink trap to access a blockage. A well-lit kitchen counter, with an open cabinet underneath, revealing a set of essential tools for unblocking a sink drain. In the foreground, a plunger, a drain snake, and a pair of pliers are neatly arranged, their metallic surfaces gleaming under the warm, directional lighting. In the middle ground, a bucket and a few cleaning rags suggest the impending task of clearing the clogged drain. The background features the sink itself, with its chrome faucet and a partially visible countertop, creating a sense of context and purpose for the tools displayed. It’s also a good idea to wear protective eyewear when using chemical drain cleaners or when disassembling pipes to prevent injury from splashes or debris.

    Method 1: Unblocking with Boiling Water

    Boiling water can be an effective solution for unblocking your kitchen sink. If your pipes are blocked by soap or fat, boiling water can help to clear the blockage by dissolving it.

    Step-by-Step Instructions

    To use boiling water to unblock your kitchen sink, start by boiling a kettle of water. Carefully pour the boiling water down the drain in two to three stages, allowing the water to work its way through the blockage between each pour. This method is straightforward and can be effective for minor blockages.

    When This Method Works Best

    The boiling water method is most effective for fresh blockages caused by grease, fat, or soap residue. It’s ideal as a first attempt for minor blockages where water still drains slowly. However, caution should be exercised with PVC pipes, as boiling water can potentially damage them; in such cases, very hot (but not boiling) water is a safer alternative.

    Blockage Cause Effectiveness of Boiling Water
    Grease or Fat Highly Effective
    Solid Food Waste Less Effective
    Soap Residue Effective

    As shown in the table, boiling water is particularly useful for blockages caused by grease or fat. However, for blockages due to solid food waste, this method may not be as effective.

    Method 2: Using Baking Soda and Vinegar

    Baking soda and vinegar can be used together to create a natural and non-toxic solution for unblocking your kitchen sink. This method is not only effective but also environmentally friendly.

    Required Materials

    To use this method, you will need baking soda and white vinegar. You will also need access to boiling water.

    Step-by-Step Process

    First, clear as much water and debris from the sink as possible. Then, pour boiling water down the plughole to help shift the blockage. Next, pour two teaspoons of baking soda into the plughole, followed by 240ml of white vinegar after a few minutes. Put the plug in the plughole and let the mixture work for five to ten minutes. Finally, pour more boiling water down the drain to clear any remaining residues.

    How It Works and Effectiveness

    The baking soda and vinegar method works through a chemical reaction that produces carbon dioxide gas, creating bubbling and fizzing that helps dislodge and break down organic material causing the blockage. The abrasive nature of baking soda scrubs away build-up on the inside of pipes, while vinegar helps dissolve grease and soap scum. This method is particularly effective for moderate blockages and is environmentally friendly compared to chemical drain cleaners.

    Method 3: Using a Plunger Effectively

    To unblock your kitchen sink, using a plunger is a simple yet effective technique. This method involves creating pressure to dislodge the blockage.

    Preparing Your Sink

    Before you start plunging, ensure the sink has enough water to cover the plunger. This helps create a good seal. If your sink has an overflow, you’ll need to seal it with a wet cloth to prevent air from escaping.

    A silver-colored plunger, its rubber cup prominent and inviting, resting on a white porcelain bathroom sink. The plunger's wooden handle extends gracefully, casting a warm, natural shadow across the sink's smooth surface. Soft, natural lighting from an unseen window highlights the plunger's textured grip, creating a sense of artisanal craftsmanship. The overall composition emphasizes the plunger's utilitarian purpose while conveying a sense of calm and domestic tranquility, suggesting its effectiveness in the task at hand.

    Proper Plunging Technique

    To plunge effectively, push down on the plunger slowly, then pull up sharply. This motion should help dislodge the blockage. After plunging vigorously for 20-30 seconds, slowly lift the plunger to check if the water begins to drain.

    Finishing the Process

    If the water drains successfully, run hot water from the tap for a minute or two to flush any remaining debris. If the sink remains blocked, repeat the plunging process 2-3 more times. For stubborn blockages, consider combining plunging with the baking soda and vinegar method.

    Plunging Technique Effectiveness
    Push down slowly, pull up sharply Dislodges blockages effectively
    Repeat 2-3 times if necessary Increases chances of clearing the blockage
    Combine with baking soda and vinegar Enhances effectiveness for stubborn blockages

    Method 4: Checking and Cleaning the Sink Trap

    The sink trap is a common culprit when it comes to kitchen sink blockages, and cleaning it can be a straightforward solution. The sink trap, also known as the P-trap, is the curved pipe under your sink that traps a small amount of water, preventing sewer gases from entering your kitchen.

    Safety Precautions

    Before you start, make sure to wear protective gloves and eyewear to avoid exposure to any harsh chemicals or debris. It’s also a good idea to place a bucket under the sink trap to catch any water or waste that may spill out.

    Removing the Trap

    To remove the trap, you’ll need to loosen the slip nuts that hold it in place. Use a wrench to loosen the nuts, then carefully lift the trap off the pipe. Be prepared for any water or debris to spill out. For more information on unblocking sink drains, you can visit this tutorial.

    Cleaning and Reinstalling

    Once removed, empty the contents of the trap into the bucket and inspect it for the source of the blockage. Clean the trap thoroughly using an old toothbrush or bottle brush to scrub away any residue. Before reinstalling, check the rubber washers or O-rings for signs of wear or damage and replace them if necessary. When reinstalling, align the trap carefully and hand-tighten the connections first, ensuring they’re properly threaded before giving them a final quarter-turn with a wrench if needed.

    After reassembly, run water through the kitchen sink while checking for leaks at the connections, tightening further if necessary. This will ensure that the pipes are clear and functioning properly.

    Commercial Drain Unblockers: When and How to Use Them

    Image of a person using a commercial drain unblocker in a kitchen sink

    Learn More

    For tough clogs that other methods can’t clear, commercial drain unblockers offer a potent solution. These products are effective at dissolving grease, food, and other organic materials causing the blockage.

    Types of Chemical Unblockers

    Commercial drain unblockers come in various forms, including liquids and gels, designed to tackle different types of clogs. They contain chemicals that break down the blockage, allowing water to flow freely again.

    Safety Considerations

    When using commercial drain unblockers, it’s crucial to wear gloves and work in a well-ventilated area. Keep the products away from children and pets to avoid accidents.

    Application Instructions

    To use a commercial drain unblocker effectively, follow the manufacturer’s instructions. Typically, this involves pouring a specified amount into the drain and waiting for the recommended time before flushing with cold water.

    Preventing Future Kitchen Sink Blockages

    A few simple practices can significantly reduce the likelihood of your kitchen sink becoming clogged. By incorporating these habits into your routine, you can maintain a free-flowing drain.

    Regular Maintenance Tips

    Regularly flushing your sink with hot water helps to clear pipes and prevent build-up. You should also clean your sink strainer or drain guard weekly to prevent debris accumulation.

    What to Avoid Putting Down Your Drain

    Grease and fat are common causes of sink blockages as they congeal and harden inside your pipes. Always dispose of them in a container and place it in your waste bin.

    Weekly Cleaning Routine

    Task Frequency
    Flush sink with hot water Weekly
    Clean sink strainer or drain guard Weekly
    Use baking soda and vinegar Weekly
    Clean sink basin Several times a week

    By following this routine and being mindful of what you put down your drain, you can keep your kitchen sink drain clear and functioning properly, especially when using a garbage disposal with cold water sink regularly.

    Conclusion

    By following the methods outlined in this guide, you’re now equipped to tackle kitchen sink blockages with confidence. You’ve learned various techniques to unblock your kitchen sink and maintain clear drains, reducing the likelihood of future blockages.

    Remember, prevention is key to maintaining clear drains in your home. Regular maintenance and being mindful of what goes down your drain can help clear stubborn blockages and keep your kitchen sink draining freely.

    If you encounter persistent issues, it may be a sign of a deeper problem in your plumbing system, requiring professional attention. By understanding the common causes of blockages and knowing how to address them, you’ve gained valuable knowledge to help clear problems quickly.

    FAQ

    What causes blockages in kitchen sinks?

    Blockages are often caused by the accumulation of food waste, grease, and soap scum in your pipes. Regularly disposing of waste properly and being mindful of what you put down your drain can help prevent clogs.

    How can I clear a stubborn blockage?

    You can try using boiling water, a mixture of baking soda and vinegar, or a plunger to clear the blockage. For more severe clogs, you may need to use a commercial drain unblocker or check and clean the sink trap.

    Is it safe to use chemical drain unblockers?

    While chemical drain unblockers can be effective, they can also be hazardous to your health and damage your pipes. Always follow the manufacturer’s instructions and take necessary safety precautions when using these products.

    How can I prevent future blockages?

    Regular maintenance, such as pouring boiling water down your drain and being mindful of what you put down it, can help prevent blockages. You should also avoid pouring grease and fat down your drain.

    Can I use a plunger on a kitchen sink?

    Yes, a plunger can be an effective tool for unblocking a kitchen sink. Make sure to prepare your sink properly before plunging and use the correct plunging technique to achieve the best results.

    What should I do if none of the methods work?

    If you’ve tried multiple methods and still have a blocked sink, it may be time to call a professional plumber to diagnose and fix the issue. They can help identify the root cause of the problem and provide a solution.

  • Replacing a Worn-Out Washer in Your Tap Easily

    Replacing a Worn-Out Washer in Your Tap Easily

    Are you tired of the incessant drip, drip, drip from your tap? It’s not just a nuisance; a leaky tap can lead to significant water wastage and increased utility bills.

    The good news is that fixing this common issue is relatively straightforward. Often, the problem lies with a worn-out washer that needs to be replaced. By learning how to change the tap washer, you can save money on both water bills and professional plumbing services.

    This guide will walk you through the simple process, helping you to tackle the problem effectively and efficiently.

    Key Takeaways

    • Understand the cause of a dripping tap and its implications.
    • Learn the simple steps to replace a worn-out washer.
    • Save money on water bills and plumbing services.
    • Reduce water wastage by fixing the leaky tap.
    • Gain confidence in tackling common household plumbing issues.

    Understanding Tap Washers and Why They Leak

    Understanding how tap washers work is essential for maintaining a leak-free tap. Tap washers are crucial components that control the flow of water from your tap.

    What Is a Tap Washer and How Does It Work?

    A tap washer is a small rubber disc located inside tap that creates a watertight seal when the tap is turned off. When you turn on the tap, the washer moves away from the seat, allowing water to flow through the gap and out of the spout. The washer’s movement is crucial for controlling water flow.

    Signs Your Tap Washer Needs Replacing

    Over time, tap washers endure substantial wear and tear from constant use, water pressure, and mineral deposits, causing them to harden, crack, or become misshapen. The most obvious sign that your tap washer needs replacing is a persistent drip when the tap is fully turned off. Other signs include having to tighten the tap handle more than usual to stop water flow or noticing that the tap is becoming increasingly difficult to turn. Modern taps may use ceramic disc cartridges instead of rubber washers, which work differently and tend to last longer but still require replacement eventually.

    Tools and Materials You’ll Need

    Having the right tools and materials on hand will make replacing a tap washer a straightforward task. You’ll need a few basic items to get started.

    Essential Tools for the Job

    To replace a tap washer, you’ll need a flat-headed screwdriver and an adjustable spanner or wrench. Pliers can also be useful for handling small components. An old towel or cloth is necessary to protect your sink surface and catch any small parts that might fall during the repair.

    Choosing the Right Replacement Washer

    Replacement tap washers come in various sizes and materials. It’s crucial to either match your old washer exactly or take it to a hardware store to find the correct replacement. Consider purchasing a pack of assorted washers if you’re unsure about the exact size.

    Preparation Steps Before You Start

    To ensure a smooth and hassle-free experience, follow these preparation steps before replacing your tap washer.

    Turning Off Your Water Supply

    The first step is to turn off the water supply to prevent flooding and make the job much easier. Locate the isolation valve underneath the sink and turn it clockwise to shut off the water supply to that specific tap. If you don’t have an isolation valve, you’ll need to turn off your property’s main water supply. For hot water taps, also turn off your boiler and immersion heater, then allow sufficient time for the system to cool down.

    Protecting Your Sink and Workspace

    Protecting your workspace is crucial. Place the plug in the sink’s drain to prevent small parts from being lost. Lay down an old towel in the sink basin to catch any dropped components and protect the surface from damage. Clear the area around the sink of any items that could get wet or be in your way, giving yourself plenty of space to manoeuvre.

    Preparation Step Purpose
    Turn off water supply Prevent flooding
    Use isolation valve or main water supply Control water flow
    Protect sink and workspace Prevent damage and loss of parts

    A well-lit kitchen counter, with a faucet and sink in the foreground. On the counter, a set of tools and materials neatly arranged: a wrench, pliers, a new tap washer, a basin, and a cleaning cloth. The lighting is soft and warm, highlighting the textures of the materials. The overall atmosphere is one of calm and focused preparation, setting the stage for a successful tap washer replacement.

    By following these preparation steps, you’ll save yourself from potential disasters and make the entire process much smoother.

    Replacing a Worn-Out Washer in a Tap: Step-by-Step Guide

    A leaky tap can be frustrating, but replacing the washer is a simple DIY task that you can accomplish in just a few steps. Before you start, ensure you have the necessary tools and a replacement washer that matches the size and type of the old one.

    Step 1: Removing the Tap Head

    Begin by removing the decorative cap or button on top of your tap. This is usually marked with ‘hot’ or ‘cold’ and can be gently pried off using a flat-headed screwdriver. Once removed, you’ll see a small screw that secures the tap handle; unscrew this carefully and lift off the handle to expose the tap body underneath.

    Step 2: Accessing the Valve and Washer

    Next, use your spanner to loosen and remove the tap bonnet or headgear. This might require some force if it hasn’t been removed for a while. Hold the tap body steady with another wrench if necessary to prevent damage.

    Step 3: Removing the Old Washer

    After removing the bonnet, you’ll be able to see the jumper valve and the washer, which is typically held in place by a small screw or nut at the bottom of the valve. Carefully remove this screw or nut and take out the old washer, noting its position and orientation.

    Step 4: Installing the New Washer

    Place the new washer in exactly the same position as the old one, secure it with the screw or nut, and ensure it sits flat and even against the valve surface. It’s also a good opportunity to inspect the valve seat for any signs of damage or limescale buildup that might prevent a proper seal; clean it gently if necessary.

    By following these steps, you can successfully replace a worn-out washer in your tap, stopping the leak and saving water. Ensure that the new washer is an exact match for the old one in terms of size and thickness to guarantee a watertight seal.

    Reassembling Your Tap Correctly

    The final step in fixing your leaky tap is to reassemble it correctly. This process involves reversing the steps you took to disassemble it, ensuring all components are securely back in place.

    Putting the Components Back Together

    Start by screwing the valve back into the tap body, being cautious not to overtighten, which could damage the threads or the new washer. Next, reattach the tap bonnet or headgear, again avoiding overtightening. Finally, replace the tap handle and secure it with the screw you removed earlier.

    Testing Your Repair

    Once you’ve reassembled your tap, it’s crucial to test it. Turn on the water supply slowly and check for leaks around the areas you’ve worked on, particularly around the tap base and spout. If you notice any leaks, turn off the water supply and make the necessary adjustments to ensure a watertight seal.

    With the tap reassembled and tested, you can now enjoy a leak-free water flow, proud of the DIY job you’ve accomplished.

    Troubleshooting Common Issues

    If your tap continues to leak after replacing the washer, there are several potential causes to investigate. A thorough examination is necessary to resolve the issue effectively.

    Tap Still Leaking After Washer Replacement

    One common cause of persistent leaks is damage to the valve seat—the metal surface against which the washer forms its seal. Over time, valve seats can become pitted, scratched, or corroded, preventing a new washer from creating a watertight seal. Inspecting the valve seat is crucial; if it’s damaged, you may need to reseat the tap or use a seat grinder to resurface it.

    Cause of Leak Solution
    Damaged Valve Seat Reseat the tap or use a seat grinder
    Stuck or Corroded Parts Apply penetrating oil and allow it to soak

    Dealing with Stuck or Corroded Parts

    Another issue you might encounter is stuck or severely corroded parts, particularly in older taps. To avoid damaging the tap body or pipework, apply penetrating oil and let it soak for several hours or overnight before attempting to remove the stubborn components.

    Sometimes, the problem isn’t with the washer but with other components like O-rings, spindles, or the tap body itself. Inspecting these parts and replacing them if necessary can resolve the leak.

    Understanding Different Types of Taps

    The first step in fixing a tap is identifying whether it’s a traditional compression tap or a modern ceramic disc tap. This distinction is crucial because the repair approach differs significantly between the two types.

    Traditional Compression Taps vs. Modern Ceramic Disc Taps

    Traditional compression taps use a rubber washer to control water flow. When you twist the tap, it compresses the rubber washer against a metal seat to stop the water. In contrast, modern ceramic disc taps operate with two ceramic discs that align to allow water flow and misalign to stop it, eliminating the need for a rubber washer.

    A high-quality ceramic disc tap, featuring a sleek, minimalist design. The tap is rendered in intricate detail, with a smooth, glazed surface that catches the light beautifully. The faucet's body is a soft, muted tone, complemented by the shiny metal accents of the handle and base. The tap is set against a plain, neutral background, allowing the device to take center stage. Soft, directional lighting illuminates the tap's form, highlighting its clean lines and precise engineering. The overall composition emphasizes the tap's functional elegance, showcasing its suitability for a modern, well-appointed bathroom or kitchen setting.

    When You Need a Different Approach

    Knowing your tap type is vital before attempting repairs. For instance, mixer taps, thermostatic taps, and sensor taps have unique mechanisms that may require specialist knowledge. If you’re unsure, consult the manufacturer’s information to avoid causing damage or wasting time on an inappropriate fix.

    Preventing Future Tap Leaks

    A little maintenance can go a long way in keeping your taps leak-free. By following some simple tips, you can significantly extend the life of your tap washers and prevent the frustration of sudden leaks.

    Maintenance Tips

    Regular maintenance is crucial. Avoid overtightening your taps, as this puts excessive pressure on the washers. In hard water areas, consider installing a water softener to reduce limescale buildup.

    Upgrading Your Taps

    Consider upgrading to ceramic disc taps when your current taps reach the end of their useful life. These taps offer superior durability and require less maintenance over time. Modern tap designs also often incorporate water-saving features that can reduce your water consumption.

    Conclusion

    Having completed this DIY task, you’ll appreciate the satisfaction of fixing a leaky tap on your own. Replacing a worn-out washer in your tap is a straightforward task that can save you money and the inconvenience of a persistently dripping tap. With the right tools and a little patience, you’ve tackled a common household repair.

    Remember, regular maintenance and proper use of your taps will extend the life of your washers and reduce the frequency of replacements needed. If you encounter significant difficulties or if the leak persists, consider consulting a professional plumber. By mastering this simple repair, you’ve added a valuable skill to your DIY repertoire.

    FAQ

    What is the purpose of a tap washer?

    A tap washer creates a watertight seal inside the tap, preventing water leakage when the tap is turned off.

    How do I know if my tap washer needs to be replaced?

    If your tap is dripping, it may be a sign that the washer is worn out and needs to be replaced.

    What tools do I need to replace a tap washer?

    You will need a screwdriver, an adjustable spanner, and a new tap washer that matches the old one.

    How do I turn off the water supply to my tap?

    Locate the isolation valve and turn it clockwise to shut off the water supply to the tap.

    Can I replace a tap washer in any type of tap?

    Most compression taps can be repaired by replacing the washer, but ceramic disc taps may require a different approach.

    How can I prevent future tap leaks?

    Regular maintenance, such as checking and replacing worn-out parts, can help prevent leaks and prolong the life of your tap.

    What if my tap is still leaking after replacing the washer?

    If the tap continues to leak, you may need to inspect the valve seat or tap seat for damage or wear.

  • Learn How to Seal a leaking pipe joint Properly

    Learn How to Seal a leaking pipe joint Properly

    Are you tired of dealing with water damage caused by leaking pipe joints in your home? Do you wonder how to effectively fix leaking issues without calling a professional plumber? Leaking pipe joints can lead to significant water wastage and costly repairs if left unaddressed.

    Identifying the cause of the leak is crucial before attempting any repair. You need to understand the type of pipe material and the nature of the leak to choose the right sealing method. Whether you’re dealing with a minor leak or a major plumbing issue, this guide will walk you through the steps to properly seal your pipe joints and prevent further water damage.

    Key Takeaways

    • Understand the causes of leaks in pipe joints and how to diagnose them.
    • Learn the importance of choosing the right sealing method based on pipe material.
    • Discover when to attempt a DIY repair and when to call a professional plumber.
    • Gain insights into step-by-step procedures for different sealing techniques.
    • Understand how proper pipe joint sealing can save you money on water bills.

    Understanding Different Types of Pipe Leaks

    Understanding the different types of pipe leaks is essential for effective plumbing repairs. Pipes are made from various materials, including metals, plastics, and concrete, and can deteriorate over time, leading to leaks. Common types of pipes include copper, galvanised metal, PVC, CPVC, PEX, and ABS DWV, each with its unique characteristics and potential failure points.

    A dimly lit, gritty industrial setting with a close-up view of a water-stained concrete wall. In the foreground, a rusted metal pipe with a steady stream of water dripping from a visible crack or joint. The light casts long shadows, emphasizing the weathered, worn texture of the pipe and wall. The background is hazy, suggesting a damp, humid atmosphere. The overall scene conveys a sense of disrepair and the need for maintenance, reflecting the theme of understanding different types of pipe leaks.

    The material your pipes are made of plays a significant role in determining the appropriate repair strategy. For instance, copper pipes often develop pinhole leaks or issues at soldered joints, while plastic pipes may crack or split at connection points.

    Causes of Pipe Joint Leaks

    Pipe joint leaks can occur due to various factors, including worn gaskets, loose connections, or corrosion at the joints. Pipe leaks can also result from age-related deterioration, excessive water pressure, and temperature fluctuations. Understanding these causes is crucial for selecting the right repair method.

    • Worn gaskets or loose connections can lead to leaks at the joints.
    • Corrosion at the meeting points between pipes is another common cause.
    • Age-related deterioration can weaken pipes and lead to leaks.

    Identifying Your Pipe Material

    Identifying whether your pipes are made of copper, PVC, CPVC, PEX, or galvanised metal is vital for determining the best repair approach. Different materials require different sealing methods; for example, what works for metal pipes may not be effective for plastic pipes. By understanding your pipe material, you can choose the most appropriate repair technique.

    • Copper pipes require soldering or specific copper-compatible repair methods.
    • Plastic pipes, such as PVC or PEX, may require specialised adhesives or clamps.
    • Galvanised metal pipes often need replacement or specialised repair clamps.

    Essential Tools and Materials for Sealing a Leaking Pipe Joint

    To effectively seal a leaking pipe joint, it’s crucial to have the right tools and materials at your disposal. A successful repair depends on being well-prepared with the necessary equipment.

    Required Tools

    The basic tools needed for sealing a leaking pipe joint include adjustable wrenches, pipe wrenches, slip joint pliers, and clean rags or towels. You may also require pipe cutters for certain repairs. Having these tools on hand will enable you to tackle the job efficiently.

    Necessary Materials

    The materials required vary depending on the repair method, but commonly include Teflon tape, pipe joint compound, epoxy putty, and self-fusing silicone tape. For most pipe repairs, some form of epoxy is ideal, such as Loctite Repair Putty-All Purpose or Loctite Epoxy Metal/Concrete for metal or concrete pipes.

    Having a variety of sealing materials in your home toolkit allows you to address different types of leaks promptly. It’s also essential to select materials compatible with your pipe type to ensure a successful repair.

    Preparation Steps Before Sealing

    Before you start sealing a leaking pipe joint, it’s essential to prepare the area properly to ensure a successful repair. This involves several crucial steps that will help you achieve a lasting seal.

    Turning Off Your Water Supply

    First, you need to turn off the water supply to the damaged pipe. If there’s no local shut-off valve, you’ll need to turn off the main water supply valve for your home. Open nearby taps to drain the remaining water from the pipes.

    Cleaning and Drying the Pipe

    Thoroughly clean the area around the pipe to remove dirt, grease, and old sealant. Some repair products require you to dry the pipe completely or roughen the surface around the leak. Cleaning and drying are crucial for ensuring a strong bond between the pipe and the repair material.

    Safety Precautions

    When working on a leaking pipe, take necessary safety precautions. If the leak is near electrical fixtures, turn off the power to the area and verify it’s off using a non-contact electrical tester. Wear protective gloves, such as nitrile or latex, to safeguard your hands while working.

    A well-lit workshop interior, with a metal workbench in the foreground. On the bench, an assortment of tools and supplies for pipe repair - adjustable wrenches, plumbers putty, pipe sealant, and a section of PVC pipe. In the middle ground, a plumber kneels, inspecting the pipe joint with a magnifying glass, preparing to seal the leak. The background shows shelves of spare parts and a window, letting in natural light. The overall mood is one of focused task-oriented activity, with a sense of diligence and attention to detail.

    Sealing a Leaking Pipe Joint with Tape

    Tape is a handy material for temporarily or permanently fixing leaks in pipe joints. There are different types of tape for various applications.

    Using Teflon Tape for Threaded Joints

    Teflon tape, also known as PTFE tape or plumber’s tape, is specifically designed for threaded pipe joints. To use it effectively, ensure the threads are clean and dry, then wrap the tape clockwise around the male threads 3-4 times, overlapping slightly with each turn. This creates a watertight seal when properly applied.

    Applying Self-Fusing Pipe Wrap Tape

    Self-fusing silicone tape works by creating a compression seal and is ideal for emergency repairs on straight pipe sections or joints. When applying, stretch the tape to approximately twice its length as you wrap it around the pipe, overlapping by at least 50% with each turn. This type of tape can sometimes be applied even when the water cannot be completely turned off.

    Using Epoxy Putty for Pipe Joint Repairs

    Epoxy putty offers a strong and lasting solution for pipe joint leaks. It is particularly effective for small to medium-sized leaks, providing a durable fix that can withstand water pressure.

    Selecting the Right Epoxy for Your Pipe Material

    Different types of epoxy compounds are formulated for specific pipe materials. To ensure a successful repair, you must select an epoxy putty that is compatible with your pipes, whether they are made of plastic, metal, or another material.

    Applying and Shaping Epoxy Putty

    To apply epoxy putty, first clean and dry the area around the leak. Then, knead the two-part compound together until it achieves a uniform colour. Press the putty over the leak, moulding it to create a smooth seal that overlaps the damaged area by at least 1-2 cm on all sides.

    Key benefits of using epoxy putty include:

    • Epoxy putty provides a strong, durable solution for sealing pipe joint leaks.
    • Most epoxy putties come as two-part compounds that must be kneaded together to activate the chemical hardening process.
    • Proper surface preparation is crucial for epoxy repairs – the pipe must be clean, dry, and ideally roughened with sandpaper to improve adhesion.
    • Allow the epoxy to cure fully according to the manufacturer’s instructions before restoring water pressure to the pipe.

    Installing Pipe Repair Clamps and Couplings

    Leaking pipes can be a nuisance, but there are effective ways to repair them. For more significant leaks or when a section of pipe needs replacement, pipe repair clamps and couplings offer reliable solutions.

    Using Pipe Repair Clamps for Emergency Fixes

    Pipe repair clamps are particularly useful for emergency repairs. They consist of a rubber gasket sandwiched between metal bands and secured with bolts, creating a compression seal around the leak. To install, unscrew the bolts, slip the clamp over the pipe ensuring the rubber seal covers the leak, and then tighten the bolts using a wrench.

    Installing Slip Repair Couplings

    For a more permanent fix, especially when a section of pipe is damaged, slip repair couplings can be used. These couplings allow you to remove the damaged part of the pipe and connect the undamaged segments. Use a pipe cutter to make clean cuts, smooth the edges with a deburring tool, and mark the correct insertion depth on each pipe end before installing the coupling.

    Fixing Specific Types of Pipe Joints

    To successfully fix a leaking pipe joint, it’s essential to understand the specific type of pipe you’re dealing with. Different pipe materials and joint types require distinct repair approaches to effectively fix leaking connections.

    Repairing PEX Pipe Connections

    PEX pipe leaks usually occur at connections held in place by crimp rings. To fix these leaks, you’ll need a PEX crimp tool and a PEX test gauge (go/no-go gauge). Use the gauge to check the crimp ring; if it doesn’t fit the test slot, recrimping may solve the issue.

    Sealing Copper and Metal Pipe Joints

    Copper pipe joints are typically soldered together, and leaks often result from poor soldering technique. For minor leaks, epoxy putty can provide a temporary fix, but proper resoldering is the most reliable permanent solution. Metal pipe threaded joints benefit from proper application of pipe joint compound or Teflon tape before reassembly.

    Conclusion: Testing Your Repair and When to Call a Professional

    Testing your pipe joint repair is essential to confirm that the leak has been fully resolved. After completing the repair, slowly turn the water supply back on and check the repair area for any signs of leakage. If the pipe continues to leak, you may need to retry the repair or try a different method.

    If the patch holds, clean up any remaining water and dry the area thoroughly to prevent mould growth. It’s also crucial to monitor the area over the next 24-48 hours to ensure no slow leaks develop as the system experiences normal pressure fluctuations.

    Understand that many DIY pipe joint repairs, particularly those using tape or epoxy compounds, are considered temporary solutions. For a permanent fix, especially for leaks in difficult-to-reach areas or main supply lines, it’s advisable to contact a licensed plumber as soon as possible.

    FAQ

    What is the best way to stop a leak in a copper pipe?

    To stop a leak in a copper pipe, you can use epoxy putty or a pipe repair clamp. First, turn off your water supply and clean the area around the leak. Then, apply the epoxy putty or attach the repair clamp to the affected area.

    How do I fix a leaking water pipe under the sink?

    To fix a leaking water pipe under the sink, start by turning off the water supply. Then, inspect the pipe and surrounding area to identify the source of the leak. You can use Teflon tape or pipe dope to seal threaded connections, or apply epoxy putty to the affected area.

    Can I use rubber or plastic materials to repair a leaking pipe?

    Yes, you can use rubber or plastic materials, such as pipe repair sleeves or couplings, to repair a leaking pipe. These materials are designed to be durable and long-lasting, and can be used on a variety of pipe types.

    How do I know if I need to replace a pipe or just repair it?

    If the pipe is damaged beyond repair or is old and corroded, it may be more cost-effective to replace it. However, if the damage is limited to a small area, a repair using epoxy putty, pipe tape, or a repair clamp may be sufficient.

    What safety precautions should I take when repairing a leaking pipe?

    When repairing a leaking pipe, make sure to turn off the water supply and wear protective gloves and eyewear. You should also ensure good ventilation in the work area to avoid inhaling fumes from epoxy or other materials.

    Can I use self-fusing pipe wrap tape on any type of pipe?

    Self-fusing pipe wrap tape is suitable for use on most types of pipes, including copper, PEX, and PVC. However, it’s essential to follow the manufacturer’s instructions and ensure the tape is compatible with your pipe material.

  • How to Fix Low Water Pressure in Your Shower

    How to Fix Low Water Pressure in Your Shower

    Are you tired of a lacklustre shower experience due to weak water pressure? You’re not alone. Many UK households struggle with this issue, turning a refreshing morning routine into a frustrating ordeal. It’s not just about the inconvenience; inadequate shower pressure can make it difficult to rinse shampoo properly or feel refreshed.

    This comprehensive guide is designed to help you identify the causes of low water pressure in your shower and implement effective solutions. Whether it’s a simple DIY fix or a more significant plumbing upgrade, we’ll walk you through the steps to restore a powerful shower experience.

    Key Takeaways

    • Identify common causes of weak shower pressure.
    • Learn simple DIY fixes to improve water flow.
    • Understand when a plumbing upgrade is necessary.
    • Discover how to maintain optimal shower pressure.
    • Explore solutions to enhance your overall bathroom experience.

    Understanding Low Water Pressure in Showers

    One of the most frustrating bathroom issues is low water pressure in the shower. It’s a problem that can turn a refreshing start to the day into a disappointing experience. Understanding what constitutes low water pressure and its impact on your shower is crucial to addressing the issue effectively.

    What Constitutes Low Water Pressure

    Low water pressure is typically defined by the time it takes to fill a container with water from your shower head. If it takes more than 6 seconds to fill a 1-litre jug, then you have low water pressure. This simple test gives you a clear indication of whether your shower is suffering from this issue.

    Impact on Your Shower Experience

    Low water pressure can significantly affect your shower experience. Some of the key impacts include:

    • Difficulty rinsing shampoo and conditioner, often leaving residue in your hair.
    • Inadequate cleansing due to a weak shower stream, potentially leaving soap residue on your skin.
    • Extended shower times as you struggle to rinse properly, leading to increased water usage.
    • A negative psychological impact, as starting your day with an unsatisfying shower can affect your mood and energy levels.
    Aspect of Shower Experience Impact of Low Water Pressure
    Rinsing Hair Difficulty in rinsing shampoo and conditioner
    Cleansing Body Insufficient pressure to properly cleanse
    Shower Duration Extended shower times
    Psychological Impact Negative impact on mood and energy

    Understanding these impacts can help you appreciate the importance of addressing low water pressure in your shower. Whether it’s through simple DIY fixes or more significant upgrades, taking action can greatly enhance your daily shower routine.

    Common Causes of Low Shower Water Pressure

    Several factors can contribute to low water pressure in your shower, and knowing these can help you fix the problem. Understanding the root cause is crucial to applying the correct solution.

    Old or Clogged Pipes

    One of the primary reasons for low water pressure is old or clogged pipes. Over time, pipes can accumulate mineral deposits, debris, and sediment, which restrict water flow. If you live in an older home, it’s likely that your pipes may be contributing to the issue.

    Shower Head Issues

    The shower head itself can also be a culprit. Limescale buildup, mineral deposits, or blockages within the shower head can significantly reduce water pressure. Regular cleaning or replacing the shower head can often resolve this issue.

    Partially Closed Valves

    Partially closed shut-off valves can restrict water flow, leading to low pressure. Ensure that these valves are fully open to allow maximum water flow.

    Water Supply Problems

    If you live in or close to a city or town centre, your low water pressure might be due to the mains water system. Municipal water supply issues, peak usage times, and properties located at higher elevations or far from main water supply lines can all impact water pressure. Consider the following factors that might affect your water supply:

    • Municipal water supply issues affecting entire neighbourhoods
    • Peak usage times causing temporary drops in water pressure
    • Properties at higher elevations or far from main supply lines experiencing lower pressure
    • Seasonal variations impacting water pressure

    Detailed interior view of a bathroom plumbing system, showcasing the common causes of low water pressure in a shower. The foreground features a damaged or clogged showerhead, with mineral buildup and debris visible. The middle ground depicts a partially obstructed pipe, with scale and corrosion buildup. The background reveals a water pressure regulator valve, with a gauge indicating low pressure. The lighting is bright and evenly distributed, highlighting the technical aspects of the plumbing components. The overall scene conveys a sense of problem-solving, with the viewer encouraged to identify and address the root causes of the low water pressure issue.

    How to Test Your Shower’s Water Pressure

    Testing your shower’s water pressure is a crucial step in identifying the root cause of low pressure issues. To do this, you can perform a simple yet effective test.

    The Measuring Jug Test

    To conduct the test, place a 1-litre measuring jug under your shower head. Turn the shower on full, and time how long it takes to fill the jug. If it takes more than 6 seconds to fill the jug, then you have low water pressure.

    Interpreting Your Test Results

    Understanding your test results helps determine the severity of your water pressure issue and guides your approach to fixing it. If your jug fills in less than 6 seconds, your shower has good water pressure. A filling time between 6-10 seconds indicates moderately low pressure, while a time of more than 10 seconds signifies significantly low pressure.

    As plumbing experts suggest, “comparing test results from different taps in your home can help determine whether the issue is isolated to your shower or affects your entire plumbing system.”

    • A flow rate above 10 litres per minute indicates good water pressure, and any issues may be related to shower head design.
    • A flow rate between 6-10 litres per minute suggests moderately low pressure that can be improved with simple DIY fixes.
    • A flow rate of less than 6 litres per minute indicates significantly low pressure that may require more substantial interventions.

    Quick DIY Fixes for Low Water Pressure

    Don’t rush to call a plumber; try these quick and easy DIY fixes to increase water pressure in your shower.

    Cleaning Your Shower Head

    One of the simplest ways to improve your shower’s water flow is by cleaning the shower head. Mineral deposits and debris can clog the shower head, reducing water pressure. Remove the shower head and soak it in a mixture of vinegar and water to dissolve any buildup. Use an old toothbrush to scrub away any remaining debris.

    Removing Flow Restrictors

    Many shower heads come with flow restrictors to conserve water. However, these can significantly reduce water pressure. Check your shower head for a flow restrictor, usually located inside the shower head or in the shower arm. Removing this restrictor can improve water flow. Be aware that removing the restrictor might increase your water consumption.

    Checking and Adjusting Shut-off Valves

    If you’ve recently moved into a new home or had plumbing work done, it’s essential to check that your shut-off valves are fully open. Partially closed valves can significantly reduce water pressure. Locate your main shut-off valve, typically found near your water meter or where the main water line enters your home. Ensure it’s fully open by turning it anti-clockwise. Check fixture-specific valves as well, usually behind an access panel.

    DIY Fix Effectiveness Complexity
    Cleaning Shower Head High Low
    Removing Flow Restrictors Medium Medium
    Adjusting Shut-off Valves High Low

    A detailed, close-up view of a shower head under strong, directional lighting, capturing the intensity and focus of the water pressure. The water streams are sharp, crisp, and well-defined, with a sense of forceful energy and motion. The background is blurred, placing emphasis on the shower head and water flow. The lighting is dramatic, creating high-contrast shadows and highlights that accentuate the textures and shapes of the water droplets. The overall mood is one of power and efficiency, conveying the potential for a revitalizing, high-pressure shower experience.

    By implementing these DIY fixes, you can potentially increase water pressure and enhance your shower experience. Always check the main and fixture-specific valves to ensure they are fully open, as partially closed valves are a common cause of low water pressure.

    Fixing Low Water Pressure in Shower: Deep Cleaning Methods

    Low water pressure can often be addressed through simple yet effective deep cleaning techniques. When your shower head is clogged with limescale and debris, it can significantly reduce water flow, affecting your overall shower experience.

    Vinegar Soak Method for Shower Heads

    One effective method for cleaning your shower head is the vinegar soak. To do this, fill a sandwich bag with vinegar and secure it around the shower head using a rubber band. This method helps dissolve limescale and break down sediment, restoring water flow. It’s a simple, non-invasive technique that can make a significant difference in your shower’s water pressure.

    Dealing with Limescale Buildup

    Limescale buildup is a common issue, especially in areas with hard water. It affects not just your shower head but potentially your entire plumbing system. Regular maintenance is key; using a shower spray cleaner after each use can help prevent limescale accumulation. For more severe buildup, consider using a descaling solution designed for plumbing systems. In extreme cases, especially in older properties, consulting a professional plumber about pipe replacement might be necessary.

    By implementing these deep cleaning methods, you can improve the flow and overall performance of your shower, ensuring a more satisfying experience.

    Upgrading Your Shower Components

    Enhancing your shower’s performance can be as simple as upgrading a few key components. By replacing or upgrading certain parts, you can significantly improve your shower experience.

    Choosing a High-Pressure Shower Head

    If you’re dealing with low water pressure, switching to a high-pressure shower head can make a noticeable difference. When searching for the best high-pressure shower head in the UK, consider models designed to maximise water pressure while minimising water usage.

    Image of a high-pressure shower head

    Learn More

    Replacing Old Shower Hoses and Arms

    Aged or kinked shower hoses can significantly restrict water flow, making replacement an effective solution for improving shower pressure. Standard shower hoses typically narrow over time due to internal mineral buildup, particularly in hard water areas.

    When selecting a replacement hose, choose one with a wider internal diameter (typically 8-10mm) to maximise water flow. Consider upgrading to a stainless steel or anti-twist hose that resists kinking and maintains consistent water pressure.

    Image of a shower hose replacement

    Learn More

    Replacing both your shower hose and arm can often yield the best results, especially if the existing components are old or have a narrow diameter.

    Professional Solutions for Persistent Low Pressure

    If you’re struggling with persistent low water pressure in your shower, it may be time to consider professional solutions. Low water pressure can significantly affect your shower experience, making everyday activities less enjoyable.

    Installing a Shower Pump

    One effective solution is installing a shower pump. A shower pump can boost the water pressure, providing a more satisfying shower experience. When selecting a shower pump, consider the type that suits your plumbing system and ensure it’s compatible with your hot water supply.

    Upgrading Your Plumbing System

    Sometimes, the issue lies with the plumbing system itself. Upgrading your plumbing can resolve low pressure problems by reducing mineral buildup and improving overall water flow. This might involve replacing old pipes or installing a more efficient system.

    Electric Showers and Power Showers

    Electric showers and power showers are other viable options. Electric showers heat water as it passes through, making them independent of your home’s hot water system. Power showers, on the other hand, use a pump to boost pressure from both hot and cold water supplies. Both provide consistent pressure, eliminating drops when other taps are used.

    Image of a power shower unit

    Learn More

    When choosing between electric and power showers, consider your hot water availability and specific needs. Power showers are ideal for homes with a good hot water supply but poor pressure, while electric showers work well in any pressure situation.

    Cost Considerations for Different Solutions

    Understanding the financial aspects of different solutions is key to resolving low water pressure issues in your shower. The cost of addressing low water pressure can vary widely, from budget-friendly DIY fixes to more substantial investments in professional solutions.

    Budget-Friendly DIY Options

    For those on a tighter budget, DIY solutions can offer a cost-effective way to improve water pressure. Cleaning or replacing your shower head and checking shut-off valves are simple tasks that can be done without significant expense. The cost of materials for these tasks is relatively low, typically under £50.

    Investment in Professional Solutions

    Professional solutions, such as installing a shower pump or upgrading your plumbing system, offer more substantial and permanent fixes but come with higher price tags. The cost of a shower pump can range from £150 to £500, with installation costs adding another £200 to £300.

    Solution Cost Installation Cost
    Shower Pump £150-£500 £200-£300
    Plumbing Upgrade £1,500+ Professional installation required
    Electric Shower £100-£300 £200-£400
    Power Shower £200-£500 £300-£500

    “Investing in a good quality shower pump can significantly improve your shower experience, providing a more satisfying and refreshing experience.”

    — Plumbing Expert

    Conclusion

    You don’t have to settle for a weak shower experience. Fixing low water pressure can be achieved through simple DIY fixes or more comprehensive plumbing upgrades. Start by cleaning your shower head and checking valves. If issues persist, consider upgrading to a high-pressure shower head or installing a shower pump. Multiple solutions may be needed to achieve optimal water pressure.

    FAQ

    What are the common causes of reduced water flow from my shower head?

    The most common causes include limescale buildup, clogged or old pipes, and partially closed shut-off valves. You can resolve these issues by cleaning or replacing your shower head, checking your pipes for blockages, and ensuring your valves are fully open.

    How can I improve the water pressure in my shower?

    You can improve your shower’s water pressure by cleaning or replacing your shower head, removing flow restrictors, and checking your home’s main shut-off valve to ensure it’s fully open. Additionally, consider upgrading to a high-pressure shower head or installing a shower pump.

    What is the vinegar soak method, and how does it help with limescale buildup?

    The vinegar soak method involves submerging your shower head in a vinegar solution to dissolve limescale deposits. This simple DIY technique can help restore your shower head’s original flow rate and improve overall water pressure.

    How do I know if my shower head is fitted with a flow restrictor?

    You can check your shower head for a flow restrictor by disassembling it. If you find a device with small holes or a mesh screen, it’s likely a flow restrictor. Removing or cleaning this device can help increase your shower’s water pressure.

    What are the benefits of installing a shower pump?

    Installing a shower pump can significantly boost your shower’s water pressure, providing a more satisfying experience. Shower pumps are particularly useful in homes with naturally low water pressure or those with long pipe runs.

    Can upgrading my plumbing system help alleviate low water pressure issues?

    Yes, upgrading your plumbing system can help resolve persistent low water pressure problems. Replacing old, corroded, or narrow pipes with new, wider ones can improve overall water flow and pressure throughout your home, including your shower.

    Are electric showers or power showers a viable solution for low water pressure?

    Electric showers and power showers can be effective solutions for homes with low water pressure. These systems use electric heating elements or pumps to boost water pressure, providing a more enjoyable shower experience.

    How much does it cost to address low water pressure in my shower?

    The cost of addressing low water pressure varies depending on the solution. DIY methods, such as cleaning your shower head or removing flow restrictors, are budget-friendly. More extensive solutions, like installing a shower pump or upgrading your plumbing system, require a larger investment.

  • Clearing a Clogged Toilet Without a Plunger

    Clearing a Clogged Toilet Without a Plunger

    Are you facing the unpleasant situation of a blocked toilet with no plunger in sight? A clogged toilet can be a significant inconvenience, disrupting your daily routine and potentially leading to unhygienic conditions in your bathroom.

    Whether you’re dealing with a minor blockage or a more stubborn obstruction, it’s essential to act quickly to prevent water damage and further complications. In this article, we’ll explore effective methods for clearing a clogged toilet using common household items and simple techniques.

    Key Takeaways

    • Discover effective methods for unblocking a toilet without a plunger.
    • Learn how to identify the signs of a blockage before it becomes a serious issue.
    • Understand the importance of acting quickly to prevent water damage.
    • Gain confidence in handling toilet blockages yourself.
    • Explore proven techniques using common household items.

    Understanding Toilet Clogs: Causes and Signs

    Understanding the causes and signs of toilet clogs is essential for effective troubleshooting. Toilet blockages can arise from various sources, and being aware of these can help you prevent or address the issue promptly.

    Causes of Toilet Blockages

    Toilet blockages can occur due to several factors, including excessive use oftoilet paper, flushing non-flushable items like wet wipes, and mineral build-up from hard water. Other culprits include deodorant blocks, waste, and even children’s toys that have been flushed by accident. It’s crucial to be mindful of what you flush down thetoiletto prevent blockages.

    Cause Description
    Excessive Toilet Paper Using too much toilet paper at once can cause clogs.
    Non-Flushable Items Items like wet wipes and sanitary products should not be flushed.
    Mineral Build-up Limescale and other mineral deposits can restrict water flow.

    How to Identify a Clogged Toilet

    Identifying a cloggedtoiletearly can save you from a bigger mess. Signs include slow drainingwater, gurgling sounds from thebowl, orwaterrising higher than normal during flushing. If thebowlis almost empty after flushing, it may indicate a problem with air circulation in the waste pipes. A completely blocked pipe will cause thewaterlevel in thebowlto rise and not fall again.

    A clogged toilet, its water level rising, the bowl filled with an unsightly mess. The scene is lit by a warm, diffused light, casting subtle shadows that accentuate the texture of the porcelain and the grime within. The camera angle is slightly low, emphasizing the imposing, problematic nature of the blockage. The overall mood is one of frustration and the need for a solution, setting the stage for the article's focus on clearing a clogged toilet without a plunger.

    By understanding these causes and signs, you can take steps tounblockyourtoiletor prevent it from becomingblockedin the first place.

    Preparing to Clear a Clogged Toilet

    Before attempting to clear a clogged toilet, it’s essential to prepare yourself and your bathroom. This involves gathering the necessary supplies and taking safety precautions to avoid potential hazards.

    Safety Precautions and What You’ll Need

    To safely clear a clogged toilet, you’ll need to wear rubber gloves to protect your hands from bacteria and other contaminants. Gather old towels, a bucket, and appropriate cleaning materials to handle any splashes. Ensure good ventilation by opening windows or using exhaust fans, especially if you plan to use cleaning chemicals.

    A well-lit bathroom interior, the focus on a clogged toilet bowl. The tank lid is open, revealing the inner workings. Nearby, a plumber's snake and a bucket of cleaning supplies stand ready. The floor is tiled, with a bathmat in a neutral color. The lighting is soft, creating an atmosphere of focused attention and problem-solving. The angle is slightly elevated, giving a clear view of the task at hand. The overall mood is one of determined practicality, with a touch of domestic tranquility.

    Preventing Overflow and Water Damage

    The first step in clearing a clogged toilet is to turn off the water supply to prevent the cistern from refilling. Locate the isolation valve near the base of the toilet and turn it clockwise. Then, remove as much water as possible from the bowl using a bucket, reducing the risk of overflow and making it safer to work on the blockage.

    The Hot Water Method

    An image of a person pouring hot water into a toilet bowl.

    Learn More

    You can often resolve a toilet blockage by using the hot water method, which involves pouring hot water into the toilet bowl. This technique works by creating pressure at the blockage and softening any solid matter causing the clog.

    Step-by-Step Instructions

    To use the hot water method, pour 2-3 litres of hot but not boiling water into the toilet bowl. Pour the water quickly but carefully to avoid scalding yourself. Wait a few minutes to see if the water level falls. If it doesn’t, and there’s enough space in the bowl, repeat the process once more.

    Tips for Maximum Effectiveness

    For the hot water method to work effectively, ensure the water is hot enough to break down the obstruction but not boiling, which could damage the toilet. Monitor the water level in the bowl to judge if the blockage is clearing. Be patient, as some blockages may require multiple attempts. You can also combine this method with other techniques for more stubborn clogs.

    Using Dish Soap to Break Down Clogs

    Clearing a clogged toilet without a plunger

    Learn More

    Dish soap can be a surprising ally in clearing a blocked toilet without resorting to harsh chemicals or plumbing tools. The surfactant properties in dish soap help break down grease, creating lubrication that aids in the movement of blockages through the pipes.

    How Dish Soap Works on Blockages

    The effectiveness of dish soap lies in its ability to lubricate the toilet bowl and the pipes. By pouring half a glass of washing-up liquid into the bowl, you help reduce friction, making it easier for debris to pass through. This method is particularly effective for minor clogs and non-flushable items that might otherwise get stuck.

    Application Method and Waiting Time

    To apply this method, pour half a glass of dish soap into the toilet bowl and wait for 10 minutes. The soapy water helps to lubricate the blockage, making it easier to flush away. If the clog is slow-draining, wait until the water level in the toilet goes down before adding soap and attempting to flush again. This technique can be especially useful for items like toys or cloth diapers that may make it to a wider section of pipe with the help of soapy lubrication.

    Key benefits of using dish soap include its ability to work on certain types of blockages, especially those involving organic matter or paper products, and its non-invasive nature. Understanding the optimal amount of dish soap to use and the appropriate waiting time can enhance its effectiveness.

    Clearing a Clogged Toilet Without a Plunger Using Baking Soda and Vinegar

    Image of a toilet bowl with baking soda and vinegar being poured into it

    Learn More

    To clear a blocked toilet without a plunger, try using a combination of baking soda and vinegar. This natural and non-corrosive method can be effective in breaking down blockages.

    The Chemical Reaction Explained

    The mixture of baking soda and vinegar creates a chemical reaction that produces carbon dioxide bubbles. These bubbles help to break up the blockage through gentle pressure and agitation, potentially clearing the clog.

    Proper Measurements and Application

    To use this method, pour half a cup of baking soda into the toilet bowl. Then, heat 2-3 litres of water in a saucepan. Before the water boils, add half a cup of white vinegar to the pan. Pour the vinegar and water mix into the toilet bowl and close the lid. Allow the mixture to work for 30 minutes before flushing the toilet to see if the blockage has cleared.

    When to Avoid This Method

    It’s essential to note that this method may not be suitable for all situations. If your home has a cesspit or a septic tank, it’s recommended to avoid using the baking soda and vinegar method as it can cause damage to these systems. Additionally, for more stubborn clogs, this method might not provide sufficient force to clear the pipes completely.

    The Wire Hanger Method

    Create an image of a person using a wire coat hanger to clear a clogged toilet.

    Learn More

    When faced with a clogged toilet and no plunger in sight, a wire coat hanger can become an unlikely hero. This method involves transforming the hanger into a DIY toilet snake to dislodge the blockage.

    Creating Your DIY Toilet Snake

    To start, straighten out a wire coat hanger, making sure it’s as straight as possible to navigate the toilet drain effectively. You may need to use some force to achieve this. Once straightened, consider bending one end into a small hook or a tight loop to minimize scratching the porcelain.

    Safely Dislodging the Blockage

    Carefully insert the wire into the toilet drain, gently probing the blockage until it becomes dislodged. It’s crucial to wear gloves to protect your hands from the dirty water and potential bacteria. Move the wire slowly and carefully to avoid pushing the blockage further down the drain or scratching the toilet bowl.

    By mastering this technique, you can effectively clear a clogged toilet without a plunger, using a tool that’s likely lying around in your closet.

    Using a Toilet Auger for Stubborn Clogs

    Generate an image of a toilet auger being used to clear a clogged toilet.

    Learn More

    Toilet augers are designed to navigate and clear even the most persistent toilet blockages. A toilet auger, also known as a closet auger or plumber’s snake, is a flexible tool that can be pushed into the toilet to remove the blockage.

    How a Toilet Auger Works

    A toilet auger features a long, flexible shaft with a coiled auger or corkscrew-like tip that can pierce through and grab onto obstructions in the toilet drain. Its specialised shape allows it to navigate the toilet trap without damaging the porcelain.

    Proper Technique for Using an Auger

    To effectively use a toilet auger, push it into the toilet until you reach the blockage. Then, use the handle to rotate the auger while pushing downwards, which should begin to break up the blockage. If the tip of the auger pierces the blockage, you can pull the auger and the blockage out from the bowl.

    By mastering the technique of using a toilet auger, you can efficiently clear stubborn clogs and restore your toilet to proper functioning.

    Alternative Methods for Persistent Blockages

    Toilet blockages that refuse to budge may require some unorthodox solutions. When traditional methods fail to clear a clogged toilet, it’s time to consider alternative approaches that can provide the necessary leverage to dislodge the obstruction.

    The Plastic Bottle Pressure Method

    One innovative technique involves using a large plastic bottle to create pressure in the toilet drain. Start by removing as much water from the toilet bowl as possible. Next, fill the plastic bottle with warm water, place your thumb over the top, and fit the top end into the outlet at the bottom of the toilet. Wearing rubber gloves for this step is recommended. Remove your thumb and squeeze the bottle to release the water, creating a makeshift water jet that can help dislodge the blockage.

    Using a Wet/Dry Vacuum

    The Wet/Dry Vacuum Method is another effective approach for clearing stubborn toilet blockages. This method involves using a wet/dry vacuum cleaner to suction out the obstruction from the toilet bowl. Ensure you use the correct attachments and settings to prevent damage to your equipment. This technique is particularly useful when traditional plunging or other methods have been unsuccessful.

    Enzyme Cleaners for Organic Blockages

    For blockages caused by organic matter, enzyme-based cleaners can provide a hands-off solution. These cleaners contain natural enzymes that break down the organic material over time, allowing for a gentle and non-invasive clearance of the blockage. This method is particularly effective for toilets with recurring clogs due to organic waste.

    Image of an enzyme cleaner being used to clear a toilet blockage

    By understanding and applying these alternative methods, you can effectively clear persistent toilet blockages without resorting to a plunger. Each technique has its advantages and is suited to different types of clogs, allowing you to choose the most appropriate solution for your specific situation.

    When to Call a Professional Plumber

    Image of a professional plumber unblocking a toilet

    Contact Us

    Recognising the signs that indicate a need for professional assistance with a toilet blockage can save time and prevent further issues. If DIY methods have been unsuccessful in clearing the blockage after several attempts, it’s time to seek professional assistance. A plumber will have the expertise and specialised equipment to tackle stubborn blockages effectively.

    Some clear warning signs that indicate a toilet blockage is beyond DIY solutions include strong, unpleasant odours emanating from the toilet or drains, and wastewater backing up into sinks, showers, or other drains in your home. If you experience water flooding around the toilet or in the bathroom, it’s a clear indication of a serious blockage that requires immediate attention from a plumber.

    For more information on dealing with toilet blockages and knowing when to call a professional, you can visit our guide on the best ways to unblock a toilet.

    Conclusion

    A clogged toilet is a common household problem that can be tackled with patience and the right approach. You can quickly resolve this issue and restore proper function to your toilet by using the methods discussed.

    Regular maintenance plays a crucial role in preventing future blockages. Make it a habit to clean your toilet bowl, rim, and outer surfaces regularly. Only flush toilet paper and human waste down the toilet to avoid causing blockages.

    By adopting simple habits and using the right techniques, you can successfully unblock your toilet without a plunger. Consider assembling a basic toilet unclogging kit to keep on hand for future emergencies. With these methods and a bit of know-how, you’ll be able to flush your toilet with confidence.

    FAQ

    What causes a toilet to become clogged?

    A toilet can become clogged due to an accumulation of toilet paper, sanitary products, or other debris that obstructs the drain. Sometimes, the issue may be related to the toilet’s design or an object that has been flushed by mistake.

    How do I know if my toilet is clogged?

    You can identify a clogged toilet by observing the water level in the bowl. If the water doesn’t drain or takes a long time to do so, or if it overflows when you flush, it’s likely clogged.

    Can I use baking soda and vinegar to unblock my toilet?

    Yes, you can use a mixture of baking soda and vinegar to help dissolve the blockage. Pour one cup of baking soda into the toilet bowl, followed by one cup of vinegar. The chemical reaction can help break down the clog.

    Is it safe to use a wire coat hanger to clear a clogged toilet?

    While it’s possible to use a wire coat hanger to create a DIY toilet snake, you should exercise caution to avoid damaging the toilet or pushing the blockage further into the drain.

    What is a toilet auger, and how does it work?

    A toilet auger is a tool designed to remove blockages from toilets. It works by inserting a cable into the toilet drain and rotating it to break up or retrieve the clog.

    When should I call a professional plumber to clear my clogged toilet?

    If you’ve tried various methods to clear the clog and it persists, or if you’re unsure about how to proceed, it’s best to call a professional plumber to avoid causing further damage to your toilet or pipes.

    Can I prevent toilet clogs from happening in the future?

    Yes, you can take steps to prevent toilet clogs by being mindful of what you flush, avoiding flushing sanitary products or large amounts of toilet paper, and regularly cleaning your toilet.